Tag: Hollywood

  • PFH’s 10 Best Instagram spots in L.A.

    PFH’s 10 Best Instagram spots in L.A.

    Let me take you on a tour of arguably one of the best places to get a huge variety of Instagram shots, my favourite city: Los Angeles.

    1. Hollywood Sign

    There are three amazing places to get shots with the world famous Hollywood sign:

    Hike to the sign

    For shots with the back of the sign you want to hike up to the top of Mt. Lee. To find out exactly how to get there take a look at my post How to hike to the Hollywood sign.

    View this post on Instagram

    A post shared by Postcards from Hawaii (@gabriellawisdom)

    View this post on Instagram

    A post shared by Postcards from Hawaii (@gabriellawisdom)

    Lake Hollywood Park

    With the sign smiling down on it, this park is the perfect place for a picnic and a cute couple shot whilst you’re at it.

    Street parking is free from 6am-8pm, spaces are usually available on both sides of the road on Canyon Lake Dr.

    Hollywood sign viewpoint

    This is actually right next to Lake Hollywood Park, it’s just a few steps further up the sloped footpath.

    Up here there are plenty of spots to get photos. Everyone queues to stand up on the rocks but really you can stand anywhere to get great photos with the sign in the background. For a slightly quieter spot, walk a little further on to where there’s a couple of trees.

    View this post on Instagram

    A post shared by Postcards from Hawaii (@gabriellawisdom)

    View this post on Instagram

    A post shared by Postcards from Hawaii (@gabriellawisdom)

    2. TCL Chinese Theatre

    “Mary’s got the same size hands as Marilyn Monroe, she put her fingers in the imprints at Mann’s Chinese Theatre Show” – Kelly Rowland.

    Miss Monroe undoubtedly brings in more tourists than any other name scrawled in concrete. The proof is in the prints; the colour of her imprints compared to everyone else’s are much much darker and worn.

    To protect Sid Grauman’s legacy the forecourt is roped off every night and is washed first thing in the morning before it opens at 8.30am.

    PFH Top Tips for getting a photo with your hands in your favourite star’s imprints:

    • Know where you’re going, Marilyn is located near the back on the left hand side. I suggest researching who you want to see and where they are before you go so you can make a beeline for them.
    • Wait out front at 8.30am, they open up from the left so stand there to get in first.
    • Bring a towel or tissues to mop up the water, the sun won’t have dried them off at 8.30am.
    • Bring antibacterial hand gel or wipes because your hands are going to look grim when you’re done.

    View this post on Instagram

    A post shared by Postcards from Hawaii (@gabriellawisdom)

    3. Central Perk

    What? Really? Central Perk, as in the coffee shop from F.R.I.E.N.D.S? Yep, you read it right!

    The Warner Bros Studios Tour features a chance to sit on the famous brown couch whilst pretending to sip out of coffee cups the size of buckets. The full Central Perk set was rebuilt for our enjoyment, and there’s even a functioning café where you can pick up a coffee and pose with the Central Perk window shown so many times throughout the show.

    Of course this isn’t the only piece of T.V. history you can get a snap with. The tour includes Rosewood from Pretty Little Liars, Stars Hollow from Gilmore Girls and the exterior of the Full House house!

    You may even be lucky enough to visit one of their current production’s sets such a Big Bang Theory, Fuller House or Ellen – you won’t be able to take photos in these though, but it’s an amazing opportunity either way!

    Tour tickets start from $55 for children aged 8-12 and $65 for adults. You can purchase them here.

    4. Beverly Hills Hotel

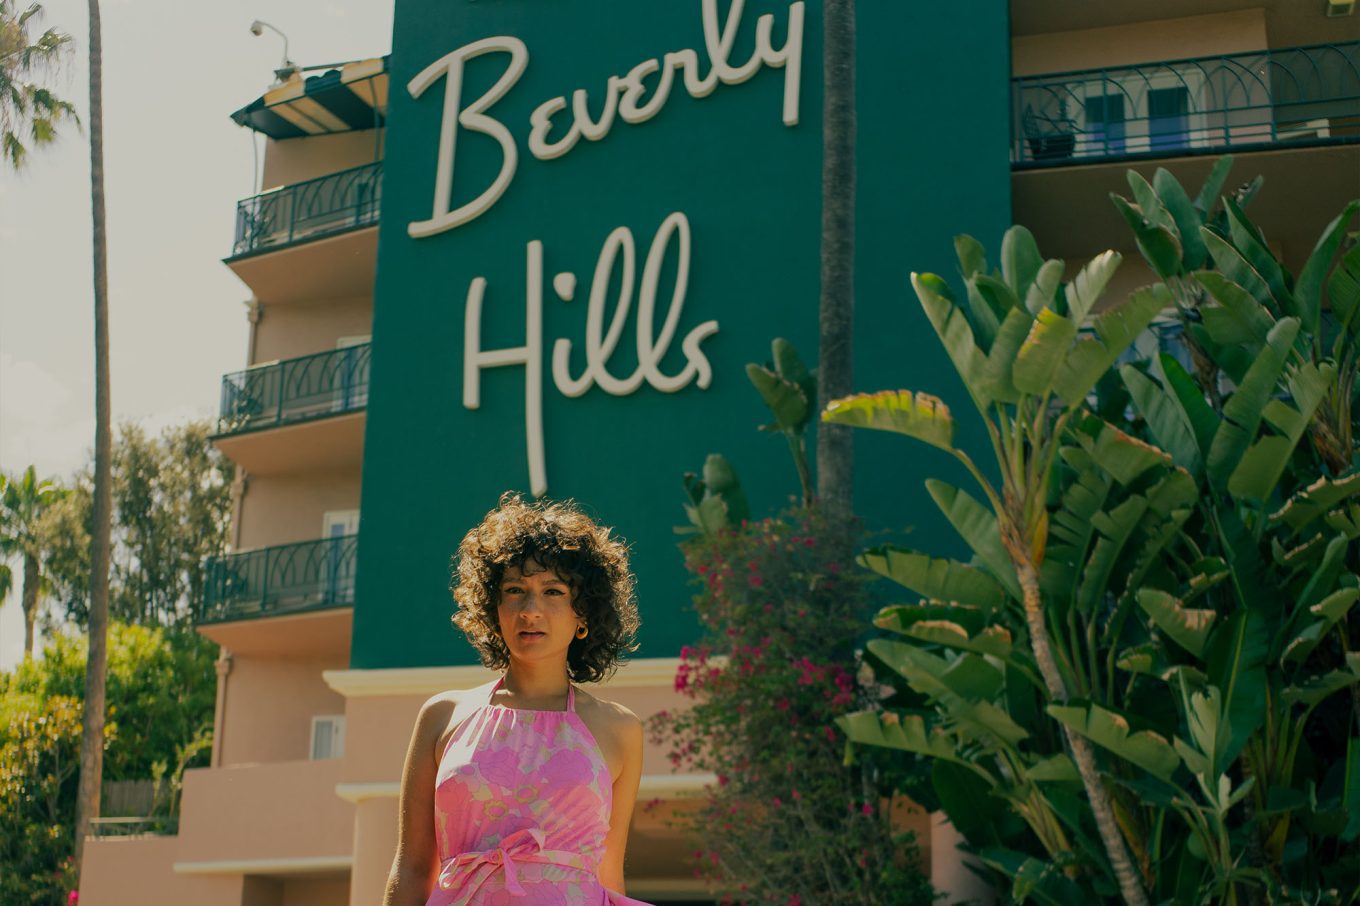
    My favourite photos from my whole three week trip were taken in the driveway to this hotel!

    The Beverly Hills Hotel is part of the Dorchester Collection and oozes Hollywood history and glamour, it’s iconic!

    For the best angle that will allow you to get in the full sign, you’ll want to stand between the first and second lamp posts and keep to the left. SAFETY PRECAUTION: This is the main entrance to the hotel by car so vehicles come through frequently. Keep alert, be patient and you’ll get your shot, but remember no photo is worth getting run over!

    View this post on Instagram

    A post shared by Postcards from Hawaii (@gabriellawisdom)

    View this post on Instagram

    A post shared by Postcards from Hawaii (@gabriellawisdom)

    View this post on Instagram

    A post shared by Postcards from Hawaii (@gabriellawisdom)

    5. Palm tree lined road

    One of the first things that comes to mind when I think of L.A. is cruising towards the Hollywood sign down a long stretch of road lined with skinny palms trees that are reaching up to a bright blue sky, the sun flickering between each tree as you pass.

    For a chance to stand in-between all of this perfection head over to where S Windsor Blvd meets W 5th St, and face North down Windsor Blvd. The sign might not seem close enough for your liking but it’s the best chance you’ve got of framing it between rows of palm trees.

    It’s a pretty quiet residential area but there are still a few cars passing through, the road is also located close to a crossroad so stay alert and make sure it is completely clear before stepping out into the road. I suggest going early in the morning, it will be safer as there are less cars about.

    “June Gloom” was taking over at the time we shot here so not only did we not get that dreamy blue sky but we also didn’t stand a chance of getting the Hollywood sign in the background, but hopefully you’ll have better luck and a clear day.

    There is parking all along these streets but keep in mind where you’re snapping from when you park your car so it’s not in your shot.

    View this post on Instagram

    A post shared by Postcards from Hawaii (@gabriellawisdom)

    View this post on Instagram

    A post shared by Postcards from Hawaii (@gabriellawisdom)

    6. Beverly Gardens Park

    This 1.9 mile park goes from Wilshire and Santa Monica Boulevard to Dohney and Santa Monica Boulevard and features one of the most photographed spots in town! The 40 foot long “Beverly Hills” sign, accompanied by a big water feature, sits between N Beverly Dr and N Canon Dr.

    There is free parking along the back of the park but if those spaces are full the surrounding streets also offer parking. Just make sure you check the time allowance if you’re planning on being in the park longer than just to take photos.

    View this post on Instagram

    A post shared by Postcards from Hawaii (@gabriellawisdom)

    7. Urban Light

    LACMA’s most famous art installation is lit up 24/7 so if you can handle it, arrive as late as you can to get nighttime shots that don’t have people zipping in and out of the background.

    PFH Top Tip: Save money on parking by ditching the pricey LACMA multistories and use the Whole Foods parking lot located on the corner of S Fairfax Ave and W 3rd St. it’s a 15min walk to Urban Light with 1hr 30mins free parking for customers but if you are aiming to shoot late then you shouldn’t have a problem.

    View this post on Instagram

    A post shared by Postcards from Hawaii (@gabriellawisdom)

    8. Colette Miller Wings

    Miller painted a series of wings across the world “to remind humanity that we are the angels of this Earth”. Six years later they’re still crazy popular on the gram.

    As L.A. is where they first made an appearance there are five across the city:

    • Traction and Hewitt in the Arts District.
    • Angel City Brewery.
    • Regent Theater.
    • St. Regis Wine & Liquor.
    • Melrose Avenue.

    View this post on Instagram

    A post shared by Postcards from Hawaii (@gabriellawisdom)

    9. The “Made in L.A.” Wall

    Located on the side of Cisco Home on the corner of Melrose Ave and N Laurel Ave.

    View this post on Instagram

    A post shared by Postcards from Hawaii (@gabriellawisdom)

    10. Paul Smith Pink Wall

    If you want a free fashion show you’ve come to the right place! People really step up their game at the pink wall and bring a multitude of props. In the 10mins I was there I saw flowers being thrown and even a fake picnic being set up!

    Luckily queues go down quickly for this one because the wall is long enough to accommodate at least five people to pose away at one time, with plenty of space in-between so that no one else is in your shot.

    FYI you can’t use any kind of professional camera equipment to take photos with the wall it’s “cell phones only” so make sure to use the best one out of the people travelling with you. Sounds strange I know but there’s actually a man whose sole job is to monitor people at the wall, making sure they only use phones and keep a good distance. I swear the security for this wall is tighter than Beyoncé’s Deréon jeans.

    View this post on Instagram

    A post shared by Postcards from Hawaii (@gabriellawisdom)

    If you make it to the Paul Smith wall there’s an instaworthy coffee shop on the opposite side of the road called Carerra Café. They also have an awesome hand painted mural wall that changes frequently. Unfortunately it was in the middle of being painted with the latest Hollywood mural when we tried to shoot there and couldn’t make it back for when it was finished. The wall isn’t even the best bit though. Here you will find the most snap-worthy coffee in town. Using the Ripple Maker they can print a multitude of images from slogans to Kim KW’s ugly cry onto the foam of your latté or cappuccino! If you’re super prepared you can even download the Ripple app and have any image of your choice printed on your coffee!

    They’re open everyday 8am-6pm.

    .

    For a chance to be featured on my Instastories use #postcardsfromhawaiiblog on your snaps at these locations!

    Aloha, Gabriella

  • How to hike to the Hollywood sign

    How to hike to the Hollywood sign

    In 1923 Harry Chandler, a real estate developer, erected a sign reading “Hollywoodland” to advertise his new housing development. It went bust during the Great Depression so the sign was neglected and it began to fall apart. In 1944 it became city property but by the time the Hollywood Chamber of Commerce took it on, the “H” had fallen over. They propped it back up again and removed the “LAND” but of course priorities changed during WWII and the sign deteriorated once more, but this time much worse, getting to the point where large sections of the letters were missing and the third “O” had toppled over.

    In 1978 the Hollywood Chamber of Commerce decided to rebuild the sign completely, and thanks to a fundraiser organised by the late Hugh Hefner, some of the biggest names in Hollywood collectively put up a quarter of a million dollars to get this done. Since then the sign frequently receives touch ups, as every big Hollywood stars does, including a facelift in 2013 in prep for it’s 90th birthday. 

    This universal icon holds such precedence that it’s considered a high risk area for a possible terror attack and therefore has 24/7 surveillance which includes cameras, choppers flying over constantly and loud speakers. If you want to take a look for yourself head here for a live video feed of the sign.

    Heads up guys, unlike in many popular films including one of my favourites Friends with Benefits, it is NOT possible to climb up the letters. Thanks to the surveillance I just mentioned, you will be spotted straight away and you will face being arrested and fined for trespassing.

    The absolute closest you can get to it (unless you’re making a movie or part of the maintenance crew) is hiking up to the top of Mount Lee. This will take you up and around the back of it, so technically you’ll be looking down on “DOOWYLLOH”. 

    Now that you know a little bit of the backstory to one of the world’s most famous signs, I’ll tell you how to get up there.

    Where to start

    Pop Bronson Caves* into your sat nav device for your starting point. When you get there, continue driving up the road past the children’s play areas which will be on both sides. There are two car parks, the first is a skinny strip on the right (see image below), the second is further up and on the left. If it’s quiet I recommend going to the one furthest on the road because it will take you closer to the start of the trail which you will appreciate on the way back to your car. Both of the car parks are free and are open from sunrise to sunset.

    Looking back at the first car park.

    Directions

    From the car park walk ahead down the path. 

    Not long after entering you will face a gate which closes off the road to unauthorised vehicles. Pedestrians can walk past the gate, this is the trail. 

    Continue on to start the climb up.

    The first sign for directions tells you to go left for the sign, the right will take you to the Griffith Observatory. This one is simple.

    The second sign will show two options for the Hollywood Sign. 

    Follow the direction for the first. Facing the two options, take the one on the right heading upwards.

    The third sign is mildly confusing, it says left to the Hollywood Sign but you actually want to follow the direction for the Mt Lee Summit, so head right. Someone has written on the sign that this trail will lead you to the back, which means behind the sign. It will seem counterintuitive to go right because it appears to lead you away from the sign but after a steep incline you will eventually wrap around the back of it and get up to the top.

    The first sighting you will get once you walk around the corner will be of the sign behind a big wire fence but keep going up and around the left for a tiny but very steep dirt track which will take you up to the best viewpoint, where you will look down on the sign and the city it graces.


    Weather

    I’ve done this hike twice, once when we were doing our RTW 2016 and the other two days ago, 26th June 2018. The first time we went was in July during a heatwave and despite us getting to the top at 6pm it was scorching and we had to keep stopping to catch our breath.

    The second time we went first thing in the morning and it was much cooler and June Gloom is taking hold of LA whilst we’re out here so the mornings have been overcast and therefore cooler than usual. The sun broke through the clouds at about 9am that day so we were comfortable on the way up but by the time we started to descend it was heating up quickly and we were grateful for already being on our way down.

    I mentioned above that you can watch a 24/7 stream of the sign, this is really helpful to see what the weather is doing up there should it be an overcast day like ours started out. The cloud does lay low though so we didn’t have a problem even before the sun came out. Be sure to check the forecast too though.

    You can do this hike all year round but obviously the height of summer during the midday sun is ill-advised. It’s not worth risking heatstroke or sunburn so go when it’s cooler.

    Time to go

    Sunset is a good time to go because the temperature will be cooling down and the views will be amazing, but keep in mind that the carpark closes at sunset, so if you dawdle or don’t leave enough time you might not be getting your car back. The other issue with this is that it will most likely be busy with people trying to get those sunset snaps.

    My advice is to go first thing in the morning. We left our accommodation not long after sunrise and arrived for 7am which was perfect for us. It was still overcast so the temperature was a cool 17 degrees Celsius, but it was still nice and bright for photos. We only passed a few locals on the way up on their morning jogs, and when we reached the top there was only one woman up there. Luckily for us, because we had to do a fair bit of shooting, we were alone up there for about an hour so I could easily get changed and shoot anywhere I wanted. By the time were done and ready to go down, which was 9am, the sun was out, people were starting to arrive up there and it was soon swarming. I counted at least 30 people up there just as we were heading down and in less than 5 minutes into our descent another 13 people passed us on their way up.

    To summarise, go as early as you can.

    How long it takes

    It’s a 7.5 mile hike which takes you 1,003 ft up and is considered a medium level hike, but that is really determined by how fit you are and what the temperature is when you go.

    As I said above we have done this hike twice the first one was on a very hot day which wore us out quickly. That time we started off at 4pm and it took us about 2hrs just to get up there. That includes stopping time because it was a rough go in the sun but also for photos. We didn’t stay up there much longer than half an hour and then we came down. The sun was on its way down as we made our descent so it was much cooler and parts of the trail were shaded so it only took 1hr to get back to the car.

    The second time only took 1hr 5mins to get to the top, it was cooler so we didn’t overheat and we didn’t stop for photos because L.A. was still under a blanket of cloud so there was nothing to see. We did however spend 1hr up at the top taking photos in multiple outfits (a girl’s gotta have options) and then our descent took longer than the climb because the sun was out and we wanted to stop and take photos of the city and the valley views. We got back to the car at 10.30am so it took us 1hr 30mins to get down including the time to take photos.

    I should note that the second time around we were on a mission to get up there before anyone else so we power walked to keep it to roughly an hour, honestly if you don’t need to rush allow an extra half an hour for a more leisurely hike. I’d say on average you’re looking at spending 3hrs not including however long you want for photos.

    What to bring

    There is no shade on the trail once the sun is up which means you are completely exposed to its burning rays, so most of these items are geared up to protect you.

    Sunhat

    Wearing a sunhat does three things: stops your head from burning, shields your eyes from the sun and absorbs sweat from your brow.

    Sunglasses

    It’s really bright even when it’s overcast so protect your eyes. They will also save you from squinting in your selfies.

    Suncream

    No lower than SPF 30 but really just go for SPF 50. You’re exposed and vulnerable so it’s better to be safe than sorry.

    Water

    Bring at least 1 litre. Not only is it hot but it’s a tough hike, plus it’s quite dusty so stay hydrated. If you don’t already have one get yourself a thermal bottle. These babies will keep your drink cold for 24 hours with no condensation, which is a blessing when you are all hot and bothered.

    Comfortable shoes

    Wear a pair of hiking boots or decent trainers (sneakers). I’m talking function over fashion people! There are two steep climbs bookending the trail and the middle is basically a dirt track. If you know the pain of stones in-between you and your sandals you will be grateful for a pair of good walking shoes. 

    If you’re hellbent on getting snapped in a cute outfit do what I did and pack it up to change when you get there. FYI there are no changing rooms up this mountain, strange I know, so bring something that’s easy to get in and out of. 

    Camera

    You’ll want to capture the moment once you’re up there but there are also amazing views of LA on your way up too.

    Selfie stick

    A simple arm out selfie won’t be enough to capture the whole sign so unless you have a wide angled lens or a GoPro, a selfie stick will be your friend. If you’re thinking “ugh a selfie stick, that’s so 3 years ago, I’ll just ask someone to take photos” well, If you take my advice and go early someone might not be there to take photos and even if someone does come up whilst you’re there they might possibly be OUT OF THEIR MIND and not actually capture the sign in the background of your photo. You don’t believe that someone could do something so absurd? Well see the image below…

    Like seriously, how?!

    .

    Check out my California road trip playlist for some Cali inspired hits to accompany a trip to the Golden State, you might even want to listen to it on your hike!

    .

    Aloha, Gabriella

    Pin this post


  • My travel makeup must haves

    My travel makeup must haves

    Having just come back from Mexico where it’s hot, hot, hot and my skin tanned to the point where Michael stopped talking to me out of jealousy – #hatersgonnahate – I want to share the makeup I was using whilst abroad because, I hate admit it, I packed way too much makeup that I didn’t need and barely used. So in the hopes that I can save you some weight and packing space I’ll take you through what I didn’t need and what I used everyday.

    Out of all the items I packed, I really only ended up using about a quarter of it, if that! When you’re somewhere hot it’s not ideal to wear heaps of makeup because let’s face it, you’re going to get a little sticky under the sun and no one wants their face to look like a Dali melting clock. The items I barely used were:

    Foundation

    Not only did I tan past my usual shade but it also dried out my skin which needs to stay frequently hydrated when I’m out in the sun. I wore it for two days then it was just deadweight in my cosmetic bag.

    Powder

    You’d think that this would be one of the most useful things, considering how shiny the heat is going to make your face, well think again sister! Maybe I’m just gross with issues but no matter how often I applied my powder I couldn’t control the shine, so I just had to embrace the shine. 

    PFH Top Tip: If you want to control your shine but don’t want to use too much makeup, grab a pack of blotting sheets, they’re inexpensive and can be bought at most stores selling makeup.

    Liquid lipsticks

    I love lipsticks, they brighten up and add colour to your face but I definitely didn’t need the amount I brought. The ones I could have done without were the liquid lipsticks.

    Staying hydrated is very important but it’s critical when you’re somewhere hot. Funnily enough though liquid lipstick with its ability to give a matte look and water with its ability to wet your mouth don’t exactly go hand in hand. So I don’t recommend bringing them, you’ll be reapplying more than your suncream.

    Mascara & Eyeliner

    I did actually use mascara, but only in the evenings and a few selective shoots. There’s really not much point in wearing it, or eyeliner for that matter. What with being in and out of the sea and pool, it’s only going to give you panda eyes. Before you ask, no it’s not worth bringing waterproof mascara. I’ve tried so many brands and I’ve never gotten on with it – it’s a bitch to take off and it only stings your eyes. Still need convincing? You’ll be wearing sunnies most of the time anyway, so your eyes will be covered up!

    .

    Now then, let’s get into the products I loved to use everyday. These babies really focus on enhancing your tan, boosting your complexion and giving your sun kissed face that extra glow. Plus they have multiple uses, so these few products actually give you a variety of looks when you wear them in different ways.

    Charlotte Tilbury – Hollywood flawless filter, 4 medium

    I only started using foundation this year (shocking I know, what have I been doing with my life?!). Taking it on holiday – somewhere where you’ll be in the sun – is pointless because you will tan past your shade and you don’t really want a full face because your pores will only clog as you sweat it off. I don’t wear it that often so I’m pretty used to going out bare skinned, but if you’re not feeling it I have the perfect product for you: Hollywood Flawless Filter! 

    This glorious product is a complexion booster that can be worn four ways: under your foundation, blended with it, as a highlighter or on it’s own – on it’s own is obviously what I’m focusing on here. It will smooth your pores and lines, give you an all over glow that illuminates and boosts your tan and it’s lighter on the skin than foundation so you won’t feel caked. There are seven shades, and unlike concealer and foundation, I found the shade to suit me at my lightest and after my tan, bonus!

    Dior – Diorskin forever undercover concealer, 20 light beige

    I ended up tanning past this shade by the end but I used my concealer almost every day to cover the dark circles under my eyes. It’s a full coverage product so the darker my face got the less product I used so it wouldn’t show up too light. Like most of these items, it’s waterproof which is always good when you’re sipping cocktails in the pool. 

    PFH Top Tip: At the end of your holiday, when your skin is nicely tanned, get your concealer matched at the airport duty free on the way home so you have one for the next time you tan past your usual shade.

    Giorgio Armani – High precision brow pencil, 2

    My eyebrows are quite patchy and need a little help filling out. I have a few eyebrow pencils but this one is my favourite to travel with because it’s so tiny but still has a brush attached. The pencil itself is so fine that it allows for a very precise application, hence the name, plus it’s waterproof which is great when the heat starts to melt your face.

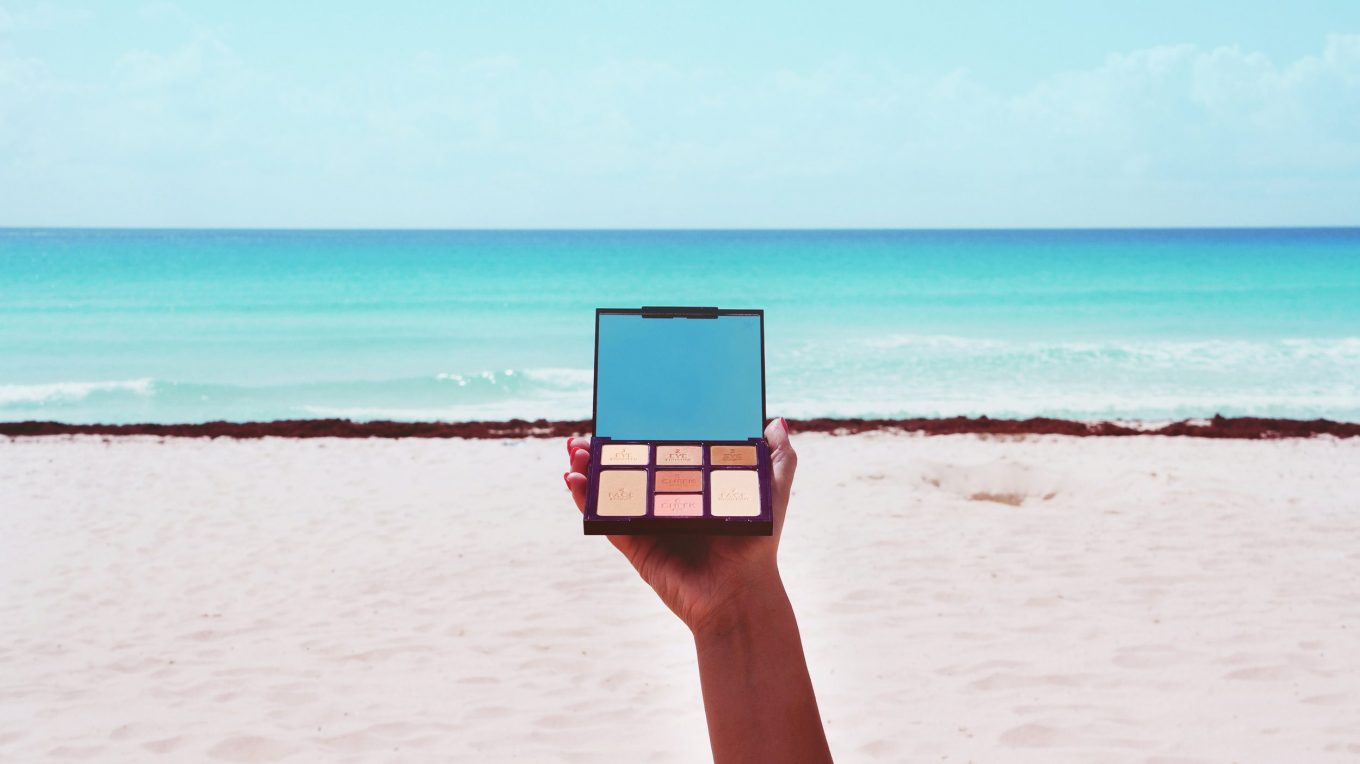
    Charlotte Tilbury – Instant look in a palette, beauty glow

    This palette was my saving grace in Mexico. I absolutely love it, it has all the basics in one place and gives such an amazing glow #glomo! It has three eyeshadows which can be worn individually to brighten the eyes during the day time or combined to create a smoky look for the evening. There’s a bronzer which can be used to bronze or contour. Two tones of blush give you a rosey glow and finally the highlighter is my favourite because it’s so pigmented that it gives an incredible high shine across the top of your cheekbones. 

    I definitely recommend getting one of these palettes if you’re on the go often. Just slip it into your bag and you can apply or touch up no matter where you are. The mirror is nice and big so you can see your whole face when applying but the palette size as a whole isn’t so big that it’s inconvenient. A lot of our excursions involved swimming in cenotes before heading on to something else, I took this palette with me so I could brighten up my face in-between and it was perfect.

    I can’t pretend it’s not expensive, I had hummed and hawed over it for a while because it retails at £49, but I feel like I have already got my money’s worth. I used it every day because it’s so easy to apply and wear.

    Dior – Diorshow cooling stick, 003 fresh pink

    This was a new buy for me at the airport duty free on the way to Cancún. It’s part of Dior’s Summer 2018 Cool Wave collection, and the moment I found out its nifty little trick I was sold! The formula is 40% water and is designed to cool the eyes upon application, it’s basically a soothing eye gel that applies colour. It’s genius and actually works so well, perfect for spending time out in the sun and it’s waterproof.

    It comes in three shades, pink, gold and bronze – I went for the pink because the CT Beauty Glow palette was made of gold and bronze tones so I wanted something different. Its creamy texture applies so smooth which means it can actually be worn three ways: on the eyelid, along the lash line or as a highlighter. 

    Vaseline

    I take great care of my lips because they dry out easily and not only is it uncomfortable but it also makes wearing any lipstick difficult. As much as I love a bright lipstick, it’s not really convenient if you’re in and out of the sea and pool, drinking cocktails and eating. 

    So that way I look after my lips on the beach whilst giving them a glossy sheen is with old reliable Vaseline. It’s cheap and nourishing!

    Dior – Rouge Dior lipstick, 520 feel good

    Of course I don’t really go anywhere without lipstick, and there will be moments to wear it, such as for photos. One of my favourite holiday shades is this Rouge Dior, it’s a punchy pink which really complements a tan.

    .

    Most of the items I’m talking about above are quite pricey, I know, but I tend to get my makeup at the airport in duty free to save money. 

    PFH Top Tip: When you make an account with Feel Unique, you can choose one brand that they sell to receive 5% off for a whole year. They sell all of the brands I’ve mentioned except Vaseline.

    Do yourself a favour, embrace your natural beauty and leave most of it at home. Just bring some items that will enhance your sun-kissed glow rather than cover it up.

    .

    Aloha, Gabriella

    Pin this post


    .

    Shout out to Pops Beauty who did a killer job with my manicure! Check them out if you’re based in Norfolk.