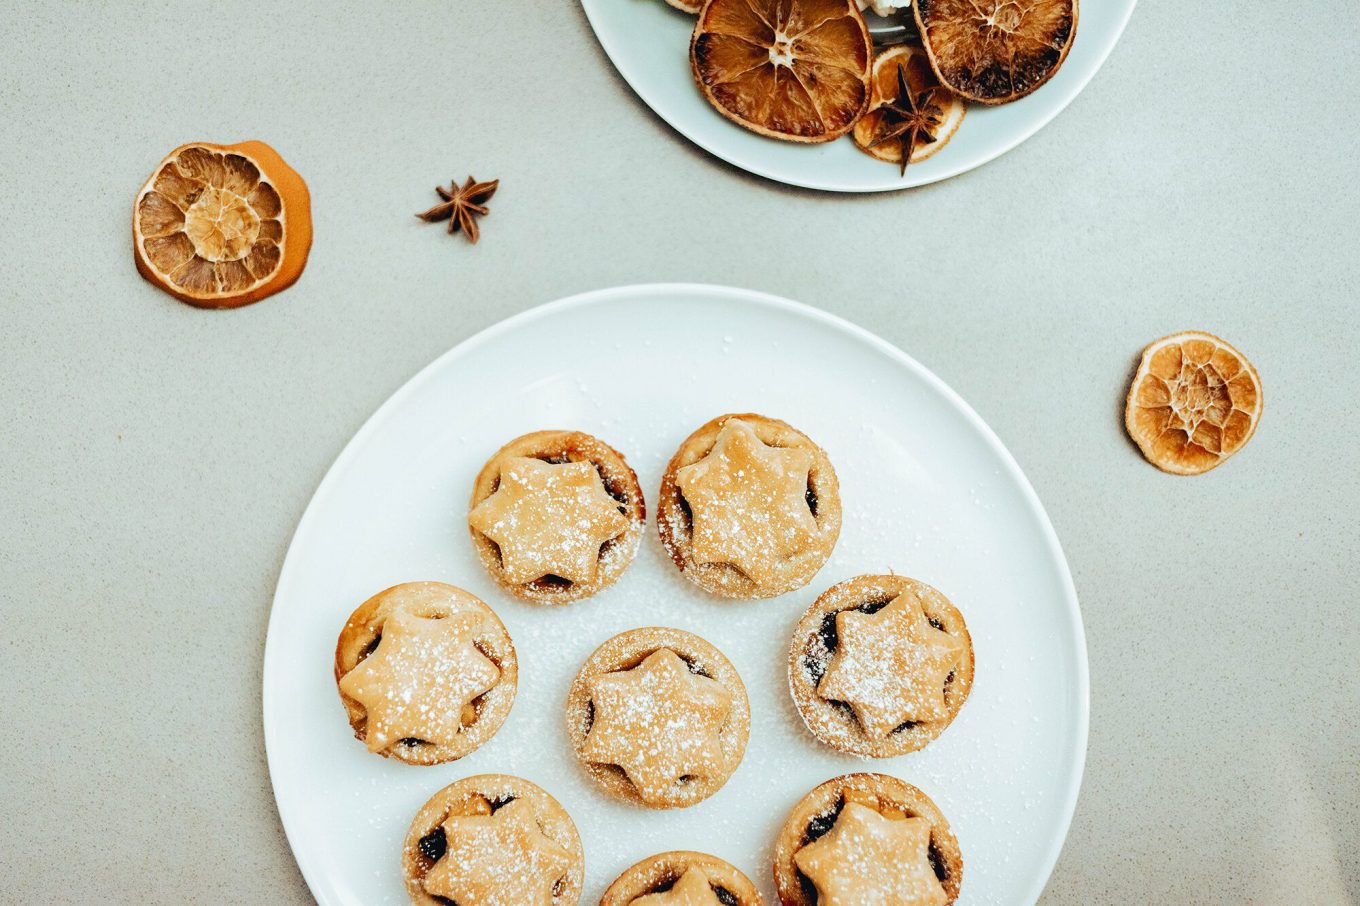
Mince pies are small, sweet pies traditionally served at Christmas as an afternoon treat with a cup of tea or coffee. There are various versions of mince pies available to shop, from sweet to savoury pastries, sober to boozy mincemeat fillings and with all sorts of additions such as nuts and cranberries but this recipe makes a festively spiced mincemeat with a simple savoury shortcrust pastry. If you’re unfamiliar with mincemeat (not mince meat) then rest assured that it is not made from meat, it is a combination of dried fruits and peel mixed together with sugar and spices such as nutmeg, cinnamon and cloves.
Fun facts about mince pies
The concept of spiced fruit came to England from the middle east in the 13th century
They’re traditionally religious and represent the birth of Jesus, the key spices – nutmeg, cinnamon and cloves – symbolise the gifts given by the three wise men
Originally they were rectangular to represent Jesus’ cradle
This mince pie recipe will show you how to make both the mince pie filling and the pastry. This is important because to save money and time most Brits (who aren’t just buying pre-made mince pies) will buy a jar of ready-made mincemeat, but I have been informed that mincemeat isn’t available in North American supermarkets as well as various other places around the world. So, I’m helping you to make this British classic from scratch, don’t worry it’s super easy and requires little to no baking skills!

So one thing I should note about this recipe is there’s one ingredient that is found in all pre-made jars of mincemeat on British supermarket shelves but isn’t in mine: suet. The reason I chose not to put suet in is because traditional meat suet isn’t vegan or vegetarian (if you didn’t know, it’s made from animal fat) and though there is vegetarian suet, that contains gluten. I’ve put together a recipe that can be made gluten free, dairy free, vegan and vegetarian and suet just didn’t make the cut. So instead I’ve used butter because it’s gluten free and can be swapped out to dairy free margarine without hesitation.
Swaps to make this allergy friendly are:
Gluten free
Gluten free self raising flour
Dairy free
Margarine
Vegan
Margarine
Dairy free milk to glaze instead of egg
Vegetarian
This recipe is vegetarian, it doesn’t use meat!
Despite having a chef and a professional cook in the family who have helped me out with many of the recipes here on PFH, when it came to mince pies I turned to Michael’s Nanny (that’s grandma for any confused North American readers) who hands down makes the family’s favourite mince pies. I don’t even like mince pies unless they’re hers. She has the contrast between spiced, sweet and savoury down and though I believe what really makes hers the best is that they’re baked with love (or maybe it’s more to do with the fact that she gets me piddled on her home made sloe gin every year), I’ve done my best to bring her pastry recipe to you, so you too can have a little British magic at home this festive holiday season.

When planning to make these, take note that you’ll want to leave at least 24 hours between making the mincemeat filling and baking the pies. The mincemeat mixture needs at least 24 hours for the flavours to infuse and intensify, giving your pies that beloved festively spiced flavour.
Right then, if you bothered to read any of that it’s finally time to get to the recipe!
Makes 24
Equipment
12 case muffin tin (x2 if baking all 24)
Measuring cups/scales
Spoon measurements
Mixing bowl
Wooden spoon
X2 jars with lids
Grater
Large wax wrap
Rolling pin
Round cookie cutter (size depends on the size of your muffin tin)
Star cookie cutter (for the lids)
Fork
Pastry brush
Filling ingredients

375g / 2½ cups, 13½ oz of mixed fruit and peel
125g, ½ cup, 4½ oz soft brown sugar
1tbs vanilla extract
1tsp ground mixed spice
½ tsp cinnamon
150g, ⅔ cups, 5 ½ oz grated butter
1 medium orange – juice and zest
1 lemon – juice and zest
1 Bramley apple – peeled, cored and grated
If you want these to be a little boozy then add 1 tbsp of brandy when you add the vanilla
Pastry Ingredients

250g, 2 cups, 16oz Self Raising flour
114g, ½ cup, 4oz butter (just do 8oz margarine if you’re going vegan or dairy free)
114g, ½ cup, 4oz margarine (extra for greasing)
16 – 20 tsp water
1 Egg or 2 tbsps of dairy free milk
Icing sugar (for decorating or hiding mistakes)
Method
Mincemeat filling
1. Measure out the butter and grate it (if you’re using a dairy free butter you can skip grating it, it just makes the harder butter easier to work with) then add to the mixing bowl.
2. Measure out the mixed fruit and peel, sugar, vanilla, mixed spice and cinnamon and add to the butter.

3. Peel, core and chop the apple and add to the mix.


4. Zest and juice the lemon and orange and add it all to the mix.

5. Combine all the mince pie filling ingredients by giving them a good stir with a wooden spoon.
6. Spoon the filling into a couple of jars and leave in the fridge for at least 24 hours to let the flavours fully infuse. I recommend leaving it in the jars for at least 2 days. It will last for about a week.


Pastry
Preheat the oven to 180°C/356°F.
1. Grease the muffin tin with margarine.

2. Measure out the flour and add it to a mixing bowl.
3. Measure out the margarine and add it to the bowl.

4. If you’re using butter, measure it out and cut it into cubes so it’s easier to manage.
5. Rub the butter and/or margarine into the flour with your fingers to resemble breadcrumbs.

6. Sprinkle flour on your hands to stop the mixture from sticking to your hands in this next part. Add water by the teaspoon and bring the mixture together with your hands to form a dough. Keep adding teaspoons of water until its formed until a ball that’s not too dry and not too sticky.

7. Knead the dough a little because I’m telling you to. Honestly I don’t understand kneading but it made it easier to roll out than when I didn’t (I’m a travel blogger not a GBBO contestant, okay).
8. Cover the dough in the mixing bowl with a wax wrap and place in the fridge for 15mins to make the dough easier to manage.
9. Sprinkle your surface and rolling pin lightly with flour before thinly rolling out your dough (you can split the dough in half to make it easier to roll out).

10. Cut out 24 pie bases with a round cookie cutter and transfer the disk to your muffin tins, gently pressing them in for a snug fit.
11. Fill each pie with a tablespoon of your mincemeat filling, avoid adding too much of the syrup that will have formed in your mincemeat as it will spill out when baking and make it really hard to get the pies out of the tin.

12. Crack an egg and beat it with a fork or pour 2 tbsps of dairy free milk into a cup and use whichever one to glaze the rim of the pies.

13. Return to your pastry, bring it together again and roll it out.
14. Cut out 24 lids with the star cutter and place one on top of each pie, gently pressing down on the edges so they seal to the pie base.

15. Wash over each lid with either the leftover egg or milk.

16. Place the trays in the oven and bake for 15-20 mins, until the pastry is golden brown.

17. Remove from the oven and set aside to cool for 5mins before gently removing each pie from the tin.
18. Before serving dust the mince pies with icing sugar. You can do this by placing some icing sugar in a sieve then holding it over the pies and tapping.

If you aren’t eating all 24 right away (I mean at a party, although Michael could probably manage one tray to himself) then you can store them in a tin or air-tight tub and if you want them for a later date then once they’ve completely cooled down, pop them in a sealed container in the freezer.
Bon appétit!

If you want to try any other classic British sweet treats check out my other blog post, Great British desserts every traveller must try and if you haven’t already, why not give my banana bread recipe a go!
For other festive content take a look at:
Low-waste Christmas gift guide for travellers 2020
12 things to do in London during the holidays
Christmas postcards (from Hawaii) with TouchNote
Mele Kalikimaka, Gabriella
Pin this post


