Tag: Popular

  • 18 most Instagrammable cafés & restaurants in London

    18 most Instagrammable cafés & restaurants in London

    UPDATE 2021 – Now a list of 18 most Instagrammable cafés, restaurants and bars in London.

    Instagrammable places to eat have been trending for the better part of a decade and with new places cropping up all the time, it’s hard to keep track of them and easy to forget about others that have been left in the dark. To help make things a little easier, I’ve put together a list of 18 (originally 10 but I keep finding more) of the most photogenic restaurants and cafés across London that will complement your IG feed perfectly.

    If you’ve browsed a few ‘gram worthy guides for places to eat in London you may notice a few differences with mine and that a couple of popular ones are missing. That’s because although I’ve been to them, I’ve chosen mine not just because they are pretty but because the service and food was amazing too, and really isn’t that the most important thing if you’re going to be spending your money to provide free marketing for them? I think so.

    So without further ado, here is my guide to 18 of the most Instagrammable (and delicious) cafés and restaurants in London:

    1. Dalloway Terrace

    Location

    Fitzrovia

    Closest Underground station

    Tottenham Court Road – Central and Northern Lines

    Dalloway Terrace is most popular for photos because of its feature wall that changes seasonally. Though it’s beautiful when it’s adorned with spring flowers, the cooler season is the best time to come. The covered terrace at Dalloway Terrace is one of the cosiest spots when the temperature drops in the city as it’s kept warm with outdoor heaters.

    Sure, the wall is beautiful and it is the restaurant’s defining feature, but I also want to stress that the food here is amazing! If you love truffles then you won’t be disappointed, their wild mushroom risotto was the perfect autumnal comfort food and don’t get me started on how much I enjoyed pinching Michael’s fries!

    PFH Top Tip: it’s not possible to book a specific table, which means you can’t be guaranteed one against the feature wall. I suggest booking first thing or arriving a little earlier for your reservation and asking if it’s possible to wait for one. 

    PLEASE be kind and polite to the staff. When we went we wanted to sit with the wall, we asked if it was possible and they let us wait for one to be sanitised. As we were eating our meal a couple were showed to their table and the woman starting screaming (no lie) at the staff because she wanted to sit with the wall for photos and refused to sit down despite there being no other tables available. See what patience and kindness will get you?

    As an alternative to the terrace try The Coral Room, the bar at the hotel, as it’s equally as beautiful. See number 14 for more.

    Book your table for 12pm to get the best chance of a seat against the feature wall.

    2. Winter Garden at The Landmark London

    Location

    Marylebone 

    Closest Underground station


    • Marylebone – Bakerloo


    • Baker Street – Bakerloo, Circle and Hammersmith & City, Jubilee and Metropolitan Lines


    • Edgware Road – Bakerloo, Circle and District, Circle and Hammersmith & City


    I learnt about The Landmark London back in 2014 when I was working for its sister hotel, K West. I used to go over there every other month for team meetings or fam trips and it was always my favourite hotel of the three to work in because of what’s waiting inside for you when you get past reception. 

    The Winter Garden is a spectacular indoor courtyard filled with tall palm trees reaching up towards the high glass ceiling. The ceiling previously only covered the ground floor but it was raised to create the Winter Garden as it is today.

    Though The Landmark London’s High Palms High Tea is named one of the best afternoon teas in London according to Time Out London, I do highly recommend eating lunch their too. The Landmark has a set menu for £45 pp which includes 3 courses and a glass of prosecco, the set menu includes their exquisite Slow Cooked Short Rib of Aubrey Allen’s Beef which I highly recommend if you eat meat. You can also enjoy a more budget friendly visit by booking a table at the Garden Terrace, which overlooks the Winter Garden, for tea, coffee or cocktails.

    PFH Fun Fact: T-Swift stayed at The Landmark London.

    Book your table here.

    Please note a smart dress code is required as this is a five-star hotel.

    3. Tiffany Blue Box Café at Harrods

    Location

    Ground floor of Harrods in Knightsbridge.

    Closest Underground station

    Knightsbridge – Piccadilly Line

    Who doesn’t want to have breakfast at Tiffany’s? It’s entirely possible at the Tiffany Blue Box Café in Harrods. The whole decor is Tiffany Blue and is made complete with little nods to the movie classic such as sheets of the script and a replica eye mask to the one Holly Golightly wore. How could a fan resist?

    If breakfast doesn’t take your fancy, book a table later in the day for a four course afternoon tea with unlimited tea, sandwiches and scones.

    Get ready to pose with your Tiffany tea cup before indulging yourself in all the sweet and savoury treats of your dreams.

    Reservations are necessary to avoid disappointment as tables are limited.

    4. EL&N

    Wardour Street EL&N

    Locations


    • Hans Crescent, Knightsbridge


    • St Pancras Station


    • Selfridges


    • Market Place, Oxford Circus


    • Brompton Road, South Kensington


    • Park Lane, Mayfair


    • Lowndes Street, Belgravia


    • Carnaby Street


    • Wardour Street, Soho


    Closest Underground station to the Knightsbridge location

    Hans Crescent, Knightsbridge – Piccadilly Line

    Wardour Street, Tottenham Court Road – Central and Nothern Lines

    Something that’s extra special about EL&N is that the interior for each one is different. Yes they’re all cute, pink and serve some of the most outrageously beautiful drinks and cakes you’ve ever seen, but they still all have something unique about them. Whether it’s a wall of candy love-hearts, floor to ceiling flowers or neon signs there’s a perfect backdrop for your next Instagram post waiting for you inside.

    The most popular and photo-worthy EL&N location in London over the years is the one with the twin alcoves lined with candy love-hearts, you can find this Instagrammable location downstairs in their Hans Crescent café, opposite Harrods in Knightsbridge. I think their newer location on Wardour Street is definitely going to take over as EL&N’s most Instagrammble café! With neon signs lining the walls and a pink and purple arcade that features a pink motorbike arcade game, EL&N on Wardour St is crushing the Instagrammable café game!

    With queues almost always out the door, EL&N is one of the top examples of a café nailing the highly sought after “most Instagrammable café in London” title. The menu actually tells you what photographs best and which is most popular for TikTok and they’re not wrong, these drinks really do look good in your hand or on the table in a photo. I highly recommend their Lucky Latte (see above) it’s topped with Lucky Charms cereal!

    Hans Crescent EL&N. Photo taken by @sarahtaylorphotoandfilm

    EL&N does not accept any bookings so arrive when it opens to get the best table.

    5. Drunch

    Locations


    • Regent’s Park


    • Mayfair


    Closest Underground station

    Regent’s Park: St John’s Wood – Jubilee Line

    Mayfair: Bond Street – Jubilee and Central Lines

    Fancy getting photos for the ‘gram and a decent brunch? Then make your way over to Drunch. Unlike most of the Instaworthy cafés, restaurants and bars on this list, the decor or view is not the main attraction, oh no. When it comes to brunch no one does it better than Drunch. Whether it’s an outrageously themed cocktail like the Escobar’s or a designer latte with a chocolate dusted haute couture logo, Turkish Eggs or heart-shaped-nutella-stuffed pancakes – you don’t want to miss the opportunity to snap the most Instagrammable brunch in London for your feed.

    Head to their Regent’s Park for cosy lounge vibes and the Mayfair Drunch for terrace dining with gigantic teddies for company.

    Drunch doesn’t take reservations so I recommend arriving when they open (11am weekdays and 10am on weekends). Expect a long queue on weekends.

    6. Peggy Porschen

    Locations


    • Belgravia (pictured)


    • Chelsea


    Closest Underground station

    Victoria – Circle and District and Victoria Lines

    It’s possible that Belgravia Peggy Porschen is the most Instagrammed café in London. Its seasonally decorated exterior is posted by food, fashion, travel, beauty and lifestyle bloggers who have travelled here from all around the world.

    As Peggy Porschen is first and foremost a bakery, I can guarantee you that you will always enjoy what you eat here, provided you have a sweet tooth. Their selection of cupcakes, biscuits and cakes by the slice is vast and trust me, everything is photogenic. If cake isn’t your thing then you can still get something that will make your table flat lay super cute, order a coffee or hot chocolate and it will come with a festive chocolate dusting.

    Either book a table here or arrive 10mins before they open (10am) to grab a table out front. Make sure you select outdoor seating with your booking to get the best spot for photos. The outdoor seats are ideal because you’ll have natural lighting, a backdrop of the pink café and your photographer (or the poor schmuck you’ve convinced to take photos of you) will be able to step back onto the pavement to get a clear shot of you.

    7. The Ivy

    Photo taken by @leana.esch

    Location

    There are multiple restaurants all across the UK.

    The exterior restaurant in the blog post is The Ivy Market Grill Covent Garden and the interior photographs are of The Ivy Brasserie, Norwich.

    Closest Underground station for The Ivy Market Grill

    Covent Garden – Piccadilly Line

    The Ivy Tower Bridge

    Each restaurant under The Ivy umbrella is decorated with a different theme but they are always elegant. If you don’t want to eat out I recommend going for drinks. The seasonal cocktail list never disappoints – I’m talking Lavender Ladies in summer and Toffee Apple Martinis in Autumn – but the mixologists are always prepared to serve you whatever your heart desires.

    It’s not too costly given the atmosphere but if you do want to keep the cost down go for breakfast. You can get a tea/coffee and a selection of mini pastries for less than £12 per person, I highly recommend their vegetarian breakfast though if you’re extra hungry.

    Though each restaurant’s interior is different, the doorway is always adorned with a seasonal display making it an ideal spot for a photo before you enjoy a drink or meal there.

    Book your table here.

    Please note the dress code is smart casual

    8. Aubaine

    Aubaine Selfridges

    Locations


    • Selfridges


    • Brompton Road, Kensington


    • Marylebone


    • Mayfair


    • Notting Hill


    • Covent Garden


    Closest Underground station to Selfridges

    Bond Street – Central Line and Jubilee Lines


    For a quick trip to France on the Tube, head to any of Aubaine’s locations across all of the most popular spots in London. 

    Aubaine Mayfair

    Aubaine’s Selfridges location is particularly popular on Instagram as it’s decorated head to toe in lavender and lilac wisteria (not real if you’re worried about hay fever). I recommend booking for the first reservation in the morning and asking for a table within the flowers when you arrive because you cannot be guaranteed a seat there, plus the breakfast menu is delicious whether you’re ordering a croissant like I did or Eggs Benedict like Michael.

    As for Aubaine’s Mayfair location I recommend booking for drinks and/or dinner – I mean champagne cocktails and burrata after work, on a date night or with friends sounds perfect right?

    Book your table at Selfridges for when they open to get the best opportunity to sit at their prettiest tables. Tables at Aubaine restaurants can all be booked except the Deli at Covent Garden which only takes walk-ins.

    9. Saint Aymes

    Location

    Tyburnia

    Closest Underground station

    Marble Arch – Central Line

    For another café with shockingly priced but ridiculously attractive drinks, head to Saint Aymes. At one point in time Saint Aymes was dubbed the prettiest café in London (according to their website anyway). Each area of the café is decorated with a different floral display and though it’s all photogenic, I would say the outdoor seats are the best. To get those I recommend turning up when it opens (check the times on the website for the day you want to visit because it varies) because there’s a £25 minimum spend to book a table. 

    Saint Aymes has been featured in major publications such as Marie Claire, Time Out and The Telegraph and has been used as a shoot location by L’Oreal, Too Faced and Instax Fuji Film, so you know, it cute!

    10. Farm Girl

    Location


    • Notting Hill (pictured)


    • Soho


    • Knightsbridge, Harvey Nichols


    • Fitzrovia


    • Hoxton


    For a killer vegan menu that looks even more exciting than it already sounds, head to any of Farm Girl’s locations. I’m talking braised shiitake bulgogi tacos, Açai smoothie bowls and coconut BLTs with rose, matcha or turmeric lattes decorated with a cute bulldog.

    If flat lays of your food is what you’re after then Farm Girl is the place for you.

    11. Circolo Popolare

    Location

    Fitzrovia

    Closest Underground station

    Tottenham Court Road – Central Line

    Tucked away on one of the side streets off Oxford Street hides Circolo Popolare, the Italian restaurant of dreams in central London. Absolutely nothing could prepare me for the beautiful decor of this restaurant, I love it so much I’ve written about it twice and eaten there more times than I should admit.

    The lighting within Circolo Popolare is romantic but dim and makes taking photos a little harder so I found the best spot to be outside in their little garden. However, it’s not as breathtaking as their white alcoves filled with wine bottles, purple and red flowers strung from the ceiling beams and fairy lights that resembles a starry sky (they create beautiful bokeh too). You’ll just have to go twice to decide for yourself which is best and though harder to get a photo I do recommend going for dinner as this restaurant is romantic AF.

    Circolo Popolare is part of the Big Mamma group whose restaurants are known for incredible food all across Europe. I highly recommend their Cacio e Pepe which on weekends and evenings is served for two straight from a pecorino wheel, alternatively you can order a plate of Cacio e Pepe on weekdays for lunch.

    Click here to make a reservation, they do take walk-ins of up to 6 people if you can’t get a table.

    12. Alto San Carlo at Selfridges

    Location

    Fifth floor of Selfridges on Oxford Street.

    Closest Underground station

    Bond Street on the Jubilee and Central Lines.

    What could possibly be one of the most sought after restaurants with their summer 2021 Dior takeover is Alto on the fifth floor of Selfridges. 

    Usually decorated with lemons and hanging vines this Italian rooftop restaurant looks like you’ve stepped out of central London and into the Amalfi Coast. During the Dior takeover it resembles more of the terrace of an Italian villa whose Dioriviera ceiling drapes seek to offer you a cool sanctuary from the sun.

    The menu is Italian cuisine served in a tapas style with the purpose of ordering multiple plates to share. Yes that means you can order pasta, pizza and risotto and eat it all!

    Might I suggest a linen outfit or a summer dress (if you wear them) – dress for lunch in Capri for the right vibe in your photos.

    To get to Alto, take the express lift opposite the Chanel perfume counter on the ground floor.

    Reservations are necessary, Alto x Dior is not currently taking walk-ins.

    13. Club Mexicana

    Locations


    • Soho


    • Seven Dials Market, Covent Garden


    Closest Underground station

    Oxford Circus – Central, Bakerloo and Victoria Lines.

    Hidden away from shoppers, tourists and locals that regularly line Carnaby Street is Kingly Court (opposite Broadwick Street) where you’ll find a treasure trove of restaurants, including Club Mexicana.

    Club Mexicana is a vegan Mexican restaurant; it’s colourful, delicious and will blow your mind even if you’ve been eating vegan before it became a trend. 

    As a vegetarian who misses fish tacos, their beer-battered Baja Tofish tacos satisfy that craving so well that upon my first bite I forgot it was vegan as was momentarily hesitant to take another bite because I was convinced it was fish! 

    These colourful tacos, burritos and Mexican beers served with chilli salt rims on hot pink tables will give you the pop of colour that your summer Instagram feed is craving.

    Added bonus, you can get x3 tacos and a margarita for under £20!

    Reservations are necessary to avoid disappointment. Please note that Club Mexicana asks that reservations are for dining not just drinking.

    14. The Coral Room at The Bloomsbury Hotel

    Location

    Fitzrovia

    Closest Underground station 

    Tottenham Court Road – Central and Northern Lines

    Another favourite of mine and Instagrammable restaurant at The Bloomsbury Hotel in Fitzrovia is their bar, The Coral Room. 

    Sure the decorative seasonal wall in Dalloway Terraces outside is beautiful for photos but The Coral Room is my personal favourite of the two. The boldly painted coral walls, colourful L.E. Hall artwork hung in gold bamboo frames on every wall, potted palms that almost give the impression that they’re leaning in to your intimate conversations and statement bar that glows from within, all pull together to create a tropical oasis from bustling Oxford Street that’s just minutes away.

    You can trust in The Coral Room to make cocktails that not only taste good but look every bit as glamorous as you’ll feel sipping them.

    You can enjoy a light lunch, afternoon tea or drinks at The Coral Room. My recommendation is to get drinks and then take your meal in Dalloway Terraces (reservations needed).

    The Coral Room is less popular than Dalloway Terraces so it will be easier to get a table here, however their afternoon tea is popular so it’s best to book your table.

    15. Jin Bo Law at the Dorsett City Hotel

    Location

    Aldgate 

    Closest Underground station 

    Aldgate – Circle and Metropolitan Lines

    Aldgate East – District and Hammersmith & City Lines

    Jin Bo Law is the skybar at the Dorsett City Hotel. Located on the 14th floor of the hotel Jin Bo Law offers incredible views out across the city of London and serves as an incredible backdrop for your “out in the city” photos. The view from Jin Bo Law includes the Gherkin, Shard and “walkie-talkie” on right and Tower Bridge and the River Thames to the left.

    Jin Bo Law is my top choice on this list to start an evening out in the city both for the view and the music, if 90s/00s RnB and cocktails is your thing then you’ll love Jin Bo Law.

    For the best photos reserve a table outside on weekday when it’s quieter. The vibe is better at the weekend but there’s a minimum spend on Friday nights so something to keep that in mind when booking.

    For another rooftop bar see number 17 on the list of most Instagrammable cafés and restaurants in London.

    16. Christina’s Shoreditch at the Mondrian London Shoreditch hotel

    Location

    Shoreditch

    Closest Underground station 

    Liverpool St Station – Central, Circle Hammersmith & City and Metropolitan Lines and the Overground, TFL rail, C2C, Greater Anglia, Stansted Express

    Shoreditch High Street – Overground

    Old Street – Northern Line or the Great Northern network

    Christina’s Shoreditch is the café and bar in one of East London’s newest hotels: Mondrian Shoreditch hotel. The Mondrian chain took over The Curtain hotel after is had to close its doors during the height of the pandemic and the makeover has been an incredible transformation. The Mondrian Shoreditch now boasts three amazing places to dine including BiBa, a Spanish restaurant ran by World Famous Michelin Star chef, Dani García.

    Christina’s, located to the right of the hotel, is where you enjoy pastries baked fresh in the neighbourhood bakery, Chestnut Bakery, some of the best sandos in London that are made with fresh ingredients from local farmers and growers and you can sip on cocktails made with ingredients only sourced from independent suppliers such as Hepple Gin and Kanpai Sake. Christina’s has put sustainability at the forefront of their conception and everything delicious morsel served speaks to this.

    Pop into the lobby at the Mondrian Shoreditch London for a neat Lightroom experience much like a mini Yayoi Kusama: Infinity Mirror Room.

    Book a table at Christina’s Shoreditch to avoid disappointment. 

    17. The Aviary at Montcalm Royal London House hotel

    Location

    Shoreditch

    Closest Underground station 

    Liverpool St Station – Central, Circle Hammersmith & City and Metropolitan Lines and the Overground, TFL rail, C2C, Greater Anglia, Stansted Express

    Shoreditch High Street – Overground

    Old Street – Northern Line or the Great Northern network

    Much like number 15 (Jin Bo Law) on this list of Instaworthy restaurants in London, The Aviary is also a skybar bar within a Shoreditch hotel. The Aviary is the rooftop restaurant and bar at the Montcalm Royal London House hotel. Some of the view highlights at The Aviary include the “walkie-talkie” and The Shard.

    Though the view isn’t quite as impressive as Jin Bo Law the terrace at The Aviary is much bigger so you can enjoy drinks with a backdrop of London’s skyscrapers with a little more personal space.

    The Aviary also has some of the most sought after dining experiences in London: igloo pods, you’ll need to plan your booking in advance for these as they’re always snapped up quickly.

    Book a table on the terrace for a seat outside with a city view.

    18. Tavolino

    Location

    Southwark

    Closest Underground station 

    London Bridge – Northern and Jubilee Lines. 

    Tavolino is an Italian restaurant located within one of London’s newer complex, More London, which sits along the River Thames close to London Bridge station. Aside from very good pizza, pasta and cocktails made with some of the best Italian spirits Tavolino is one of the best spots to savour a view of Tower Bridge, one of London’s most iconic landmarks. For more ideas on where to take photos of or with Tower Bridge then take a look at my blog post, Best locations to photograph Tower Bridge.

    Book a table outside on the terrace if it’s not raining for unobstructed views of Tower Bridge. If it’s raining book a table inside and request the second floor for the best indoor views of the bridge.

    So there you have it, my top 18 Instagrammable cafés, restaurants and bars in London where you’ll be able to get killer content and good food! Enjoy! 

    Keep an eye out here throughout the summer of 2021 as new restaurants get added!

    Do more on & for the planet, Gabriella

    Pin this post


    If you enjoyed this blog post, why not check out my 10 most Instagrammable places in London, England blog post.

  • How to plan trips with Notion

    How to plan trips with Notion

    For the first time ever, someone other than me has published a blog post on Postcards from Hawaii and here it is, Michael has written all about his love affair with Notion and why he uses it as his space for planning and organising our travels. Everyone plans and prepares for trips differently right? So we figured why not share with you an alternative way that he absolutely swears by!

    So Michael, take it away…

    Notion is a tool that helps you organise just about every aspect of your life. It works in your browser or as a dedicated app for Mac, Windows, iOS and Android. You can organise your every day via to do lists and goals, you can run your business on it through powerful project management tools and it works perfectly for single users and giant corporations alike.

    I use Notion mainly to run my animation studio, organising complicated projects, timelines and teams. However, the page I most enjoy opening in my Notion account isn’t work related at all, it’s my beautifully organised and very detailed travel journal. It’s the place I plan every single trip in and it’s been through many rounds of refinement to get it to its current form, a form that I am sharing in full with you as a Notion template, meaning you can use this very blueprint for your own adventures around the world. Let’s dive in!

    1. Sign up

    To get started with this travel journal you will need a Notion account. If you already have one great, if you don’t, sign up here. You can easily use your Google account to create one with Notion. They offer a free account which has a limit on how much you can create, a $4/month personal subscription which offers unlimited creation and a couple of business plans.

    2. Duplicate my template

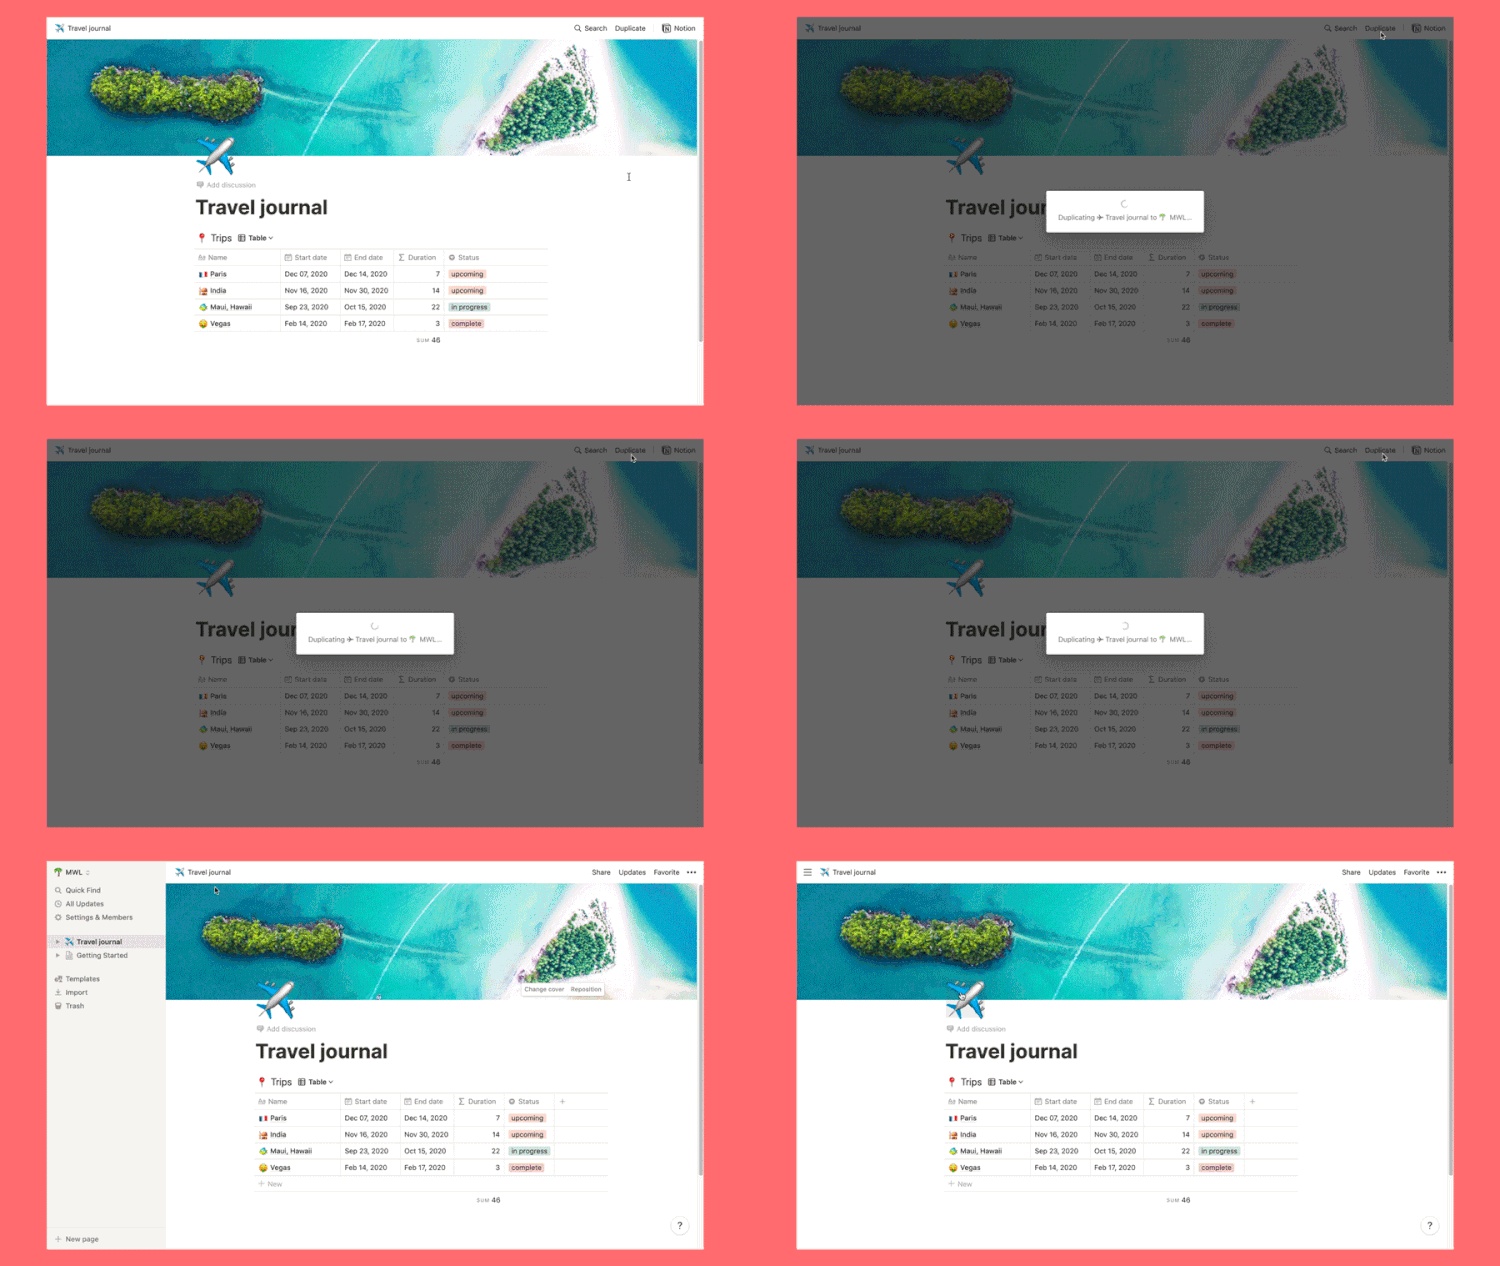
    Once you have an account, the next step is to duplicate the template I have created so you can personalise it and begin planning your travels.

    Click on this link then click “duplicate” in the top right hand corner. If you’ve made an account and are logged in, it will take you to your new travel journal in your own account. If you’re not logged in it will prompt you.

    3. Personalise

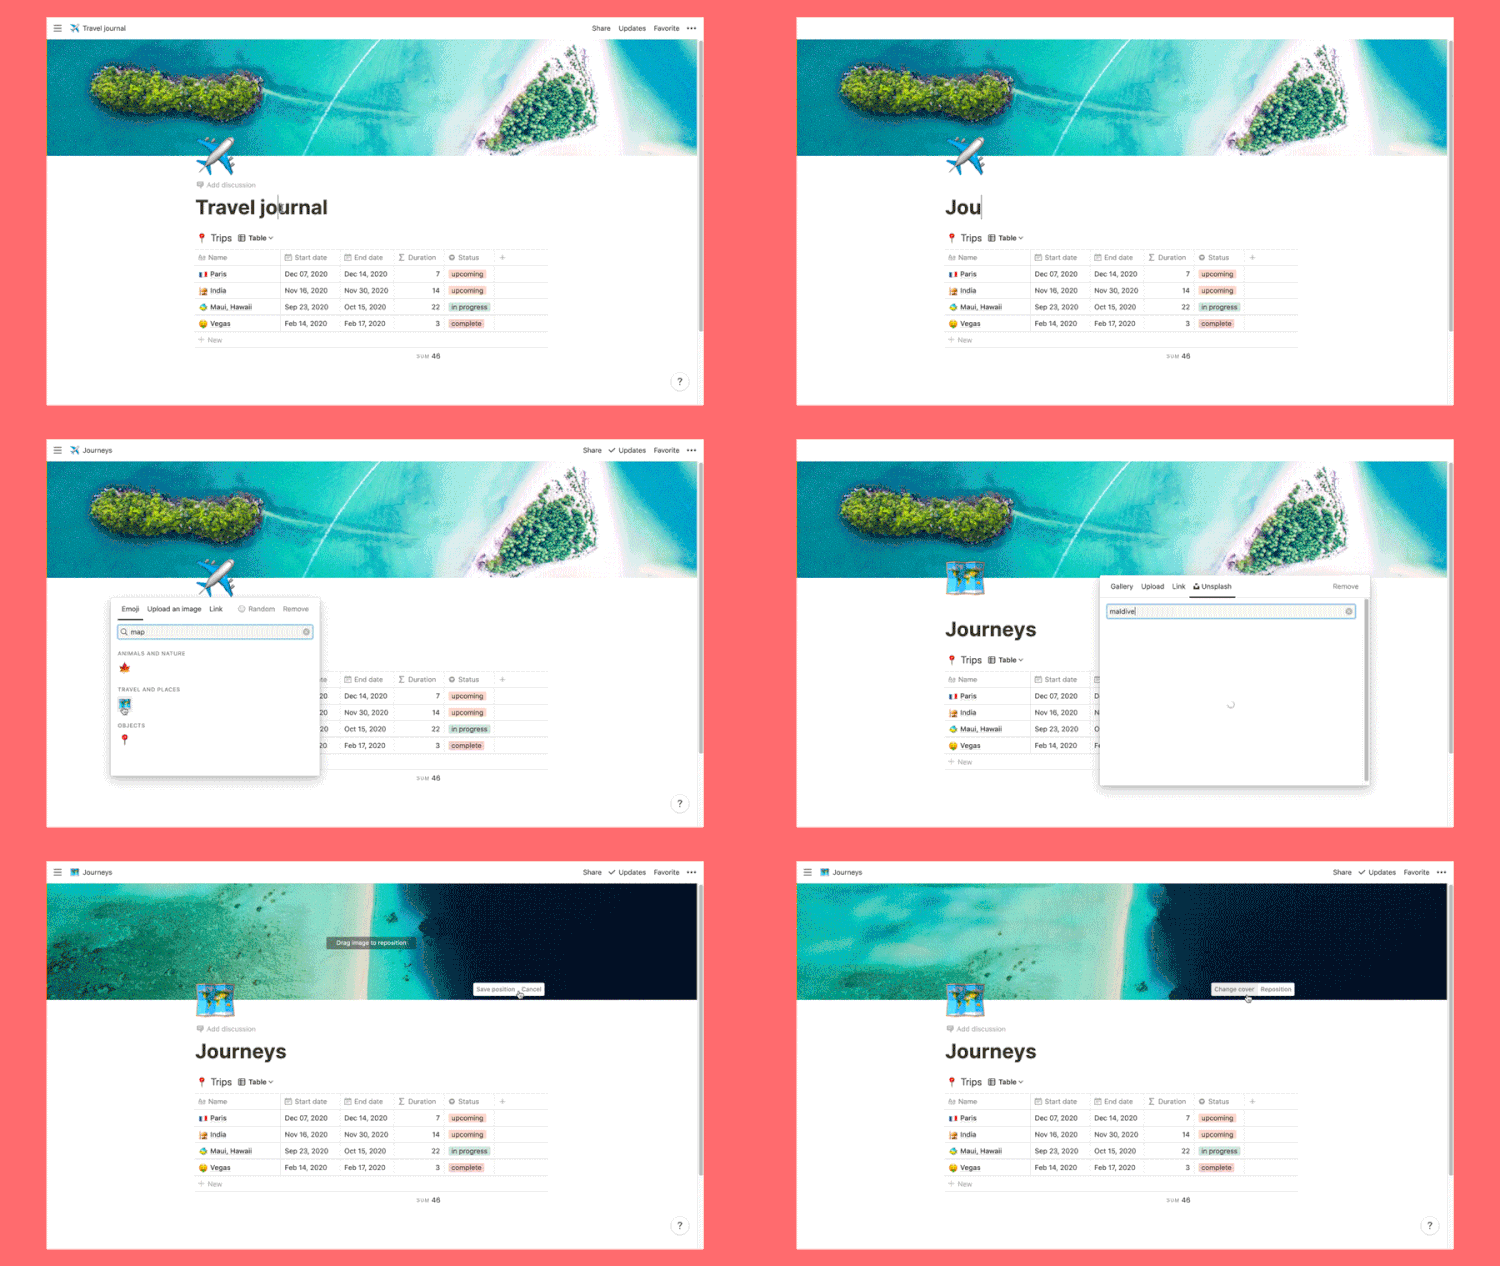
    Time to make it yours! Personalise your travel journal with a new title, emoji and cover photo. Notion hooks up to Unsplash and gives you 900k+ hi res photos to choose from (you can use these anywhere you like not just as header photos).

    Individual trip pages can be personalised in this way as well, in fact any page of your travel journal can!

    4. Explore the template

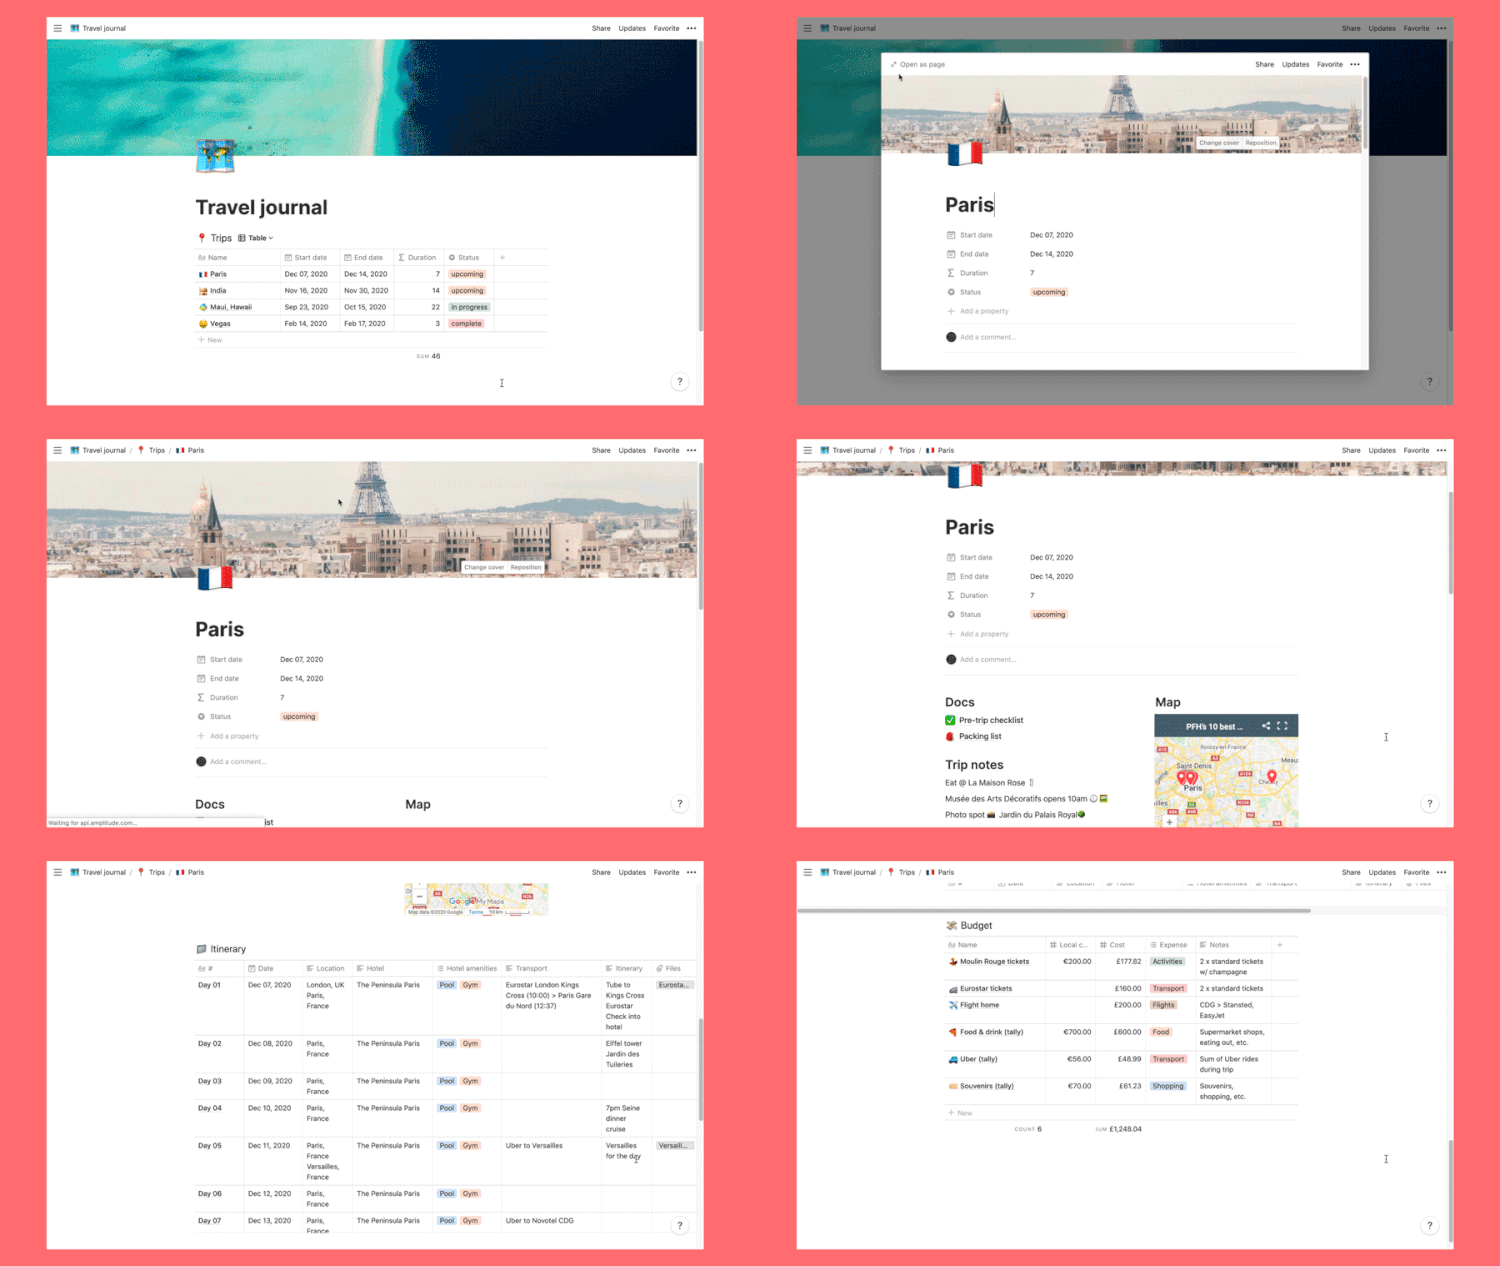
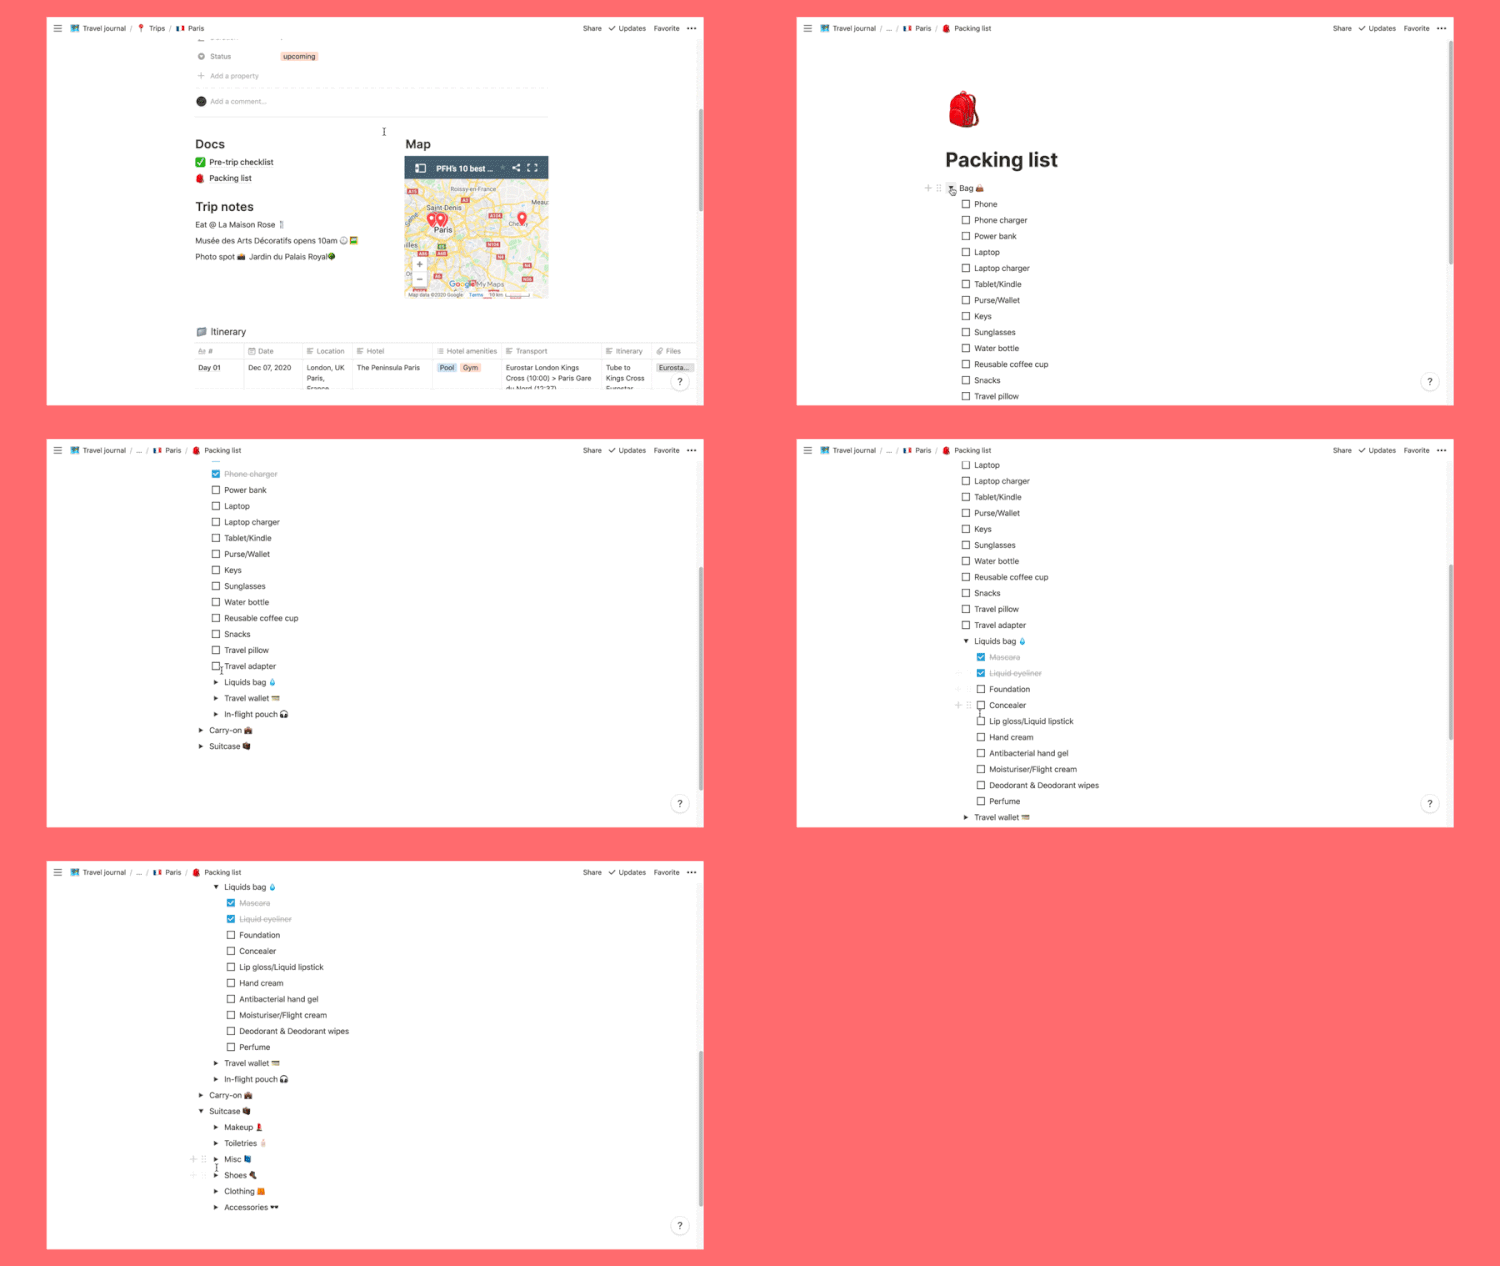
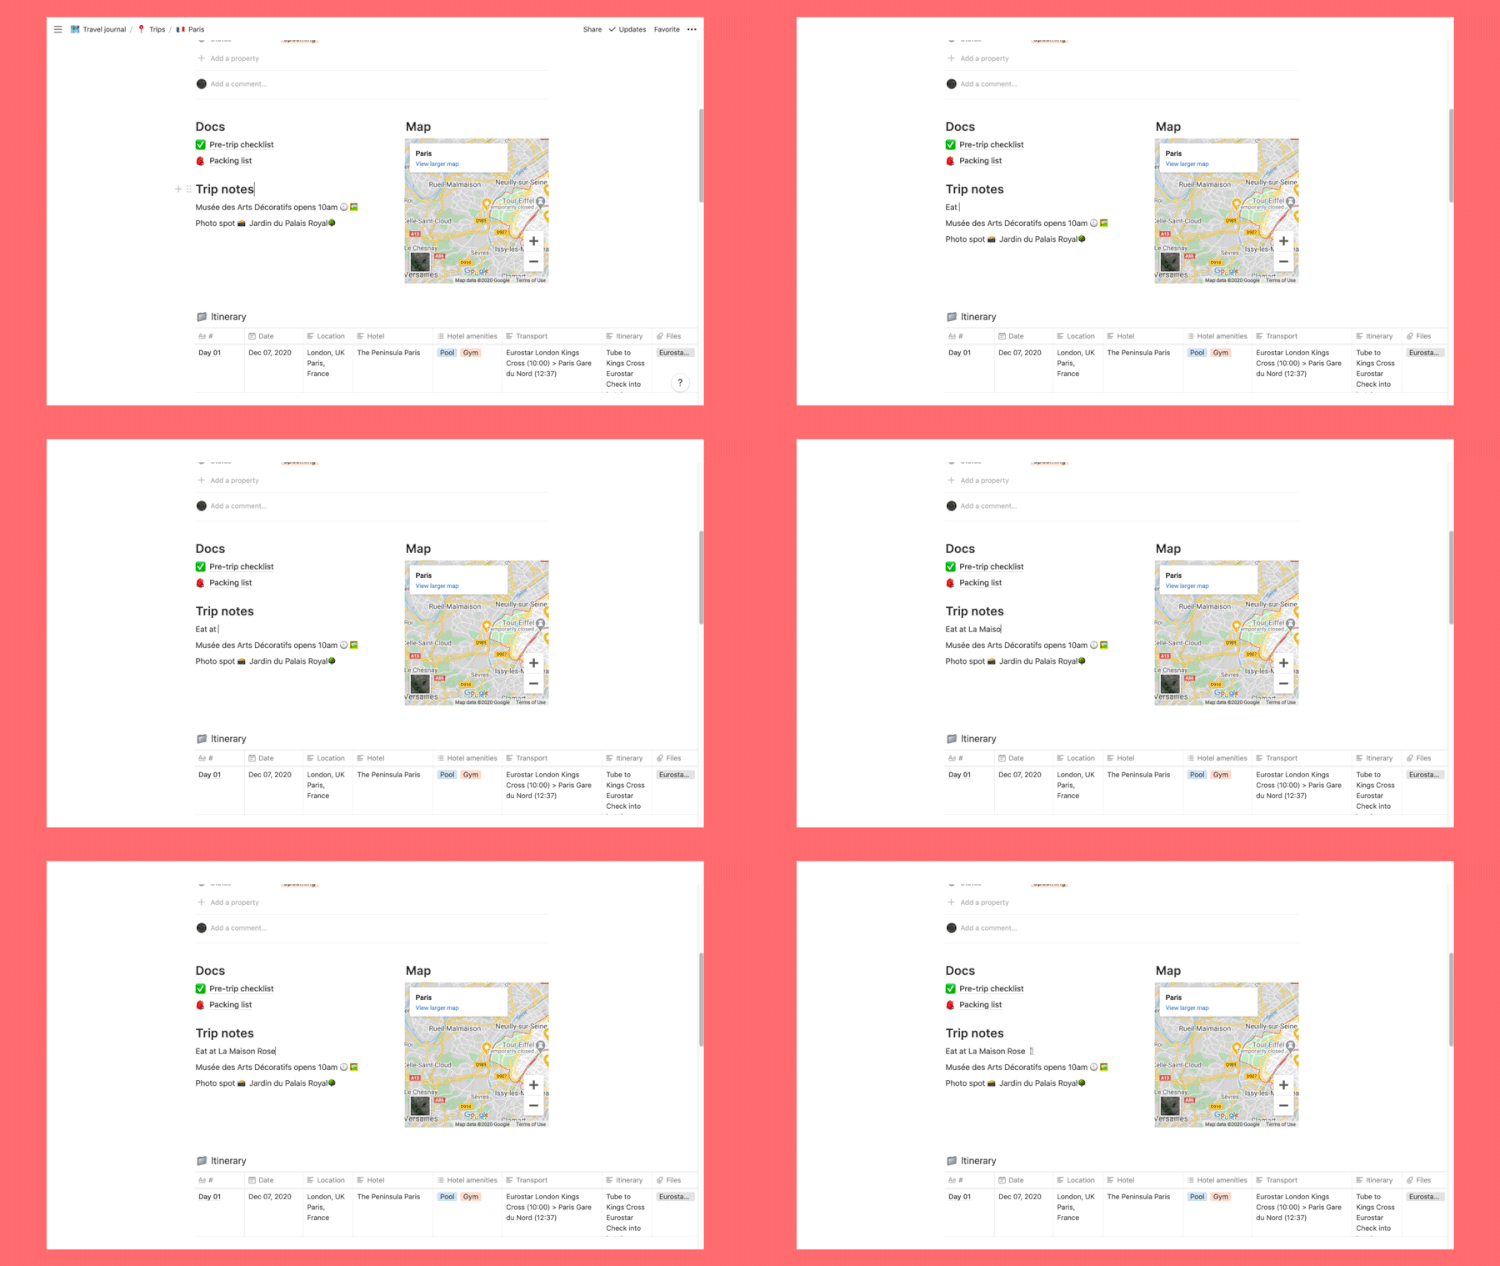
    Take it for a spin and get familiar with how your trips will be organised. Click on one of the demo trips, Paris for example. Notice each trip has its own page? Inside the trip page you’ll find what I consider key resources for planning a trip: a pre-trip checklist, a packing list, a map (all inspired by Gaby’s previous blog posts), an itinerary, a budget, and a space for any notes.

    Here’s a quick breakdown of each section:

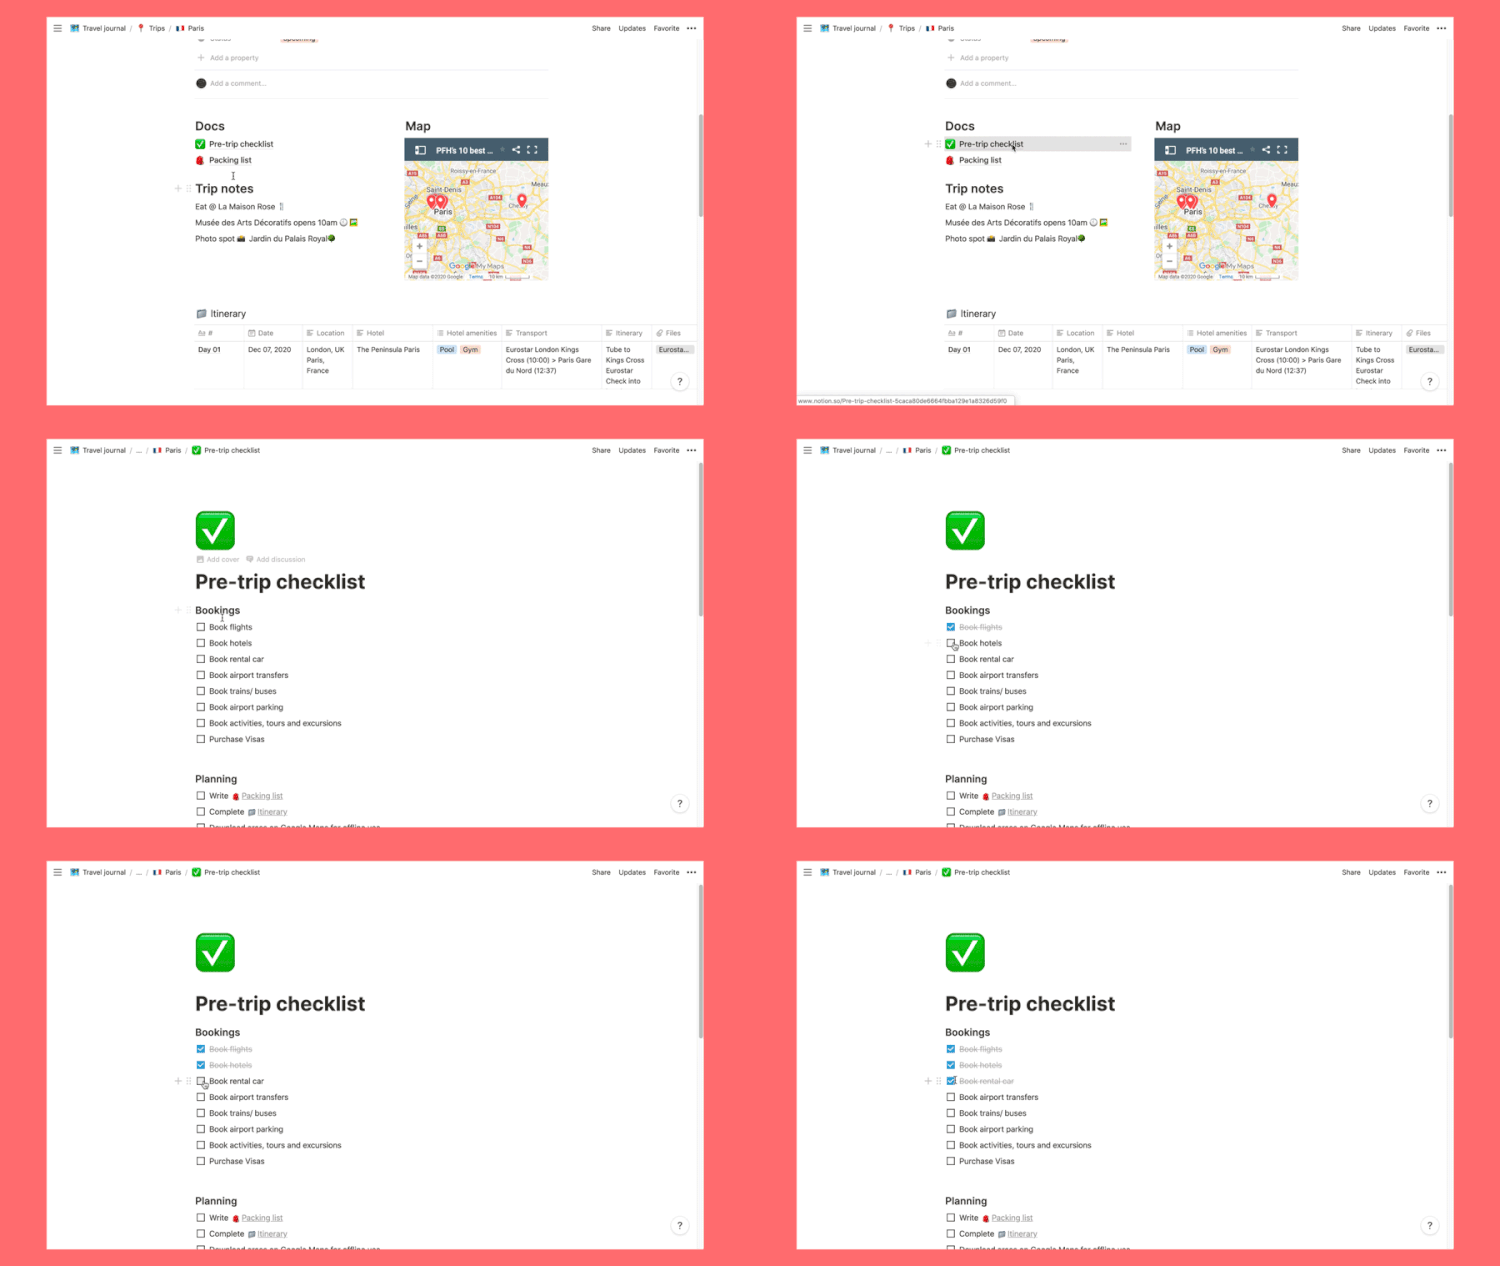
    Pre-trip checklist

    You’ll be able to customise this check list to suit your needs – add to it, take away, rework it.

    Packing list

    Again, use ours as a guide or write your own from scratch. Use toggles to organise cases, bags and categories. To add to this list (or any aspect of the travel journal) hover or click on the + and choose what kind of block you’d like to add; there are so many to explore.

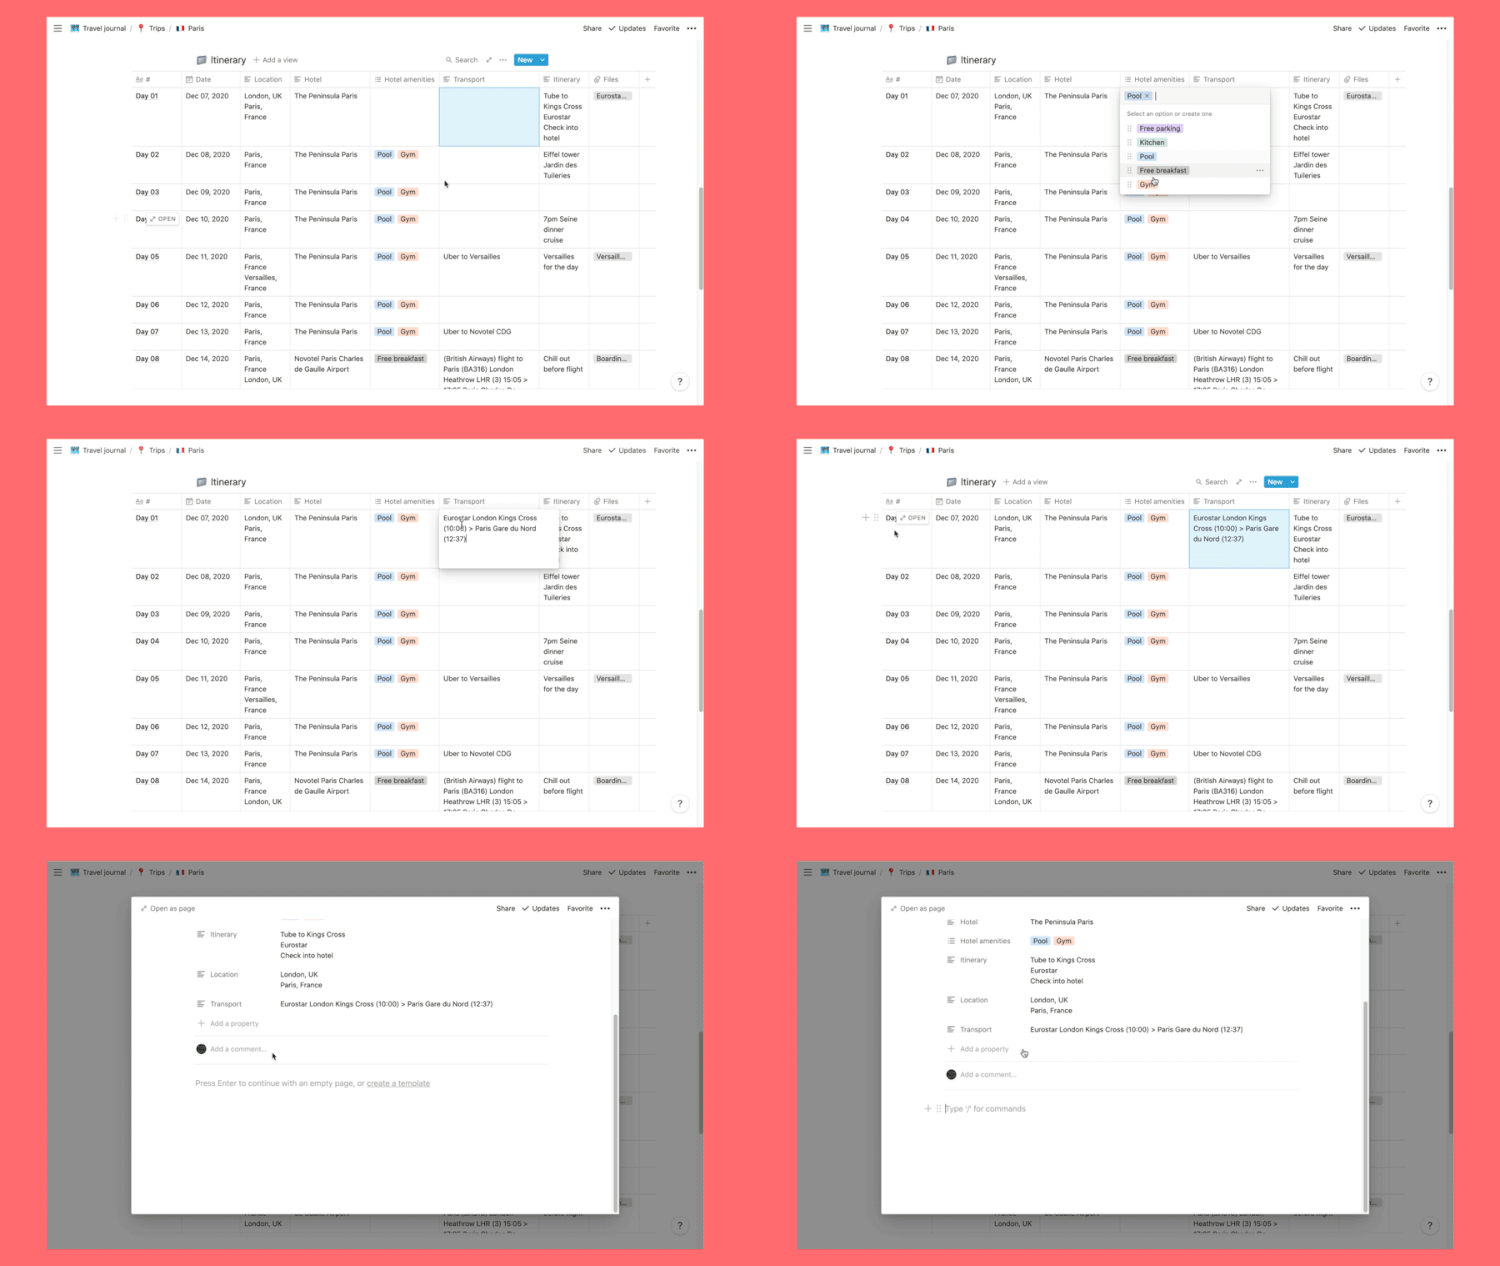
    Itinerary

    The itinerary is set up as another database so it functions just like your main travel journal database – each day can be clicked and is a stand-alone page. This is great if you want more space for each day, maybe you’re a big journaller or want a place to collate some images for a travel shoot moodboard, you can do it all here.

    Customise your columns to suit your needs: fill in your days, drop your boarding pass PDFs in the ‘files’ column on the corresponding day and you have everything for your trip in one place.

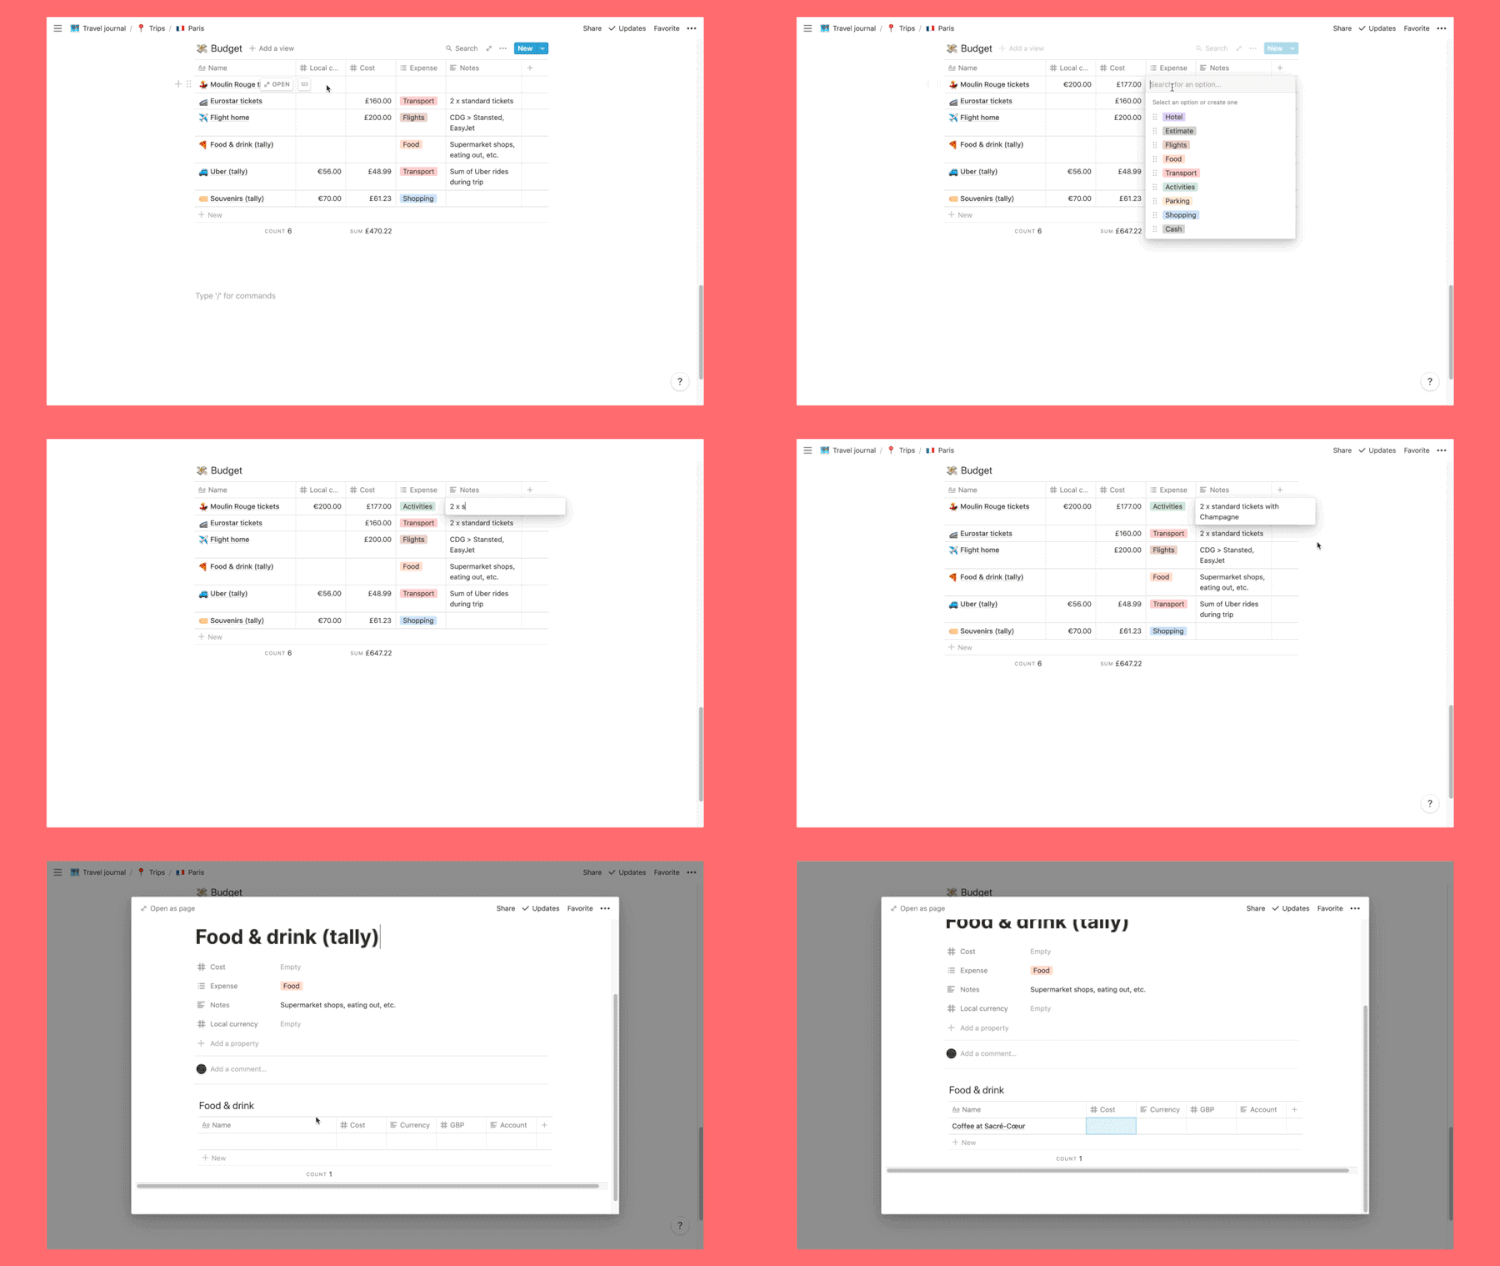
    Budget

    Depending on how organised you want to be you can create a budget – either use this as a plan to keep to your spending limit or a log as you go. You can add single expenses or create more detailed budgets by nesting smaller tallies (see ‘food & drink’) – the possibilities are endless!

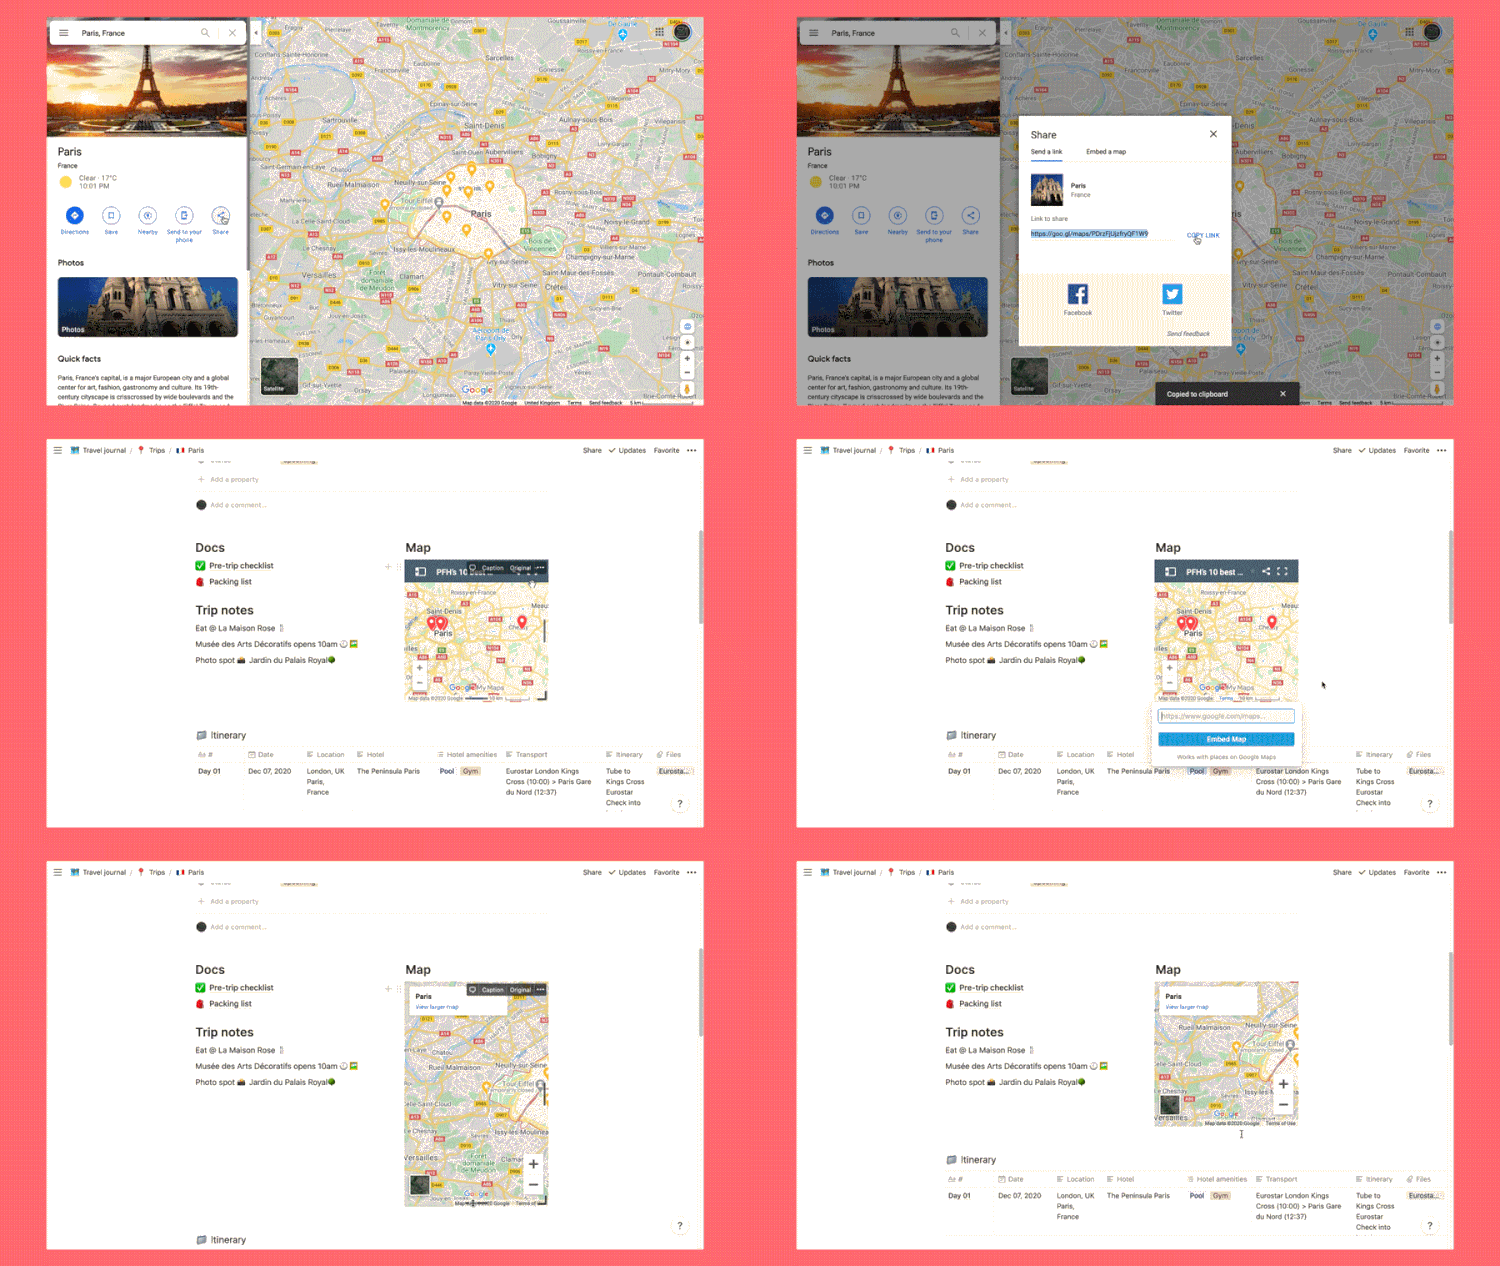
    Map

    Use this space to drop a map of your destination in. It’s a great way to embed pre-made maps with spots you want to visit. Just click on replace in the map menu and paste the link to any Google map.

    Trip notes

    A free space for anything that doesn’t have a home above. I like to jot down recommendations we’ve received on our trips or useful details I need to remember like airport parking locations (because I always forget where the car is parked which always leads to an argument in the middle of the carpark with Gaby).

    5. Start planning

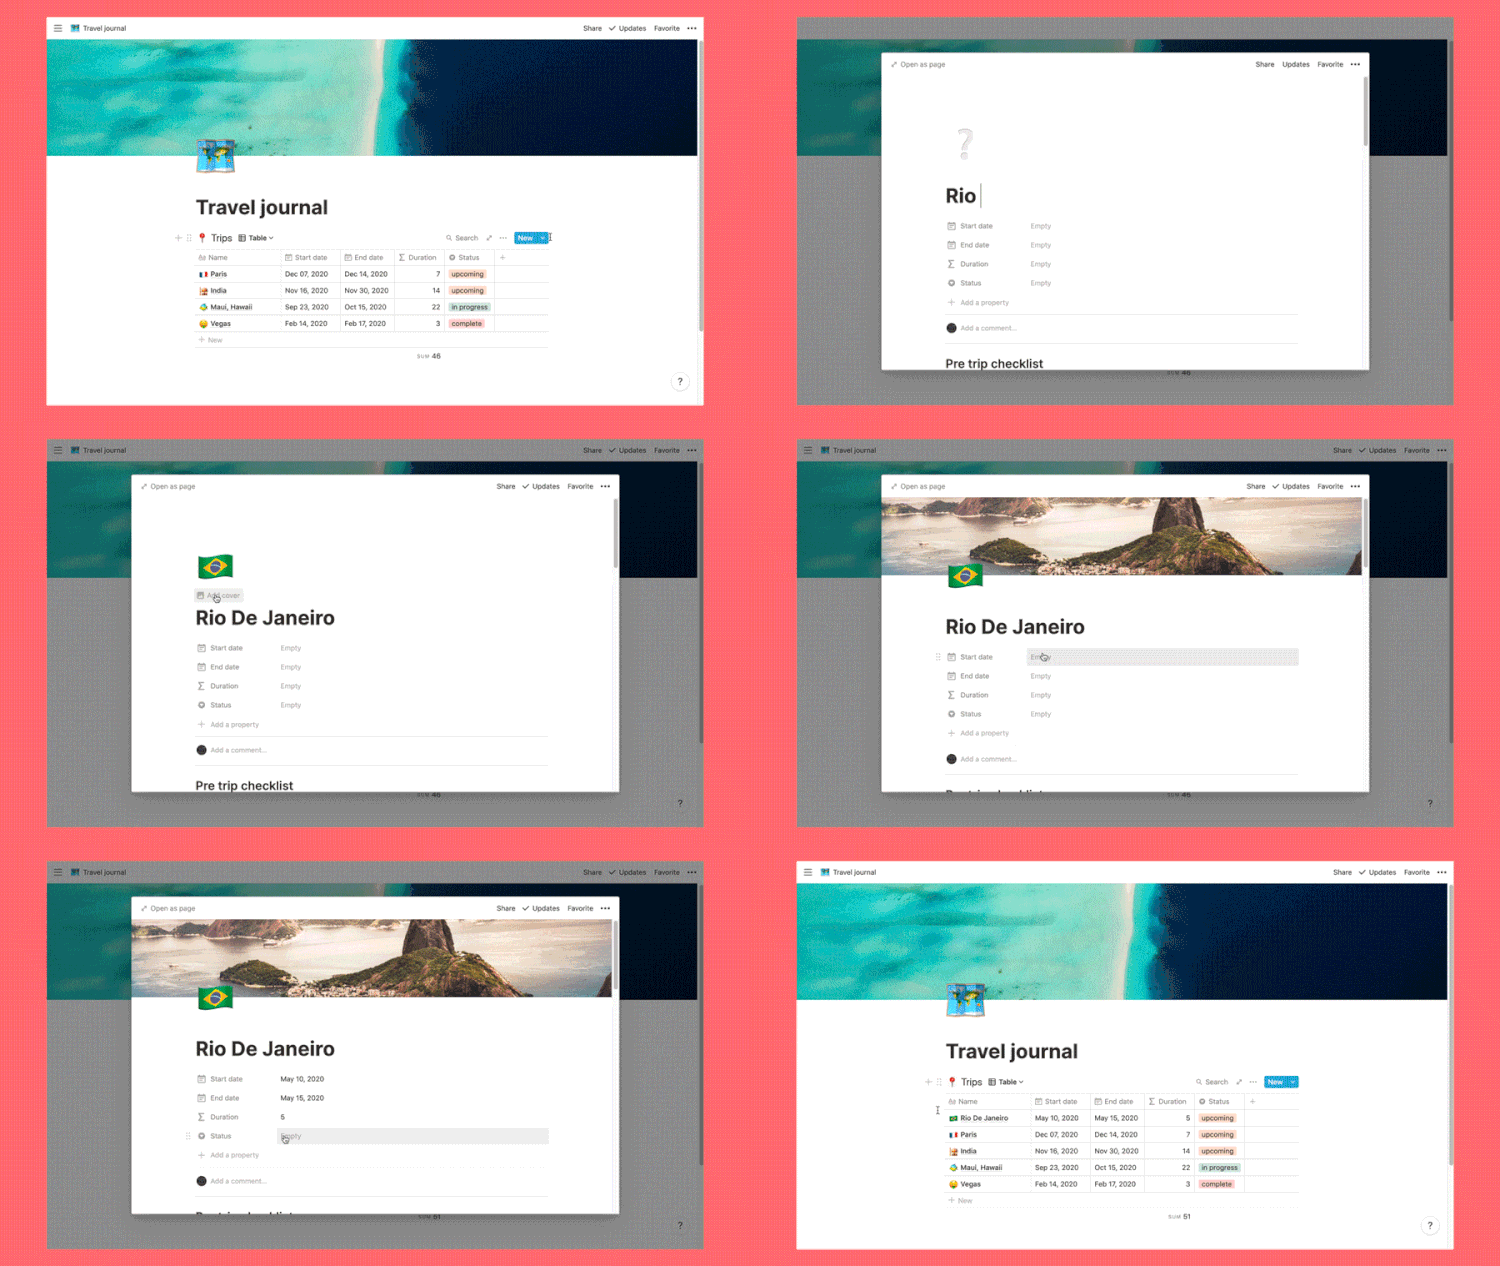
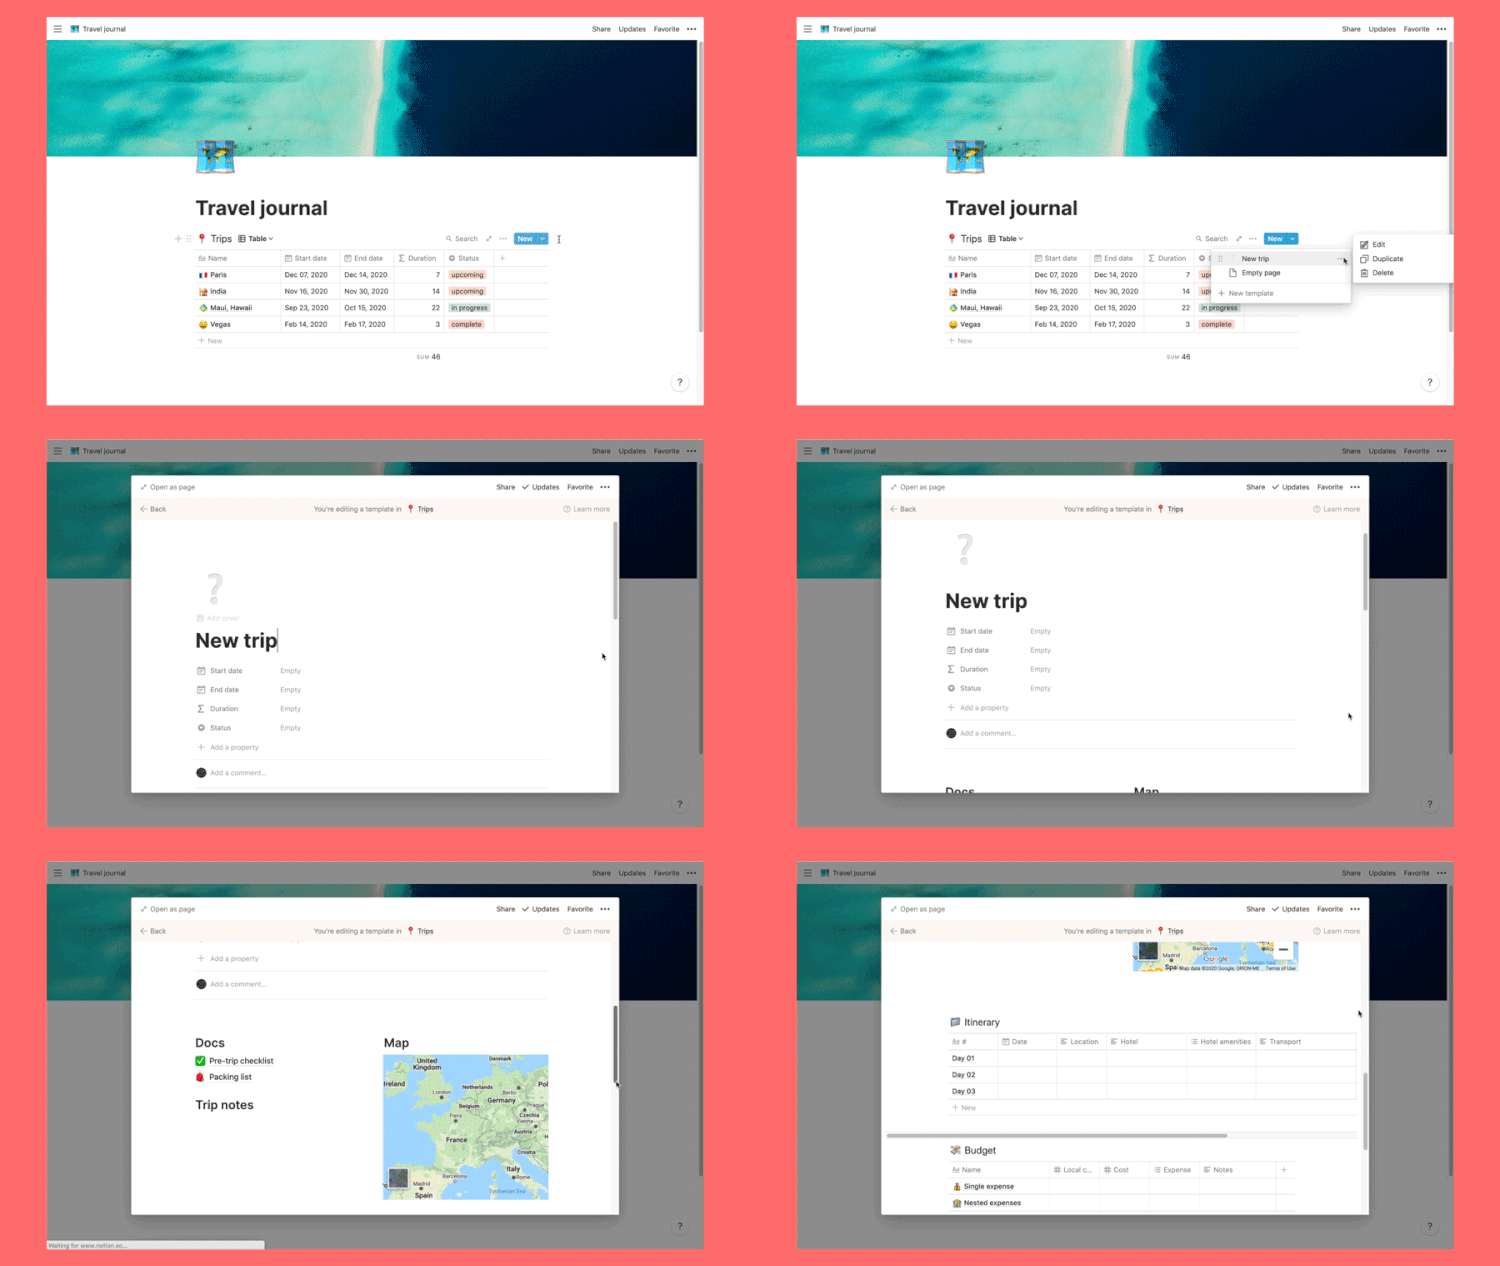
    Time to create your own trip! When you are back to your main travel journal page (use the navigation menu at the top of the page), hover over the trips database, click on the arrow on the blue ‘New’ button and click ‘New Trip’. Title your trip page, personalise the icon & wallpaper and add some details. Back in your travel journal you’ll see your new trip, now you are ready to plan.

    Edit your trip template

    When you create a new trip, you are duplicating a template I have made. If you want to make changes to this template click on the blue arrow of your main database and select edit – any changes you make in here will be active each time you press new trip. This is great if you want to customise your pre-trip checklist or packing list and have the changes reflected for every new trip.

    6. Additional tips

    Explore different views

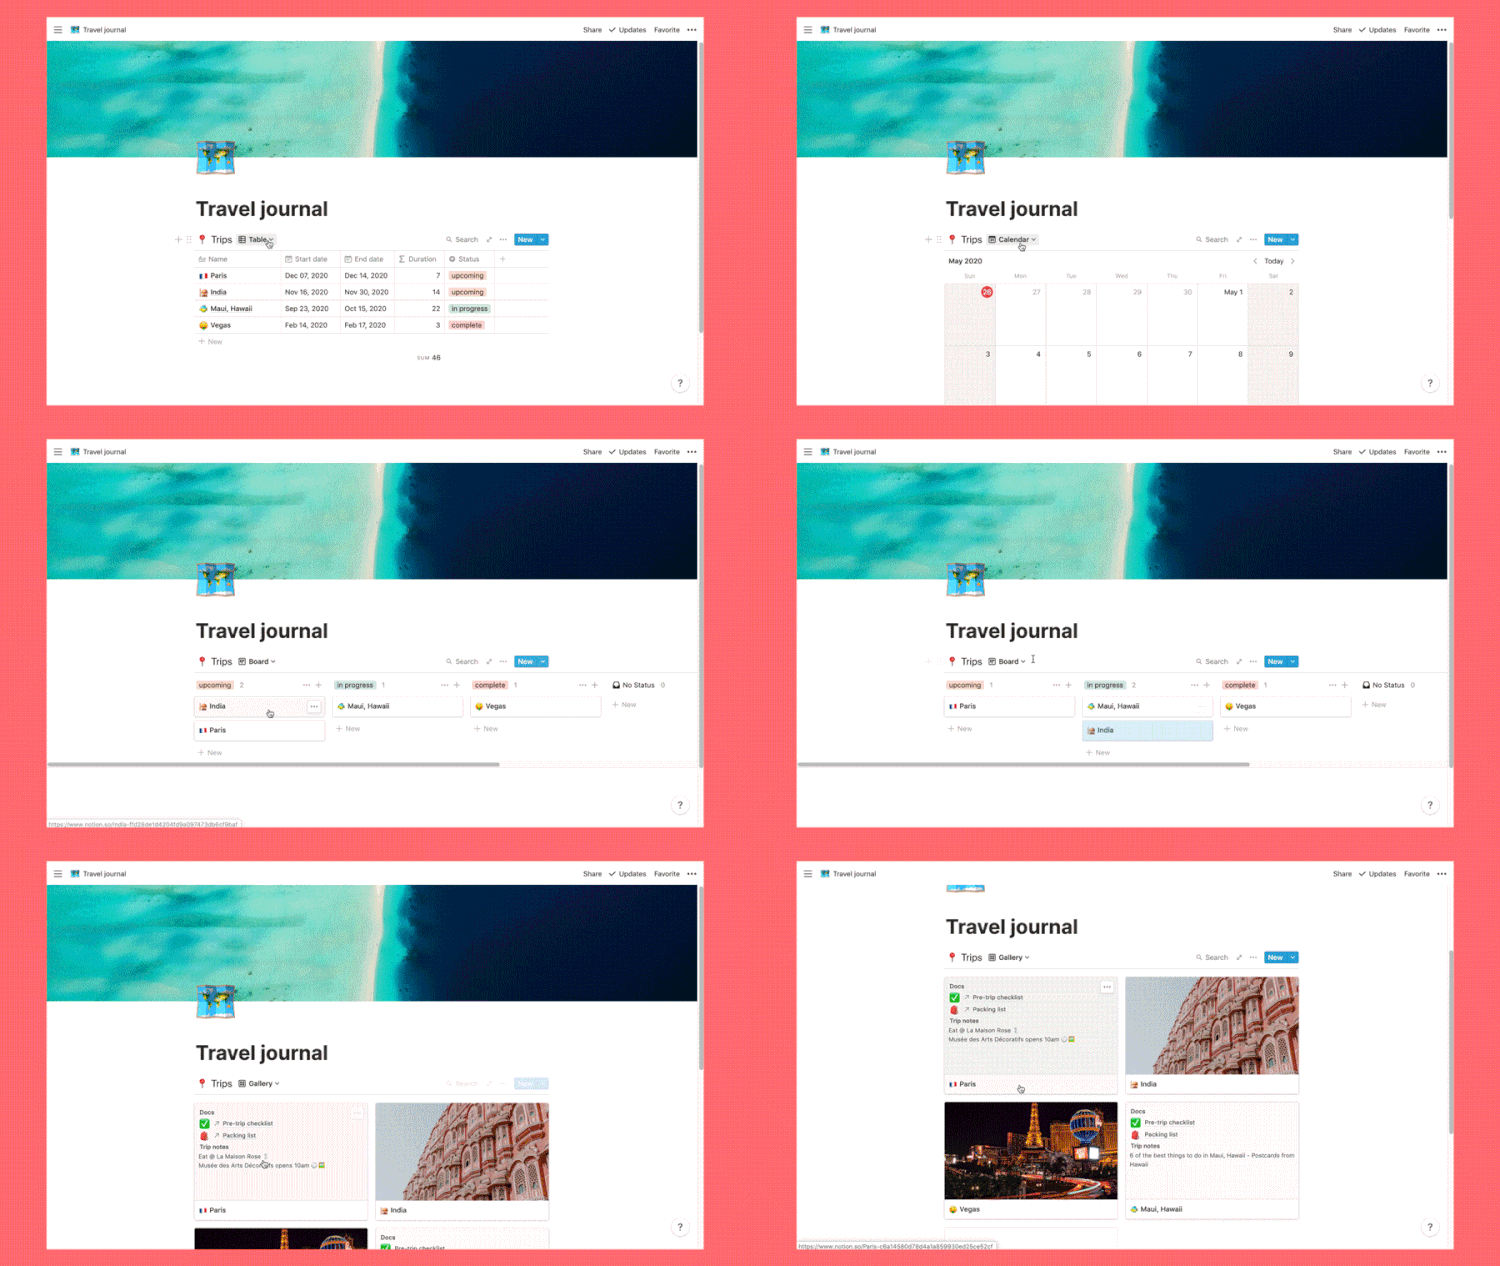
    With any Notion database you can create multiple views. Let’s say you want to see how all your travel plans look on a calendar, you simply click “new view” and then “calendar view”; your trips will appear based on the dates you’ve set. There’s also a “board view” and ““gallery view” – explore your options. You can then toggle between views whenever you like and you can even copy and paste a linked view, so you can see both at the same time while retaining it as one database.

    Add custom columns

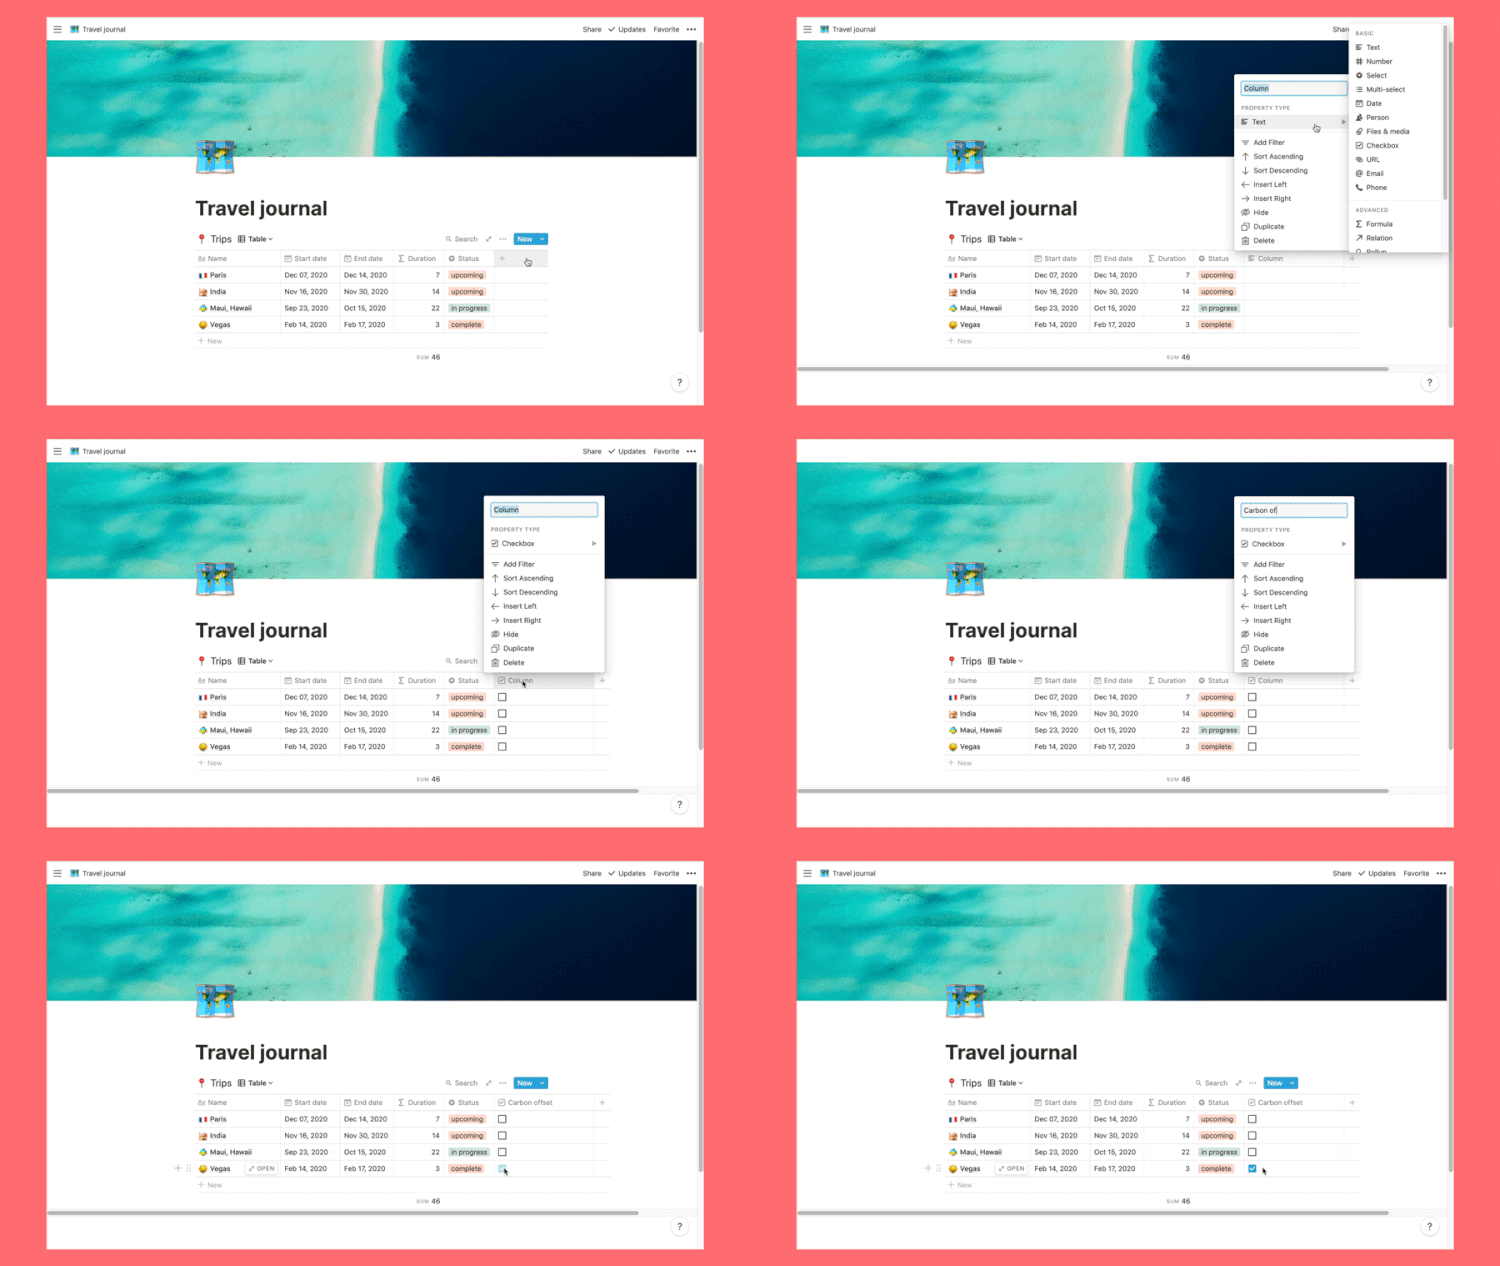
    Add your own columns to your main database for example, a checkbox for carbon offsetting the trip.

    Use filters

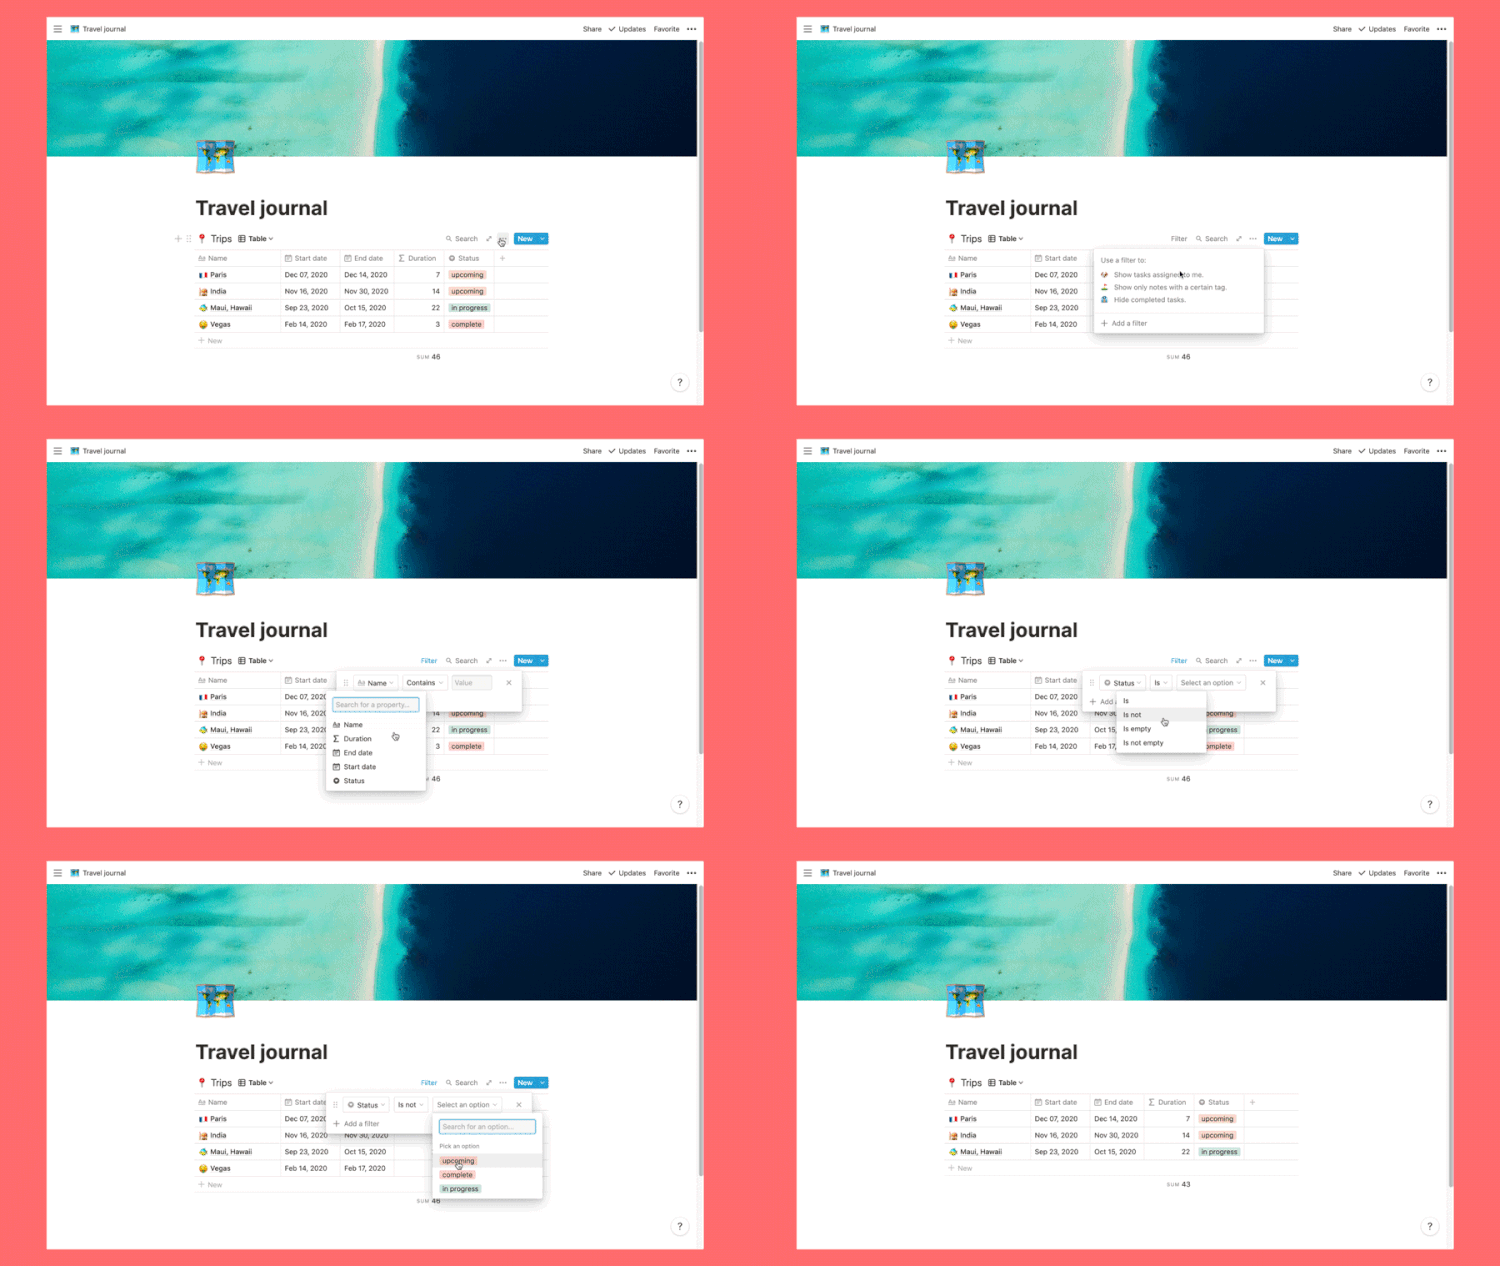
    Filters are a great way to change which trips your database shows without deleting anything. Try adding a filter to hide any completed trips.

    .

    So there’s my introduction into how Notion works as a whole but particularly how it can benefit you most for planning your travels. As you’ve probably gathered by now, every part of what I’ve shown you is customisable so don’t be afraid to explore. We all have different organisation styles and ultimately different travel needs and Notion recognises this by allowing you to plan in a multitude of ways. So what are you waiting for? Make an account, grab a coffee and use this template to start organising all your future travel plans, dreams and soon, your whole life (it’s addictive).

    Thanks for reading!

    Here is the link to the template again

    Aloha, Michael

    Pin this post


  • 6 of the best murals in Nashville, Tennessee

    6 of the best murals in Nashville, Tennessee

    Whilst researching what do to in Nashville for my road trip in September 2019, one theme that kept recurring was murals in Nashville. Aside from being known for its live music scene, Nashville is surprisingly colourful with painted walls almost everywhere you look – from the playful What Lifts You wings mural to the iconic I Believe In Nashville mural there’s an Insta-worthy wall all over Music City.

    There are so many murals in Nashville, some ever-changing and updating, that it is impossible to list them all but whether you’re just interested in the artwork or looking for a snap for your Instagram, here are six of the best murals in Nashville, Tennessee and where to find them:

    1. I Believe In Nashville mural

    The I Believe In Nashville mural is probably the most famous street art in Nashville. It was painted in 2012 by Adrien Saporiti and since then its popularity has led to a few more of them popping up around the city, but this one is the OG.

    I Believe In Nashville mural location

    2702 12th Ave S, Nashville, TN 37204, United States

    I Believe In Nashville mural artist

    Adrien Saporiti for DCXV Industries


    2. Draper James mural

    Unintended to be so, the Draper James blue stripes out on the right hand side of the shop have ended up being one of the most popular walls to Instagram in Nashville. Its simple Draper-James-blue and white stripes are a must whether you’re shopping in store or not. Although, I do recommend a visit because a) Reece Witherspoon is life b) the clothing and accessories are darling and c) you are offered a complimentary glass of sweet tea, which on a hot day in Nashville, is a necessity. 

    One of the best parts about the location of the Draper James mural and the I Believe In Nashville mural is that they share the same address. They’re located directly opposite each other so you can check off two in one stop!

    Draper James mural location

    2608 12th Ave S, Nashville, TN 37204, United States


    3. Looking Pretty, Music City mural

    This huge, colourful wall is Madewell’s, mural and sits on the side of the clothing store on 12 Avenue. The Looking Pretty, Music City Madwell mural is the most colourful one on this list of Nashville murals. What I particularly love about this wall art, aside from the pretty pastel tones, is that you can be creative with it. Due to its size it’s not an easy one to get the whole thing into one frame so instead pick sections of this mural and make it abstract.

    Looking Pretty, Music City mural location

    2709 12th Ave S, Nashville, TN 37204, United States

    Looking Pretty, Music City mural artist

    Emily Eisenhart

    4. Make Music Not War mural

    Down a little alley between Epice and Green Pea Salon is the Make Music Not War mural. Though very simple in design, this Nashville mural’s statement is powerful and very in keeping with the vibe of Music City.

    There is another mural opposite the Make Music Not War wall that features a collage of wild flowers, but it’s not as iconic as the six famous wall art pieces in this list.

    Make Music Not War mural location

    2902 12th Ave S, Nashville, TN 37204

    Make Music Not War mural artist

    Relax Max


    5. Nashville Looks Good On You mural

    Located on a small wall in the back of Frothy Monkey’s parking lot, next to a few scuzzy dumpsters, stands one of TheNash.TN’s four “Nashville look good on you” walls.

    Nashville Looks Good On You other sign locations


    • 2311 21st Ave S, Nashville, TN 37212


    • 1911 Nolensville Pike, Nashville, TN 37211


    • 700 S 14th St, Nashville, TN 37206


    This one of 12th South is the best in terms of location to the others on this list if you’re planning on checking off all six of these in one day.

    Nashville Looks Good On You mural 12th Avenue location

    2509 12th Ave S, Nashville, TN 37204, United States

    Nashville Looks Good On You mural artist

    TheNash.TN

    6. “What Lifts You” angel wings mural

    Kelsey Montague’s “What Lifts You” angel wings mural (not to be confused with her butterfly wings mural that Taylor Swift Commissioned for her single, ME!) is the only one on this list that isn’t on 12th South, sorry about that, I tried to make this list as easily navigable as possible but I just couldn’t leave out the famous Nashville wings mural! 

    The people of Nashville have a love-hate relationship with these wings, you’ll often hear things like “the stupid wings” or “ugh those wings” groaned in a long (deeply attractive might I add) southern accent, but they also bring people from all around the world to The Gulch, as Montague’s “What Lifts You” campaign is global, with wings in Ireland all the way to Australia. You’ll find people’s hang ups with the wings mural is the amount of day-drinking-squealing bachelorette and birthday girl gangs disturbing the peace to get their photos here, so totally understandable. If you are here to get your photo with the What Lifts You angel wings mural maybe keep the volume down so not to give them an even worse reputation. Everyone wins that way, we get to take our photos with Nashville’s angel wings in peace and locals don’t get disturbed too.

    Read on for where to find Nashville’s angel wings mural.

    What Lifts You angel wings mural location

    302 11th Ave S, Nashville, TN 37203, United States

    What Lifts You angel wings mural artist

    Kelsey Montague

    Mural map of Nashville


    One great thing I learnt about being in Nashville is that it’s super laid back so unlike places like New York or Paris where you have to be an early riser to stand any chance of getting a clear shot in popular locations, in Nashville you can rock up at pretty much any time to get your photo with any of these murals. The only one you might have to wait for are the What Lifts You wings but it won’t be a long wait. Plus murals are one of the easiest things to get a clear shot of because people take it in turns unlike say in front of Tower Bridge or the Eiffel Tower where it’s a free-for-all.

    If you take any photos with or of any of the six murals in Nashville listed above after reading this blog post, tag me using @gabriellawisdom or use #postcardsfromhawaiiblog and I’ll share your photos on my Instagram Stories. 

    Do more on & for the planet, Gabriella

    Pin this post


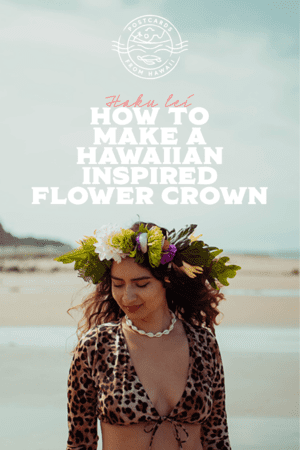
  • How to make a haku lei *lei po’o* (flower crown)

    How to make a haku lei *lei po’o* (flower crown)

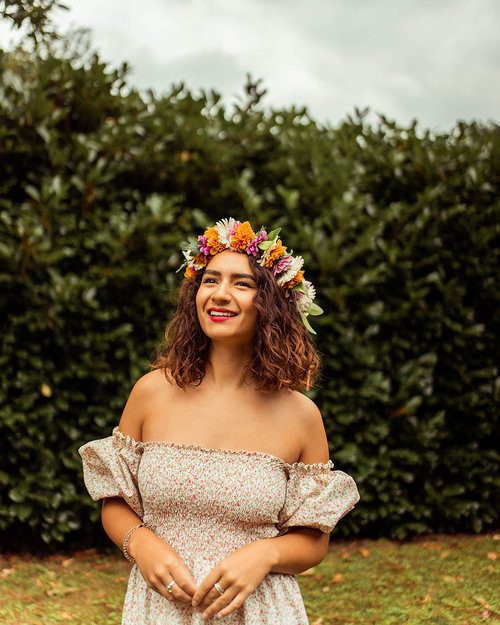
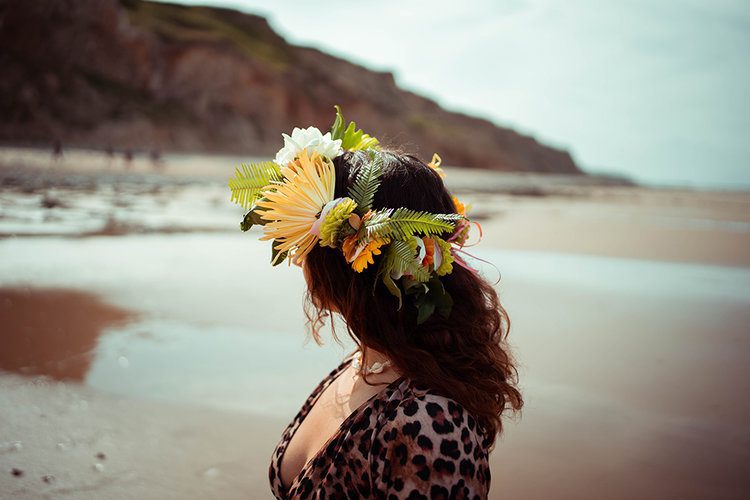
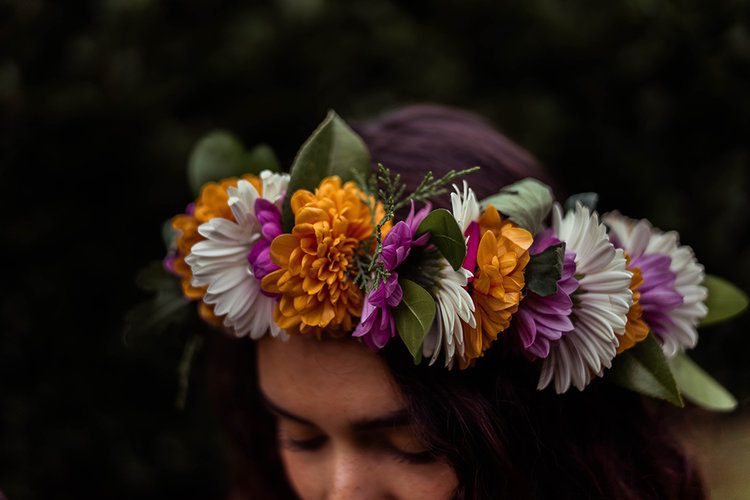
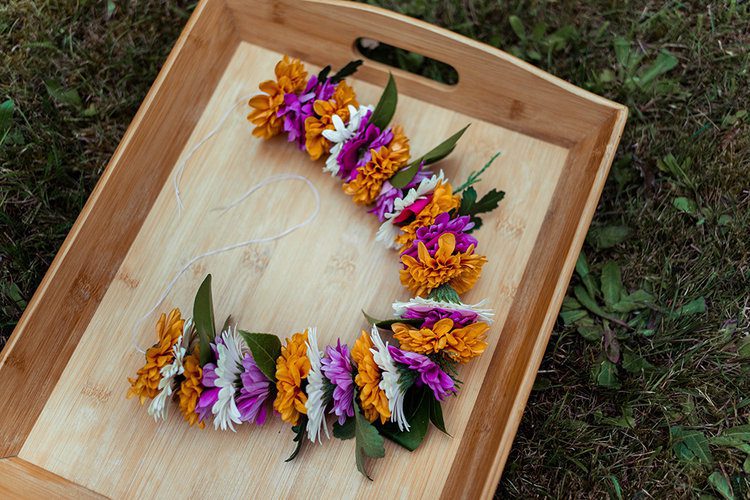
    A haku lei is a Hawaiian lei worn around the head, otherwise recognised as a flower crown. Usually they are worn on special occasions such as luaus, weddings, graduations and so on.

    ** updated **

    Haku lei meaning

    “Haku” refers to the technique in which the flower crown is made either by braiding or weaving flowers and foliage together, “Haku lei” means weaver of lei. When I first published this post I was under the impression the threading technique used in this blog post was also for a haku lei, as this was the technique used for the “haku lei” I was given as a gift from an independent florist on the island of Maui. I have since learnt that the threading technique used to make the flower crown I received and learnt in Maui is used to make lei worn on the neck (lei ‘ä’ï) and head which are called Lei Po’o not haku lei. So really this blog post is a tutorial on how to make a lei po’o.

    This threading technique is far easier than weaving a hawaiian head lei, lei po’o, or flower crown so if you’re interest in learning keep reading on.

    In 2020 I celebrated Postcards from Hawaii’s first birthday in Hawaii on the island of Maui, I also celebrated my birthday for which I had asked Michael just for one gift: a haku lei. Using a local florist on the island he chose a really simple crown made from white plumeria, red rose petals and a few sprigs of something green. It was the first time I had seen a haku lei or flower crown that wasn’t woven or made with wire and tape, as I mentioned above I have come to learn that this is because of a miscommunication and it was a lei po’o not a haku lei. This one was made in the same traditional way as a lei that is worn around the neck (see image below) but it was finished on each end with a ribbon so it was adjustable to the wearer.

    During my time spent in Hawaii I have taken classes on how to make lei ‘ä’ï, lei worn on the neck and ti leaf lei, braided lei made with ti leaves. The technique for making the lei po’o in this tutorial is what I learnt in Maui.

    Flower crowns are a popular accessory for weddings, christenings, baby showers, wedding showers, birthdays and more. If you are interested in learning how to make really quick and simple yet stunning flower crown. This threading technique is cheaper, easier and less time consuming should you need to make more than one before your special occasion.

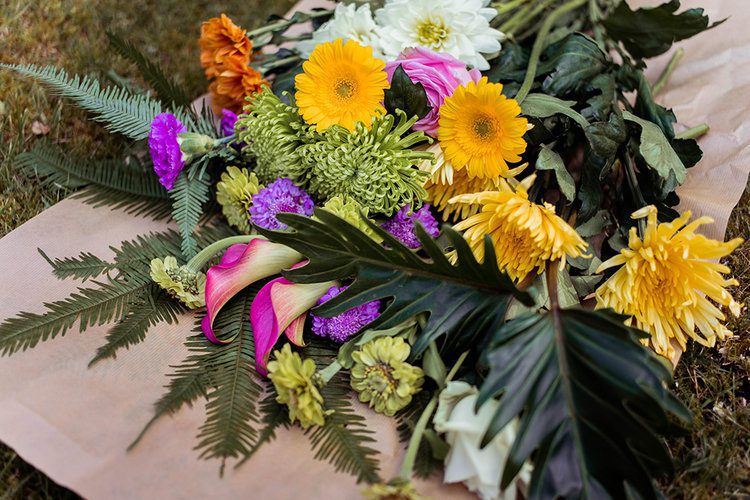
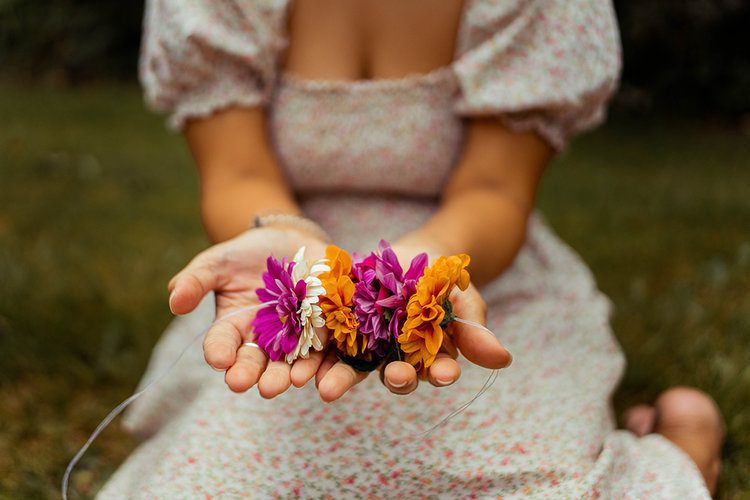
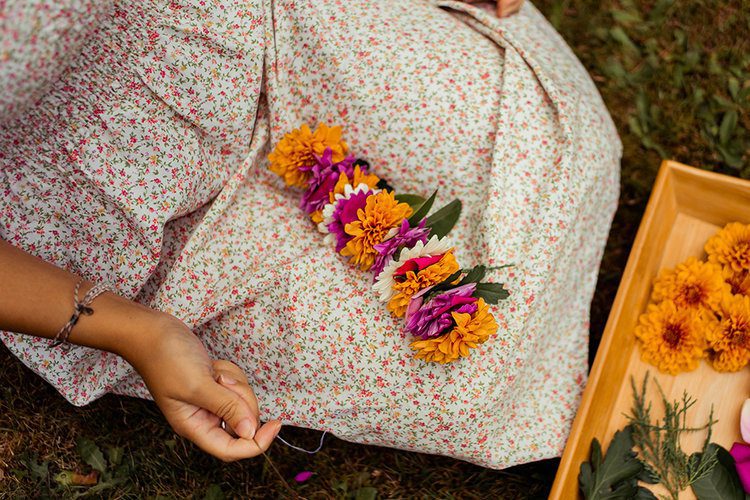
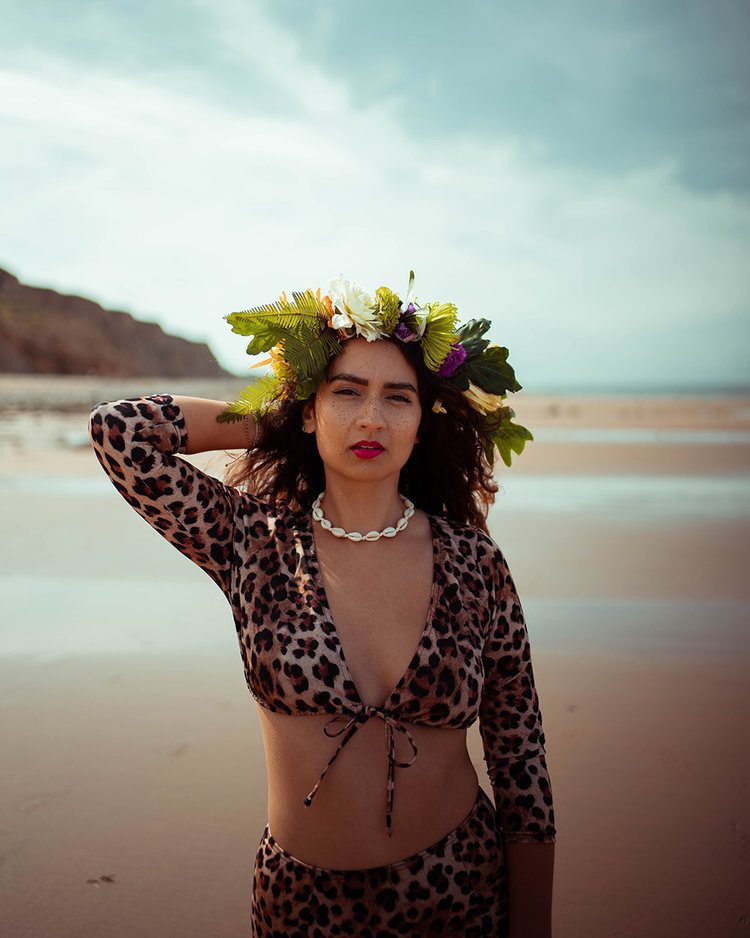
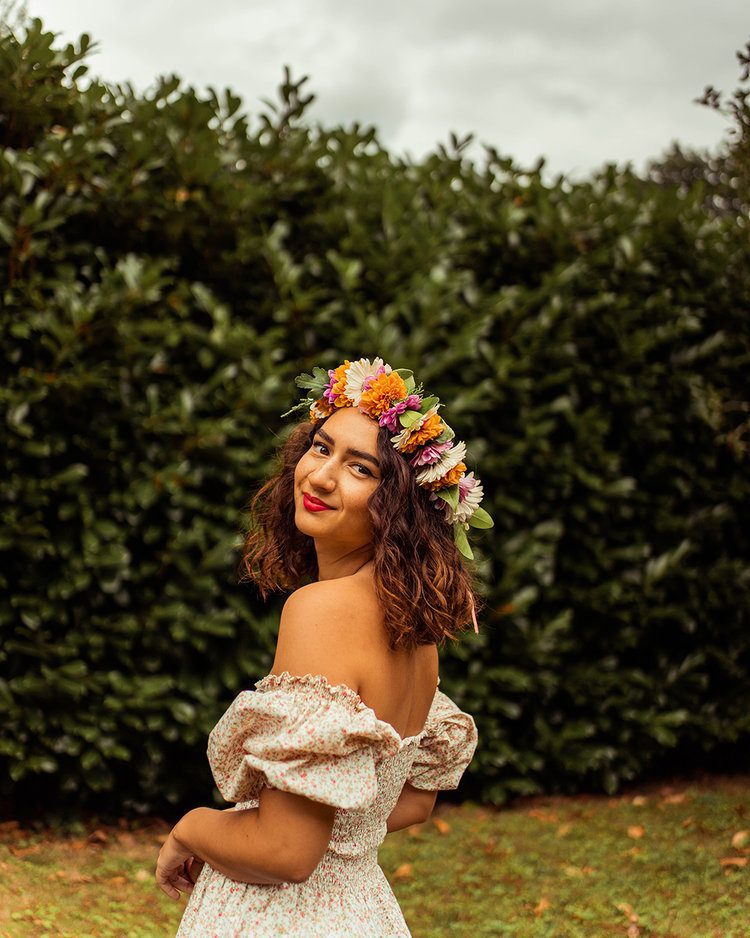
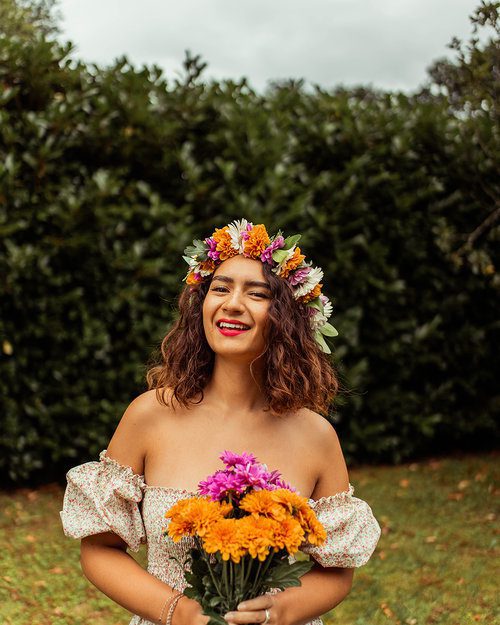
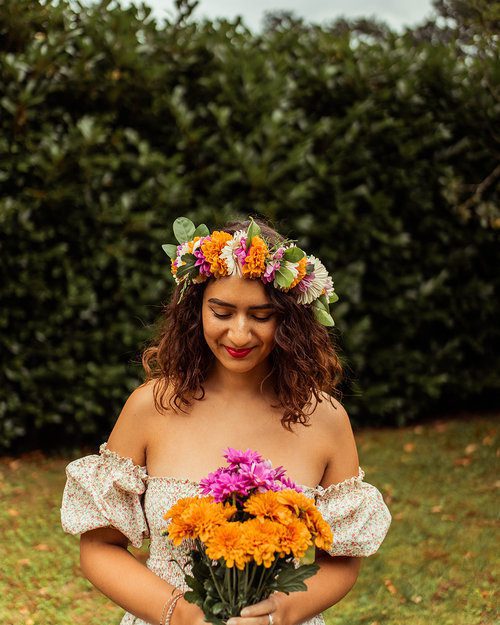
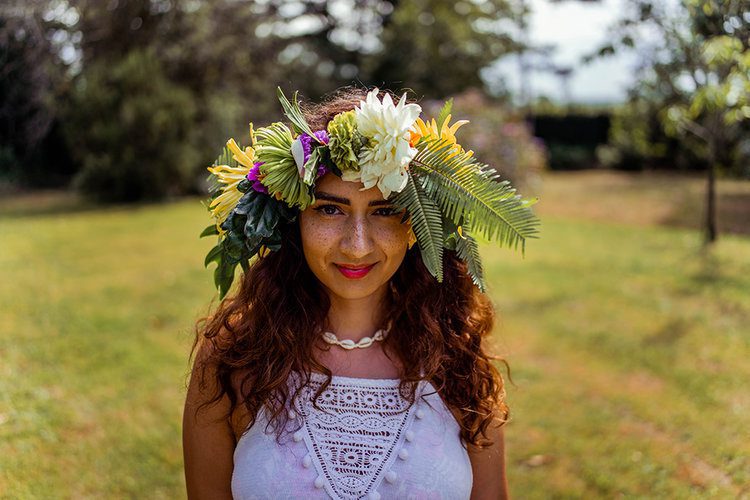
    In this blog post I have featured two different types of lei po’o so that you can decide which aesthetic you want. One is more elaborate; a tropical statement piece made with flowers I had hand selected from independent florists Crown House Flowers and The Rose Garden in Norfolk, England. The other is much smaller, more practical, and cost effective lei made with flowers from the supermarket.

    As I mentioned this technique is a lot quicker and very simple, but it does include the use of a needle so please make sure that any children who wish to make this are accompanied by an adult.

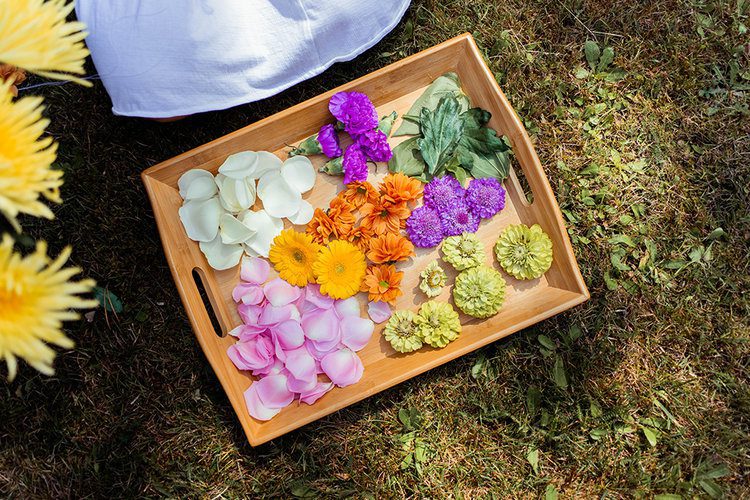
    Choosing your flowers and foliage

    The four main points that you want to keep in mind when selecting your flowers are:

    1. Weight

    You don’t want the flowers to be too heavy. I learnt this after using large chrysanthemums in my larger head lei, they will weigh down the crown and with little to support it, it will slip down your face. This doesn’t mean you can’t go for big flowers, just make sure you don’t select too many heavy ones.

    2. Structure

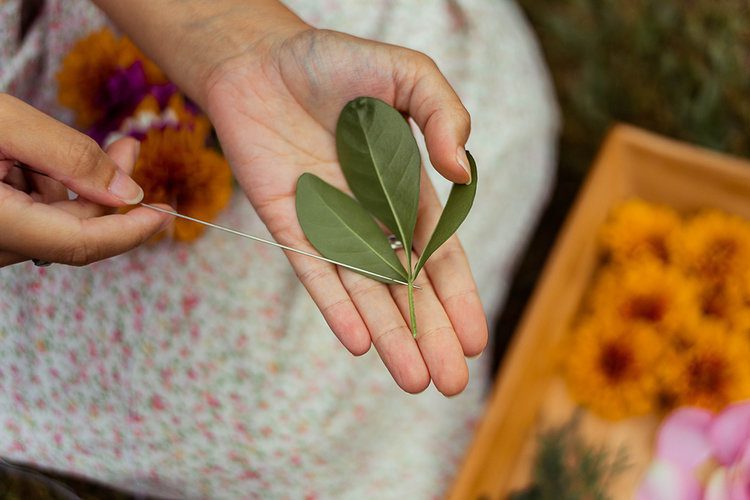
    As you are pushing a needle through them, you want your flowers to be quite firm. You will notice how fragile the rose petals are once they are pierced with the needle, they are ok because they will be sandwiched quite tightly, but you want your main flowers to stand strong. Example of flowers with structure are small chrysanthemums, germini, gerbera or scabiosa. Also keep in mind how big the base of the head is, for example: carnations. Although they have a beautiful flower, they have large heads which are hard to cover, leaving you with a big green gap. Look for flatter bases such as germini or small chrysanthemums. Speaking of structure, the same applies for the leaves. Try to pick strong leaves or ones that have a thick stem so they don’t fall apart when you put a needle through them.

    3. Be thrifty

    Take advantage of what you have around you. I’m not at all suggesting you decapitate your neighbour’s rose bush, but be more aware of the leaves on trees and bushes. Picking a selection of leaves from your garden or the park will save you money. They don’t even have to be particularly interesting ones either, they can be pulled off the stems of the supermarket flowers if need be! Of course, if you are going for a big, bold tropical look, I strongly recommend going to a florist because they are your best chance of finding philodendron or umbrella fern.

    4. Quantity 

    Don’t get too carried away! It’s so easy to do, especially if you are buying them in a florist, and it will surprise you how little you need. For the smaller of the two head lei that I made, I only bought three bunches of flowers and made the rest up with petals from two different coloured roses and leaves from my garden, these three bunches could easily have made two Hawaiian flower crowns.

    5. Cost

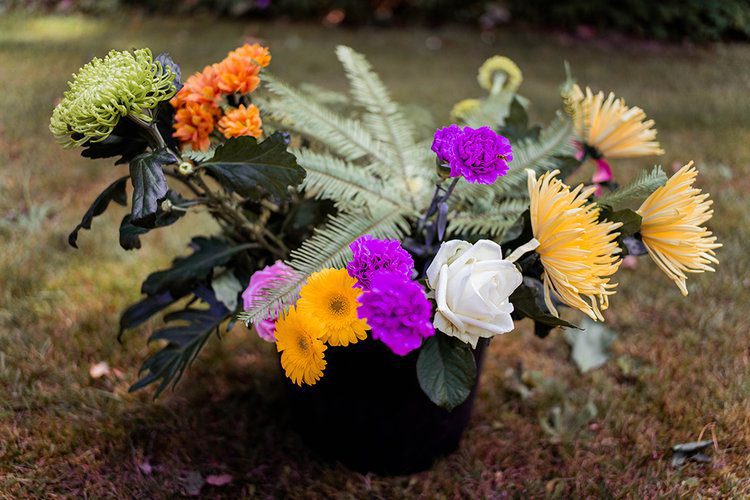
    For the larger haku lei I wanted bigger flowers and tropical leaves that would make a statement. I bought a selection of flowers that featured zantedeschia, dahlias, zinnia and more from two florists and together that cost £30. I am aware that this is costly and really only viable for a special occasion, but they did make a wonderful statement haku lei that reminded me most of the ones in Hawaii. I didn’t use all of the flowers so I put the remaining together in a vase to make the most of the money spent.

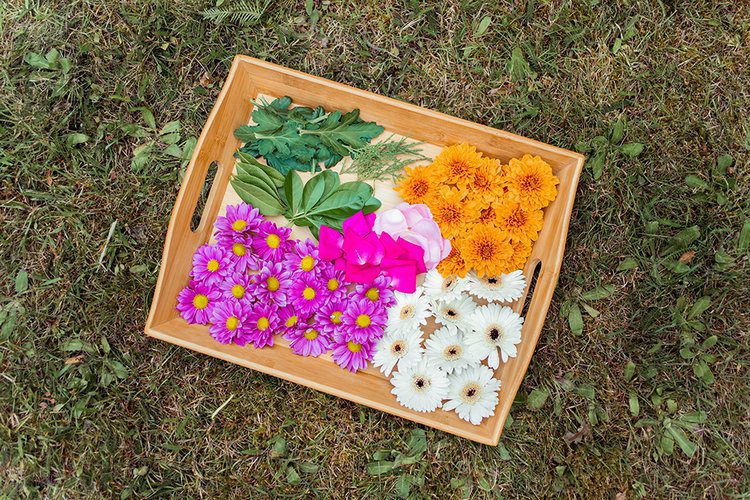
    For the smaller and cheaper haku lei, I used flowers from my local Morrisons supermarket. I bought two bouquets of small chrysanthemums in pink and orange and one bouquet of white germini, to accompany these I used the remaining rose petals I bought in the florist and a selection of leaves from the garden. The bouquets were £3.50 each or two for £5, so collectively I spent £8.50. I know, much more reasonable, that’s why I’ve made two versions for you!

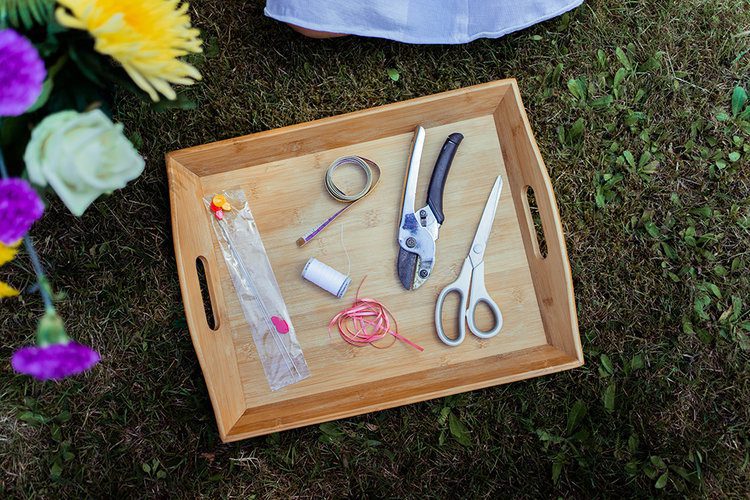
    What you need to make a flower crown


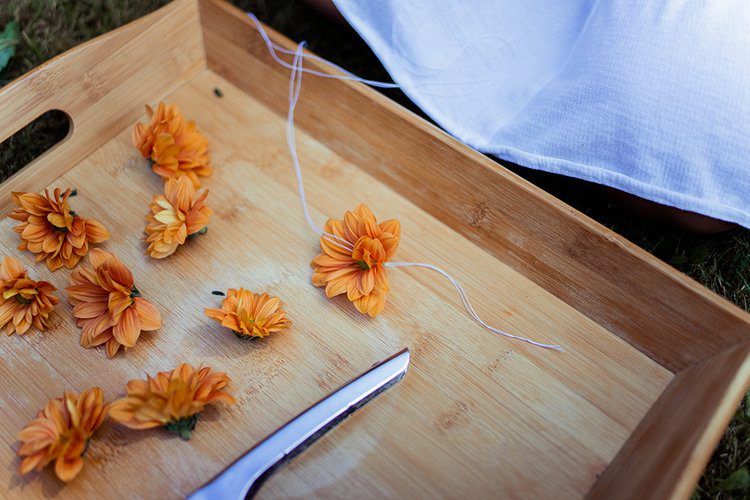
    • Scissors (for cutting the ribbon and thread)


    • Secateurs (for cutting the flowers and leaves)


    • Tape measure (for measuring the thread)


    • 6 or 9 inch upholstery needle (to pierce and sew the flowers)


    • 2 metres of extra strong thread (to hold the lei together)


    • 1 metre of ribbon (to tie the open ends of the lei together)


    • A selection of flowers and leaves


    Step-by-step tutorial for how to make a Hawaiian lei po’o (flower crown)

    Whether you have bought your flowers from a florist or the supermarket, make sure that you sit them in water until you are ready so they remain fresh for as long as possible.

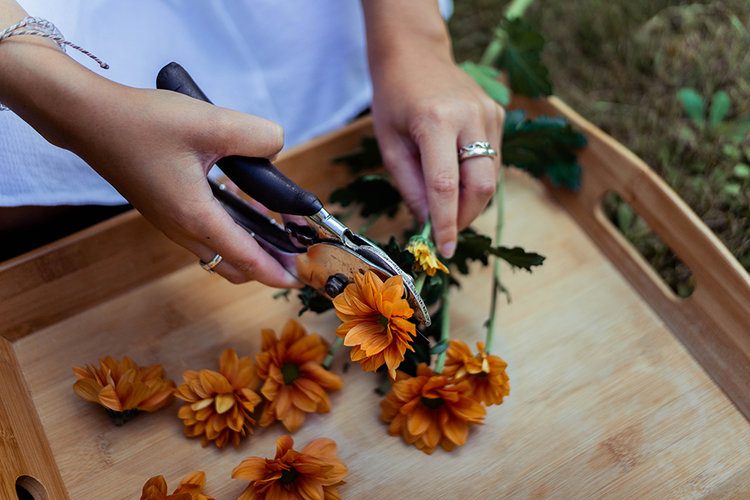
    1. Start by beheading your flowers with care using the secateurs. You want to cut as close to the bottom of the head of the flower as possible, removing all of the stem. Don’t cut all of them, start with a few and cut as you go, this way if you don’t use them all, you can put the remaining flowers in a vase.

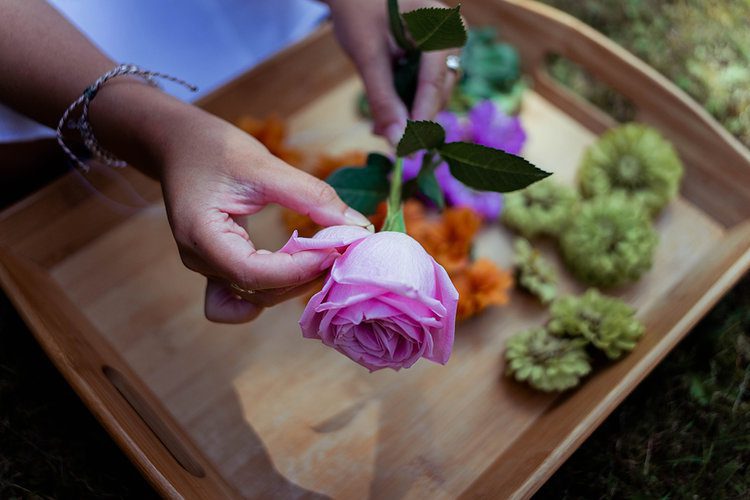
    2. If you are using rose petals, gently pluck the petals off the head.

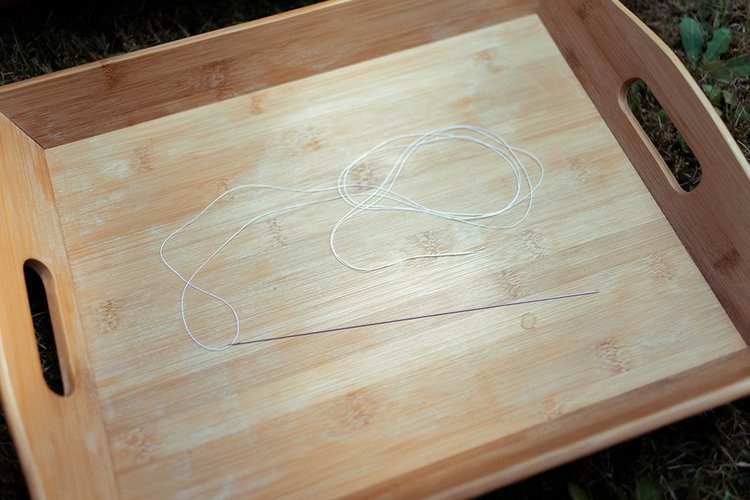
    3. Using the tape measure, measure out and cut 2 metres of the thread.

    4. Thread it through the needle so that the thread is doubled (the needle is in the middle of the thread).

    5. Tie the ends together with a couple of knots.

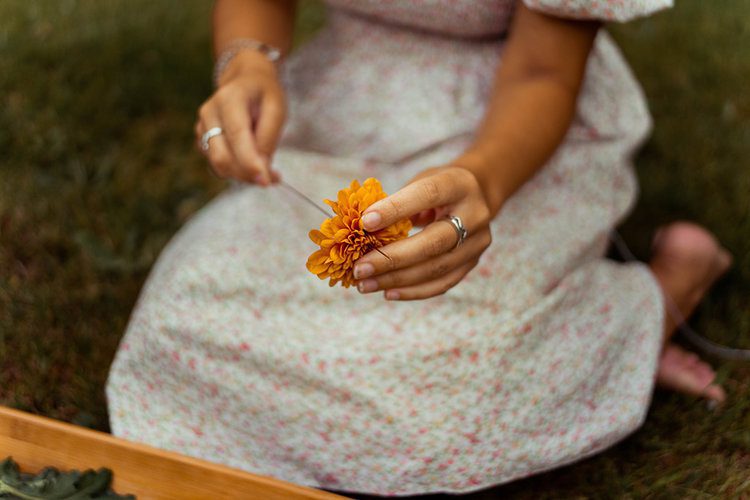
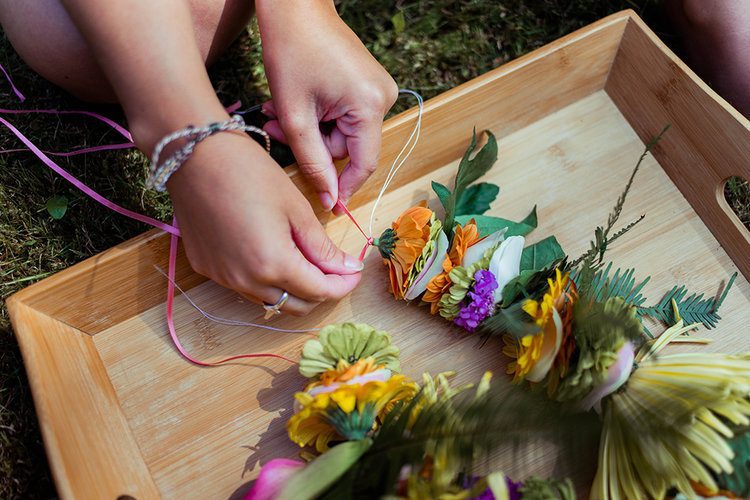
    6. Begin to thread the flowers on in the order you want, being careful with the point of the needle as you do. As you push the first flowers down the thread towards the knots, leave about 10cm of the thread so the flowers don’t fall off and that you have enough thread to tie the ribbon to.


    7. Thread on your flowers and leaves in whatever order you fancy. It is up to you if you want to create a pattern or not, but if there are certain flowers that you want to use at the front, be aware of how far you have worked down the thread. Also every head size is unique so keep holding it up to yours to gauge how much further you have to go.

    8. The reason I recommend using a longer needle is because lei are made with one (unfortunately I couldn’t find any at a reasonable cost) because they make the process quicker. With a longer needle, you can thread on multiple flowers and then push a larger section down the thread.

    9. Once you have your desired length in flowers, cut the thread at the eye of the needle.

    12. Make sure the ribbon and thread is securely tied to each other before cutting the excess thread.

    13. All you have left to do is carefully lift your Hawaiian flower crown, lei po’o, to your head and tie the ribbons together at the back of your head. A bow with a double knot will secure it.


    If you are making your haku lei for an occasion it is best to make it on the day so that the flowers are their freshest selves. If you want to make the most out of, sprinkle it with water and store it in the fridge. Depending on the flowers you chose it can last a couple more days.

    .

    Now you know exactly how to make your very own Hawaiian head lei inspired flower crown you can make them for all sorts of occasions: weddings, baby showers, birthday parties and more.

    If you do make one please share them using #postcardsfromhawaiiblog and I will share them on my Instagram stories.

    Do more on & for the planet, Gabriella

    Pin this post


  • Travelling on your period with a Saalt menstrual cup.

    Travelling on your period with a Saalt menstrual cup.

    This blog post came about when I was preparing to answer the questions you had sent in about using a menstrual cup, after I did an unboxing on my Instagram stories of the products I received from Saalt. As I was preparing, I realised I had so much I wanted to say about menstrual cups that it only felt right to put it in a blog post where you can always reference it.

    The amount of positive feedback I received from speaking about and educating you on Instagram about using menstrual cups has been mind-blowing. I had so many girls and women reach out to me saying that they want to start using a menstrual cup after watching my stories, I can’t even begin to put into words how happy that makes me. I hope that this blog post educates and encourages you to make one of the best decisions you’ll ever make.

    “Little cup, big difference.” – Saalt.

    It doesn’t matter whether you are male, female or non-binary, menstrual education is a global issue which affects everyone. There are 2 billion people on earth who have periods, but did you know that millions of girls and women miss school and work because of it? 

    #passthesaalt

    Saalt was founded by two amazing women and sister-in-laws, Cherie Hoeger and Amber Fawson. Their story starts with a phone call to Cherie’s aunt in Venezuela when she learnt about the staggering amount of girls and women who don’t have access to menstrual hygiene products. With this information at hand and a burning passion to turn these numbers around, Cherie and Amber teamed up to create Saalt. Saalt creates hypoallergenic, non-toxic, BPA and latex free silicone menstrual cups that simplify period care.

    Aside from the beautiful packaging and positive engagement on social media, the reason I was really sold on buying a Saalt menstrual cup was that they are partnered with Her International, an organisation dedicated to keeping girls in school when they get their periods. With every cup sold, a portion of the profits go to Her International.

    “When a girl gets her period in the United States, she may miss a class. When a girl gets her period in a developing country, she may never go to school again.” – The Pad Project.

    Giving girls the opportunity and means to stay in school during their period gives them the education they deserve which will lead to a better quality of life.

    Now that I use a cup that can be left in for 12 hours, I never have to skip a period again. I just pop my cup in and sit on flights without worrying about getting up to change it. I have been on 14km hikes, gone swimming, kayaking, worn white swimsuits, sunbathed on the beach, been to places with limited toilet access and so much more! Nothing phases me with my cup in, I even forget I’m on my period! 

    Travelling on my period used to be such a dreadful thought and now I don’t give it a second one! 

    Why use a cup rather than single use tampons and pads?


    1. They will save you so much money long term. The average box of 18 tampons costs £3 or $4 and you will be lucky if that’s enough for one period. A Saalt cup costs £23 or $28.99 and it will last you 10 years!


    2. Did you know that over 4.3 billion menstrual hygiene products are thrown away every year in the UK and 20 billion pounds in the USA? Or that it takes longer than the lifetime of the user for just one to decompose? Cups eliminate the need for single use pads, tampons and applicators so they are saving the environment from a lot of unnecessary waste.


    3. You don’t have to change them every 4-6 hours like a tampon. Cups can stay in for 12 hours! The small size holds the amount of three regular tampons and the larger size holds four.


    4. You can swim with your cup with far less risks than a tampon. Tampons absorb water, chemicals and bacteria which increases the risk of infection and toxic shock syndrome.


    5. Speaking of TSS, the risk of getting it with a cup is far lower than with tampons. Leaving a tampon in too long creates the perfect environment for bacteria to thrive which can be absorbed into the blood stream from abrasions caused by frequent use of tampons. The cup collects blood rather than absorbing it like tampons and won’t leave any chemical residue behind.


    6. They are made with no BPA, latex or chemicals. They are non-toxic, odour free and maintain natural PH.


    How is wearing a cup different to wearing tampons? 

    Let me run you through what I got up to on my last period:

    Day 1

    I inserted it and went to my 9am spin class. I then showered with it in, if I was using tampons I would have taken it out and had to put in a new one the second I had dried myself. After work I went shopping, out to dinner and to the cinema, I didn’t have to think about how many tampons to take in my bag or when I should change them. I only emptied, washed and reinserted my cup before going to bed.

    Day 2

    I went to the gym and showered. I removed the cup in the shower, tipped the contents down the drain, washed it with soap and water and reinserted it. You know that race you have with your body to get a tampon in after you’ve showered before the blood makes its way onto your towel? With a cup in, you don’t have to worry about that! I removed my cup, washed it and reinserted it before bed.

    Day 3

    I removed my cup, washed it and reinserted it before my 9am spin class. I was on one of my heavier days so I wanted to empty it before leaving the house. Again I was able to shower with it vs having a tampon. I went for a run with Michael and packed my suitcase before removing, washing it and reinserting it ready for bed.

    Day 4

    I removed, washed and reinserted my cup in the shower before heading to the airport to fly to Portugal. We didn’t get to the hotel until 10pm. I didn’t worry about a long car journey, sitting on a plane or driving to the hotel. I removed, washed and reinserted my cup in the shower.

    Day 5

    I left the hotel at 5am to go shoot photos on the beautiful beaches along the Algarve coast in a white swimsuit. I am never worried about leaking past my cup because I don’t leave it in for more than 12 hours and I always make sure I have a good seal. We got back to our hotel for lunch and then headed to the beach for a few hours of sitting out in the sun, I came back and went to the gym and for a swim, showered and went out for dinner before removing my cup in the evening. Back in the days of using tampons I would never have gone for a swim or felt comfortable in a swimsuit, I would be so conscious of leaks, but with a cup, my period is the last thing on my mind! Plus, I didn’t have to worry about my tampon string soaking up the chemicals in the pool water and entering my body.

    Day 6

    This was a very long day! We went to Spain for the day so I was in the car for about four hours there and back and we walked around all day exploring and sightseeing. It was the last day I used my cup because I had started back on the pill on day five. I had it in all day and the only blood was on the rim, and unlike a dry tampon, it wasn’t at all uncomfortable to remove. I washed it with soap and water and put it in its bag. When I got home from Portugal, I washed it with the cup wash that Saalt sent me ready for my next period.

    In those six days, I never had to worry about finding a toilet to change my tampon, carrying around the right amount of them or packing them. I never had to worry about leaking whilst I sunbathed in my white swimsuit, getting my tampon string wet whilst I swam, changing a tampon on the plane and road trips, or the string getting sweaty when I worked out in the gym. In just one period, using my Saalt cup saved the environment from 21 tampons and applicators.

    Questions you, my followers and readers sent me to answer:

    How long have I been using one?

    I have been using my Saalt menstrual cup since the start of 2019 I have not used a tampon since! It has been not only my favourite sustainable swap but one of the best decisions I’ve ever made.

    Why do I use one?

    For all of the reasons I listed under “Why use a cup rather than single use tampons and pads?”. I have been making huge efforts to swap to as many sustainable and reusable products as possible so I finally made the swap at the beginning of this year when I had reached the point where I had only a few tampons left and the choice was to restock or finally start using a cup.

    Is it hard to insert?

    The first time I was nervous so I called my friend who had been using them for years and she talked me through it. I wet the cup to lubricate it then folded it into a “C fold”.

    Image belongs to Saalt.

    To my surprise, I never found it difficult to insert my cup the first time, and once it was in, I couldn’t feel it. Don’t get me wrong, not every time is a breeze. There have been a few times where it has been a little trickier to insert, just like with tampons every now and then you have a rogue insert which feels uncomfortable from the get go. If this happens I just remove it, wet it, and try again. The first time I inserted my cup, I went to a spin class 30mins later and I actually think it was more comfortable than a tampon!

    How do you put them in?


    • First I wash my hands.


    • Then I check the four holes are clear.


    • Then I wet the cup to lubricate it.


    • I do the “C fold”.


    • I either squat down or prop up a leg on the toilet seat or side of the bath and insert it into my vaginal canal.


    • Once I have inserted it, I let go when I can feel a little pop as the cup opens up. I run my finger around the base of the cup to check it opened out.


    • If it hasn’t, I give the cup a little twist and wiggle until I feel it pop open.


    • I then very lightly tug on the stem to make sure the suction seal has formed so it won’t leak or move.


    • I then wash my hands and I’m ready to go!


    Is it comfortable?

    It is! I trimmed my stem so it didn’t poke me so I can never feel when it’s in!

    How do you know whether to cut the stem?

    Every vaginal canal is different so the cup might sit higher inside you or lower. For me it’s lower so I noticed my stem poking within the first day. I stuck with it for a second day before trimming it back to be certain but after day two I cut to the second notch. The stem is there to locate the cup inside you so it doesn’t matter if yours is long or short. Make sure you cut on these notches using a pair of scissors and make a clean cut.

    Where do you buy it from?

    As I am based in England, I bought mine on Amazon with Prime delivery.

    If you are based in the United States you can also purchase them in store in Target as well as Urban Outfitters and Revolve. Click here for more retailers.

    Their website also offers global shipping and a 10% discount on your first order.

    .

    Some evenings I want a break from inserting my cup so I use HighOh’s reusable pads**. These are great environmentally conscious products for girls and young adults who haven’t used tampons and aren’t confident with inserting a cup just yet.

    .

    So there you have it. A full blog post educating you on why making the switch from single use menstrual products to a sustainable Saalt cup is the right decision for yourself and the planet. It turns out your period holds more power over this world than anyone ever imagined, here is your opportunity to use it to make the world a better place.

    Do more on & for the planet, Gabriella

    Pin this post


    .

    * I was gifted two menstrual cups and cup wash from Saalt, but I had purchased and used their menstrual cup before working with them. Please know that I only recommend products I love and use myself. I wrote this blog post because I wanted to share this information to encourage you to make a life-changing decision that will benefit you and the environment. I was not paid to create this blog post.

    ** I was also gifted a pack of reusable pads from HighOh. They are far more absorbent than cotton pads and you just need to pop them into your regular dark wash in your washing machine.

    .

    As an Amazon Associate and Saalt Affiliate I earn from qualifying purchases.

  • 6 of the best things to do on Maui, Hawaii

    6 of the best things to do on Maui, Hawaii

    Help support these amazing Maui businesses who have suffered from the wildfires that  swept the town of Lahaina. 

    In August 2023 huricane winds blew the deadliest wildfire in the US for 100 years  through the historic town of Lahaina on Maui. More than 100 people have died and cultural landmarks, business and homes have been destroyed, leaving nothing behind.

    Lahaina, as it is for many, is a special place that held cherished memories. 

    It is also where many of the recommendations on this list of 6 best things to do on Maui are located. 

    As these incredible business have suffered huge loss I have updated this blog post to include the ways you can donate and help them recover from the devastating Maui wildfires.

    Responsible tourism is encouraged once again to help the economy of the island recover.

    If you are able to please donate and when the time is right and these local businesses are able to operate again, be sure to book with them to help them bring joy to the world once again.

    Thank you.

    —

    I had the very best time in Maui despite the weather not cooperating 100% of the time, my birthday in particular. It was all down to the experiences we had whilst on the island. I do want to clarify that we were celebrating Valentine’s day, my birthday and the first anniversary of Postcards from Hawaii, so we spent a fair amount of money on the experiences below. We wouldn’t usually do many big excursions and activities as they are costly, but each one was incredible and I would be foolish not recommend them. 

    So here are six of the best things to do in Maui, Hawaii, in my opinion:

    1. Open door helicopter tour over Molokai

    An open door helicopter ride in Hawaii was recommended to me by a follower on Instagram and the second she told me I was desperate to do it! Michael is scared of flying though – he just about stopped digging his nails into my hand in October 2018, he still squeezes my leg during turbulence though – so I thought this was a no-go. I just about got him in a helicopter over the Grand Canyon three years ago and I thought it would never happen again, let alone with the doors off. The gem that he is though surprised me with it for my birthday!

    We took the Doors-off West Maui & Molokai tour with Air Maui which is the only doors off helicopter tour on the island. The helicopter takes off from Kahului Airport Road, Hangar 110, and flies over the Pailolo Channel (if you’re lucky and it’s the right season you’ll see whales from above) to the island of Molokai, where you will fly over the 4,000ft high cliffs, cascading water falls, luscious forests and through deep valleys. 

    There’s no radio for passengers so you can’t really communicate but when your pilot has a playlist including soundtrack numbers from Top Gun, Avatar, Jurassic Park and Weezer’s Island in the Sun, you don’t really have a reason to speak. I could not stop crying with complete and utter joy as we swooped down to fly past the 3,500 ft high waterfalls crashing down to the sea below whilst John William’s “Theme from Jurassic Park” was playing. It was incredible! It was one of the most thrilling and memorable things I have ever experienced.

    Price

    $325 (£245) per person if you book through Air Maui.

    $300 (£225.70) per person booked through Viator – which is what Michael did.

    My only gripe is that there are only 3 doors available but there are six seats and they charge the same price for all tickets, so 3 people pay for a doors open experience and don’t get one. Be prepared for not everyone getting seated on the edge, they won’t send the helicopter up with two or less people. 

    Flight times

    8am – 12pm

    12pm – 5pm

    *flights last approximately 45mins, check in 30mins prior.

    What to wear

    • Air Maui will provide wind-breaker jackets. 

    • Shorts – it is windy but we went in winter and my legs were warm in the sun. 


    • Hair must be tied back.


    • You are provided with googles and a headset. 


    • You mustn’t have anything in your pockets or be wearing any jewellery.


    • You must wear closed toe shoes.


    • Suncream


    You aren’t allowed to bring a camera. Only phones are permitted and you are given a lanyard to prevent them from falling,

    Click here to see the terms and conditions.

    2. Surfing on Maui

    I’ve taken a few surf lessons around the world and on Maui and Lahaina Surf Shack was by far my favourite place to learn.

    Sadly the whole business burnt down in the August 2023 wildfire. 

    Here is a link to Lahaina Surf Shack’s Go Fund Me page. 

    One of their surf instructors, Richard “Tricky Ricky” Yeckley has lost his job and home along with all of his belongings, saving only his cat and the clothes he wore in the early hours of the morning. Here is a link to his Venmo and Go Fund Me page.

    Before our helicopter ride which was in the afternoon, my birthday (which was delayed due to rain) started with a private surf lesson for Michael and I. We booked with Lahaina Surf Shack and had a great time! 

    Before this trip I had mentioned to Michael that I wanted to try surfing again so he surprised me with a surf lesson for my birthday. We had a semi-private lesson which is for two people and one instructor. “Tricky” Ricky took us out and we had a blast! 

    Our lesson started on the beach where he briefly broke down how to get up on our board, the correct way to fall that won’t hurt us (and I’m happy to report I didn’t hurt myself) and where to position ourselves on the board.

    We spent 2 hours in the water catching endless waves, moving out further so they were bigger and I caught the majority of mine! It wasn’t until Michael got out to take photos that I missed a bunch, typical! Check out my Instastory highlight “Maui part 2” to see what my instructor had to say about me catching a 5ft wave! 

    What I really admire about learning to surf with Lahaina Surf Shack is that after every wave your instructor encourages you to analyse how you did and gives you pointers so you can improve the next time. This was invaluable because we continued to get better on each wave doing this!

    Price for surfing on Maui

    Private one on one lessons are $150 per person

    Semi private lesson which is for two people are $100 per person

    Group lessons are $75

    Obviously group lessons are cheaper and make more sense if you are on a budget, but I strongly recommend taking a private/semi private lesson if it’s your first time out because your instructor will be solely focused on you, plus you will get to catch more waves because you won’t be waiting for others to surf theirs.

    They also rent out a selection of longboards, short boards, beginner boards and stand up paddle (SUP) boards at a discounted rate if you have had a lesson with them.

    What to wear for surf lessons on Maui

    • Swimsuit

    • Reef safe suncream


    • They will provide you with a rash vest and reef booties


    3. Hula dancing lessons on Maui

    Since publishing this blog post I have learnt that Jordan Saribay, who taught my hula lesson mentioned below has started his own production company called Kupu Productions. His company teaches hula, ukulele and lei making lessons.

    Jordan was born and raised in Lahaina and sadly his family lost four of their homes during the wildfires in August 2023. 

    Here is a link to his family’s Go Fund Me page, donations will be split across the family to help them after their loss.

    “In ancient Hawaii, a time when a written language did not exist, hula and its chants played an important role in keeping history, genealogy, mythology and culture alive. With each movement – a hand gesture, step of foot, swaying of hips – a story would unfold. Through the hula, the Native Hawaiians were connected with their land and their gods.” – Taken from the official Hawaiian tourism website.  

    I really wanted to learn hula dancing, but I didn’t want to get lost in a group. I have zero hand-eye coordination but I also wanted to absorb as much as I could, in groups you risk getting left behind or the class can focus on other people and you don’t end up learning much, so I chose to do a private lesson.

    We booked a private Hula lesson with Hawaii Hula Company which lasted an hour and included:


    • Dancers coming to a location of your choice.


    • Music.


    • Use of a pareo which they will show you how to tie.


    • Fresh flowers and a lesson in making your own rosette for your hair, which you get to keep.


    • Of course the lesson and brief history of the hula.


    The dancers that came out to me were Jordan Nelson Keali’i Kūpule Saribay and his cousin Annastaceya Kau’iokalani Saribay Arcangel-Pang, aren’t they beautiful names! They are both professional dancers in Luau shows at local hotels, in fact Annastaycea dances in the Luau at the hotel we were staying at, Myths of Maui Luau at the Royal Lahaina Resort.

    The lesson started with Jordan teaching me to make a rosette for my hair out of plumeria (frangipani) and then he showed me how to tie the pareo (a large sarong) into a dress and a skirt whilst giving me a brief history of the dance. Annastaycea then took me through the routine step by step, putting it together without music at a slow pace, and then we put it to music, picking up the pace. Both Jordan and Annastaycea explained the meaning behind the moves – I was telling the story of a woman’s beauty; her eyes, her hands, her body. They were incredibly patient whilst I fluffed up and very supportive when I remembered the steps! Close to the end, they encouraged Michael to join in and Jordan took his place as photographer, then we all danced together. It was such a joyous experience, and even though I don’t look as gracious as I felt, I enjoyed every moment dancing out beneath the trees with two really lovely instructors. 

    PFH Fun Fact: If you are in a relationship you wear your flower behind your left ear, and if you are single you wear your flower behind your right.

    Price for hula lessons on Maui

    $286.46

    That is the price we paid for a private lesson for one person.

    You can also contact Jordan directly at jksari9@hawaii.edu or on 808 264 4082 which I recommend doing.

    What to wear to a hula dance lesson

    • Bare feet.

    • Free flowing hair because it feels and looks good when you dance.


    • A cute top if you plan on wearing the pareo as a skirt.


    • Shorts so you can hide them under your skirt or dress.


    • A huge smile! I have the song I danced to playing as I write this and I have a big smile on my face.


    4. Whale watching on Maui

    My experiences whale watching with Ultimate Whale Watch and Snorkel have been some of the most magical moments of my life. 

    Sadly most of their vessels were lost in the wildfires that swept Lahaina in August 2023. Some of their crew have also lost their homes and all their belongings in the fires too. 

    Here is a link to the Venmo Ultimate Whale Watch and Snorkel. 

    We had always intended to book another snorkel trip with Pride of Maui, especially as we had such a good time with them before but as it was whale season during our trip, we decided that we would use that budget to go on a whale watching tour, and it might have been one of the best decisions of the trip. 

    Humpback whales migrate to Hawaii’s warm water from November – May to escape the freezing conditions up north. The peak of the season is January – March, and as we were there in February it seemed foolish to pass up the opportunity to go. 

    The truly amazing thing about humpback whale season is that you can see them from Kāʻanapali  beach with the naked eye. In fact, we soon learnt (and I mean from the very first moment we stepped onto our balcony) that it is impossible not to see one! Thanks to them spouting water from their blowholes to such a great height, they are forever catching your eye, even when you’re not looking for them. Plus they are so happy! They spend all day breaching and slapping their pectoral and tail fins but better than that, on a good day you can hear them in the water. Yes, you read that correctly, you can HEAR them in the water! Michael went swimming in the sea and moments later he was dripping on me panting something about how he could hear the whales. Well of course I went running in after him and I can confirm that all you had to do was put your head under water and you could hear the whales communicating. It was wild!

    We booked our whale tour for our last night. It was a sunset tour which set off at 5pm and lasted two hours. We chose to book with Ultimate Whale Watch and Snorkel because they offered a small boat tour which only carries 26 people maximum and is a low vessel so you are close to the water. The tour is also led by marine naturalist guides, which I know from previous tours means that you are going to learn heaps about marine life and their enthusiasm for it is unprecedented. 

    We were out on the water for less than 10mins before our guides spotted our first whale which was a mumma with her calf who were joined by three bottle-nose dolphins. Our guides were so excited you couldn’t help but be filled with joy. We then headed further out where we came across a male whale who was just diving. Disappointed at first because that usually means they won’t resurface for a while we were then treated to his beautiful singing which, and I kid you not, we could feel through the hull of the boat! An experience you wouldn’t get if you were on a big tour boat. Our tour guide then put a hydrophone in the water for us to hear the whale’s song and it has to be one of the most magical experiences of my life. We listened for 12 minutes and I cried for most of them. In those 12 minutes you could hear a pattern in the song as he repeated sections almost like verses and a chorus. We continued on to meet more whales and the highlight was when a youngster swam beneath us and then came up for air beside us before diving again, breaching his tail as he went down. Well, I was a mess! It was breathtaking.

    PFH Fun Fact: Did you know a whale’s song is as loud as a jet engine at 140dB, to put that into perspective, humans can reach 70dB when shouting and our tolerance for sound before it is too painful is 120dB.

    Price for whale watching on Maui

    Adults: $54 plus tax per person 

    Children: $33 plus tax per child aged 4-12yrs old

    What to wear on a whale watching tour


    • Water proof jacket or something you don’t mind getting wet, it can get splashy.


    • Bare feet, shoes are left at the harbour so don’t bring anything pricey.


    • Shorts so you dry quickly.


    • Tie up hair, it is windy and you don’t want anything obstructing your view.


    • Sunglasses because until the sun sets, the sun will reflect brightly on the water, and when the boat is going it gets windy so they will prevent your eyes from watering too much.


    • Suncream.


    PFH Top Tip: The guides will say there are no “best seats” because they are all front row seats, and to be fair, they are. However all but two face either left or right which is tricky if the whale is spotted out to one side or the other. We were the last to board after the group was told that the front seats on the bow of the boat are the “splash zone” so everyone avoided them and we got them. I was NOT disappointed! Turns out our seat was best in the house because we had just shy of a 360° unobstructed view, we saw everything! I can only assume they don’t want people fighting for the seat so they make it out to be a bad one but it was incredible!

    5. Driving the Road to Hana

    We saved driving the road to Hana until a couple of days before the end of our trip because we figured if we’re going to die doing it that it should be at the end of our trip. What am I talking about? Well we received a warning of death from just about everyone we spoke to about driving the road to Hana. Even the lady at our hotel’s guest services told us about guests from the hotel who died doing it or as she put it, “guests who are no longer with us (checked out?)…on earth (oh cool, so dead). 

    Of course we were worried but we were set on doing it, I wanted to go to a black sand beach and it was sure to be a thrilling experience. I have to say though, the actual road itself did not live up to the hype. Sure, it’s a seemingly never-ending winding road with one sharp apex after the other, but to my surprise it’s very well paved, it has two lanes wide enough to easily fit two cars – aside from the areas where it narrows to one lane but those parts are easy to navigate because each side can be seen so you know when to give way – and there is a wall up on the edge. Never mind the fact that it’s in the jungle which feels less threatening than driving along a cliff edge. Now, maybe it’s because we have driven far worse roads in terrifying conditions that we weren’t as scared as we could have been (I’m talking through the mountains of the Amalfi coast, at night, in a torrential downpour which turned the road into a river and our visibility was non existent, oh and there were land slides all over the shop), but honestly I really got the impression that tourist are warned off it because they just want to keep the road quiet and the land in good condition, which of course is understandable. 

    The actual road aside, the points to stop off are beautiful! We didn’t managed to stop off at all of the ones recommended below that we were told to stop at, but the ones we did see were amazing!


    • Hookipa beach park to see turtles on the beach (if you’re lucky, we weren’t)


    • Twin falls


    • Nailiili-Haele Falls (bamboo forest)


    • Rainbow Eucalyptus


    • Halfway to Hana store for freshly baked warm banana bread – it’s so good!


    • Waianapanapa (black sand beach)


    • Hana


    • Kaihalulu Beach (red sand beach)


    PFH Top Tip: Though you can go anywhere else on the island and not get eaten, the mosquitos in Hana have an attitude and they will get you the second you step out of your car if you haven’t sprayed. Trust me, I know from experience. I didn’t want to spray in the car so I stepped out to do it and I had a whopping five bites in the time I was spraying! Not cool! Spray before you go!

    6. Snorkelling at Molokini & Turtle Town

    During the wildfires that destroyed the historic town of Lahaina ion Maui, captain Patrick Grady from the Pride of Maui crew lost his home and all of his possessions. 

    Here is a link to his Go Fund Me page to help him.

    Whilst on a snorkel trip in Waikiki, Oah, a few years back we witnessed the crew throw chocolate chip cookies into the water, and last time I checked wheat and chocolate don’t grow in the sea and are therefore not part of a natural diet for turtles or fish. There were only four turtle in the water, one was young too, and another three boats came to join us, including a boat loaded with scuba divers and even a glass bottom boat! At one point there were approximately 40 people both on and beneath the surface surrounding these poor turtles. You’re supposed to stay 10ft back from them to prevent the turtle from being scared, harassed or harmed and yet people were swarming them whilst the crew did nothing. I had to stop at least five people from chasing the turtles when they surfaced and I even pulled a person away after they TOUCHED one of the turtles. It was incredibly distressing! 

    It is important that people do not harass turtles when they surface because:


    1. They surface to breathe. If they feel threatened they will be reluctant to surface which could lead to asphyxiation and therefore death


    2. Sea turtles are an endangered species


    3. It is illegal!


    I reported the tour company, Holokai, to the authorities and I do not under any circumstances recommend you use them. 

    If you would like to learn more about responsible tourism and swimming with sea turtles take a read of my blog post How to practice responsible tourism.

    The company I do whole heartedly recommend is Pride of Maui and this is for five very good reasons:


    1. They are incredibly conscious of the environment you’re in, they do not and will not allow chasing or touching of the animals.


    2. They provide ocean friendly suncream which doesn’t release harmful chemicals into the reefs


    3. They also provide vests to keep you warm in the water. The water temperature can still be cool in summer.


    4. The crew are great company and they make good cocktails! 


    5. They have a BBQ on the boat and will make you the best lunch you can have out on the ocean. 


    The tour lasts about 5hrs and includes breakfast, a BBQ lunch, cocktails or soft drinks, snorkel equipment and they take you to two snorkel sites: Molokini Crater to swim with the fishies and “Turtle Town” to float with the green sea turtles.

    Price for snorkelling in turtle town

    $99 per adult aged 13yrs and over.

    $69 per child aged 3-12yrs.

    Children under 2yrs go free.

    Tickets are $25 cheaper (the price quoted above) if you book online. Fuel cost and tax not included.

    I didn’t do the Molokini snorkel tour on this trip, but I have used them in the past and it is still one of my top recommendations for things to do in Maui.

    For advice on what to bring take a look at Packing guide – what to take on excursions, tours and day trips. 

    Taking a trip to Maui? You might also be interested in my blog post, 5 things to do on Maui at sunrise.

    Do more on & for the planet, Gabriella

    Pin this post


  • 8 of the best places to get photos with the Golden Gate Bridge

    8 of the best places to get photos with the Golden Gate Bridge

    UPDATED: 8 of the best places to get photos with the Golden Gate Bridge.

    In this updated blog post I am sharing not just 3 but now 8 of the best places to get photos of or with the Golden Gate Bridge. I will be sharing how to find all 8 photo spots, where to park, the best time of day to get to them and photography examples of each location. I created fresh content for all eight best Golden Gate Bridge locations but some of the original photos from this blog post remain because even though I cringe at the edits it’s always fun to see the evolution of content creation.

    These Golden Gate Bridge picture spots will have you travelling around San Francisco to appreciate it from eight spectacular locations at both north and south of the bridge but before I share them, let’s learn some facts about the Golden Gate Bridge.

    Postcards from Hawaii Travel & Lifestyle blog 8 OF THE BEST PLACES TO GET PHOTOS WITH THE GOLDEN GATE BRIDGE, Gabriella Wisdom, Golden Gate Bridge picture spot, Golden Gate Bridge photo spots, Golden Gate Bridge park, San Francisco, Golden Gate Overlook

    It might no longer be the tallest, or the longest but the Golden Gate Bridge is most definitely the most photographed bridge in the world. More than 10 million people come to visit Irving Morrow’s iconic structure each year and is it really any wonder why? With its 746ft tall towers, art deco style and unmistakable “International Orange” the Golden Gate Bridge is a triumph to be marvelled at.

    Golden Gate Bridge was built over four years to connect San Francisco to Marin County which previously was reached by ferry boat. On May 28th 1937 the bridge was opened to traffic and as of January 2014, 2,025,883,491 vehicles have crossed the Golden Gate Bridge*.

    Postcards from Hawaii Travel & Lifestyle blog 8 OF THE BEST PLACES TO GET PHOTOS WITH THE GOLDEN GATE BRIDGE, Golden Gate Bridge picture spot, Golden Gate Bridge photo spots, Golden Gate Bridge park, Baker Beach

    What’s truly magic about the Golden Gate Bridge is her relationship to the ever changing fog that rolls across the bay, sometimes concealing her entirely and often allowing only the very tops of her towers to peak through. No matter what time of year you visit you’re in for a treat.

    I’ve picked these eight place to get photos with the Golden Gate Bridge because each one of these Golden Gate Bridge picture spots offers a completely different perspective of the bridge and none of the environments are the same. Of these eight Golden Gate Bridge photo spots Baker Beach offers views from far away, getting the whole bridge in the frame, Battery Spencer takes you up a mountain to look down on the bridge and the city and Fort Point and Moore Rd give you the opportunity to view the Golden Gate Bridge from underneath whilst looking out across the bay. The Welcome Center offers an educational experience, the Overlook lets you see the bridge towers head on and crossing the bridge gets you up close and personal with this masterpiece of engineering.

    Here’s 8 of the best places to get photos with the Golden Gate Bridge:

    1. Golden Gate Bridge photo spot: Baker Beach

    Postcards from Hawaii Travel & Lifestyle blog 8 OF THE BEST PLACES TO GET PHOTOS WITH THE GOLDEN GATE BRIDGE, Gabriella Wisdom, Golden Gate Bridge picture spot, Golden Gate Bridge photo spots, Golden Gate Bridge park, San Francisco, Baker Beach

    Baker Beach is a mile long public beach located Northwest of the city. It’s not safe for swimming due to large waves and rip currents but it’s popular for fishing and incredible views for pictures of the Golden Gate Bridge. It’s one of my favourite spots to take photos of and with the Golden Gate Bridge.

    Baker Beach allows you to photograph the whole bridge from afar which can look pretty spectacular on both clear and foggy days.

    Postcards from Hawaii Travel & Lifestyle blog 8 OF THE BEST PLACES TO GET PHOTOS WITH THE GOLDEN GATE BRIDGE, Gabriella Wisdom, Golden Gate Bridge picture spot, Golden Gate Bridge photo spots, Golden Gate Bridge park, San Francisco, Baker Beach
    Postcards from Hawaii Travel & Lifestyle blog 8 OF THE BEST PLACES TO GET PHOTOS WITH THE GOLDEN GATE BRIDGE, Golden Gate Bridge picture spot, Golden Gate Bridge photo spots, Golden Gate Bridge park, Baker Beach


    You can easily do all 8 of these places to get photos with the Golden Gate Bridge over 2 days but if you’re going to do that, I suggest planning them all around Baker Beach as the best photo spot there is reliant on tide times.

    Check the tide times for Baker Beach in advance here. For anyone who is unsure of tide times, you want to arrive as close to low tide as possible, and avoid getting there around high tide.

    Parking at Baker Beach for photos of Golden Gate Bridge

    There is a free beachfront car park/parking lot with an overflow at Baker Beach. Continue past the overflow and down to the beach front to get the closest spaces to the beach. Please don’t leave any belongings visible in your car, San Fran is notorious for car break-ins so lock it away or keep it on you. Be wary of visibly moving valuables to a safe space in your car as thieves may be watching.

    How to get to Golden Gate Bridge photo spot on Baker Beach

    If you’re facing the beach, the entrance to Baker Beach is in the right hand corner of the car park. Once you’re on the beach turn right and keep walking towards the Golden Gate Bridge until you reach the rocks that prevent you from going further, this will take about 15mins. As you’ve planned to be there around low tide, you will be able to walk around the left of the first set of rocks. Climb up the second set of rocks from the right hand side, you want to be standing along the third ridge on the far left. Please be careful and wear shoes with good grip and be sensible when climbing these rocks. They’re not very high, but you don’t want to slip.

    Postcards from Hawaii Travel & Lifestyle blog 8 OF THE BEST PLACES TO GET PHOTOS WITH THE GOLDEN GATE BRIDGE, Golden Gate Bridge picture spot, Golden Gate Bridge photo spots, Golden Gate Bridge park, Baker Beach

    To get to the Golden Gate Bridge photo spot where I was for these images, you want to walk between the rocks. Just be careful not to damage any of the marine life attached to the rocks on either side. Once you’re through to the other side it is here that you’ll be able to stand in the sand with an unobstructed view of the bridge. This is my personal favourite place to take photos with the Golden Gate Bridge on my list.
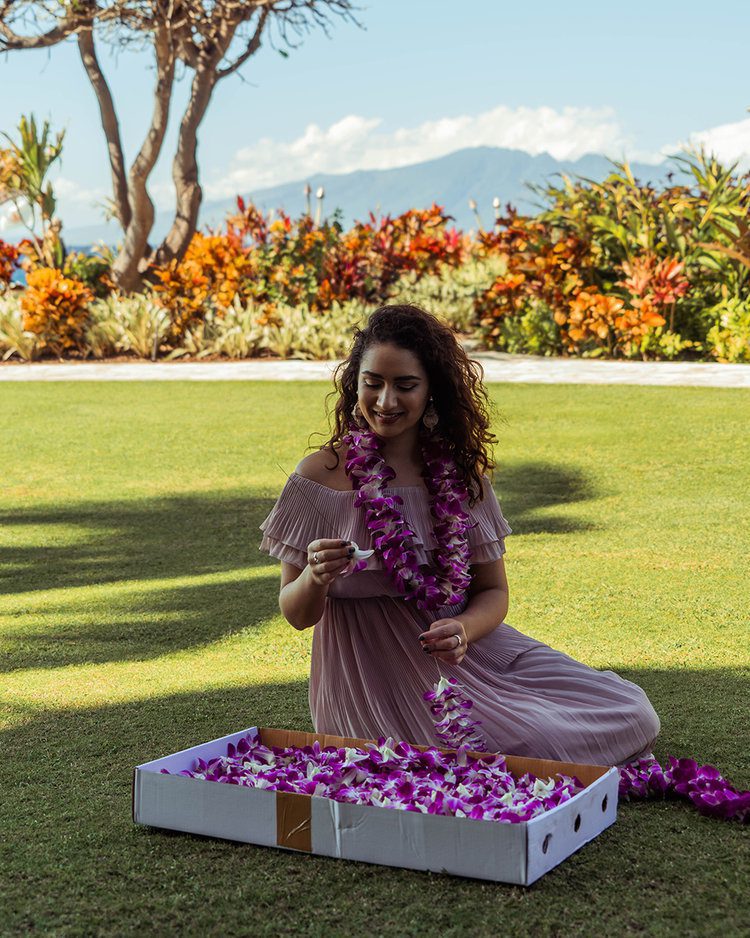
    Postcards from Hawaii Travel & Lifestyle blog 8 OF THE BEST PLACES TO GET PHOTOS WITH THE GOLDEN GATE BRIDGE, Golden Gate Bridge picture spot, Golden Gate Bridge photo spots, Golden Gate Bridge park, Baker Beach

    FYI the far end of the beach, near the rocks, is the nudist section so be respectful of the people’s choice to go au naturel as you make your way to the rocks.

    2. Golden Gate Bridge photo spot: Fort Point

    Postcards from Hawaii Travel & Lifestyle blog 8 OF THE BEST PLACES TO GET PHOTOS WITH THE GOLDEN GATE BRIDGE, Gabriella Wisdom, Golden Gate Bridge picture spot, Golden Gate Bridge photo spots, Golden Gate Bridge park, San Francisco, Fort Point

    Fort Point was built between 1853 and 1861 with the means to protect and defend San Francisco Bay. It has survived the Gold Rush, earthquakes, Civil War and World War II and even escaped demolition in 1930 before the original plans to build the Golden Gate Bridge changed to build around the fort rather than in place of it. These days this ideal spot for taking photos of the Golden Gate Bridge is a museum which is only open Friday – Sunday 10:00am-5:00pm.
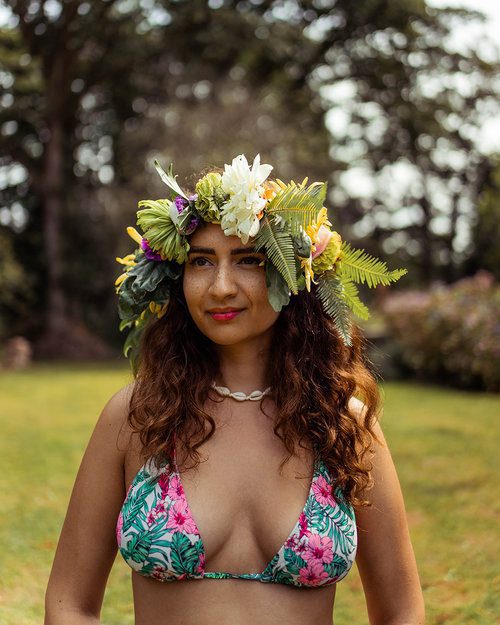
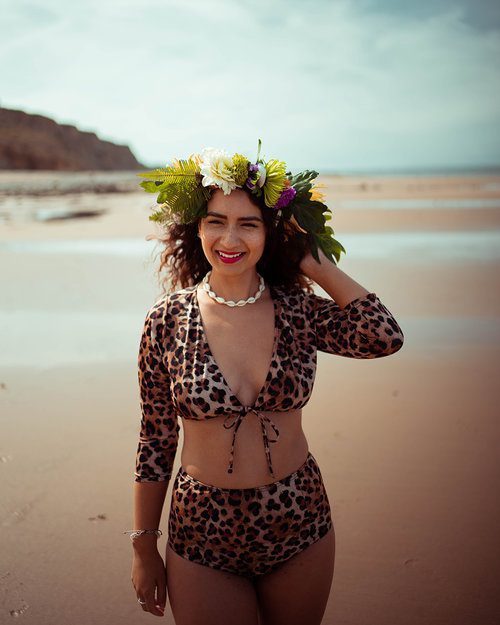
    Postcards from Hawaii Travel & Lifestyle blog 8 OF THE BEST PLACES TO GET PHOTOS WITH THE GOLDEN GATE BRIDGE, Gabriella Wisdom, Golden Gate Bridge picture spot, Golden Gate Bridge photo spots, Golden Gate Bridge park, San Francisco, Fort Point, Rollerskating

    Parking at Fort Point for photos of Golden Gate Bridge

    There are free parking spaces all along the waterfront leading up to Fort Point. For the best angles of Golden Gate Bridge aim to park in the second from last section of parking spaces. It’s not the end of the world if you can’t, it just saves you from having to walk there.

    Postcards from Hawaii Travel & Lifestyle blog 8 OF THE BEST PLACES TO GET PHOTOS WITH THE GOLDEN GATE BRIDGE, Gabriella Wisdom, Golden Gate Bridge picture spot, Golden Gate Bridge photo spots, Golden Gate Bridge park, San Francisco, Fort Point

    How to get to Golden Gate Bridge photo spot at Fort Point

    To get the this amazing and super easy location to photograph the Golden Gate Bridge, all you have to do is step over the chain railing that’s in front of the parking bays to the edge of the promenade and you’ve got the perfect spot anywhere along there, depending on how much of the bridge you want in. The closer you get to Fort Point the less you will capture as you are underneath it, but if you want the whole bridge in, position yourself in front of the parking spaces I just mentioned.

    Postcards from Hawaii Travel & Lifestyle blog 8 OF THE BEST PLACES TO GET PHOTOS WITH THE GOLDEN GATE BRIDGE, Golden Gate Bridge picture spot, Golden Gate Bridge photo spots, Golden Gate Bridge park, Fort Point
    Postcards from Hawaii Travel & Lifestyle blog 8 OF THE BEST PLACES TO GET PHOTOS WITH THE GOLDEN GATE BRIDGE, Golden Gate Bridge picture spot, Golden Gate Bridge photo spots, Golden Gate Bridge park, Fort Point


    Oh boy, these old edits are really quite something, aren’t they?

    3. Golden Gate Bridge photo spot: Battery Spencer

    Postcards from Hawaii Travel & Lifestyle blog 8 OF THE BEST PLACES TO GET PHOTOS WITH THE GOLDEN GATE BRIDGE, Gabriella Wisdom, Golden Gate Bridge picture spot, Golden Gate Bridge photo spots, Golden Gate Bridge park, San Francisco, Battery Spencer Park

    Just like Fort Point, Battery Spencer was another area of defence for San Francisco bay and harbour. Though the buildings are in poor shape as they were scrapped for anything that could contribute to World War II, you can still walk around them and see where the 12” guns would have been manned.

    Battery Spencer is the most breathtaking Golden Gate Bridge picture spot on this list. From up here you can gaze down at the bridge with the San Francisco city skyline as a backdrop.

    Postcards from Hawaii Travel & Lifestyle blog 8 OF THE BEST PLACES TO GET PHOTOS WITH THE GOLDEN GATE BRIDGE, Gabriella Wisdom, Golden Gate Bridge picture spot, Golden Gate Bridge photo spots, Golden Gate Bridge park, San Francisco, Battery Spencer Park

    Parking at Battery Spencer for photos of Golden Gate Bridge​

    Parking at Battery Spencer for views of the Golden Gate Bridge is free but limited. The best parking is right outside the park entrance but it’s hard to tell if there will be empty spaces at the top as you’re going up, so I suggest parking when you see a space then walk up to the park entrance from there.

    Postcards from Hawaii Travel & Lifestyle blog 8 OF THE BEST PLACES TO GET PHOTOS WITH THE GOLDEN GATE BRIDGE, Gabriella Wisdom, Golden Gate Bridge picture spot, Golden Gate Bridge photo spots, Golden Gate Bridge park, San Francisco, Battery Spencer Park

    How to get to Golden Gate Bridge photo spot at Battery Spencer

    From the entrance of Battery Park walk up the path until it opens out at the edge of the cliff. There’s no one monitoring the area so it is possible to get photos on the other side of the rope, but of course this is at your own risk.

    PFH Top Tip: It’s incredibly windy up there so make sure you don’t wear anything that can blow away and maybe tie your hair up if you don’t want it looking unruly in photos.

    Postcards from Hawaii Travel & Lifestyle blog 8 OF THE BEST PLACES TO GET PHOTOS WITH THE GOLDEN GATE BRIDGE, Gabriella Wisdom, Golden Gate Bridge picture spot, Golden Gate Bridge photo spots, Golden Gate Bridge park, San Francisco, Battery Spencer Park

    Best locations to photograph Tower Bridge

    Read here

    4. Golden Gate Bridge photo spot: Golden Gate Overlook

    Postcards from Hawaii Travel & Lifestyle blog 8 OF THE BEST PLACES TO GET PHOTOS WITH THE GOLDEN GATE BRIDGE, Gabriella Wisdom, Golden Gate Bridge picture spot, Golden Gate Bridge photo spots, Golden Gate Bridge park, San Francisco, Golden Gate Overlook
    Postcards from Hawaii Travel & Lifestyle blog 8 OF THE BEST PLACES TO GET PHOTOS WITH THE GOLDEN GATE BRIDGE, Gabriella Wisdom, Golden Gate Bridge picture spot, Golden Gate Bridge photo spots, Golden Gate Bridge park, San Francisco, Golden Gate Overlook Dune London Jealous T Platform


    This top location for taking photos of or with the Golden Gate Bridge is called the “Golden Gate Overlook” which makes finding it without a guide like this list of best places to take photos with the Golden Gate Bridge pretty difficult. It took us quite a while to find the place between the trees so I could share it with you but once we did, it didn’t disappoint.

    Before making my third trip to San Francisco so that I could update this list of best Golden Gate photo spots, my favourite place to take photos of the bridge was from Baker Beach but it is now tied with the Golden Gate Overlook.

    What the Golden Gate Overlook has over the others on this list is that you can photograph the bridge from head on, lining up the towers behind one another to look straight through them.

    Postcards from Hawaii Travel & Lifestyle blog 8 OF THE BEST PLACES TO GET PHOTOS WITH THE GOLDEN GATE BRIDGE, Gabriella Wisdom, Golden Gate Bridge picture spot, Golden Gate Bridge photo spots, Golden Gate Bridge park, San Francisco, Golden Gate Overlook
    Postcards from Hawaii Travel & Lifestyle blog 8 OF THE BEST PLACES TO GET PHOTOS WITH THE GOLDEN GATE BRIDGE, Gabriella Wisdom, Golden Gate Bridge picture spot, Golden Gate Bridge photo spots, Golden Gate Bridge park, San Francisco, Golden Gate Overlook


    When photographed with a lens that offers you a narrow field of view or shallow depth of field, the Golden Gate Overlook has the potential to elevate your content to a cinematic and so beautifully dramatic level. When I shared the difference between taking photos at the Golden Gate Overlook on our Sony FE 24-240mm f/3.5-6.3 OSS zoom lens at 25mm and 233mm on my Instagram Stories I had a lot of people in disbelief that it was the same place.

    Postcards from Hawaii Travel & Lifestyle blog 8 OF THE BEST PLACES TO GET PHOTOS WITH THE GOLDEN GATE BRIDGE, Gabriella Wisdom, Golden Gate Bridge picture spot, Golden Gate Bridge photo spots, Golden Gate Bridge park, San Francisco, 25mm 23mm Sony zoom lens shallow narrow depth of field

    Not long before publishing this update I saw a viral Reel that claimed to show you an iPhone hack that delivers this shallow depth of field result on your phone but then uses photographs taken with a professional camera as the end result. They did put a disclaimer in the caption but it does concern me how misleading it is, so I wanted to be super transparent about our exact camera equipment and focal length for how we achieved these photographs of the Golden Gate Bridge. If you want cinematic results like this then you can’t expect to achieve the same quality with a phone camera.

    We visited the Golden Gate Overlook for photos twice to take these photos and both times we went between 8-10am in July and we were the only people there. Don’t bank on it always being this quiet though so I do recommend going early on a weekday if you want a clear shot without the pressure of onlookers or other photographers and content creators.

    Postcards from Hawaii Travel & Lifestyle blog 8 OF THE BEST PLACES TO GET PHOTOS WITH THE GOLDEN GATE BRIDGE, Gabriella Wisdom, Golden Gate Bridge picture spot, Golden Gate Bridge photo spots, Golden Gate Bridge park, San Francisco, Golden Gate Overlook

    Parking for photos at the Golden Gate Overlook

    The closest parking lot to the Golden Gate Overlook is Langdon Court Parking and it’s right next to this Golden Gate Bridge photo spot.

    Parking at Langdon Court Parking is free.

    The address for parking at this Golden Gate picture spot here is Langdon Ct, San Francisco, CA 94129, United States.

    Postcards from Hawaii Travel & Lifestyle blog 8 OF THE BEST PLACES TO GET PHOTOS WITH THE GOLDEN GATE BRIDGE, Gabriella Wisdom, Golden Gate Bridge picture spot, Golden Gate Bridge photo spots, Golden Gate Bridge park, San Francisco, Golden Gate Overlook

    How to get to Golden Gate Overlook photo spot

    From Langdon Court parking lot, walk though the trees towards the bridge to the steps located in the middle of a concrete circle wall.

    5. Golden Gate Bridge photo spot: Moore Road

    Postcards from Hawaii Travel & Lifestyle blog 8 OF THE BEST PLACES TO GET PHOTOS WITH THE GOLDEN GATE BRIDGE, Gabriella Wisdom, Golden Gate Bridge picture spot, Golden Gate Bridge photo spots, Golden Gate Bridge park, San Francisco, Moore Road
    Postcards from Hawaii Travel & Lifestyle blog 8 OF THE BEST PLACES TO GET PHOTOS WITH THE GOLDEN GATE BRIDGE, Gabriella Wisdom, Golden Gate Bridge picture spot, Golden Gate Bridge photo spots, Golden Gate Bridge park, San Francisco, Moore Road


    Like Battery Spencer, number 3 on this list, Moore Road allows you to view the Golden Gate Bridge from the north end of the bridge. Moore Rd takes you to the other side of the bridge though and gives you the opportunity to view and photograph it from below rather than over the top.

    Moore Rd is a much quieter spot than all the others so you don’t need to arrive early to this best place to take photos of the Golden Gate Bridge in order to avoid crowds.

    There’s a little concrete platform that juts out at the water’s edge that creates an ideal spot to stand for photos of the Golden Gate Bridge.

    Postcards from Hawaii Travel & Lifestyle blog 8 OF THE BEST PLACES TO GET PHOTOS WITH THE GOLDEN GATE BRIDGE, Gabriella Wisdom, Golden Gate Bridge picture spot, Golden Gate Bridge photo spots, Golden Gate Bridge park, San Francisco, Moore Road

    How to get to Golden Gate Bridge photo spot on Moore Road and where to park

    Moore Road is located in Sausalito at the north end of the Golden Gate Bridge. Take exit 442 and make a left onto Alexander Ave until it turns into Conzelman Rd. Keep left when Conzelman Rd forks and take it until it joins Moore Rd. Make a right onto Moore Rd and when you’re there you can park up onto the side of the road where it’s wide enough to let other cars pass you.

    Postcards from Hawaii Travel & Lifestyle blog 8 OF THE BEST PLACES TO GET PHOTOS WITH THE GOLDEN GATE BRIDGE, Gabriella Wisdom, Golden Gate Bridge picture spot, Golden Gate Bridge photo spots, Golden Gate Bridge park, San Francisco, Moore Road

    6. Golden Gate Bridge photo spot: Golden Gate Bridge Welcome Center

    Postcards from Hawaii Travel & Lifestyle blog 8 OF THE BEST PLACES TO GET PHOTOS WITH THE GOLDEN GATE BRIDGE, Gabriella Wisdom, Golden Gate Bridge picture spot, Golden Gate Bridge photo spots, Golden Gate Bridge park, San Francisco, Golden Gate Bridge Welcome Center

    The Golden Gate Bridge Welcome Center is more than just a best photo location for the bridge. Here is where you’ll find an exhibition on the history of the bridge, a gift shop selling GGB themed memorabilia, the Round House which holds Equator Coffees coffee shop, true size replicas and artefacts from the bridge’s construction and it’s where you can start your walk across the bridge. See more below in 7 and 8 about crossing the Golden Gate Bridge.

    Postcards from Hawaii Travel & Lifestyle blog 8 OF THE BEST PLACES TO GET PHOTOS WITH THE GOLDEN GATE BRIDGE, Gabriella Wisdom, Golden Gate Bridge picture spot, Golden Gate Bridge photo spots, Golden Gate Bridge park, San Francisco, Golden Gate Bridge Welcome Center, Equator Coffees

    Visit Equator Coffees in the Round House for the opportunity to sip coffee with a pretty incredible view of the Golden Gate Bridge. I really admire that someone made the decision to put a coffee roaster like Equator Coffees in the Round House. They could have just sold over priced drip coffee like so many popular tourist locations but someone made the right call to serve high quality coffee and it really does elevate the experience.

    Postcards from Hawaii Travel & Lifestyle blog 8 OF THE BEST PLACES TO GET PHOTOS WITH THE GOLDEN GATE BRIDGE, Gabriella Wisdom, Golden Gate Bridge picture spot, Golden Gate Bridge photo spots, Golden Gate Bridge park, San Francisco, Golden Gate Bridge Welcome Center

    Pretty much everywhere around the Welcome Center offers great views of the Golden Gate Bridge.

    The Golden Gate Bridge Welcome Center is open daily from 9am – 6pm except for Thanksgiving and Christmas Day.

    Postcards from Hawaii Travel & Lifestyle blog 8 OF THE BEST PLACES TO GET PHOTOS WITH THE GOLDEN GATE BRIDGE, Gabriella Wisdom, Golden Gate Bridge picture spot, Golden Gate Bridge photo spots, Golden Gate Bridge park, San Francisco, Golden Gate Bridge Welcome Center

    Parking at Golden Gate Bridge Welcome Center for photos of Golden Gate Bridge

    There is a parking lot at the Golden Gate Bridge Welcome Center but there are limited spaces. There are only 26 general, 6 bus and 3 accessible spaces available so try to arrive early if you’re visiting during peak times of the year.

    Parking is charged at 25¢ per 15mins and there’s a 2 hour limit.

    Heads up, Golden Gate Bridge parking lots are closed on weekends and holidays between 11am – 5pm. Keep up to date with the parking lot closures here.

    Alternative parking that’s free for visiting the Welcome Center or to walk on the Golden Gate Bridge is Fort Point. Park in one of the bays on the waterfront and take the path up the slope to the Golden Gate Bridge Visitor Center. It’s a steep but short walk to the top and will save you from having to rush to get everything done in the 2 hour time limit for parking at the Welcome Center.

    Postcards from Hawaii Travel & Lifestyle blog 8 OF THE BEST PLACES TO GET PHOTOS WITH THE GOLDEN GATE BRIDGE, Gabriella Wisdom, Golden Gate Bridge picture spot, Golden Gate Bridge photo spots, Golden Gate Bridge park, San Francisco, Golden Gate Bridge Welcome Center

    How to get to Golden Gate Bridge Welcome Center

    The Golden Gate Bridge Welcome Center is located in Presidio of San Francisco on the US Highway 101. The address is, Golden Gate Bridge, Coastal Trail, San Francisco, CA 94129, United States.

    Golden Gate Transit bus routes 101, 130 and 150 all go from downtown San Francisco or Union Square and stop at the Golden Gate Bridge Visitor Center. Check the GGT bus schedules here.

    7. Golden Gate Bridge photo spot: On the Golden Gate Bridge – pedestrian or cyclist

    Postcards from Hawaii Travel & Lifestyle blog 8 OF THE BEST PLACES TO GET PHOTOS WITH THE GOLDEN GATE BRIDGE, Gabriella Wisdom, Golden Gate Bridge picture spot, Golden Gate Bridge photo spots, Golden Gate Bridge park, San Francisco, Golden Gate Bridge Welcome Center

    Unless you’re scared of heights (guilty) the most exciting way to experience the Golden Gate Bridge is on the Golden Gate Bridge. Every other Golden Gate picture spot on this list allows you to view the bridge from further away so you can get more of this magnificent landmark into your Golden Gate Bridge photo.

    Experiencing the Golden Gate Bridge up close allows you to truly appreciate what an incredible accomplishment of engineering it is, not to mention humbles you as you imagine how brave the people were/are who built and work on the bridge.

    Walking or cycling on the Golden Gate Bridge also gives you a beautiful vantage point to take photos looking back at downtown San Francisco.

    The walk across the Golden Gate Bridge one way is 1.7 miles long and will take approximately 30 minutes if you’re not stopping to take photos.

    Postcards from Hawaii Travel & Lifestyle blog 8 OF THE BEST PLACES TO GET PHOTOS WITH THE GOLDEN GATE BRIDGE, Gabriella Wisdom, Golden Gate Bridge picture spot, Golden Gate Bridge photo spots, Golden Gate Bridge park, San Francisco, Golden Gate Bridge Welcome Center

    We used our 90mm Leica lens for photos of me with the Golden Gate Bridge and for photos of the city.

    PFH Top Tip for visiting Golden Gate Bridge: even on a warm day in San Francisco it is still cold and windy up on the bridge. Don’t forget the Golden Gate Bridge is suspended 67m in the air so expect a strong wind and dress appropriately. Avoid anything that can blow away and bring a warm layer.

    For an even more immersive experience of visiting the Golden Gate Bridge sign up for a FREE walking tour with San Francisco City Tours which sets off every Thursday and Sunday at 11am.

    Postcards from Hawaii Travel & Lifestyle blog 8 OF THE BEST PLACES TO GET PHOTOS WITH THE GOLDEN GATE BRIDGE, Gabriella Wisdom, Golden Gate Bridge picture spot, Golden Gate Bridge photo spots, Golden Gate Bridge park, San Francisco, Golden Gate Bridge Welcome Center

    Parking for photos on the Golden Gate Bridge

    The best place to park to walk on the Golden Gate Bridge is the parking lot at the Golden Gate Bridge Welcome Center. There are only 26 general, 6 bus and 3 accessible spaces so try to arrive early.

    Parking at the Golden Gate Bridge Welcome Center is 25¢ per 15mins and there’s a 2 hour limit.

    Golden Gate Bridge parking lots are closed on weekends and holidays between 11am – 5pm. Keep up to date with the parking lot closures here.

    See alternative and free parking advice for walking across the Golden Gate Bridge under Parking at Golden Gate Bridge Welcome Center for photos of Golden Gate Bridge in the 6th best Golden Gate Bridge photo spot in this list.

    Postcards from Hawaii Travel & Lifestyle blog 8 OF THE BEST PLACES TO GET PHOTOS WITH THE GOLDEN GATE BRIDGE, Gabriella Wisdom, Golden Gate Bridge picture spot, Golden Gate Bridge photo spots, Golden Gate Bridge park, San Francisco, Golden Gate Bridge Welcome Center

    How to get onto the Golden Gate Bridge for photos

    From the Golden Gate Bridge Welcome Center (see number six on this list to see how to get here) walk towards the bridge and take the sidewalk/pavement behind the Round House (Equator Coffees) that runs parallel to the road. This sidewalk/pavement leads directly onto the Golden Gate Bridge.

    Be mindful of cyclists – and other pedestrians – on the bridge when you take your photos with the Golden Gate Bridge. Even on a sunny afternoon we were able to wait for breaks in the crowd, try not to block people from getting past.

    8. Golden Gate Bridge photo spot: On the Golden Gate Bridge – by vehicle

    Postcards from Hawaii Travel & Lifestyle blog 8 OF THE BEST PLACES TO GET PHOTOS WITH THE GOLDEN GATE BRIDGE, Gabriella Wisdom, Golden Gate Bridge picture spot, Golden Gate Bridge photo spots, Golden Gate Bridge park, San Francisco

    As I was only with my fiancé who was driving I could only get a photo of the Golden Gate Bridge rather than with it, as this blog post title suggests. I wanted to include this extra point though as taking a photo as a passenger of the Golden Gate Bridge has the potential to be a unique photo. Also when I originally published this blog post it was very much during a time when travel bloggers believed they had to be in every photo in order to succeed.

    Set yourself up to photograph the Golden Gate Bridge in the wing mirror for some great road trip content or B-roll for a Reel/TikTok.

    How to drive across the Golden Gate Bridge for photos

    If you are travelling southbound into San Francisco then there is a toll to pay. To reduce traffic Golden Gate Bridge no longer accepts toll fees on the bridge. To pay your toll you can either use FasTrak, a license plate account, pay a toll invoice or do a one-time payment. Payment can be taken online, over the phone or in person in select locations.

    More information about the cost and how to pay the Golden Gate Bridge toll fee can be found here.

    If you are driving north across the Golden Gate Bridge from San Francisco then you don’t need to pay the toll to cross.

    Postcards from Hawaii Travel & Lifestyle blog 8 OF THE BEST PLACES TO GET PHOTOS WITH THE GOLDEN GATE BRIDGE, Gabriella Wisdom, Golden Gate Bridge picture spot, Golden Gate Bridge photo spots, Golden Gate Bridge park, San Francisco, Fort Point


    There you have it, 8 of the best places to get photos with the Golden Gate Bridge.

    If photos of or with iconic landmarks is something that thrills you then you may be interested in one of my other popular blog posts, Best locations to photograph Tower Bridge.

    Do more on & for the planet, Gabriella

    Pin this post

    Postcards from Hawaii Travel & Lifestyle blog 8 OF THE BEST PLACES TO GET PHOTOS WITH THE GOLDEN GATE BRIDGE, Gabriella Wisdom, Golden Gate Bridge picture spot, Golden Gate Bridge photo spots, Golden Gate Bridge park, San Francisco, Golden Gate Overlook Pinterest
    Postcards from Hawaii Travel & Lifestyle blog 3 OF THE BEST PLACES TO GET PHOTOS WITH THE GOLDEN GATE BRIDGE, Golden Gate Bridge picture spot, Golden Gate Bridge photo spots, Golden Gate Bridge park
    Postcards from Hawaii Travel & Lifestyle blog 8 OF THE BEST PLACES TO GET PHOTOS WITH THE GOLDEN GATE BRIDGE, Gabriella Wisdom, Golden Gate Bridge picture spot, Golden Gate Bridge photo spots, Golden Gate Bridge park, San Francisco, Golden Gate Overlook Pinterest