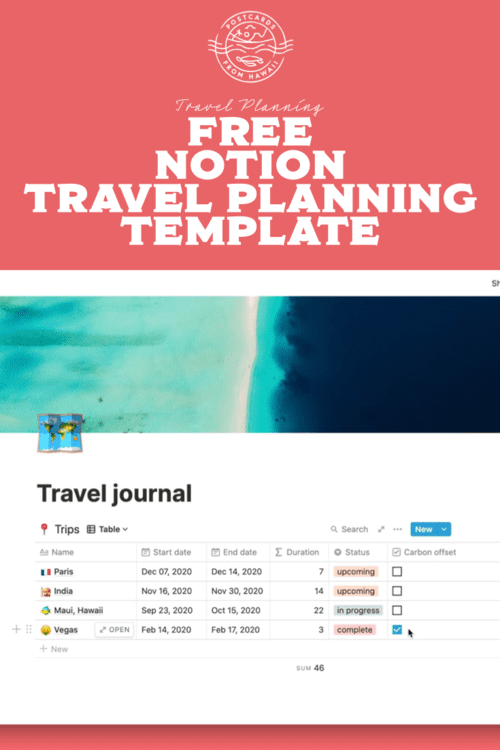
For the first time ever, someone other than me has published a blog post on Postcards from Hawaii and here it is, Michael has written all about his love affair with Notion and why he uses it as his space for planning and organising our travels. Everyone plans and prepares for trips differently right? So we figured why not share with you an alternative way that he absolutely swears by!
So Michael, take it away…
Notion is a tool that helps you organise just about every aspect of your life. It works in your browser or as a dedicated app for Mac, Windows, iOS and Android. You can organise your every day via to do lists and goals, you can run your business on it through powerful project management tools and it works perfectly for single users and giant corporations alike.
I use Notion mainly to run my animation studio, organising complicated projects, timelines and teams. However, the page I most enjoy opening in my Notion account isn’t work related at all, it’s my beautifully organised and very detailed travel journal. It’s the place I plan every single trip in and it’s been through many rounds of refinement to get it to its current form, a form that I am sharing in full with you as a Notion template, meaning you can use this very blueprint for your own adventures around the world. Let’s dive in!
1. Sign up
To get started with this travel journal you will need a Notion account. If you already have one great, if you don’t, sign up here. You can easily use your Google account to create one with Notion. They offer a free account which has a limit on how much you can create, a $4/month personal subscription which offers unlimited creation and a couple of business plans.

2. Duplicate my template
Once you have an account, the next step is to duplicate the template I have created so you can personalise it and begin planning your travels.
Click on this link then click “duplicate” in the top right hand corner. If you’ve made an account and are logged in, it will take you to your new travel journal in your own account. If you’re not logged in it will prompt you.

3. Personalise
Time to make it yours! Personalise your travel journal with a new title, emoji and cover photo. Notion hooks up to Unsplash and gives you 900k+ hi res photos to choose from (you can use these anywhere you like not just as header photos).
Individual trip pages can be personalised in this way as well, in fact any page of your travel journal can!

4. Explore the template
Take it for a spin and get familiar with how your trips will be organised. Click on one of the demo trips, Paris for example. Notice each trip has its own page? Inside the trip page you’ll find what I consider key resources for planning a trip: a pre-trip checklist, a packing list, a map (all inspired by Gaby’s previous blog posts), an itinerary, a budget, and a space for any notes.

Here’s a quick breakdown of each section:
Pre-trip checklist
You’ll be able to customise this check list to suit your needs – add to it, take away, rework it.

Packing list
Again, use ours as a guide or write your own from scratch. Use toggles to organise cases, bags and categories. To add to this list (or any aspect of the travel journal) hover or click on the + and choose what kind of block you’d like to add; there are so many to explore.

Itinerary
The itinerary is set up as another database so it functions just like your main travel journal database – each day can be clicked and is a stand-alone page. This is great if you want more space for each day, maybe you’re a big journaller or want a place to collate some images for a travel shoot moodboard, you can do it all here.
Customise your columns to suit your needs: fill in your days, drop your boarding pass PDFs in the ‘files’ column on the corresponding day and you have everything for your trip in one place.

Budget
Depending on how organised you want to be you can create a budget – either use this as a plan to keep to your spending limit or a log as you go. You can add single expenses or create more detailed budgets by nesting smaller tallies (see ‘food & drink’) – the possibilities are endless!

Map
Use this space to drop a map of your destination in. It’s a great way to embed pre-made maps with spots you want to visit. Just click on replace in the map menu and paste the link to any Google map.

Trip notes
A free space for anything that doesn’t have a home above. I like to jot down recommendations we’ve received on our trips or useful details I need to remember like airport parking locations (because I always forget where the car is parked which always leads to an argument in the middle of the carpark with Gaby).

5. Start planning
Time to create your own trip! When you are back to your main travel journal page (use the navigation menu at the top of the page), hover over the trips database, click on the arrow on the blue ‘New’ button and click ‘New Trip’. Title your trip page, personalise the icon & wallpaper and add some details. Back in your travel journal you’ll see your new trip, now you are ready to plan.

Edit your trip template
When you create a new trip, you are duplicating a template I have made. If you want to make changes to this template click on the blue arrow of your main database and select edit – any changes you make in here will be active each time you press new trip. This is great if you want to customise your pre-trip checklist or packing list and have the changes reflected for every new trip.

6. Additional tips
Explore different views
With any Notion database you can create multiple views. Let’s say you want to see how all your travel plans look on a calendar, you simply click “new view” and then “calendar view”; your trips will appear based on the dates you’ve set. There’s also a “board view” and ““gallery view” – explore your options. You can then toggle between views whenever you like and you can even copy and paste a linked view, so you can see both at the same time while retaining it as one database.

Add custom columns
Add your own columns to your main database for example, a checkbox for carbon offsetting the trip.

Use filters
Filters are a great way to change which trips your database shows without deleting anything. Try adding a filter to hide any completed trips.

.
So there’s my introduction into how Notion works as a whole but particularly how it can benefit you most for planning your travels. As you’ve probably gathered by now, every part of what I’ve shown you is customisable so don’t be afraid to explore. We all have different organisation styles and ultimately different travel needs and Notion recognises this by allowing you to plan in a multitude of ways. So what are you waiting for? Make an account, grab a coffee and use this template to start organising all your future travel plans, dreams and soon, your whole life (it’s addictive).
Thanks for reading!
Here is the link to the template again
Aloha, Michael
