Author: Gabriella Wisdom

  • 7 free museums in Paris for Europeans aged 18-25

    7 free museums in Paris for Europeans aged 18-25

    Shortly after graduating from university, I moved to Paris for a year following my boyfriend who was offered a job in advertising. Whilst there I worked as a language instructor (*ahem* glorified name for English speaking babysitter), which meant I had the day to explore the city before picking the kids up from school. 

    Up until this point I had never moved away from home, and though I was very excited to be living abroad, I was also so nervous about being young and heading out on my own. Turns out it’s awesome to be under 25 in Paris because EU citizens aged 18-25 get free and concessionary tickets to so many tourist sites. All you need is your passport or driver’s licence!

    To save you from doing the research yourself, I’ve compiled a list of 7 of the best museums in Paris that offer free admission to 18-25 year old EU citizens; some of them even make exceptions for non EU citizens under 26!

    1. Musée du Louvre

    The world’s biggest art museum is home to some of the world’s most recognised pieces of art such as Da Vinci’s Mona Lisa, Venus de Milo, Delacroix’s Liberty leading the people and of course, Pei’s pyramids. There is so much to see in the Louvre that each of the three wings, Sully, Denon and Richelieu, require at least a day to explore. For this reason I think it’s the perfect place to seek shelter from the rain and cold whilst absorbing a wealth of culture. When I was living in Paris, I visited all eight departments on the days when the weather was at its worst.

    PFH Top Tip – Don’t miss Napoleon III’s apartments in the Richelieu wing. They are some of the most extravagantly decorated rooms in the world, every inch of the Rococo decor is a work of art.

    Admission


    • Free access to the permanent collections for EU citizens aged 18-25.


    • Free admission for under 26 year olds of all nationalities every Friday from 6pm.


    Opening hours


    • Open 9am-7:30pm on Mondays, Thursdays, Saturdays and Sundays.


    • Open 9am-10pm on Wednesdays and Fridays.


    • Closed on Tuesdays.


    Getting there


    • Rue de Rivoli, 75001 Paris, France.


    • Métro lines 1 and 7 – Palais-Royal Musée du Louvre.


    2. Musée d’Orsay

    Formerly a train station built in 1900, this museum now houses works of art from 1848-1914. Some of it’s most famous inhabitants are Van Gogh’s Self Portrait, Manet’s Olympia, Whistler’s Mother and Monet’s London, Houses of Parliament. 

    PFH Top Tip – Arrive first thing in the morning to get an instagram worthy shot from behind the clock face. It’s on the fifth floor in the North East corner along with the café. I’m yet to get a good shot of this, so if you do, know that I’m super jealous of you!

    Admission


    • Free access to the permanent collections for EU citizens aged 18-25.


    • €8 concessionary ticket price for 18-25 year olds of all nationalities.


    Opening hours


    • Open 9.30am-6pm Tuesdays, Wednesdays, Fridays, Saturdays and Sundays.


    • Open 9.30am-9.45pm Thursdays.


    • Closed on Mondays.


    Getting there


    • 1 Rue de la Légion d’Honneur, 75007 Paris, France.


    • RER C – Musée d’Orsay.


    3. Musée du Quai Branly

    Just a six minute walk from the Eiffel Tower and nestled behind trees, Musée du Quai Branly showcases collections of non-European art. The permanent collections are divided into geographical areas showing approximately 3,500 pieces of clothing, masks, weapons, instruments and so much more. 

    PFH Top Tip – Though the work is fascinating and a welcomed change of pace, the museum is not of the same calibre as the Louvre or d’Orsay. So, if you have limited time in Paris I wouldn’t suggest putting it at the top of your museum list, but if you do have time to explore Paris’ less talked about hotspots, it’s definitely worth a trip.

    Admission


    • Free access to the permanent collections for EU citizens aged 18-25.


    Opening hours


    • Open 11am-7pm on Tuesdays, Wednesdays and Sundays.


    • Open 11am-9pm on Thursdays, Fridays and Saturdays.


    • Closed on Mondays.


    Getting there


    • 37 Quai Branly, 75007 Paris, France.


    • Métro line 9 – Alma Marceau.


    • RER C – Pont de l’Alma.


    4. Musée Rodin

    In 1908 Rodin donated his entire life’s work to the French State for it to be displayed within the grounds of Hôtel Biron, his former studio, which was to be known as “Musée Rodin”. It has since been listed a historical monument and is home to some of the world’s most critically acclaimed pieces such as The Kiss, The Thinker and The Gates of Hell. 

    Fun fact – The garden has hosted the Dior couture catwalk show during Paris Fashion Week for the last 10 years.

    PFH Top Tip – May is the best time to visit Musée Rodin because the rose garden is in full bloom.

    Admission


    • Free access to the permanent collections and sculpture garden for EU citizens aged 18-25.


    • €7 concessionary ticket price for 18-25 year olds of all nationalities on Wednesdays.


    Opening hours


    • Open 10am-5.45pm from Tuesday-Sunday.


    • Closed on Mondays.


    Getting there


    • 77 rue de Varenne, 75007 Paris, France


    • Métro lines 13 and 8 – Invalides.


    • Métro line 13 – Varenne.


    • RER C – Invalides.


    5. Musée des Arts Décoratifs

    Located in the West wing of the Louvre, this one is for interior design lovers. The decorative arts and design museum houses works from the Middle Ages, Renaissance, 17th, 18th and 19th centuries, Art Nouveau, Art Deco, Modern and Contemporary. If you’re a fashionista however, it’s worth keeping an eye out for their forthcoming events as they also showcase fashion exhibitions. The most recent Christan Dior Couturier du Rêve exhibition, celebrating 70 years of Dior, was magnificent and worked harmoniously with the interior of the museum. Please note that you will have to pay for a ticket to the non-permanent exhibitions no matter your age and nationality.

    PFH Top Tip – The gift shop has an amazing art and design book shop at the far end and is worth a visit for anyone working within the creative industry.

    Admission


    • Free access to the permanent collections for EU citizens under the age of 26.


    Opening hours


    • Open 11am-6pm Tuesday-Sunday.


    • Open 11am-9pm on Thursdays (from 22nd March).


    • Closed on Mondays.


    Getting there


    • 107 Rue de Rivoli, 75001 Paris, France


    • Métro line 1 – Tuileries.


    • Métro lines 1 and 7 – Palais-Royal Musée du Louvre.


    6. Musée des Arts et Métiers

    If you fancy a change from the arts, why not check out Europe’s oldest science and technology museum. Much like Musée du Quai Branly, I wouldn’t suggest spending your limited time in Paris visiting this museum, but with over 2,400 pieces of technological innovation, these centuries old inventions are worth a visit when you have the time.

    Admission


    • Free access to the permanent collections for EU citizens aged 18-25.


    Opening hours


    • Open 10am-6pm Tuesdays, Wednesdays, Thursdays, Fridays, Saturdays and Sundays.


    • Open 10am-9.30pm on Thursdays.


    • Closed on Mondays.


    Getting there


    • 60 Rue Réaumur, 75003 Paris, France


    • Métro lines 3 and 11 – Arts et Métiers.


    • Métro lines 3 and 4 – Réaumur – Sébastopol.


    7. Musée de l’Armée Invalides

    The National Military Museum hosts an abundance of historical artefacts from 13th-17th Century armour to weaponry from the two world wars. Though it sounds a bit heavy going, it’s actually fascinating to learn about military defence and conduct from other countries’ viewpoints. Plus not all the items on display are weapons; there are also paintings, uniforms, vehicles and personal belongings from the focused eras.

    PFH Top Tip – If there is one thing you cannot miss at Musée de l’Armée Invalides, it’s Napoleon’s tomb. Beneath the spectacular dome, which can be seen for miles, rests Napoleon I within a very grand black marble coffin.

    Admission


    • Free access to the permanent collections and sculpture garden for EU citizens aged 18-25.


    Opening hours


    • 1st April – 31st October: Open 10am-6pm from Monday-Sunday.


    • 1st Nov – 31st March: Open 10am-5pm Monday-Sunday.


    Getting there


    • 129 Rue de Grenelle, 75007 Paris, France


    • Métro lines 8 – La Tour Maubourg.


    • Métro lines 13 and 8 – Invalides.


    • Métro line 13 – Varenne.


    • RER C – Invalides.


    Bon Voyage!

    Aloha, Gabriella

    Pin this post


    .

    Full disclosure – Ticket prices and opening times were correct at time of posting.
  • Winter packing guide – Amalfi Coast, Italy

    Winter packing guide – Amalfi Coast, Italy

    During the six days we were in the Amalfi Coast in February, the weather averaged out at 10 degrees celsius. Four of them were sunny with bright blue skies and if there were any, the clouds were little wisps of cotton candy in the sky. However, the other two days featured thunderstorms and torrential rain that caused flash floods, which led to a terrifying drive up the side of a mountain that made me contemplate who would inherit my beloved Gucci bag if I died. Having checked the weather report in advance to packing I made sure I was fully prepared for both weather conditions, and despite over packing by a few unnecessary items, I didn’t find myself pining after anything I didn’t have.

    There are five things from my packing list that I want to highlight to explain how you will definitely benefit from them on a colder trip.

    1. Accessories

    It’s hard to show off a good outfit in winter when you really want to be bundled up in your coat, so, I bring a selection of hats, headbands, neckerchiefs and sunglasses to spice up what would be the same look over and over. Other ways to change your look in photos where you’re wearing the same coat is to don a different handbag or lipstick colour. I’ve recently become obsessed with turban style headbands because they’re a stylish way to keep your ears warm, your hair out of your eyes and they save you from hat hair!

    2. Dry bag

    This is an item I would usually bring to put my wet swimsuit in so it doesn’t get anything else wet in my bag, but on a trip like this I actually use it to line my foldaway backpack which is showerproof but not waterproof. I put all my contents into the dry bag, seal it and pop it in my backpack (so it’s easier to carry) and everything stays dry. I was gifted mine and it has turned out to be one of the best travel items I have. The exact one I own is the Karrimor 10 litres in yellow.

    3. Zip lock bags

    I like to save money on food when I’m travelling, hey who doesn’t?! So I go to the closest supermarket to pick up bits and bobs for a packed lunch. These lunches usually comprise of fruit, crisps, a cereal bar and sandwiches. The zip lock bags are to keep the sandwiches fresh on the go. As I’m storing the food in hotel fridges and making them up in the room, I buy a pack of bread rolls, butter portions, sliced cheese and sliced meat – the less prep I have to do the better.

    4. Winter PJ set

    Night time is very chilly and because the Amalfi Coast is a summer holiday destination, it isn’t geared up for off season travellers who want to stay warm. There will more than likely be extra bedding available and a radiator but it won’t be as powerful as the air con is for summer, so I suggest bringing warmer pyjamas to stay cosy when you sleep.

    5. Waterproof over-trousers

    Ok I’m not going to pretend that they are by any means fashionable, in fact they’re verging on looking like you strapped a couple of black bin bags to your legs, BUT when the rain is relentless, trust me, these babies will be your best friend. Save yourself the misery of being soaked through to your pants trying to dry off your crotch under the hand dryer in the bathroom and grab a pair. Mine are from Mountain Warehouse, they fold up into a little travel pouch so you can just pop them in the bottom of your bag just in case you get caught out.

    PFH Top Tip: If you’re a size 8 you can save money by buying the children’s age 13 because it fits exactly the same as the women’s 8.

    .

    Like I mentioned before I did pack a few things that I needn’t have. They’re not on the packing list above because I didn’t wear them at all and they were just unnecessary weight.

    Burberry trench coat

    As you can see I had already packed two coats, one for protection against rain and the other for warmth and style. I brought my trench coat because I thought on sunnier days I would need a lighter coat, but although there were times in the sun where I did take my teddy coat off, it wasn’t long before I had put it back on again thanks to a cold breeze or simply just being in the shade. We were usually out all day and once that sun had gone it was freezing, so I had no use for a lighter coat and didn’t wear it once.

    Denim jacket

    Pretty much the same as above, I thought I could get away with a light jacket in the sun. I wore it out once on our first day but it was only good for about two hours, after that I was shivering.

    T-shirts

    I brought three more t-shirts than the two I listed (and actually wore). They were supposed to be different outfit options but five was overkill for a chilly trip and I just didn’t need so many given how cold it was most of the time #overoptimisticpacker.

    .

    Why not take a look at my Amalfi Coast itinerary for tips on how to make the most of your time there.

    If you would like to edit your own packing list like the one above check out my ultimate interactive packing list where you will find a downloadable PDF to save and customise.

    Aloha, Gabriella

    Pin this post


  • Italy itinerary – a six day trip to the Amalfi Coast

    Italy itinerary – a six day trip to the Amalfi Coast

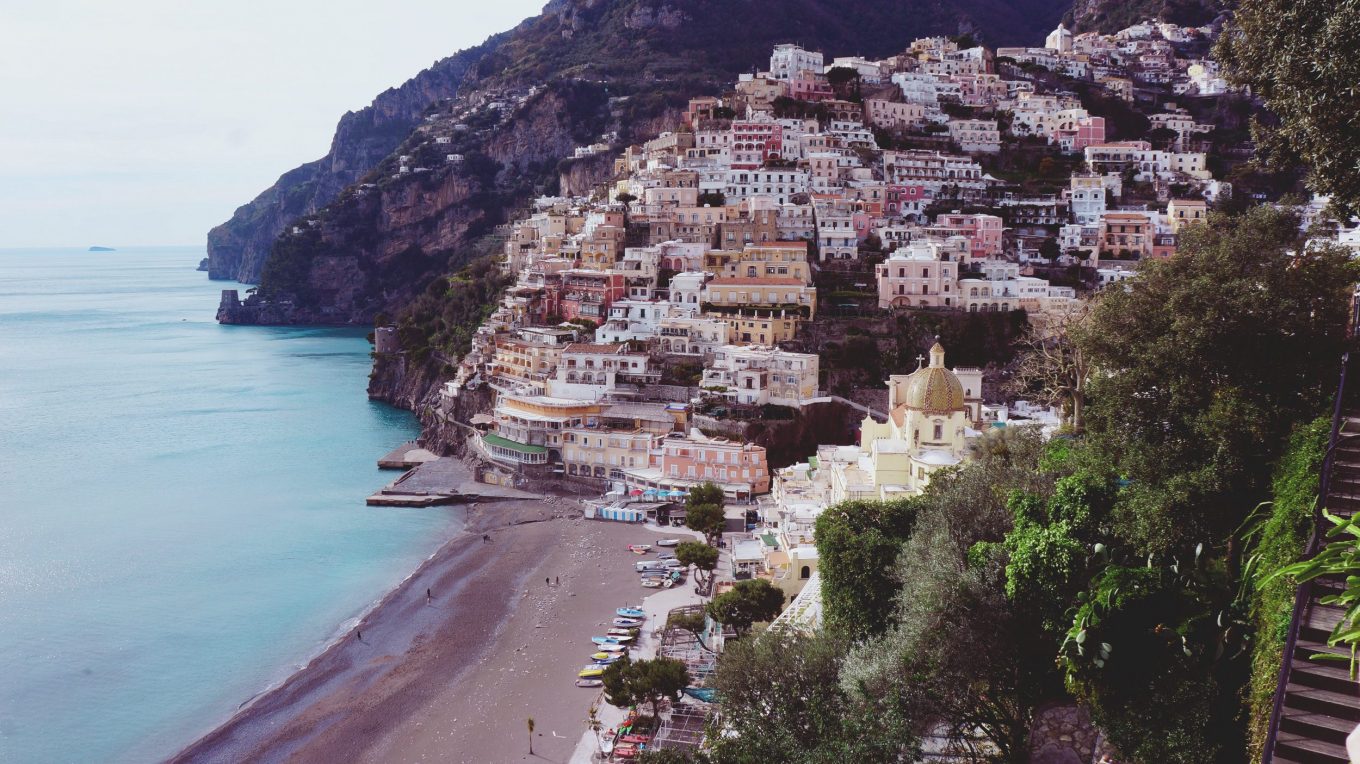
    I have wanted to go to the Amalfi Coast since May 2016 when a monsoon in Cairns meant I was cooped up inside watching endless reruns of Giada in Italy on the Food Network. I was hooked in the first five minutes and knew I had to go there to see it for myself. Pastel coloured buildings cascading down from mountains until they ended at sparkling turquoise waters, and little beaches dotted with wooden fishing boats and colour co-ordinated parasols; it was so picturesque I had to keep pinching myself, in-between taking endless photos of course!

    Though the Amalfi Coast is predominantly a summer holiday destination, spring and autumn are significantly warmer compared to northern Europe so the off season is pretty much just Nov-Mar. I chose to visit in February because I wanted to go somewhere that would be scenic no matter how chilly it was, and to be fair to the weather there were a few moments of glorious sunshine where you could whip out your swimmers before retreating back to your coat. So let’s be real, there are some major pros and cons to travelling out of season in general, with our trip these were:

    Pros


    • Cheaper travel, accommodation and car rental – who doesn’t love to save money!


    • The roads are quiet, which considering they are narrow and wind through mountains, is a blessing – we were told multiple times how the traffic is bumper to bumper in summer.


    • It’s peaceful – no crowds or queues. You can get your photos without people in the background, though you might get some side eye action for prancing around in your swimsuit, or so I’ve heard…


    • Mountainous walks and hikes are easier in cooler months – little chance of dehydrating or burning.


    • Public travel is empty – buses in summer are rammed tighter than the central line at 7am.


    Cons


    • Most restaurants and cafés were closed – on average only two restaurants open per town, except for Amalfi which had a bigger choice but even there only half of the restaurants and souvenir shops were open.


    • Some tourist attractions were closed – parts of Pompeii such as the amphitheatre weren’t open to the public.


    • The weather is a gamble – most of our days were sunny with bright blue skies but a couple of days were wet and one even featured a thunderstorm. It’s possible to enjoy lunch outside in the sun but don’t hold out for sunbathing.


    • Ferries to Capri and neighbouring towns run on a limited schedule, and in the thick of winter they are cancelled due to bad weather – the best chance of a photo looking back at the coastline from the water is by walking to the end of one of the piers.


    Despite the fact that we went off season, my itinerary and focused tips will benefit you no matter what time of year you go.

    Day 1


    • Flight from Stansted to Naples.


    • Pick up rental car from Sicily by car.


    • Check into Hotel Palumbo, Ravello.


    • Fiordo di Furore.


    • Amalfi.


    Day 2


    • Pompeii.


    • Vesuvius.


    • La Reggia Designer Outlet.


    • Centro Commerciale Campania


    Day 3


    • Naples.


    • Return rental car.


    • Transfer from rental car to hotel.


    Day 4


    • Ravello.


    Day 5


    • Amalfi.


    Day 6


    • Positano.


    • Nana Positano.


    Day 7

    (early morning flight home)


    • Transfer from hotel to Airport.


    • Flight from Naples to Stansted.


    Car Rental

    To find the best priced rental car I used Argus Car Hire which led me to Sicily by Car. For a three day hire with insurance our Smart Forfour car cost just £25.86. We only filled up once just before returning the car and it fit one big suitcase and a bag in the boot and one big suitcase and one cabin case on the backseat. Originally we wanted to keep it for the whole week but we were flying home on Sunday and the car rentals weren’t open for returns early Sunday morning, so we only hired it for three days. I planned it so the longer trips out, such as Pompeii and Vesuvius, could be done in the first few days with the car and on the third day we could spend time in Naples before dropping the car off back at the airport. There is a shuttle service going from the airport to the car rental offices which takes 5 mins or you can walk there in just 10 mins.

    Hotel Palumbo

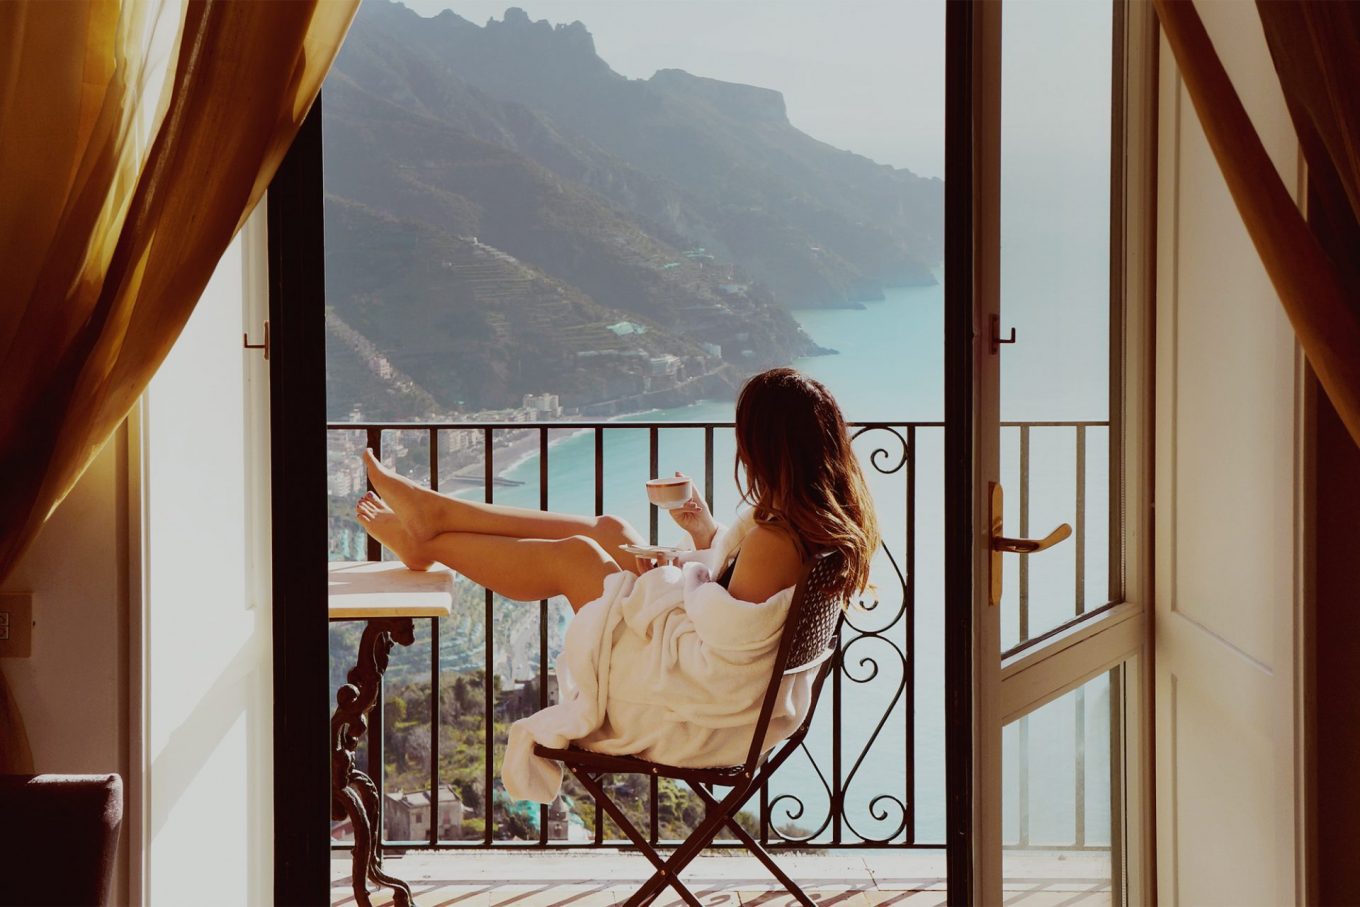
    It’s one of the oldest family owned establishments in Italy. Though it’s a 5* hotel full of character, don’t expect Dorchester standards; the bathroom tiles are uneven and the hunt for plugs is like an obstacle course. However, what you do get is a whole lot of charm, antique mirrors, ornate dressing tables, brocade bedding, spectacular views of the coastline and friendly staff.

    The two junior suites have private balconies where you can eat your breakfast and sip on freshly squeezed juice made from fruits growing in the garden below. If you aren’t staying in one of the suites but wish to dine with a view, their terrace restaurant, Confalone (open in warmer months), over looks the same picturesque mountains.

    Just a few previous famous guests of the hotel include Humphrey Bogart, Truman Capote, Tennessee Williams, Angelina Jolie and Brad Pitt (who filmed a later deleted scene for Mr and Mrs Smith on the hotel grounds). Check out the hotel website to see the full list of world famous guests. Rooms start from £164 per night.

    Fiordo di Furore

    Getting to Fiordo di Furore by foot is tricky but the bus to Positano from Amalfi will make a stop there if you request it and you can reach it by car if you’re not stopping too long. We drove here but I truly believe this was only possible because it was out of season and no one else was there, other than one man fishing off the steps. We were able to pull our car up behind his at one end of the bridge (the opposite side to the tunnel) allowing enough room for buses to get past. We were lucky to get that space because of the time of year we went but I strongly recommend going by bus and not risking driving there to find there’s nowhere to park. From the bridge, take the long flight of steps down to the beach, stopping to take photos on the way down. The halfway point is a great place to get photos of the whole bridge and turquoise water below. As I’ve mentioned above, a massive pro from going in winter meant that we were the only ones on the beach so we could get our photos without anyone else in the shots. Though having seen images online of the fiord in summer, despite it being very packed, it’s a beautiful spot to spend the day sunbathing and frolicking in the clear water. 

    PFH Top Tip: When you’re there, take a closer look at the pebbles on the beach, it’s actually scattered with fragments of brightly coloured tiles which have been smoothed by the waves over time so they’re no longer sharp, it’s not unlike hunting for seashells really.

    Pompeii

    I booked my tickets to the Pompeii archaeological sight online here. It’s €13 euros for an adult, €7.50 for 18-24 and free for children under 18. There is an extra €3 booking fee and if you chose to print the tickets at home it comes at an additional cost of €2.50. I would recommend printing at home during the peak months but there wasn’t a single person in the queue when we went so the tickets could easily be collected onsite – which is free. When you arrive but before scanning your ticket for entrance into Pompeii, go to the room on right hand side of the ticket office. In here you will be able to pick up a booklet guide. If you don’t pick up one of these and chose not to have an audio or tour guide, you will have no idea what you’re looking at because there are no signs or plaques explaining what everything is.

    There isn’t an onsite car park for Pompeii so if you are driving you will need to plan where you are parking in advance, especially if you’re going during a busier period. Zeus Camping is a 24hr monitored car park right outside the gates, and once parked will take you barely 3 mins to walk to the entrance. You will receive a ticket at the barrier upon entering and when you return, the payment machines are on the left just after the barrier. The parking fee is €3 per hour and you have 15mins after payment to leave the car park. I have read that by parking with Zeus Camping you get a discount in their restaurant but, check the small print because there is a minimum spend that might not benefit a couple or a small family.

    PFH Top Tip: Don’t expect to see many preserved bodies or artefacts in Pompeii, they are on display at the National Archaeological Museum of Naples.

    Vesuvius

    The active volcano which destroyed Pompeii and Herculaneum in 79AD that you can actually hike up despite this chilling fact. The eerie but exciting drive from Pompeii up to the Vesuvius crater car park takes about half an hour. The parking fee is €2.50 and the entrance fee to hike to the crater is €10 per person. The quickest round trip walk will take approximately 1 hour, but make sure you allow extra time for taking photos. Unfortunately, like every volcano I have had the opportunity to hike, the weather was atrocious and the path up to the crater was closed on the one day I had the chance to go. So as usual my view was mist and cloud, but if you have (or had) the opportunity to get to the top please send me your snaps, I’d love to see what you saw!

    PFH Top Tip: In bad weather conditions, like the day I went, the hiking trail will be closed for your own safety. If you can see cloud loitering above the crater then check in advance by calling +39.081.8653911.

    La Reggia Designer Outlet

    As we were collecting our suitcases in the airport I spotted a leaflet for an outlet shopping mall just north of Naples. Knowing the weather was going to be bad for a couple of days I thought it would be something to do inside whilst it was raining and we had the rental car.  Opposite La Reggia is Centro Commerciale Campania which is a normal shopping mall with a big Carrefour, where we picked up food for packed lunches. Parking is free at both and there are plenty of shops to keep you occupied. As much as I love shopping though, I recommend you go sightseeing and seek shelter here at the end of your day.

    Naples

    Before returning the rental car to the airport we spent the day in Napoli exploring the little bustling backstreets. I have read quite a bit about how Naples has a high crime rate so keep your whits about you, but we didn’t have any trouble when we were there. In terms of parking, there is a lot of free parking around the city but beware of the men who point out spaces then try to ask you for money, they are not official. If you’re brave you can say no and walk away but if you don’t want to risk leaving your car unattended I strongly recommend parking in underground carparks which are monitored 24 hours. The price is higher but you know your car is safe. The one I chose was Gran Garage on Via Incoronata, it was close to Via Toledo (one of the main shopping streets) and Via S. Gregorio Armeno, a little road full of stalls selling hand crafted souvenirs and antiques. When you’re on Via S. Gregorio Armeno pick up some Cornicello, little red horns, they symbolise a Neapolitan superstition. When gifted to someone (that’s very important, you can’t buy your own) you are bringing them luck and protecting them from the evil eye. 

    PFH Top Tip: Don’t freak out when they take your keys, the underground car park is like a valet service, they will re-park your car and bring it out when you return.

    Ravello

    Ravello is the town where our hotel was located. It’s a small town high up from the coast which means the view looking down at the beaches and buildings in stunning. There are a few hotels, so restaurants in summer are plentiful, but as I mentioned only a couple – Hotel Garden and Hotel Parsifal – were open in February. A five minute walk from the hotel down a pretty little path takes you into the town square which on a sunny day is full of chairs belonging to the surrounding cafés for outdoor dining. On one side of the square is Duomo Ravello (Ravello cathedral) and the other looks out onto the surrounding mountains stretching down to the sea. During the warmer months in Ravello the coral museum is open to visitors along with the Oscar Niemeyer Auditorium.

    Amalfi

    Funnily enough Amalfi is the central hub of the Amalfi Coast. All major bus and ferry connections along the coast are made here, there is an abundance of gelaterias and the biggest choice of souvenirs and shops. Going back to buses, the public SITA buses do not sell tickets on board so to travel on them you must buy your tickets from the tobacco shops (tabaccheria). Hotels will provide timetables and point you in the direction of the tabaccheria. In Ravello it is in the town square and Amalfi has one on the other side of the road to the bus stop. Parking is limited and we had to circle the seafront car park for 5mins before getting a space. It’s €1 per hour and you will need to put your licence plate number into the machine.

    When the sun is out you can sit at the end of one of the three piers looking back at the coastline – they’re one of the best places to take photos of Amalfi. In the centre of the square stands Amalfi’s grand cathedral looking down on all the restaurants below; the steps are another lovely place to sit in the sun.

    Positano

    To get from Ravello to Positano by bus you will need to connect at Amalfi picking up the Sorrento bus from the main station, which is opposite to where the Ravello bus drops off. It takes about 2hrs depending on how well timed your connection is. It’s definitely worth the long bus journey though. Positano was by far my favourite place along the coast, it’s stunning and so colourful. The bus drops you off on the top road so you only have to walk downhill for 1 minute to reach the best location to take photos looking down at Positano’s beach. I recommend getting photos from up there during the day and again for sunset. In the sunshine the peach and yellow toned buildings stand out proudly against the green mountains, clear sky and bright blue sea. Then as the sun goes down the sky lights up with streaks of burnt orange and lilac, casting a purple light across the buildings whose lights are just starting to go on. 

    As beautiful as Positano is, it’s not for the faint-hearted. The whole town is built on a steep slope so there’s an abundance of steps weaving around the buildings taking you up and down. I hit up the gym most days of the week but my legs were trembling after all those steps, not to mention I had eaten far too much pizza that week to be taking them on! My advice is to take it slow and give yourself plenty of time to get back uphill for the bus stop.

    Nana Positano

    One of the very few shops open in Positano was Nana Positano, a place where your customised-handmade-Italian-leather-sandal dreams come true. It’s a little boutique ran by Nana and her husband selling leather and Swarovski crystal sandals in all shapes and sizes, each one made to order and fitted then and there. Again because of the time we went, we were the only people in the shop so we only had to wait as long as it took him to make them, which including the fitting and tweaking took roughly half an hour. I have read that during busier times the general wait is an hour minimum. They are so comfortable and classic and I can’t wait to take them on further travels. For a plain leather pair without crystals the cost is €55.


    .

    To see what I packed take a look at Winter packing guide – Amalfi Coast, Italy.

    Aloha, Gabriella

    Pin this post


    .

    Full disclosure: Prices and ticket information were correct at the time of posting.

  • RTW drug bag

    RTW drug bag

    “The drug bag” is my name for the toiletry bag I travel with containing all the medication, preventatives and treatments I need for a trip. The biggest one I’ve taken with me, in terms of contents, is the one I packed for my round the world trip.

    You probably won’t need some of the items I pack and so don’t let my list panic you over being too prepared. You know your body and what it needs so pack what suits you, but hopefully some of these items inspire you to be more prepared when you travel. Remember though, you can always pick up what you need on the go.

    Make certain to check the restrictions in the countries you are travelling to. I read quite a bit about medication restrictions in Dubai and horror stories of people being arrested for having unprescribed painkillers. When I travelled to Dubai I made sure to have my prescription from my pharmacy along with the full packaging which had my name on it. Better to be safe than sorry!

    Ibuprofen & Paracetamol:

    Painkillers! I actually carry these around everywhere whether I am travelling or not. You never know when a headache will strike so rather than getting caught out, always keep them on you.

    Ibuprofen Gel:

    I have suffered with back and neck pain for years and although it is usually triggered by carrying excessive weight, stress can also be a contributing factor. When I’m travelling I don’t always have access to a memory foam pillow or an ice pack, so I carry a maximum strength ibuprofen gel for extreme cases.

    Cold & Flu relief:

    You really can’t predict when you’re going to get sick, I honestly thought if I was going to catch a cold on my RTW it would be in the middle of winter in New Zealand not during our stay in the tropics of Queensland, Australia. Unfortunately our arrival to Palm Cove was met with a monsoon and we were rained in for seven out of ten days. After two days solid of freezing cold rain I got a cold and was very grateful for my cold and flu tablets.

    Mosquito Repellent:

    My top choice brand is Jungle Formula. In warm climates I spray my arms and legs which is usually enough to ward away insects, and when trekking I make sure to spray my feet and ankles to prevent ant bites. My one little bottle took us all the way through our four month trip and I’m still using it a couple of years later. I know it’s quite pricey but it’s worth it.

    PFH Top Tip: It is important to reapply after contact with water, you can see why under antihistamine.

    Calamine Lotion: 

    Calamine lotion has become a travel necessity for me when heading to warmer climates. It’s my miracle product because it soothes rashes, insect bites sunburn and so much more.

    PFH Top Tip: It applies pink so make sure to wash it off before you go out in public, also try to purchase a plastic bottle because it’s easier to travel with than glass.

    Antihistamine:

    These are for treating extreme symptoms related to allergies and reactions for example, hay fever and insect bites. I prefer more external remedies so my first response for insect bites is calamine lotion but in some worsened cases an antihistamine will help reduce the symptoms drastically. When I did a Jungle Trek in Malaysia we stopped to cool off in a waterfall. I then laid out on the surrounding boulders in the sun to dry off before I reapplied my mosquito spray but it was too late. The next day I came out with bites on my thighs the size of tennis balls, they were so swollen that it hurt to walk so I took an antihistamine for a couple of days and smothered them in calamine lotion and they settled down.

    If you prefer cream to tablets, you can pick up Germolene which you can apply directly on bites, but this comes with a medicated smell that the tablets don’t have.

    Contraception:

    I suggest having your current course of the contraceptive pill in your hand luggage but if you are going on a trip that will outlast that month, don’t forget to pack the next however many packs necessary. In addition to your pill I highly recommend bringing condoms as a back up for a couple of reasons:


    • If you forget about the time difference and miss a day it will provide extra protection.


    • If you are sick or have diarrhoea within 4 hours of taking your pill it may not have been absorbed yet.


    Suncream:

    Due to my boyfriend and I having completely different skin tones I end up packing a larger array of factors when we travel together but I always recommend travelling with a second factor higher than your usual so you don’t get caught out if the temperature spikes. The selection of suncreams I travel with are:

    Boots Soltan Protect & Repel

    I use the spray bottle in factors 15 and 30. Soltan is a cost effective brand which not only saves you pennies but you get boots points too, bonus! Because Soltan is a Boots own brand it’s super easy to get hold of and there is almost always an offer on it. The spray application is easy to use and because it’s still a cream rather than a liquid spray or aerosol you will still get full coverage when you rub it in. I use the protect and repel formula because I like maximum protection from bites and what’s great about this product is it doesn’t have a repellent odour and it’s non-greasy.

    Facial suncream

    Some foundations and tinted moisturisers contain SPF now but you won’t be wearing those in the pool or whilst snorkelling so get a facial suncream that won’t leave streaky marks when wet. Many skincare brands have developed formulas including SPF so you will be able to find one that works with your skin type. I look for ones that are oil free and for sensitive skin, also anything that’s anti-aging is a bonus! My current one is Simple Light Moisturiser SPF 15.

    Factor 50

    I carry a small SPF 50 bottle because I have a few areas of skin which I want to protect more than I want to tan – which for the record means I really want to protect them. These areas are my nose and shoulders because they are super sensitive and my décolletage because this is the first area to show age and damage after prolonged sun exposure, so I often apply factor 50 to this area for ultimate protection. 

    Don’t forget a good moisturiser or aftersun to keep your sun-exposed skin hydrated. I prefer to use Aveeno Daily rather than aftersun because I find it to be more hydrating and soothing. Another very compelling reason I don’t use aftersun is I once bought Soltan Aftersun Lotion Tan Prolonger thinking the name meant it had a special hydrating formula that stopped your skin from peeling and therefore preventing the loss of your glossy tan… What it actually meant and yet does not mention on the bottle is it has FAKE TAN in it! Now being mixed race I am blessed to have no use for fake tan, so you can imagine my surprise when I noticed my fingers were orange after liberally using this fake tan aftersun as hand lotion for 3 days after my trip, so no more aftersun for me.

    Aloe Vera Gel:

    For burns and severe sunburn. If you have a mini fridge where you are staying, store this in there so when you need to use it, it will be extra cold and soothing. Just don’t forget to pack it when you leave.

    Bonjela:

    I am super prone to ulcers, sometimes they’re stress induced but they are also a result of me being way too excited when I’m eating something super yum and I end up chomping down on my cheeks. Ulcers ruin all eating experiences for me so I always have Bonjela on me.

    Plasters:

    I always pack a few blister plasters because I’m on my feet a lot when I’m abroad. Though I wear in my shoes I can still get blisters after longs days of walking, and as comfortable as my hiking shoes are they aren’t the most stylish footwear. Another reason I pack blister plasters are to protect my feet from new shoes that I might buy on my trip. 

    Antibiotics:

    This is not something I travelled with before my RTW and I only travelled with them until I had my wisdom tooth removed (yeah yeah wisdom, laugh it up, the dentist did too). I had an impacted wisdom tooth which I couldn’t get removed until after I returned so to cure any infections (which happened often) whilst I was away, my dentist prescribed one course of antibiotics should the worst occur – thankfully it didn’t and these were responsibly disposed of correctly.

    Aqua Ear:

    I went scuba diving for the first time in the Great Barrier Reef, two days later I arrived in Sydney with irritated and itchy ear canals. I couldn’t hear anyone properly and the only way I could describe it was as though someone was covering my ears with their hands – I knew people were talking but I couldn’t understand them all. The friend I was staying with took me to a pharmacy and after describing my problem they gave me Aqua Ear which was an over-the-counter treatment for swimmer’s ear, which is when water is trapped in your ear canals causing a blockage and irritation. Moments later I had my head in my friend’s lap on a bench outside as she treated my ears. The solution dried up the moisture and my hearing came back almost immediately! Though I don’t take Aqua Ear everywhere I go, I do take it if I’m going to a beach and plan to snorkel or dive, just in case it happens again.

    .

    Aloha, Gabriella

  • 8 items you don’t want in the overhead locker

    8 items you don’t want in the overhead locker

    It’s so frustrating when you realise you need something you packed but it’s currently above your head, and you stand no chance of getting it because either the seatbelt sign is on or the person in the aisle seat is fast asleep. Well I’m here to stop that from happening. So here’s a few items that you won’t usually think of keeping on you during your flight but will most likely need, the majority of which will conveniently fit into a standard toiletry bag or travel pouch.

    1. Money

    For that rare occasion where you see something you want to purchase in the duty free magazine and/or for food and beverages on budget airlines. Note how water is on this list further down, that’s because some airlines, such as WOW Air, charge you for water and it’s triple the terra-firma price.

    2. A pen

    If you’re on an international flight and an immigration card is required then you’ll need one of these to fill it in onboard. Those who don’t have a pen to hand have to wait until they’re at passport control where it’s a fight for one and space to lean. Imagine how smug you will feel waltzing past the crowds knowing that yours is complete – time saver! Also, considering they don’t hand them out with the cards, you will no doubt be popular amongst the travellers in your row.

    PFH Top Tip: You will want to have your accommodation information and passport to hand to complete the form.

    3. Headphones

    Let’s face it, the flimsy set you’re given onboard aren’t the best so it’s nice to be able to wear your own ones, a bit of home comfort. The airline’s headphones usually have a dual jack adapter attached to the end so make sure you use this before inserting them into the arm rest. However, if the airline is carrying decent noise cancelling headphones and yours aren’t, I would opt for these instead – no more sniffing, snoring or baby cries, yay!

    4. Tissues

    They are handy for multiple reasons, some of which are:

    • Your nose will dry out along with anything up it so you will want to keep that passageway clear.
    • It’s something to dispose your gum in when there’s no sign of the attendant’s rubbish bag.
    • Nosebleeds can occur with the altitude so avoid a crime scene by having something to catch it in straight away.
    • A spot of turbulence or an overly expressive elbow could take out your drink at anytime so as that G&T makes its way from your tray table to your lap and beyond it’s good to have those tissues for mopping.
    • Those inflight movies can be real tearjerkers, my partner sniffled* at the end of Eddie the Eagle and I was a mess after Hidden Figures – dry those tears before the sobs can be heard.

    *blubbered like a proud parent at graduation.

    5. Sweets, snacks and chewing gum

    Sweets and chewing gum can help ease popping ear discomfort when flying, plus gum is a quick fix to freshen your breath after eating or sleeping.

    I always have some snacks on me such as crisps and dried mango, even if there is a complimentary food service included, this is mainly because I’m asleep when the food comes around, but I also get peckish outside of meals so it’s nice to be prepared.

    6. Antibacterial gel or wipes

    I don’t believe in religious use of these because they can dry out your skin and they’re not great for building your immune system, but if you’re about to eat with your hands it’s not the worst idea. Give it time to dry off though so your hands don’t taste like the cheap vodka you used to drink in college, unless that’s your thing. The wipes are also handy for cleaning your tray table and headphones before use.

    7. Book or magazine

    For when there’s no inflight entertainment or if your eyes need a break from your little screen, which I recommend you do on long-haul flights.

    8. Water

    I’ve said it before and I will say it again, always pick up a bottle of water in the airport (post security). Yes it will take up a bit of room in your seat pouch, but trust me you won’t regret it. You must stay hydrated during your flight but aside from that it is also useful if you get a cough from the dry air, or if you spill some food or drink down yourself, you can quickly blot it out.

    .

    For a similar themed post check out 10 hand luggage items for staying fresh on a flight, a few items overlap so if you’re prepared with the above you’re already a step ahead!

    Aloha, Gabriella

    Pin this post


  • Riad Kaiss, Marrakech, Morocco

    Riad Kaiss, Marrakech, Morocco

    Despite being just a five minute walk away from the hustle and bustle of the vibrant souks, Riad Kaiss is a tranquil oasis, whisking you away from the commotion to embrace you into a serene haven.

    In 2017 we stayed here for seven nights from the end of May to the beginning of June. I must have trawled through at least 100 hotels online trying to find the right one. Originally I wanted to be outside of the Médina where I was sure it would be quiet, but mediocre reviews and standard room design was pushing me closer to the heart of Marrakech. I made the decision to find a riad mostly looking for the kind of interior design dreams are made of, but I was put off by iffy reviews until I found Riad Kaiss (and her sister hotel Dar Anika) and after reading endless glorious reviews I knew this was the one.

    Getting There

    Riad Kaiss uses a private taxi company and will arrange the airport transfer for you. It is a fixed price which is added to your bill at the end of your stay, so you won’t need the money to hand. The journey takes 20 minutes, traffic permitting, so just sit back and admire the scenery as you ride in comfort. The hotel will also arrange for you to use the same taxi company should you want to get anywhere else without walking.

    Location

    Jardin Majorelle

    The location is perfect, it’s just two minutes away from Riad Zitoun Lakdim, which is not only one of the main streets that takes you straight into Jemaa el-Fna, it is also lined with little independent shops, hammams and restaurants such as Zwin Zwin Café. The aforementioned Jemaa el-Fna and souks are less than 10 minutes away and it’s no more than 20 minutes via taxi to further tourist hot spots such as Jardin Majorelle.

    PFH Top Tip: The shops on Riad Zitoun Lakdim sell the same goods as the souks but often at a cheaper price than you would get bartering. This is because they set the barter price higher than the shops so that if you knock it down you think you’re getting a good deal but you’re actually still paying more.

    Welcome

    Before we had even arrived in Morocco, the hotel was already reaching out to us to make sure we could make the most of our stay. After booking via hotels.com, we received an email directly from Riad Kaiss packed full of attachments such as restaurant menus, their hamman and massage price list and so much information about excursions. I am aware this is to encourage you to spend more money with the hotel, but there was something endearing in them taking time to contact us directly.

    Camel ride excursion booked through Riad Kaiss

    Upon our arrival we were offered rose water to cleanse ourselves after our travels, after which we were served milk and dates followed by traditional Moroccan pastries and sweet mint tea, a digestive served in abundance across Morocco.

    After this generous welcome feast we were greeted by Abu, who is one of the two brothers that own and run Dar Anika and Riad Kaiss. He gave us a tour of the riad and showed us a couple of rooms so that we could pick our favourite one – each one had a different design. As our luggage was taken to our room he sat with us in the courtyard under a canopy of dangling vines surrounded by candle lit lanterns and proceeded to show us a map of Marrakech. He circled the best cafés, restaurants, evening entertainment, museums and so much more.

    Souk Semmarine

    The Room

    The decor was so ornate and authentic down to the last detail. The thick wooden door was hand painted and opened with a gold key accompanied by a little tassel, inside stood a four-post bed from which hung huge white linen drapes. Surrounding the bed were wardrobes, tables and chairs all wooden with intricately carved patterns, even the window to the courtyard was a wooden carving. In the centre of the tiled floor lay a large worn rug resembling those in the souks and when you looked up the ceiling was painted to look like the zellige tiles featured on almost every wall and floor in Marrakech. There was so much detail to every inch of that room that even the complimentary bottle of water was presented in a hand cut metal case with a pattern similar to the lamps dotted around the room.

    Fresh flowers were everywhere you looked and each day the bed was scattered with rose petals and the fruit basket was fully stocked with any fruit you desired from the market – we were assured they were all washed properly in advance. As if there wasn’t enough to look at, in every corner sat hand woven bread baskets and painted plates, the likes of which you could buy in Jemaa el-Fna.

    In terms of electrical amenities there were plenty of plug sockets and a fully stocked mini fridge stood discretely behind yet another very delicately hand carved door. Though there was complimentary wifi don’t expect a TV, Marrakech is anything but shy of entertainment so there’s no reason to stay indoors.

    My only dispute with this incredible room was that it didn’t have a full length mirror and the light was dim during the day which was an inconvenience when putting an outfit together, but they’re not at all the worst problems for a hotel room.

    The Bathroom

    Our bathroom was just to die for, it was everything I expected a Moroccan riad bathroom to be. Every detail of our bathroom was not only instagram worthy but it was pure inspiration for how I want my bathroom to look at home. At one end was the toilet which was partitioned for privacy by yet another amazing door (I mean, those doors, drool!). At the other end was an enormous terra-cotta alcove shower framed by a colourful zellige, different to the one running across the rest of the bathroom walls. Within the shower was a further two alcove shelves containing little clay pots full of heavenly scented argon oil shower cream and shampoo.

    Between the toilet and shower was the dressing area. Hung above the brass dome sink embedded in marble was a huge mirror with a zellige frame. Atop of the marble sat a vanity mirror, tissues encased in silver, clay pots full of cotton pads and ear buds, flowers, towels scattered with petals and a brass dish with argon oil soap wrapped in a leaf. Even the hooks were hand crafted and upon them hung fluffy rose sceneted robes with slippers sitting pretty beneath rose petals – yep, even the slippers were adorned with rose petals!

    The Riad

    A riad is a traditional Moroccan house which has an interior andalusian-style courtyard. If you are looking for a jaw-dropping and authentic aesthetic then you want a riad within the Médina over a resort hotel just outside the Médina.

    I don’t think I could ever do the courtyard justice, there was so much to look at. The floor was tiled in bright colours, fountains were loaded with fresh flowers every morning, huge trees stretched up from the ground and draped multiple vines down all around you, big lanterns surrounded the base of the trees, tables and chairs were in-between them and at one end stood a big wooden swinging bench – It was stunning! Surrounding the courtyard were multiple little rooms, each more detailed than the last – in Marrakech more is more! You could have breakfast in any of these rooms as well as the courtyard.

    The rooftop divided into three sections. The first had the swimming pool, a small enclosed area with a pool suitable for no more than a paddle but perfect for a refreshing dip. Around the pool were sun beds accompanied by a straw hat, fan and a towel.

    The second rooftop area featured covered seating should you want a change from the courtyard for breakfast.

    Finally, the third rooftop area was set just above the other two. A little staircase took you up to more sun beds, a few tables and chairs, and a double bed beneath an iron gazebo. This is where we spent our time chilling out with music and a cold drink when we weren’t outside of the Riad. It was too hot to sit out directly in the sun so this provided shelter from the rays.

    Like all good riad hotels should, Kaiss has a hammam. A hammam is a Turkish bath not unlike a dark wet room just with good interior decor. In this one there is a sink and a shower, used for cleansing you before and after your treatment, and 2 wooden slatted beds where you receive your treatment*. The best way to relax after your time in the hammam is a massage, there in a treatment room within the hotel that offers single and couples’ full body massages.

    PFH Top Tip: Be prepared for full nudity and boob brushing – all legitimate and not intended to be harassment, like almost all cultures excluding us English prudes, nudity in public baths is the norm.

    Dining

    The restaurant at Riad Kaiss wasn’t open during our stay because the owners were still refining the menu so the only food you could eat was breakfast but boy did they make it count! Their breakfast immerses you into Moroccan culture by serving up a staggering six course extravaganza! You start with a very traditional harira soup – eating a hot vegetable soup first thing in the morning did take some getting used to but it was delicious. Then along side freshly squeezed orange juice and a hot drink of your choice, you are served yoghurt and a bowl of tropical fruit salad (Oh I nearly forgot, roaming the courtyard are the friendliest tortoises who are partial to a bit of fruit salad, should you want to share!). After this you are brought a crêpe and a slice of cake, similar to a madeira sponge. Following your cake, a selection of jams, butter, honey and peanut butter come out with a bread basket boasting a variety of freshly baked rolls. To finish it off you are offered eggs of your choice and a msemen which is a fried savoury pancake filled with either cheese or vegetables. This breakfast is not for the faint hearted but all courses are optional.

    I should also note that we ate in the rooftop restaurant in Dar Anika, the sister hotel. It was so good we went twice. The view of the sun setting over the rooftops as the prayers for Ramadam are sung out on loud speakers across the Médina is a memory I hope to never forget. The food was outstanding too, their lamb shoulder tagine was the best tagine that we had the pleasure of eating.

    Service

    Every evening a tray of sweet milk and dates was left in our room, fresh juice was offered to us every time we returned to the hotel, and we were given a mobile phone for the duration of our stay should we need to contact the hotel directly for anything at all. We were escorted to the restaurants within walking distance in the evenings, all the staff asked us about our day and how we were enjoying Marrakech, and we were even offered help with bartering if we wanted to get the price down on something in particular.

    After checking out we took on one last trip into the souks before leaving. When we came back we were offered a room to shower in before our flight, and upon leaving we were presented with a hand written note from Abu and a packed lunch for our journey home. I’ve never known a hotel to do all of that, to me that is outstanding customer service.

    .

    If you’re looking for a combination of luxury and authenticity I highly recommend staying at Riad Kaiss or Dar Anika during your time in Marrakech, rooms starts from £186 per night. If you’re still not convinced I’m happy for you to email me here with any questions about my stay at Riad Kaiss.

    Aloha, Gabriella

    .

    Full disclosure – I am not sponsored by Riad Kaiss and have no paid partnership with the hotelier, these are just my own opinions and reviews. Starting price per night was true at time of posting.

  • How to ace airport security like a pro

    How to ace airport security like a pro

    Safety and necessity aside, airport security can be a bit of a Debbie Downer when you are beyond eager to get those glorious duty free shops. I’m definitely not suggesting that you will have full control of how quickly you can get through, but I have got a few pointers that will speed you up for sure. 

    It goes without saying that you are not to pack any of the banned items and that your liquids should be 100ml or under and in a clear 20cm x 20cm ziplock bag, but if you are uncertain of what is and isn’t allowed check out British Airways’ Banned and Restricted Items.

    Preparation

    I aim to have everything out and ready just before I get to the front of the line so I don’t back everyone up at the conveyor belt. 


    • I put my passport away securely because I won’t need it for a little while.


    • I take off my watch and put it securely in my bag.


    • I take my coat/jacket off – if I’m wearing one – and fold it up.


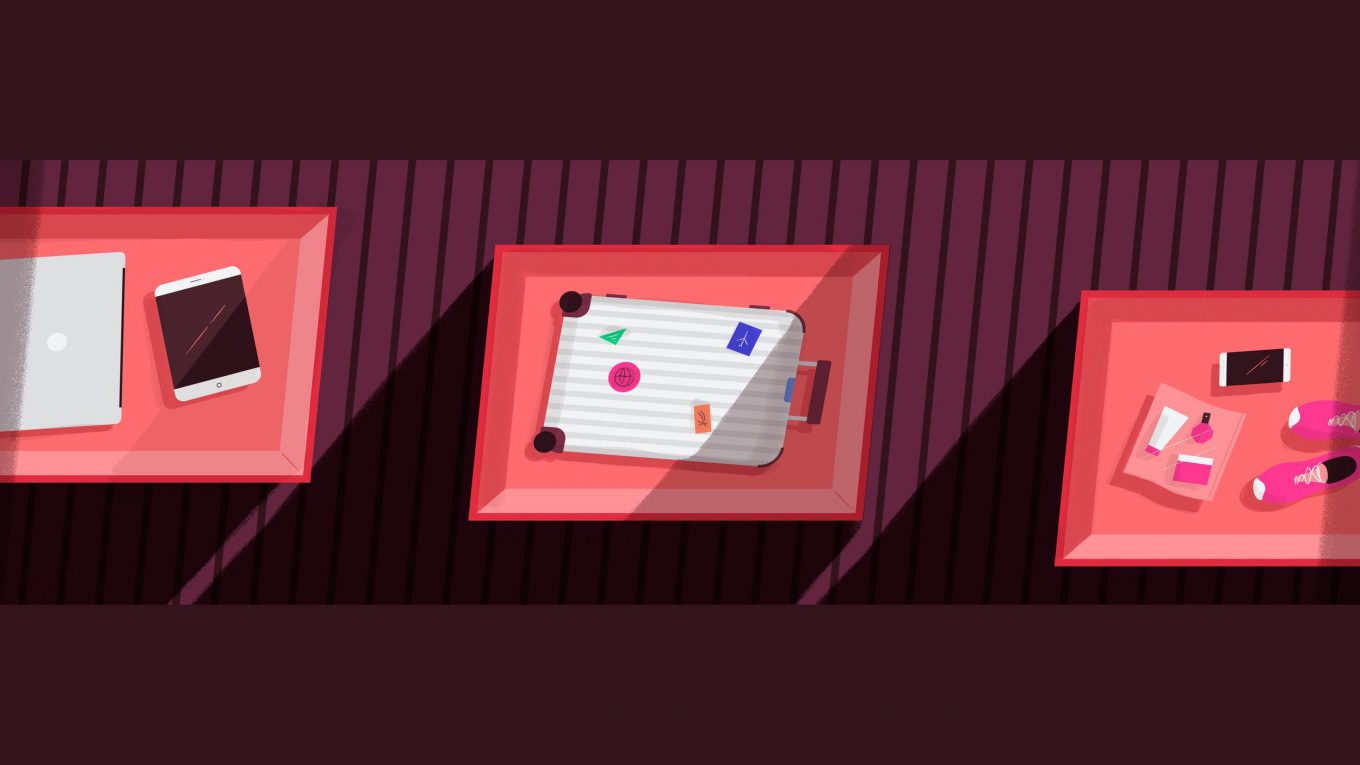
    • I take out my liquids bag, phone and laptop.


    This means that by the time I get to my box tray, I only have two things to do which are put it all in the tray and take my shoes off. 

    Footwear

    Some airports require you to take your shoes off so that they can be scanned. The best thing to do is keep this in mind when picking your travel shoes. Avoid shoes which are difficult to take off and put back on again but in saying that, if you are going to wear slip-ons please wear socks to walk through. Who knows how many dirty bare feet have walked that floor, so steer clear of those germs and cover your feet.

    PFH Top Tip: Try not to wear white socks because they will turn black by the time you get your shoes back – I wore white trainer socks under my white converse when flying to Morocco and I was genuinely shocked at how quickly my soles changed colour!

    Jewellery

    Try not to wear excessive jewellery when travelling, for example necklaces and bracelets. I understand if you have some sentimental pieces that you always wear or wear for luck when travelling, so my advice is to put it in a little bag and keep it safe in your hand luggage until you have made it through security where you can put it on. I prefer to do this because I don’t want to risk forgetting or dropping anything small.

    Belts

    When I went to Paris for NYE I received the highly coveted Gucci belt as a belated Christmas present. I wore it every chance I got including to travel home in, totally forgetting why I don’t travel with a belt. It’s so inconvenient to take off and put back on again with everything else going on. Never mind what a faff this is, I also find it super awkward to fiddle about near your crotch in front of a bunch of strangers.

    Trays

    Whilst sticking to the rules – tray content requirements vary at different airports – try to use as few trays as possible. It’s easier to pick up and move one tray of lose belongings and it means you don’t have to wait so long for it to all come through. Also be helpful and stack the empty trays at the end, this is actually one of my pet peeves. There is always someone who complains that their belongings are taking forever to come through, and yet they are the same people who leave their multiple trays on the belt after they have retrieved their things. Empty trays block the belt and hold everyone up, create good karma and stack the empty ones, even if they’re not yours, it’s good travel etiquette. Speaking of, don’t hang around at the end of the belt, there are chairs provided for you to put your shoes and coat back on, take advantage of this for some personal space after what can be an invasive experience.

    These tips are surprisingly simple, I know, but they are so efficient. Some seem so insignificant but they have not only saved me time by just being one little step ahead but it prevents me from forgetting and leaving anything behind.

    Though my tips are to help you get in and out as quickly and as fuss free as possible not everything is in our control, so don’t stress if someone else holds you up or if you get picked for a random search test, remember it’s all in place for our security.  

    .

    Safe travels!

    Aloha, Gabriella

    Pin this post


  • Iceland itinerary – a five day trip to Reykjavik

    Iceland itinerary – a five day trip to Reykjavik

    In March last year my wonderful boyfriend took me on a trip to Iceland to see the Northern Lights for my (belated) birthday. It was one of our shorter trips lasting just 5 days, but we planned those days well and easily checked off all the must-do things this beautiful insta-worthy country has to offer. Let me take you through what we did with tips for surviving the cold and making the most of your activities.

    Day 1

    Flight with WOW Air from Gatwick to Reykjavik.

    Check in to The Swan House.*

    Dinner out on the main shopping street, Laugavegur.

    Gray Line Northern Lights Mystery Tour.**

    Day 2

    Supermarket shop.

    Sólfarið – The Sun Voyager sculpture.

    Harpa Concert Hall.

    Hallgrímskirkj.

    Explore the little shopping streets in central Reyjavik.

    Day 3

    Coach to Blue Lagoon.

    Blue Lagoon Premium Experience.***

    Dinner at Blue Lagoon Lava Restaurant.

    (We actually saw the Northern Lights a second time on the coach home)

    Day 4

    Hire a car at Procar to drive the Golden Circle.****

    Þingvellir.

    Geyser.

    Gullfoss.

    Grotta Nordurstrond public car park, after dark to catch the Northern Lights one last time.

    Return the hire car.

    Day 5

    Last bit of souvenir shopping.

    Flight with WOW Air back to Gatwick.


    *The Swan House

    Iceland is very expensive! On our first night we went out for dinner to a no-thrills Italian restaurant not far from our hotel, we had one alcoholic drink and a bowl of pasta each and the bill was close to £120. Considering it was equivalent to the likes of a high street chain restaurant, imagine what eating out every night will put you back by the end of your trip. The solution? Go self-catering. The Swan House is a conveniently located hotel full of beautifully furnished and fully equipped apartments. The closest mini-market is just a six minute walk away and sells everything you need to whip up breakfast, lunch and dinner for your whole stay, plus it will cost less than just one night’s dinner at a restaurant.

    **Aurora Borealis

    Grey Line Northern Lights tours will take you every night until you either see the lights or your trip ends. We were incredibly fortunate to see them on our first night but don’t be fooled, it’s not an easy feat. The weather is freezing cold, the wind is sharp and unforgiving, it’s virtually pitch black and you’re in the middle of nowhere.

    PFH Top Tips for seeing the Northern Lights

    Clothing


    • Thermal base layers – leggings, vest and long sleeve top.


    • Sports tights over the thermal leggings because they are a quick dry fabric, should you get caught in a snow flurry.


    • Foldaway waterproof over trousers.


    • Socks with ski socks on top.


    • Snow boots or hiking boots with a sheep skin insole.


    • Fleece.


    • A waterproof, down filled puffer-coat that zips up to your nose. Preferably with a fur trimmed hood which is designed to not only look good but trap snowflakes before they land on your face.


    • Ski gloves, and if possible wear thin knitted woolen gloves underneath.


    • Fleece lined hat.


    • Thick knitted snood so the wind can’t pull it off, unlike a scarf.


    Photos

    Keep in mind these are tips we picked up on the trip, I am no professional photographer and I strongly recommend researching these tips further.


    • Bring a camera where you can manually change the settings.


    • Charge that baby to the max and bring a spare battery.


    • Bring a tripod, we didn’t and because you need a slow shutter speed to capture that light our photos came out a little shaky (which you have undoubtedly noticed) despite our makeshift stabiliser or for a more technical term, a pile of rocks.


    • Drop your aperture to the lowest number you can. This is really important because you can’t always see the true colours of the lights with the naked eye but by doing this your lens is taking in more light than you can see.


    • Extend your shutter speed so your lens is open for longer to absorb the light I mentioned before.


    • You won’t get it perfect the first time and you can’t test it until your lens is pointing up at that display, so don’t be disheartened if the first few come out crappy. Just keep fiddling with those settings and you’ll get there. The best thing you can do is familiarise yourself with those settings before your trip so you know where they are when you need them.


    Tour:


    • You could be in for a long night and your short trip means you will be up early the next day so sleep on the bus. The tour guide will wake you up when the lights come out, just be ready to roll.


    • Though you are surrounded by other tour groups, you are still in the middle of nowhere and there is a lot of waiting so bring a bag of snacks – go easy on the liquids though because the only relief is your bus toilet and it’s not easy to get in and out of those layers in such a cramped environment.


    ***Blue Lagoon

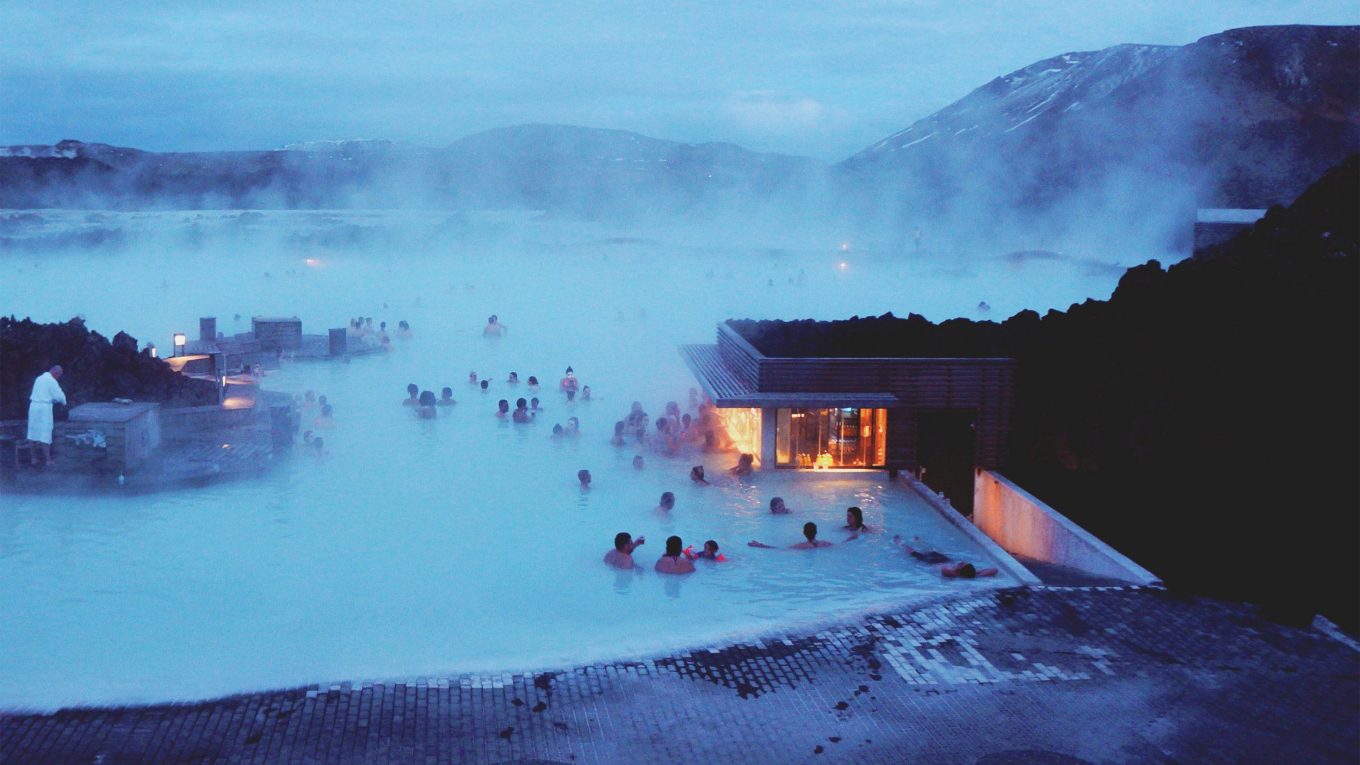
    Listen to me very VERY carefully and if you take anything from this post let it be this. That geothermal water will damage your hair, it will dry it out and make it a texture that resembles knotted tacky straw. Trust me no matter how much conditioner you put on that hair – and considering it’s free in the showers so I used over half a full-sized bottle – it isn’t likely to settle for days. I even borrowed someone’s coconut oil but nothing was taming my barnet. You see I did what you are thinking of doing, I prioritised my photos at the expense of my hair. I have at least 100 photos of me pulling and flicking my hair in various poses and the only advice I can give you is: 


    • Tie up your hair the moment you are done.


    • Go back to the changing room and run as much conditioner as you can through it.


    • Bring every protective/conditioning product under the sun for afterwards.


    • Don’t apply heat to it until the next day, at the very least.


    Don’t panic for the long term though, a few washes and conditioning masks over the following couple of days will eventually sort it out.

    I also know that if you’re anything like me, you want makeup on in your snaps so get your photos first thing with your makeup on and then take your makeup off in the changing rooms (bring makeup remover) to return to the lagoon for face masks. Whilst you’re in the changing room, return your camera/phone to your locker because you will want to relax and not worry about holding it. On that note, dear Lord please put a wrist strap on your camera/phone, I genuinely know someone who forgot they had their gopro in their pocket, dropped it and spent the day scouring for it across the gummy floor beneath opaque water. Someone must have been looking out for him that day because he recovered it, but please don’t take that risk.

    Speaking of that opaque water, be prepared to wash out your swimsuit like a bajillion times because the silica is going to cling on for dear life, rinse that thing until it drips clear and not white. 

    ****Golden Circle

    The Golden Circle is a driving route that takes you through snowy peaks to explosive geysers, tranquil national parks and a magnificent waterfall. Though you can take a guided tour, I highly recommend driving it yourself so that you can enjoy the beautiful surroundings at your own pace and stop to take photos whenever you please. 

    As you can see in the itinerary above, we set aside a whole day for this road trip. That’s because, depending on how thorough you are, it can take somewhere between 4-10 hours. Thankfully the roads are very well maintained so this will not not be a delaying factor on your trip. The rental company will provide you with the route map but I suggest downloading the area for offline use on google maps. 

    Pack up lunch and flasks of hot drinks in advance, this is not only useful if you get stuck somehow and need sustenance (again, very unlikely), but also the food choices en route are few and far between and honestly not that great. The three main points of interest are Þingvellir, Geyser and Gullfoss:

    Þingvellir

    Is a historical national park which hosts the site where Vikings settled in the 10th century to build the world’s oldest parliament. It is also where the North American and Eurasian tectonic plates meet, both of which are being pulled apart at a rate of 2cm per year and has thus created the Þingvellir rift valley.

    There is no entrance fee for the park but parking costs 500 ISK. However, this is an all-day ticket and is valid in all the Þingvellir car parks.

    Geyser

    The Great Geyser is located on a geothermal field and is surrounded by hot springs and sporadically bubbling mud pits boiling away beneath the surface. It is the oldest geyser to be documented with the first known account written in 1294. The most active geyser in the area is Strokkur which ejects water up to 30 metres high every couple of minutes.

    There is no entrance or parking fee for this tourist hot spot – pun intended. Speaking of hot spots, please don’t do an Ed Sheeran and ignore the warnings to stay within the marked pathways. The barriers are there for a reason, the ground is literally boiling hot and you will burn the skin off your foot should you go wrong, which is exactly what happened to Mr Sheeran.

    Gullfoss

    Gullfoss is the iconic 32-metre-drop waterfall fed by the second largest glacier in Iceland. Be prepared with waterproof clothing as the spray travels. The site hosts the biggest gift shop of all those on this excursion featuring all sorts of handmade trinkets including a selection of Lopapeysa, Iceland’s traditional knitted jumper (come with deep pockets if you wish to purchase one of these though). There is no entrance or parking fee for this end-of-trail destination.

    .

    Hit me up here if this has been a useful read for planning your Icelandic adventures or if you just want a sympathetic ear for your Blue Lagoon hair scare story!

    Aloha, Gabriella 

    Pin this post


  • My ultimate interactive packing list

    My ultimate interactive packing list

    I love lists! I love lists so much that even my lists have lists. What’s my favourite list I hear you say, well that’s easy, it’s my packing list! The first thing I do once we’ve started to book a trip is draft my packing list, even before I’ve researched what I’m going to do – which of course helps me plan appropriate outfits – I’m diving straight into my template and typing up all the outfits in my wardrobe that I can take with me. Seriously my screen saver is so littered with my packing lists I can barely see Margot Robbie’s beautiful face on my Pan Am screen saver, criminal I know!

    I know it seems eager, but there is method to my mad-lists! without fail my first draft will contain about 30% of items I won’t need, so by starting early I can keep going back to it and taking things out and sometimes replacing them with more practical items, especially after I have started to plan activities. When I am making my packing list I usually put a * next to “maybe” items, this helps me throw things out when I need to whittle it down. If you’re anything like me you will end up buying clothes when you’re away anyway so let’s make room for that!

    In time I have created a template which hasn’t failed me yet. The key to a fail-proof packing list is categories and subcategories. When making a list, nothing is too trivial, include everything and you won’t forget anything. Sounds obvious I know, but my partner once refused to put underwear on his packing list because why would you forget underwear?… Well I’m sure you can guess what we had to do first after checking into our hotel in Brussels… Be specific too, describe the item of clothing with brand, style and colour, for example, “Joules stripy top with gold stars”, it will make a less cryptic list when it comes to packing.
    Check out my interactive packing list below, just one click you will be able to edit and customise your very own*. You can change the destination and replace items with full descriptions of everything you want to pack, just like my example above. If you need help editing it, take a look at the GIFs below, it’s super easy and saves trees, yay!

    In time I will post about what you can pack and wear in different climates and how to adapt your wardrobe to alternative cultures, but for now I’ve kept it general and flight-friendly with items for both male and female ready for you to personalise for your next trip.

    Happy Packing!

    *Customisation requires Adobe Reader and the file may need to be saved first.

    DOWNLOAD


    Edit Packing List

    Customise your list with the destination and exactly what you want to pack.

    Big trip or struggling to pack light? No problem, I’ve got you covered! Use the scroller to view all your items.

    If you want to copy it into your preferred planning assistant/app, you can export the list to plain text and paste it wherever you want.

    .

    Let me know if you found this helpful or if you think I missed off something we would die without!

    Aloha, Gabriella

    Pin this post


  • 10 hand luggage items for staying fresh on a flight

    10 hand luggage items for staying fresh on a flight

    Due to recirculated air and low oxygen levels in the cabin, flights, no matter the length, are dehydrating and can leave you feeling pretty grotty afterwards. To help battle this, here are the most important items that I always pack in my carry on and tuck inside the seat pocket for the duration of my flight, all of which fit into a standard toiletry bag: 

    1. Makeup removal wipes

    Travel-size makeup wipes are the best way to quickly remove your makeup onboard. It is very important to remove your makeup on a long haul flight even if it is daytime. Your skin will dry out and your makeup will clog your pores, plus we’ve all made that mistake of sleeping with our makeup on and had a moment of silence for the fallen eyelashes who made a sacrifice for our laziness. 

    2. Flight or night cream

    Soap and Glory have a great Night and Flight Cream. It’s under the liquid restrictions and the container is sturdy which will prevent leakage in your plastic zip lock. The consistency is thick which means your skin will slowly absorb it throughout your flight, and it smells like peaches which isn’t overpowering for your fellow passengers. If you prefer a lighter texture I highly recommend Clinique’s Moisture Surge, it’s a deeply hydrating moisturiser which I frequently use as a mask and allow it to sink into my skin over time. This will instantly perk up your skin after any flight.

    3. Toothbrush and toothpaste

    Most long haul flights will either hand you a wash bag or you can go to the galley to ask an attendant for a toothbrush set. However, I always carry mine on me when I travel just in case I need to brush my teeth anywhere on the go. Aside from cleaning bacteria, brushing your teeth whilst travelling does three crucial things for you:

    1. Helps your body get into that sleep mode – you wouldn’t go to bed without brushing your teeth would you?
    2. Gets rid of any funky morning breath you may be imparting on your fellow passengers. 
    3. Makes you feel fresh and ready to start whatever lies ahead.

    PFH Top Tip: Buy some toothbrush head covers to protect it from picking up any nasties in your bag. I get mine from Tiger, you can get a pack of four for just £1! Make sure you rinse them out after every use.

    4. Sleep mask

    I find these work in two ways. One is that it blocks the light and prevents me from getting disturbed by the glare of the night owls’ TV monitors. The second is that I feel like if I can’t see them then they can’t see me and it’s the closest you’ll get to feeling like you’re in bed and not sleeping with a bunch of strangers that didn’t buy you dinner first! Sleep is imperative for staying fresh not only when flying but with any form of travel, also it makes the time pass quicker!

    5. Tissues

    Whether you have a little travel pack or just stashed some toilet roll, it’s always handy to have something to blow your nose. Just like your skin, your nose will also dry out on a flight which will not only block it but in some cases the altitude can cause nosebleeds.

    6. Chewing gum or breath mints

    For two good reasons, the first is to ease popping ears during flights, my partner is a nervous flyer and something to suck or chew always calms his nerves and distracts him when his ears pop. The second is if you can’t get to the bathroom to brush your teeth, gum/mints will quickly freshen your breath.

    7. Deodorant

    Travel can be stuffy, stressful and if it’s long haul you can’t wash so pack some deodorant or deodorant wipes to freshen up in the restroom. Avoid aerosol cans so that other travellers don’t get choked by the fumes.

    8. Makeup

    Your “I can’t be seen without my…” makeup items so you can reapply your face when the captain announces the 30mins from landing cue. Lip balm is a crucial item here for rehydrating those lips.

    PFH Top Tip: I find popping on a bright lippy perks up your face reduces the appearance of tired eyes.

    9. Compact mirror

    So you can see everything you are doing in the above.

    10. Water

    Ok you can’t pack it due to liquid restrictions and it won’t fit into a toiletry bag, but it is so very important to drink as much water as you can when flying. For the reasons mentioned at the start, you will need to replace the fluids lost, so pick up at least 1L of bottled water at the airport – post security – because complimentary bottles are too small, cups will spill on you whilst you sleep and buying it onboard is costly.

    .

    Wishing you healthy and hydrated travels!

    Aloha, Gabriella 

    Let me know if you found this helpful, also I would love to hear what items keep you fresh in the air.

    Pin this post