Author: Gabriella Wisdom

  • Mexico itinerary – a thirteen day trip to Cancún

    Mexico itinerary – a thirteen day trip to Cancún

    Mexico! The land of siestas, tequila and some damn good food! Originally we were looking at Cabo on the Pacific side, but in the end we chose Cancún for its turquoise waters and Maya history. Only the Caribbean side has ancient Maya ruins, the most famous of course being Chichen Itza. 

    May is out of season for Cancún, but unlike some destinations like Amalfi where it can be freezing out of season, it’s probably the best time to go: it’s after “spring break woo hoo hoo” (not only is that a Friends reference but I’m also very grateful that it’s after Spring Break), before the summer holidays when the prices get jacked up and the weather is supposedly the best of the year according to locals.

    This was mainly a beach vacay, which you’ll be able to tell from my itinerary and the length of the trip compared to my previous posts, but we did some amazing excursions that I really want to share with you.

    Day 1

    11.20 flight from London Gatwick airport to Cancún International Airport.

    Hotel transfer from airport via Hoppa operated by Best Day.

    Check into Hyatt Zilara.

    Day 2

    Breakfast.

    Walk to Flamingo + La Isla shopping malls.

    Dinner.

    Day 3

    Breakfast.

    All-inclusive Cozumel snorkel trip with Aquaworld.

    Dinner.

    Day 4

    Breakfast.

    Book excursions at the Best Day desk at the hotel.

    Lunch.

    Walk to Kukulcan plaza shopping mall.

    Teppanyaki dinner.

    Evening cocktails.

    Day 5

    Breakfast.

    Walk along the beach.

    Lunch.

    Beach.

    Dinner.

    Day 6

    Watch the sun rise from the beach.

    Breakfast.

    Beach.

    Lunch.

    Beach.

    Dinner. 

    Hotel’s Mythology show.

    Day 7

    Breakfast.

    Chichen Itza tour with Cancún Passion. 

    Dinner.

    Day 8

    Breakfast.

    Beach.

    Lunch.

    Walk along the beach.

    Walk to La Isla shopping mall.

    Dinner.

    Evening cocktails.

    Day 9

    Río Lagartos and Las Coloradas tour with Cancún Passion.

    Dinner.

    Day 10

    Breakfast.

    Beach.

    Lunch.

    Dinner.

    Enquire about renting a car from Hertz.

    Day 11

    Breakfast.

    7am pick up rental car at Hertz.

    Cenote Dos Ojos.

    Drive to Tulum.

    Smoothie bowls at Matcha Mama.

    Lunch at Akiin beach club.

    Drive back to Hertz in Cancún.

    Dinner.

    Day 12

    Watch the sun rise from the beach. 

    Breakfast.

    Beach.

    Lunch.

    Walk along beach.

    Dinner.

    Evening cocktails.

    Day 13

    Breakfast.

    Last 45 mins on the beach.

    Check out of hotel.

    Souvenir shopping at Flamingo mall.

    Lunch.

    Transfer from hotel to airport.

    17.15 flight from Cancún International Airport to London Gatwick.

    Shopping malls

    Flamingo

    The Flamingo mall was located on the other side of the road to our hotel. This is a great one for souvenir shopping because it is full of them, all competing with each other with prices and deals; it’s here that you can find ridiculous offers such as buy one get one free on everything. Aside from souvenir shops there’s an abundance of pharmacies and two restaurants: Outback Steakhouse and Bubba Gump.

    La Isla

    The La Isla shopping centre is about a 20min walk south of Hyatt Zilara. It is full of restaurants, coffee shops and clothing stores ranging from Zara and Roxy to designer shops such as Louis Vuitton and Gucci, down at the Fashion Harbour end. Also here are rental car offices and the brand new Gran Rueda ferris wheel which opened this spring.

    Kukulcan Plaza

    Kukulcan Plaza is the furthest away of the three, taking about 30mins to walk from our hotel. For a more scenic route I suggest walking along the beach, the public beach offers the perfect exit as it takes you right up to the entrance of the mall. Here you can find clothing shops, duty free, mini-marts, a tequila museum and souvenir shops.

    Cozumel snorkelling trip with Aquaworld

    We booked our Cozumel Snorkelling all inclusive day trip with Aquaworld online. It includes the bus from Aquaworld to the ferry port in Playa del Carmen, the ferry ticket to Cozumel, snorkelling trip to Columbia Shallows reef and El Cielo reef, lunch in downtown Cozumel, the ferry back to Playa del Carmen and the bus which will take you back to your hotel. Tickets cost $122 USD per adult and $61 USD per child.

    There’s soft drinks, water, beer, cookies, crisps and plenty of fruit onboard to last you up until lunch. Lunch is served on land after your snorkel trip at La Mission in downtown Cozumel. When you are seated you have a choice of many classic Mexican dishes such as tacos and fajitas. Soft drinks are included but you have to pay for alcohol.

    PFH Top Tip: Reapply your suncream between each swim, the Mexican sun is very hot and the water reflects it onto your skin. Please be careful and look after your skin, I am mixed race and tan very well but even I wore SPF 50 and still got tan lines that day.

    P.S. The snorkel you are given onboard is yours to keep, so don’t leave it behind!

    Colombia Shallows reef

    The first stop is a 30min guided swim in the Columbia Shallows reef. It’s teeming with wildlife which will all be pointed out to you, within the first five minutes of us being in the water a sea turtle swam right beneath us! I’ve swam in many reefs around the world but I don’t remember being in one where the fish are so curious, they all come right up to you, it’s hard to not feel like a Kardashian being swarmed on Rodeo Dr.

    El Cielo

    The tour description on the website was a little misleading, we did make three stops but instead of going to Palancar like it says, we actually went to two different areas of El Cielo. 

    The first stop is where you will find starfish dotted across the seabed. This was one of my favourite photo destinations, the water is crystal clear and the starfish are huge compared to the ones I’m used to in the Norfolk rock pools back home! There are very few tours that stop here so those that do are pricey, but it’s definitely worth it.

    The second is where you stop to chill out in the shallows by the beach. You have about 45mins here to bob around with a soft drink or beer whilst listening to the music blaring from the surrounding party boats. Or… you can do what we did which was stray from the crowds to swim with the wild rays that surround the boats.

    Chichen Itza tour with Cancún Passion

    We booked the Basic Chichen Itza tour with Cancún Passion. It’s a 12hr trip which includes transport, a swim at a cenote, lunch, souvenir shopping and a guided tour around Chichen Itza. Tickets cost $75.65 USD per adult and $51 USD per child.

    Pick up from our hotel was 7.30am but this varies depending on how many pick ups they need to do, ours took quite some time because there were 50 odd people on our tour. On the way home though, they split the group in half, loading them into a second bus based on hotel location, this way the drop offs are much quicker. Despite there being 50 plus people, the coach was very spacious and had air con, comfortable seats and a toilet.

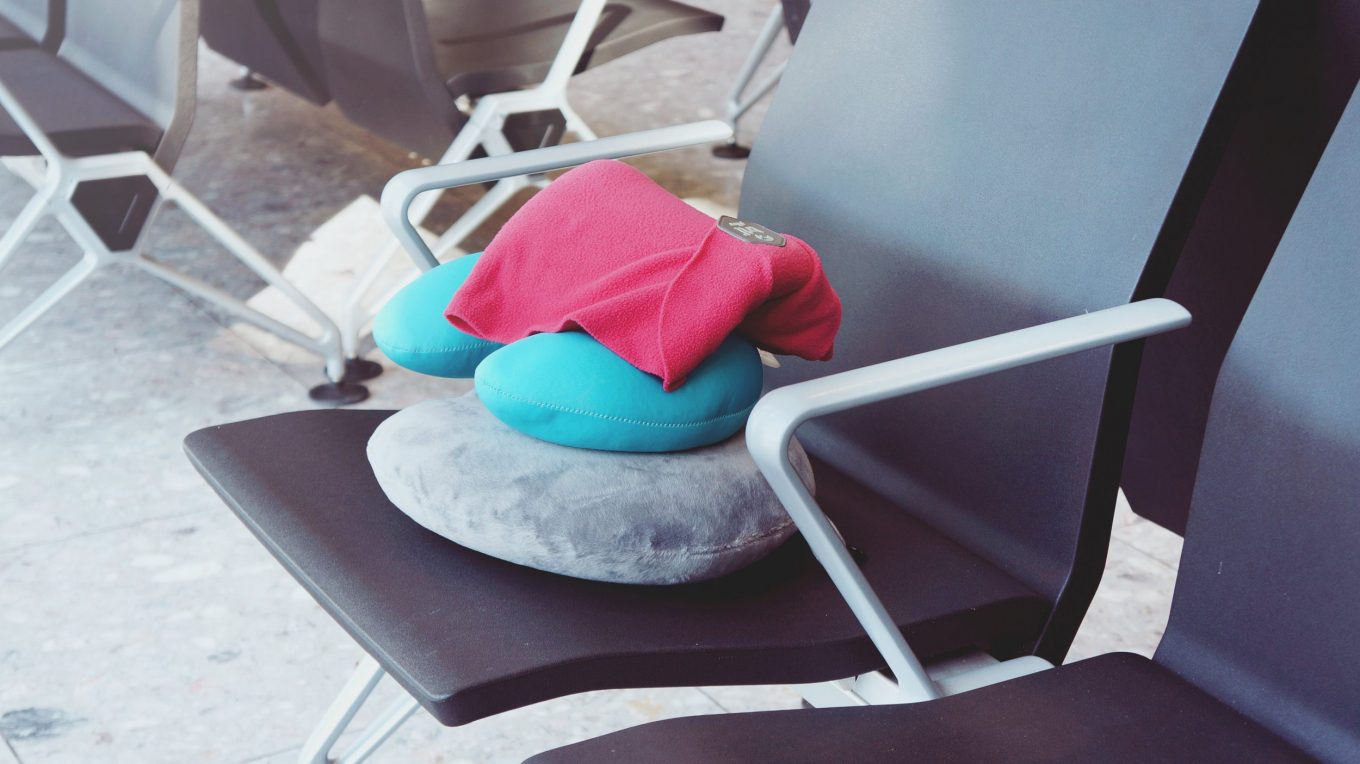
    PFH Top Tip: Bring a travel pillow for the journey, it’s a long drive and you are able to leave items on the bus whenever you stop to get out.

    Cenote Samaal

    A cenote is a naturally formed sink hole which you can swim in. The ancient Maya used it as a sacrificial well, whereas nowadays they are predominantly a tourist destination to escape the heat.

    The cenote we went to on this tour was the Samaal cenote which is 40m deep and icy cold. As it is so deep, it is mandatory to wear a life jacket, this is included in your tour ticket along with the use of a locker. You are required to shower off suncream before entering the water so be mindful of how much you are in the sun. This tour allows for an hour here but it will go by quicker than you think, so make sure you leave enough time to get dressed afterwards. 

    PFH Top Tip: Should you wish to swim you need to bring your own towel. I highly recommend getting a microfibre towel because they dry quickly and take up very little space. I got mine from Mountain Warehouse.

    The Cancún Passion tour runs back to front compared to most of the others, they go to the cenote first because they found all the tour buses went after Chichen Itza which meant it was over crowded and lockers weren’t available. My advice for this is, have your swimsuit on already to save time and, if you wear it, pack your makeup so you can touch up your face for photos at Chichen Itza. To see what makeup I was bringing on excursions check out My travel makeup must haves.

    PFH Top Tip: If you need the toilet before getting in, race there first once your tour guide lets you go because the queue gets long quickly and you don’t want to lose swimming time.

    Lunch

    A buffet lunch is provided at Pueblo Maya, they do a Mexican spread and an international one – it’s not the best food but it’s edible, also drinks are not included. After lunch you get time to wander through their souvenir shop which is divided into sections: pottery, lava rock sculptures, alcohol, hammocks, sombreros, clothing, silver jewellery and trinkets. I picked up a pair of silver hoop earrings for just £15 and I have worn them pretty much every day since!

    Chichen Itza

    Upon arrival the tour group is split into two, English and Spanish speaking, you then have a 45min guided tour which is followed by an hour of free time for you to take photos before returning to the bus.

    Chichen Itza is the name of the ancient Maya complex, there are many buildings/ruins to see, the most popular one being the High Temple. I read that you have to get there upon opening to be able to take photos with no one else in them, but honestly even though the grounds were swarming with people we still managed to get our shots, it just requires a little patience, which will be difficult under the sun, but it can be done.

    It is INCREDIBLY hot at Chichen Itza, it was reaching 40 degrees when we were there plus there’s no breeze like Cancún. Luckily for us we were warned by a new friend we made on our snorkel trip a few days before. He advised us to cover our heads and the back of our necks, and trust me that’s good advice. I also advise you to top up your suncream regularly, the tour guides do their best to keep you in the shade but it’s not always possible, so be safe. Make sure you bring plenty of water too.

    If you don’t want to visit Chichen Itza via a tour, parking costs 10 pesos and the entrance ticket is 111 pesos per person which includes a light show when the sun goes down. I would recommend reading up about the ruins before heading out on your own because there are so many neat quirks that you don’t want to miss out on. For example, when you clap in close proximity to the high temple, it actually echos back the sound of the national bird’s call. What’s even more fascinating is no one knows how!

    Rio Lagartos tour with Cancún Passion

    Just like the Chichen Itza tour, we booked this one with Cancún Passion. When I was enquiring about a tour to Las Coloradas and Rio Lagartos with Best Day, we were told that the only way you could do this was to pay $500 USD for a private tour. This however, is not true, Cancún Passion runs a tour on Tuesdays and Thursdays which includes: transport, breakfast at a hacienda, a guided tour around Las Coloradas, a boat trip to see crocodiles and flamingos in Rio Lagartos, a chance to try a Maya mud mask and lunch.

    This Coloradas tour costs $126.65 USD per adult and $89.25 USD per child.

    Pick up from our hotel was 6.35am but this varies depending on how many pick ups they need to do, it’s a small tour though – ours only had nine people including us – so it won’t take long.

    PFH Top Tip: Bring a travel pillow for the journey, it’s a long drive (longer than Chichen Itza) and you are able to leave items on the bus whenever you stop to get out. The bus is small and has little to no comfort so I strongly recommend you do this. Also the ride is very bumpy so if you get travel sick make sure you take something.

    Breakfast

    A continental breakfast is served at a 16th century Hacienda, Kaan Ac, it’s about a 2hr drive from the Cancún hotel zone. After breakfast you are given a very quick tour around the Hacienda –  which is a working hotel – before heading on to Las Coloradas.

    Las Coloradas

    The salt extraction lakes of Las Coloradas have been on my bucket list for a while now, and they did not disappoint. The cotton-candy pink lakes are the final stage of the three part solar salt evaporation process. Micro-organisms such as red plankton, algae and brine shrimp – who we all know as our beloved childhood pets, Sea Monkeys – are all minding their own business within the lakes, unfortunately for them though as the water evaporates under the sun, these amigos become more concentrated giving the salt lakes they’re iconic and spectacular pink colouring.

    PFH Fun Fact: Flamingos actually have white feathers but they turn pink after feasting on all the little red micro-organisms!

    I’m afraid unlike the many photos you can see on Google images, times have changed and rules have been implemented, you can no longer get into the water for risk of contamination. To be fair, that does make sense, ain’t no one who wanna be sprinkling feet infused salt on their guacamole. So to stop this, you can now only get access with a tour guide and the same goes for trying the salt. 

    A guided tour is included, they will explain to you how the extraction works, show you the three lakes/stages, fish out some Sea Monkeys for you to take a look at, show you what the larger salt flowers look like and let you pick out your own salt flower from the water’s edge to try yourself. After the 20min tour we had an extra 30mins to get photos before heading on to our boat ride.

    Rio Lagartos

    After Las Coloradas we got on a boat which gave us a tour through the Rio Lagartos mangrove area. On this trip we were taken just metres away from a crocodile and flamingos. Please note that though the river is swarming with flamingos it isn’t likely that you will be able to see them without a boat tour so I would recommend booking one. 

    After gawping at the wildlife we made a stop along the river bank for a baño Maya which is a traditional mud mask. The ancient Maya used to cover their skin with this high sulphur mud, it has been known to treat skin conditions, so you are encouraged by the tour guides to put it everywhere. Watch your step though, it’s incredibly slippery! Once we were covered and back on the boat where the mud could dry out, we pulled up on a little beach to wash it off before lunch.

    Lunch

    After the boat ride, we docked outside a seafront restaurant, El Perico Marinero, for lunch. Your order is taken on the bus before you get on the boat so that the food is ready when you arrive. There’s a choice of Chicken Fajitas, “Mexican style” chicken and fish which was either breaded or grilled. Soft drinks were included but alcohol was extra.

    After lunch, we had about 10mins to take photos with the “Rio Lagartos” sign – which is just around the corner – before getting back on the bus to go home.

    Dos Ojos

    Dos Ojos is the cenote entrance to a flooded cave system and is approximately a 1hr 45min drive from the Cancún hotel zone. When you turn into the entrance you have to stop at the ticket office. There are multiple cenotes within these grounds, the most popular one being Dos Ojos where you can either scuba dive through the cave network or simply swim around the entrance. The latter option is 350 pesos per adult, there’s only one cenote but it actually has two eyes (hence the Spanish name “Dos Ojos”) so there are two pools included in your ticket.

    PFH Top Tip: Use the toilets at the ticket office rather than the ones by the cenote. The ticket office toilets are proper ones whereas the cenote ones are seats over a pit.

    It’s a 2km drive from the ticket office to the cenote car park. Once you are there you can change in one of the two changing rooms but it’s easier if you’re already in your swimwear. Once you’re ready, take your belongings over to the locker room which has life vests hanging out front. You can hire out any extra equipment such as a snorkel or life jacket here. Lockers cost 50 pesos each but they’re big enough for two people to share.

    PFH top tip: Wear your flip flops for the walk down to the cenote, the path is covered in gravel and trust me you’ll be grateful you did. We didn’t and it was like walking on a path of Lego bricks, seriously wear them.

    Unlike the Samaal cenote, it’s clear and for the most part you can stand on the rocks. Though it doesn’t have a dramatic drop like others, it is beautiful and much better for taking photos. Originally we wanted to go to Gran Cenotes but after reading that tour buses arrive from 10am, I found Dos Ojos which is only reached by personal or public transport.

    Tulum

    It’s approximately a 2hr drive from the Cancún Hotel Zone or 40mins from Dos Ojos if you want to do it in the same day like we did.

    We went to the hotel zone, which unlike Cancún’s, is a single skinny road entirely enclosed by a tunnel of palm tree and foliage, one turn right and it’s like you’ve entered the jungle. This part of Tulum has a boho chic vibe; it’s full of boutique hotels, shops and restaurants all flaunting that #veganlife. Come with deep pockets though, it’s not cheap.

    PFH Top Tip: Wear Insect repellent! We realised after a couple of days that there was no mosquito bite risk in Cancún so we stopped wearing repellent. Tulum is very different however and was swarming with them! Within half an hour we each had at least 10 including one on my cheek! Do yourself a favour, wear repellent and bring a remedy such as Germaline, calamine or Lucas Paw Paw for if those little suckers do get you.

    Car Rental

    We rented our car with Hertz because 1. We have the Gold Plus Five Star loyalty card with them and 2. They had an office close to our hotel at La Isla mall. The minimum rental is 24 hours but if you don’t need it for more than a day and don’t want to pay parking charges the hours for this Hertz is 7am-10pm. We paid $35 USD (which included basic insurance) for the lowest category car which was an automatic VW Polo but our loyalty scheme does mean we get an upgrade to the next category so we had an automatic VW Jetta instead. 

    If you’re interested in their Hertz Gold Plus Rewards to earn points with every rental, I’ve included a link here.

    When we returned the car, the closest gas station for filling up was Pemex, located next to McDonalds, which is just 2.9km from the Hertz office.

    We were a little apprehensive about driving in Mexico because we had read stories of the Police stopping people and demanding they pay dodgy fines that they wouldn’t get a ticket for. I don’t know how common this is though because we had no problems driving. If you’re worried, the advice we read online for if you do get stopped to pay an illegitimate fine is to say that “I don’t have any money but I will drive with you to the Police Station”, and apparently they will let you go because they’re really just in it for the easy money. Of course this isn’t to say they’re all corrupt and obviously it won’t work if it is a real fine – know the speed limits and drive on the right!

    Parking

    The majority of beach clubs along the hotel zone offer free parking if you eat there so I recommend doing this.

    Matcha Mama

    The highly instagram-able vegan café which will have appeared on every blogger’s account if they’ve recently been to Tulum. To be perfectly honest, I have mixed feelings about this place. On the one hand it looks great in pictures, you get a free shot with every order and the food is delicious! However, the service isn’t great, the smoothie bowls are overfilled and the place is riddled with ants – which are no doubt attracted to the leaking smoothie bowls. Never mind the fact that you wait ages to sit on the swings only to be asked to move every two minutes so someone can take a picture, despite the fact that you’re eating and they haven’t ordered anything! 

    My advice would be to order your food to takeaway and get your photos whilst you wait, but be mindful of the people that are trying to eat…


    What to carry in your bag for excursions in Mexico

    Water

    SPF 50 suncream

    Aftersun

    Bug repellent – To know which brand I use have a look at my RTW drug bag.

    Makeup – For my essential travel cosmetics items check out my post My travel makeup must haves.

    Microfibre towel

    Dry bag – To see which one I recommend take a look at my post Winter packing guide – Amalfi coast, Italy.

    Change of clothes if you’re swimming


    Mexico is becoming an increasingly popular destination to travel to – it’s the full package: sun, sea, food and culture. I highly recommend going if you can, what I will say though is that Cancún is a very touristy area, as one tour guide said whilst we were there “ Cancún is not a true represntation of Mexico. When we’re in Cancún, we feel like we’re in Miami”. If you do go, please try to venture outside of the all-inclusives, there’s just so much to see! 

    .

    If you have a trip planned soon and have any questions please don’t hesitate to ask me here. 

    Keep an eye out for next week’s post where I will be sharing my Cancún packing list.

    Aloha, Gabriella

    Pin this post


  • My travel makeup must haves

    My travel makeup must haves

    Having just come back from Mexico where it’s hot, hot, hot and my skin tanned to the point where Michael stopped talking to me out of jealousy – #hatersgonnahate – I want to share the makeup I was using whilst abroad because, I hate admit it, I packed way too much makeup that I didn’t need and barely used. So in the hopes that I can save you some weight and packing space I’ll take you through what I didn’t need and what I used everyday.

    Out of all the items I packed, I really only ended up using about a quarter of it, if that! When you’re somewhere hot it’s not ideal to wear heaps of makeup because let’s face it, you’re going to get a little sticky under the sun and no one wants their face to look like a Dali melting clock. The items I barely used were:

    Foundation

    Not only did I tan past my usual shade but it also dried out my skin which needs to stay frequently hydrated when I’m out in the sun. I wore it for two days then it was just deadweight in my cosmetic bag.

    Powder

    You’d think that this would be one of the most useful things, considering how shiny the heat is going to make your face, well think again sister! Maybe I’m just gross with issues but no matter how often I applied my powder I couldn’t control the shine, so I just had to embrace the shine. 

    PFH Top Tip: If you want to control your shine but don’t want to use too much makeup, grab a pack of blotting sheets, they’re inexpensive and can be bought at most stores selling makeup.

    Liquid lipsticks

    I love lipsticks, they brighten up and add colour to your face but I definitely didn’t need the amount I brought. The ones I could have done without were the liquid lipsticks.

    Staying hydrated is very important but it’s critical when you’re somewhere hot. Funnily enough though liquid lipstick with its ability to give a matte look and water with its ability to wet your mouth don’t exactly go hand in hand. So I don’t recommend bringing them, you’ll be reapplying more than your suncream.

    Mascara & Eyeliner

    I did actually use mascara, but only in the evenings and a few selective shoots. There’s really not much point in wearing it, or eyeliner for that matter. What with being in and out of the sea and pool, it’s only going to give you panda eyes. Before you ask, no it’s not worth bringing waterproof mascara. I’ve tried so many brands and I’ve never gotten on with it – it’s a bitch to take off and it only stings your eyes. Still need convincing? You’ll be wearing sunnies most of the time anyway, so your eyes will be covered up!

    .

    Now then, let’s get into the products I loved to use everyday. These babies really focus on enhancing your tan, boosting your complexion and giving your sun kissed face that extra glow. Plus they have multiple uses, so these few products actually give you a variety of looks when you wear them in different ways.

    Charlotte Tilbury – Hollywood flawless filter, 4 medium

    I only started using foundation this year (shocking I know, what have I been doing with my life?!). Taking it on holiday – somewhere where you’ll be in the sun – is pointless because you will tan past your shade and you don’t really want a full face because your pores will only clog as you sweat it off. I don’t wear it that often so I’m pretty used to going out bare skinned, but if you’re not feeling it I have the perfect product for you: Hollywood Flawless Filter! 

    This glorious product is a complexion booster that can be worn four ways: under your foundation, blended with it, as a highlighter or on it’s own – on it’s own is obviously what I’m focusing on here. It will smooth your pores and lines, give you an all over glow that illuminates and boosts your tan and it’s lighter on the skin than foundation so you won’t feel caked. There are seven shades, and unlike concealer and foundation, I found the shade to suit me at my lightest and after my tan, bonus!

    Dior – Diorskin forever undercover concealer, 20 light beige

    I ended up tanning past this shade by the end but I used my concealer almost every day to cover the dark circles under my eyes. It’s a full coverage product so the darker my face got the less product I used so it wouldn’t show up too light. Like most of these items, it’s waterproof which is always good when you’re sipping cocktails in the pool. 

    PFH Top Tip: At the end of your holiday, when your skin is nicely tanned, get your concealer matched at the airport duty free on the way home so you have one for the next time you tan past your usual shade.

    Giorgio Armani – High precision brow pencil, 2

    My eyebrows are quite patchy and need a little help filling out. I have a few eyebrow pencils but this one is my favourite to travel with because it’s so tiny but still has a brush attached. The pencil itself is so fine that it allows for a very precise application, hence the name, plus it’s waterproof which is great when the heat starts to melt your face.

    Charlotte Tilbury – Instant look in a palette, beauty glow

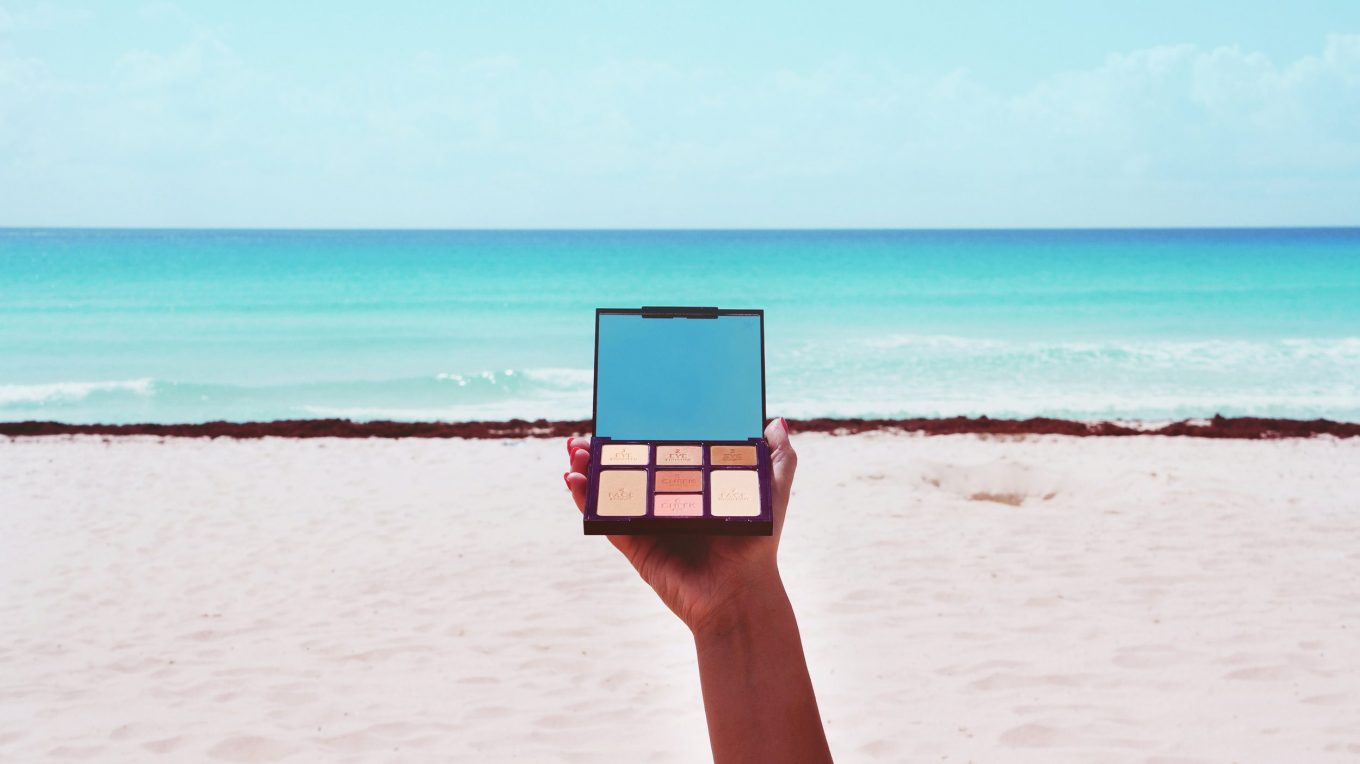
    This palette was my saving grace in Mexico. I absolutely love it, it has all the basics in one place and gives such an amazing glow #glomo! It has three eyeshadows which can be worn individually to brighten the eyes during the day time or combined to create a smoky look for the evening. There’s a bronzer which can be used to bronze or contour. Two tones of blush give you a rosey glow and finally the highlighter is my favourite because it’s so pigmented that it gives an incredible high shine across the top of your cheekbones. 

    I definitely recommend getting one of these palettes if you’re on the go often. Just slip it into your bag and you can apply or touch up no matter where you are. The mirror is nice and big so you can see your whole face when applying but the palette size as a whole isn’t so big that it’s inconvenient. A lot of our excursions involved swimming in cenotes before heading on to something else, I took this palette with me so I could brighten up my face in-between and it was perfect.

    I can’t pretend it’s not expensive, I had hummed and hawed over it for a while because it retails at £49, but I feel like I have already got my money’s worth. I used it every day because it’s so easy to apply and wear.

    Dior – Diorshow cooling stick, 003 fresh pink

    This was a new buy for me at the airport duty free on the way to Cancún. It’s part of Dior’s Summer 2018 Cool Wave collection, and the moment I found out its nifty little trick I was sold! The formula is 40% water and is designed to cool the eyes upon application, it’s basically a soothing eye gel that applies colour. It’s genius and actually works so well, perfect for spending time out in the sun and it’s waterproof.

    It comes in three shades, pink, gold and bronze – I went for the pink because the CT Beauty Glow palette was made of gold and bronze tones so I wanted something different. Its creamy texture applies so smooth which means it can actually be worn three ways: on the eyelid, along the lash line or as a highlighter. 

    Vaseline

    I take great care of my lips because they dry out easily and not only is it uncomfortable but it also makes wearing any lipstick difficult. As much as I love a bright lipstick, it’s not really convenient if you’re in and out of the sea and pool, drinking cocktails and eating. 

    So that way I look after my lips on the beach whilst giving them a glossy sheen is with old reliable Vaseline. It’s cheap and nourishing!

    Dior – Rouge Dior lipstick, 520 feel good

    Of course I don’t really go anywhere without lipstick, and there will be moments to wear it, such as for photos. One of my favourite holiday shades is this Rouge Dior, it’s a punchy pink which really complements a tan.

    .

    Most of the items I’m talking about above are quite pricey, I know, but I tend to get my makeup at the airport in duty free to save money. 

    PFH Top Tip: When you make an account with Feel Unique, you can choose one brand that they sell to receive 5% off for a whole year. They sell all of the brands I’ve mentioned except Vaseline.

    Do yourself a favour, embrace your natural beauty and leave most of it at home. Just bring some items that will enhance your sun-kissed glow rather than cover it up.

    .

    Aloha, Gabriella

    Pin this post


    .

    Shout out to Pops Beauty who did a killer job with my manicure! Check them out if you’re based in Norfolk.

  • 5 jet setter cocktails

    5 jet setter cocktails

    As the first Food & Drink entry into Postcards from Hawaii, I’m sharing recipes for five cocktails inspired by my travels around, but in particular to Singapore, Hawaii, Brazil, Mexico and France. From sweet game-changer classics such as the Singapore Sling, to bitter eye-openers like a Caipirinha, there’s a drink here for every intoxicated mood.

    Each recipe below makes one glass.

    1. Singapore Sling

    Origin: Singapore

    In 1915, Ngiam Tong Boon, a bartender at Raffles Hotel, created a tropical gin based cocktail disguised to look like fruit juice so that women had a socially acceptable way to drink alcohol in public, yes you read that correctly, way back when, it wasn’t acceptable for women to socially drink in public! Mr Boon deserves a lot more credit than he gets. Recently celebrating its 100th anniversary, this world famous cocktail is available in many variations at Raffles Hotel, Singapore, but of course the OG is the best. Should you get the change to visit Singapore, you must enjoy a Singapore Sling in the Long Bar at Raffles Hotel surrounded by piles of discarded peanut shells. Until then, here’s how to mix one up at home.

    You can read more about the history of the Singapore Sling on the Raffles website.

    Ingredients

    30ml Gin

    15ml Cherry brandy

    7.5ml Cointreau

    7.5ml Dom Benedictine 

    A dash of Angostura Bitters

    10ml Grenadine

    15ml Lime juice

    120ml Pineapple juice

    A handful of ice

    Method


    1. Put all the ingredients in the order listed above into a cocktail shaker.


    2. Shake.


    3. Add ice to your glass.


    4. Strain into the glass.


    5. Garnish with a slice of pineapple and/or a cherry.


    2. Mai Tai

    Origin: Maui, Hawaii

    Fun Fact: The Mai Tai gets its name from “maita’i roa ae!” which in Tahitian means “the very best!”

    There are many variations of the Mai Tai, most focus on making it sweet with a mix of pineapple and orange juices but the original 1944 recipe is as follows:

    Ingredients

    60ml Aged dark rum

    30ml Lime juice

    15ml Orange curaçao

    7ml Orgeat (almond) syrup

    7ml Simple syrup

    2 Handfuls of ice

    Method


    1. Put all the ingredients in the order listed above into a cocktail shaker.


    2. Shake.


    3. Add ice to your glass.


    4. Strain into the glass.


    3. Caipirinha

    Origin: Rio de Janeiro, Brazil

    It’s the national cocktail of Brazil and famous for its simplicity and intensity. Its sole liquid ingredient is Cachaça, which is a Brazilian hard liquor made from sugarcane. Despite it being made from sugar cane, it doesn’t carry an intense sweetness as you would expect, it only took two of these to send my partner running off on his own into the sea on Copacabana beach to frolic in what was very cold water in the middle of winter though.

    Ingredients

    1/2 Lime cut into quarters

    1 tsp Sugar

    70ml Cachaça

    A handful of ice

    Method


    1. Put the lime and sugar in your glass.


    2. Add the ice.


    3. Pour in the Cachaça.


    4. Stir.


    4. Tequila Sunrise

    Origin: Cancún, Mexico

    If you’re not up for tequila shots (I for one am haunted by my teenage escapades at the student bar) but don’t want to miss out on the fun, a tequila sunrise is a great way to sweeten up those otherwise bitter memories, sorry I mean shots of tequila by making it a long drink accompanied by a lot of sugar. Despite it being a ridiculously popular drink in the 70s, thanks to the Eagles and Rolling Stones, it actually originated in the 1930s.

    Ingredients

    45ml Tequila

    90ml Orange juice

    15ml Grenadine syrup

    2 Handfuls of ice

    Method


    1. Put the tequila and orange juice into a cocktail shaker.


    2. Add ice.


    3. Shake.


    4. Add ice to your glass.


    5. Strain into the glass.


    6. Slowly pour in the grenadine syrup and let it settle at the bottom.


    5. Monaco

    Origin: Paris, France

    This fruity French beer cocktail makes drinking beer easier for those who aren’t keen on it. I came across this cocktail in a Parisienne café when it was recommended to me by a friend who knew I hated the taste of beer. It’s now my go-to summer drink.

    Ingredients

    170ml Pale ale

    60ml Lemonade

    45ml Grenadine syrup

    2 Handfuls of ice

    Method


    1. Pour the lemonade and grenadine syrup into a cocktail shaker.


    2. Add ice.


    3. Shake.


    4. Add ice to your glass.


    5. Strain into the glass.


    6. Pour beer on top.


    .

    So there you have it, five jet setter cocktails from around the world, which one will be your favourite?

    Aloha, Gabriella

  • 8 ways to manage your travel money

    8 ways to manage your travel money

    Identity theft and bank fraud are stressful and mortifying things to happen. Suddenly someone’s wrongdoing become your living nightmare and the burden of recovering your money back ASAP takes over your life. It’s an awful thing to happen at any point in your life, but imagine it happening whilst your on the other side of the world with very little internet and won’t be returning back home for another 3 months…

    Unfortunately for Michael and I, we don’t have to imagine it, because this actually happened to us when we were just one month in to our Round the World trip.

    It was our last day in Australia before heading to New Zealand, we were just about to enter the Blue Mountains National Park when Michael got a text from his bank that had a mini statement saying he had spent money in ASDA a couple of days ago. Straight away this rang alarm bells because we had been out of the country for a month so there was no way he was spending money in an ASDA in the UK. Back then Vodafone used to charge to roam when you were anywhere abroad so we had to pay £5 to use data to get online to find the bank’s phone number to report fraud. After giving his security information he reported the fraudulent activity and they assured him the card had been blocked from use and that his remaining money will be protected whilst they looked into it. 

    The next day however, he called from NZ to check on the progress only to find out that the block was not in place and all of his money had gone. It took our whole road trip from Auckland down to Wellington – lasting about one month – of endless phone calls (most of which were either on hold for hours or disconnected altogether) before we found out that they had spent his money in stores, got cash back, changed all of his personal information (which then made it nearly impossible for Michael to get through to someone on the phone because he couldn’t prove his identity), added an extra person to the account and then cleared out the whole account.

    Eventually, after two very stressful months and a whopper of a phone bill he got his money back. 

    Anyway, horror story aside, here are eight simple pointers for keeping your travel money safe whilst you’re abroad and how you can be prepared should something happen to it:

    1. Write a budget

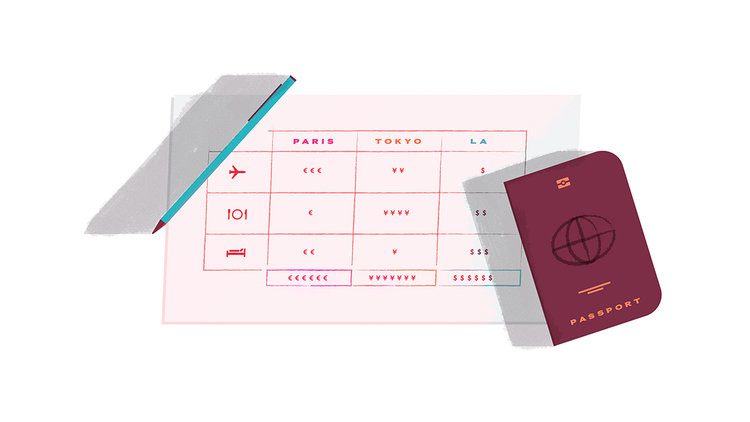
    Whilst planning our Round the World trip, I made a spreadsheet that had the cost of every excursion and activity that we were doing, along with a rough food estimate, hotel prices and an allowance for shopping, souvenirs etc. From this spreadsheet I was able to calculate a rough budget for each destination so I could divide up all the money we had accordingly.

    I now do this for every trip we make. Having a budget means you know how much money to put away, and it helps prevent you from spending more money than you anticipated. When budgeting I always round up and allow a little wiggle room because you’ll never know exactly how much you’re going to spend. Plus this way you have a chance to save money as you go. 

    2. Stash your cash in different places

    Split your physical cash into different compartments across your luggage, so if something gets stolen, all of your money won’t be gone.

    I usually split cash between my purse, my travel wallet (which are both in my hand luggage) then in two different purses in both sides of my suitcase. If I’m carrying a second piece of hand luggage I will put one of the suitcase purses in that instead.

    True Story: Many years ago Michael once went on holiday with someone who was scared of leaving his money in the hotel room, so he kept every penny of it on him. On their first night out, he went to the toilet and got mugged, losing all of his money in less than 24 hours after arriving. Obviously I can’t imagine any of you would do something as daft as this, but it’s a good example of what can happen if you don’t divide up your money.

    3. Split your money across bank accounts

    Similar to above but this time it’s the money in your bank as opposed to your physical cash. 

    When we were gearing up to embark upon our Round the World trip in 2016, we split up our money across eight different bank accounts:


    • X2 STA cash card


    • X2 STA Eccount


    • X2 Debit Card (different banks)


    • X2 Savings Account (different banks)


    Along with all of the above, I also had my credit card and I changed up about £20 in each of the seven currencies we needed, so we had taxi money to hand. Eight might seem a bit excessive but we were going away for 4 months and wanted to be safe. As you’ll have read above though, unfortunately you can never be too careful, but just imagine how stuck we would have been if most, if not all, our money was in that one account that got drained?

    4. Learn your exchange rates

    Know the exchange rates before you go away, this will save you from doing tricky maths with your fingers or wacking out your phone calculator before purchasing something. I always check what £1 and £5 is in the currency of the country I’m going to. I have found I can work out the price of something just from knowing these two. This is especially helpful if you’re bartering and don’t have time to work out the price with a calculator. It also helps to stop you from getting ripped off if you already have an idea of what something costs.

    5. Get to know the money

    Familiarise yourself with the currency so you know what you’re handing over. Take a look at the sizes of the notes and coins, look for identifying pictures or colours. For example, our fivers are small and green but our £20 notes are much bigger and purple. US dollars might all be green but they can be identified by the presidents on them, and each of the Australian quantities have individual colour schemes. 

    By familiarising yourself with the money you are already taking away one big tourist give away. It makes it easier and quicker to pay if you know what you’re handing over, plus haggling prices on markets is far less awkward if you know what you’re dealing with.

    PFH Top Tip: Fold your notes separately in your purse/wallet and organise them by value so you aren’t pulling out a wad of cash wherever you are when you need to spend it.

    6. Consider a travel card

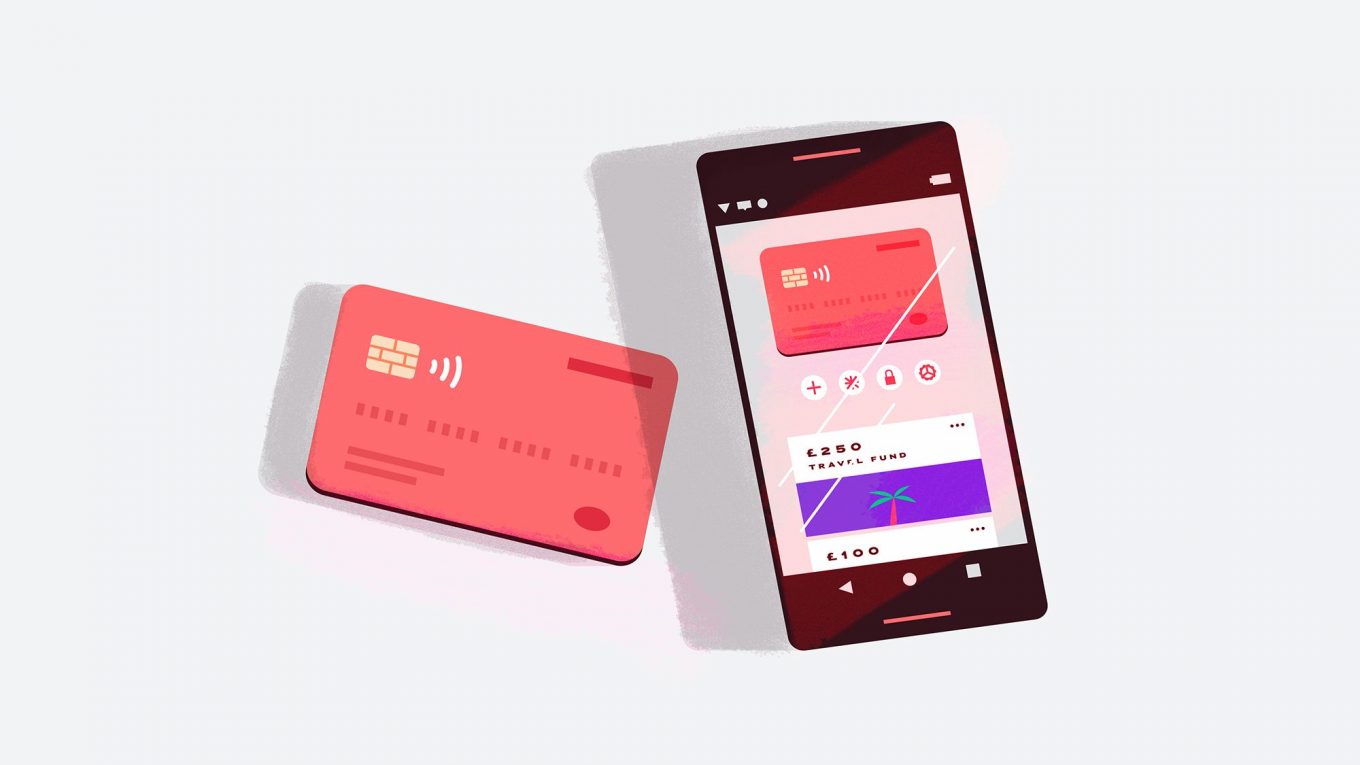
    Travel cards are managed solely online are becoming increasingly popular and are a great way to manage your travel money. 

    My first one was the STA cash card, we were given it for free as we were booking such a big trip with them. At first it seemed like a great idea because it’s a MasterCard that you can pay with and withdraw money from for free when you’re abroad. I didn’t like using it though because the online log in is very complicated, it takes a minimum of four working days for your money to be deposited into the eccount, they charge you to look at your balance at any cashpoint and unless you are spending a large amount of money with them you have to buy the card.

    I now use Monzo (yeah these are the guys with the very popular orange card) and Starling. I much prefer to use Monzo and Starling now because:


    • They have very easy to use apps which are password protected.


    • The apps have the option to make your own digital piggy banks for your different saving goals.


    • You don’t get charged to spend your money abroad.


    • Transfers are virtually immediate.


    • You get a notification as soon as you spend money, provided you’re online.


    • Unlike STA you can transfer money out of their accounts.


    Extra bonus, they both have a really nice design and chances are you will be complimented for the colour of your card when you use it! 

    PFH Top Tip: Apply for Monzo and Starling as soon as possible and not just before your trip because they are in high demand and have a long waiting list. Monzo members are allowed to shortlist someone though so check to see if anyone you know has one.

    7. Apply for a credit card

    They aren’t necessary should you not want to or aren’t able to get one, but there are great benefits to getting a credit card for your travels:


    • Credit cards are like a safety net for your expenses should something go wrong.


    • Hotels require a bank card for incidentals (room service, mini bar etc.), some can be funny about accepting debit cards and prefer credit card.


    • Not all car rental companies will take debit cards and if they do, chances are they will carry out a credit check. Holding a credit card shows that you’re not a credit risk. You will find most rental companies will only take a credit card as insurance should you not return the car.


    • Some credit cards come with travel perks such as travel insurance, lounge access, hotel upgrades etc. It’s worth doing some research into the different companies depending on your style of travel.


    PFH Top Tip: I recommend pre paying for your holiday – flights, hotel etc – with your credit card because should the company go bust before or during, you are protected by the Consumer Credit Act. This means the credit card company has equal liability should you not receive the service you’ve paid for. It’s added protection for your money.

    Pay off your CC as soon as possible to protect your credit score. Remember it’s the bank’s money, not yours so don’t let the debt pile up, they should just be considered a back up plan in case of a problem.

    8. Be prepared

    When the fraudulent activity happened with Michael’s bank account, the people who did it had managed to change all of his personal information which then made it near on impossible for Michael to prove his identity over the phone and get his money back. For this reason I strongly recommend you name a trusted family member on your bank account, so that if anything goes wrong whilst you’re away, they can go in to your local branch and fix the problem with someone in person.

    There’s not a whole lot of point in adding someone for smaller trips and holidays as it won’t be long before you will be home and therefore able to go into the bank yourself, but if you are travelling for a long time or moving abroad, I highly recommend you do it.

    Either way, you should definitely write down or save the phone number for reporting fraud to your bank before you go, so that you don’t have to worry about getting online to find it. You can find the helpline on the back of your bank card but save it somewhere else in case you lose your card.

    .

    What I can say from this experience is no matter how careful you are, you really can’t prevent some things from happening, but these eight tips will help you to be safer and more efficient with your travel money.

    .

    Aloha, Gabriella

    Pin this post


  • How to make long distance relationships work

    How to make long distance relationships work

    I’ve decided to share this post with you as Michael and I celebrated our eighth anniversary this weekend just gone. The first four years of our relationship were long distance so with eight years now under our belts, we want to share our advice on making it work when you’re apart.

    You may, or may not, know that we started our relationship just four months before heading off to university in different counties to each other. Then after making it through the three years of our degree, Michael moved to Paris and it was a few months before I could join him. In addition to this, I have traveled a fair amount without him which has put us into wildly different time zones.

    In my honest opinion, it really only comes down to two factors that will successfully make a long distance relationship work: having regularly scheduled visits and equally sharing the effort to stay in contact. They don’t scream romance though, so I’ve shared all the other little ways we both put in effort that kept us going until the next time we would be together.

    Scheduling

    Always have at least one planned visit booked in advance. This is for two reasons: so you don’t fluster over trying to get a date in the diary and so you have something to look forward to. 

    One of the hardest times when we were doing long distance was whilst we were living in Paris and I had taken a month long trip to Mauritius to see family. Michael had come to stay there for 2 weeks but when he left we were uncertain of whether I would come straight back to Paris, or if I would spend some time back at home in England after returning to the UK (I was flying into London from Mauritius). It was the not knowing, not having a set date for my return, that was so difficult for us. We had always known when we would see each other again. Eventually I booked my train back to Paris, but until then, it was so difficult not having a day to count down to.

    For this reason I always suggest, to anyone who asks, you have the next visit in the diary. The first two years we took it in turn to see each other every fortnight, but on our third and final year of our degrees, we made the mutual decision to focus on our work, so we cut down the amount of travel and visits to once every 3-4 weeks. We never regretted this decision because we both came out with first class degrees. It was definitely one the most mature moments of our relationship and a very good example of how you must make sure your life is equally balanced. Long distance relationships need to be worked into your life but not become your life.

    Equality

    It is highly unlikely that a relationship will pull through if all the effort and expense is one sided. 

    When we were at university, train tickets were expensive and it took about 3.5 hours to get from door to door, so we decided right from the beginning that we would take it in turns to visit each other. Despite making this decision, we still had some problems because although the travel was being split equally, time spent together wasn’t, so we had to work on that.

    It doesn’t matter if you are living together or apart, no relationship succeeds if all the effort is one sided, undoubtedly that person will begin to resent the other and it might not end well.

    Surprise visits

    Scheduling is definitely the key factor in making a long distance relationship work, but it doesn’t mean that you can’t sneak in a few surprise visits*. 

    I remember one Friday evening, I came out of uni about 6pm and sitting on the bench outside was Michael. He had been waiting patiently for an hour and I had no idea! He didn’t even text to say he was waiting because he wanted to see my face when I saw him. How sweet is that?

    *Just make sure you know the other person is free so you don’t go all that way for nothing.

    Give each other space

    You’re probably thinking how does this make any sense, you already live apart so how much more space do you need? What I mean by this is, don’t let the need to be in contact take over your lives, your life doesn’t stop because you’re apart. You still need to make time for work, socialising and binging on box sets, so don’t feel like you need to spend every moment updating each other. 

    Michael and I actually had a lover’s spat over this in our second year of our relationship. We were texting each other throughout the whole day, but then we were also making time to talk to each other on the phone in the evenings. Our squabble came out of frustration over the fact that we had nothing much to talk about on the phone, because we had already text every detail down to what we had eaten during the day. We then decided not to text each other so much during the day which was good for two reasons: We could have a lengthy conversation at the end of the day and secondly, it was far less distracting and we could get on with our days without checking our phones every five minutes.

    Care packages

    Telephone, video calls, text, email, WhatsApp, Facebook messenger, Instagram and Snapchat – there is so much choice for staying in contact these days that you can mix it up for every day of the week. My ultimate favourite way to stay in contact though is good ol’ snail mail! There is something so special and uplifting about receiving physical mail from a loved one. 

    Of course this wasn’t our only method of contact, but we used to send mail back and forth because none of the others are more personal than hand written messages. We sent mostly letters but sometimes they would be full blown care packages. 

    My two favourite care packages that I sent were:

    Christmas

    Before going to stay with him in London around Christmas, I sent him a package that had one present for every day leading up to me arriving. They were all silly items that I had picked up from poundland (the life of a poor student) and I had written a note explaining each one. From what I remember there was a lot of foil decorations for his room , fairy lights and chocolate.

    Valentine’s Day

    Valentine’s Day 2014 – I had gone back to England to celebrate my birthday whilst Michael stayed in Paris. We couldn’t spend the day together because he was working, so I wanted to send him something special that cheered him up. I made a drawstring bag and on it I embroidered a section of the map of Europe with a line linking love hearts from Norfolk to Paris. I then filled it with heart shaped chocolates and sweets, cold and flu tablets and tissues (because he had caught a cold) and of course, a card. 

    Traditions

    Traditions, no matter how big or small are a lovely way to celebrate your relationship, here are some of ours:

    We started every morning with a text that said “Morning Beautiful/Handsome” and ended every day with a text that said “Night Beautiful/Handsome”. I understand that in some circumstances, talking every day isn’t possible so I really don’t think it’s necessary in making long distance work, but it’s just something we always did.

    Every text ends with “I love you x” – if it doesn’t one of us is extremely pissed off!

    Whilst at uni, during the first week of the Christmas break, I would go to London and we would spend the whole week doing Christmassy things. This usually included ice-skating at Somerset House, baking cookies, Christmas present shopping down Oxford street and/or Westfield (both of which usually involved celebrity spotting), drinking seasonal coffees while strolling in Hyde Park and of course Winter Wonderland.

    As our relationship began in Paris in 2010 on a school trip, we have made it a tradition to go back to Paris every year. We always stroll in Jardin Tuileries, get macrons from Ladurée, gorge ourselves on charcuterie boards and take a ridiculous amount of photos of the Eiffel Tower. 

    The little things

    Big gestures such as surprise visits are nice, but the little things make a big difference. Here are some of ours:

    Whenever I was leaving him, just before going I would spray some of my perfume onto his pillow so he would be reminded of me when he went to bed. 

    When he was leaving me, he used to give me a t-shirt that he had worn and sprayed his Eau de toilette on.

    We both used to leave little notes under each other’s pillows.

    We made mix-tapes for each other – which were really just playlists we put together on iTunes.

    .

    This post is geared up towards being in a romantic relationship but some of these apply to any kind of long distance relationship for example:

    Some of my closest cousins live in New Zealand, so we hardly see each other but we make the effort to schedule regular Skype calls, have a group chat on messenger and we send care packages back and forth all the time!

    One of my best friends has been living in Australia for almost five years now, we have been fortunate enough to see each other a few times since she moved but aside from that we WhatsApp all the time.

    We also met two beautiful people from Canada whilst we were in Hawaii a couple of years ago, we hit it off so well that we have been in contact ever since. We have scheduled monthly Skype calls ever since we left Hawaii, and despite not seeing each other in person since we met, we are incredibly close and currently planning a trip to meet their newest family addition! 

    I truly believe succeeding at long distance all comes down to scheduling and equal effort. With these two pointers you can make it work no matter how far apart you are or how long it’s been since you saw each other in person.

    .

    Aloha, Gabriella

    Pin this post


    .

    Disclaimer: I am not sponsored by any of the communication apps or companies mentioned. I just personally recommend them as they have proven to be great ways to stay in contact with people you love.

  • Observing local customs: how to cover up and dress respectfully

    Observing local customs: how to cover up and dress respectfully

    It is one of the greatest joys in life to experience other cultures and all that comes with it: architecture, cuisine, music, religion and clothing. Having travelled to places such as Morocco, Dubai, Egypt, Mauritius and Singapore, this is a topic I have exhausted on Google. Really it comes down to not wanting to be disrespectful to local customs, be it for religious or cultural reasons.

    Whilst seeking out advice on what I can wear, I have asked hotel staff, taxi drivers and so on, and I always get the same answer which is along the lines of “there are only tourists here, don’t worry”, but I don’t agree with this being the answer. Why should we ignore local customs when it comes to dressing in other cultures just because we’re tourists? If you want to immerse yourself in and respect other cultures, you put the effort in to observe and participate.

    There is a truth behind what they are saying by certain locations being driven by the tourism industry, and that the lines are blurred on what to wear. For example, Marrakech is far more lenient than somewhere more rural in Morocco but then Dubai is even more accepting of a little more skin, but you should never assume that everyone will be comfortable with the amount you choose to show.

    An example of a Bardot sleeve with my scarf close by to cover my shoulders in the presence of others.

    From my travels and experiences I have put together the following guidelines for dressing modestly:


    • Cover your shoulders.


    • Cover from your knees up.


    • Don’t wear anything low cut.


    • Don’t wear anything see-through.


    Really none of these are unimaginable, they’re entirely understandable and easily done. However, the problem we 21st century ladies face is how all of the above are the biggest trends going and are completely unavoidable on a shopping trip; Short-shorts cut to reveal some booty, Bardots and cold shoulder sleeves, deep Vs and mesh tops have been dominating the fashion universe for the last few years.

    So the question is, how can we dress respectfully, whilst keeping up with current trends?

    The answer lies in focusing on our less skin-baring trends and wearing one accessory that will literally have your back throughout your trip:

    Cover your shoulders

    This is where that one accessory comes into play. The magnificent scarf! This blessing can be carried easily in your bag when you don’t need it, and when you do, it can be worn in a multitude of ways to cover your head, shoulders and legs!

    A scarf means you can wear strappy items, cold shoulders or Bardot sleeves and when you need to, you can throw a scarf over your shoulders to cover them.

    Go for a light one because if you’re looking at this post then the chances are you are heading somewhere hot, so you want cotton or a loose weave to stop you from overheating. If you want it to be able to cover you legs for visiting a temple but you’re wearing shorts, then pack a wider one that can be tied as a sarong.

    Kimonos are another great way to cover up, they’re light and loose so you won’t overheat and they are majorly in fashion at the moment. 

    Bring some options to accessorise your outfits.

    Cover from your knees up

    What I mean by this is don’t wear short skirts or shorts, especially not shorts that cut right up your bum. I’m partial to flashing a bit of cheek in swimsuits but when you’re walking through the old Medina in Marrakech, shopping in the souks of Dubai or visiting temples in Singapore, it’s inappropriate and may get you unwanted attention. 

    Not being able to wear above-the-knee shorts is difficult I know because they are practical and comfortable in the heat, but there are some amazing bottom half trends in fashion at the moment which are entirely suitable:

    Palazzo pants

    These long and loose trousers are amazing for staying cool in hot climates because they don’t cling to your body, plus the length means they will cover your legs.

    Culottes

    With the same benefits as the palazzo pants but these bad boys are cropped so the hems won’t get dirty and your lower legs can get a bit of sun.

    Jumpsuits

    Your whole outfit in one with the practicality of trousers! With such a huge variety of top styles and cuts for the legs, you have so much to choose from.

    Midi skirts

    My absolute go to at the moment, I am loving midi skirts. I’m short so they don’t crop as high as they would on taller gals, but for me, it means I can get length without them draping along the floor. Brands such as Urban Outfitters are coming out with matching midi co-ords so they’re easy to style.

    Midi dresses

    Same as the midi skirts except you have one less worry over what to wear on top, because it comes with one!

    If you’re heading to any souks or into the desert, I wouldn’t recommend wearing maxi-length skirts or dresses because the hem will get dirty very quickly.

    Don’t wear anything low cut

    I’m not talking wear roll-necks, but I wouldn’t suggest going more than a couple of inches below your collar bone.

    Don’t wear anything see-through

    Mesh tops, crochet creations and braless numbers (where nips are visible) are all best to avoid.

    A dress bought in the medina in Marrakech, Morocco.

    Hopefully, this has made dressing modestly a little less daunting. There are so many options and with a silver lining of not having to shave half of your legs (if you do shave) it’s easy to adhere to. Plus, you can always buy clothing from the country you’re in (see the photo above). 

    Some locations are a little more lenient than others, and some might just require dressing modestly when in a place of worship – just do a little research before you go to be sure.

    Aloha, Gabriella

  • Egypt itinerary – a three day trip to Cairo

    Egypt itinerary – a three day trip to Cairo

    I’ve always wanted to make a trip to Cairo to see the only existing member of the Ancient Seven Wonders of the World. The intelligence behind their design and craftsmanship is unfathomable. I’m so happy I got to check this off my travel bucket list and I fully encourage you to see them once in your lifetime, if possible. Although I’ve written five days just below, we arrived to the hotel about midnight on the day we travelled there and we left the hotel at 6am, so in terms of activities we only had three days. This was more than enough time to get through the things we wanted to do whilst there. So let’s take a look at what that was!

    Day 1 (travel)

    2pm flight from London Heathrow to Cairo International Airport.

    Hotel transfer from airport.

    Check into Sofitel Cairo Nile El Gezirah.

    Room service dinner before bed.

    Day 2

    Egyptian breakfast at hotel.

    Egyptian Museum.

    Cairo City Festival Mall.

    Dinner at shopping mall.

    Day 3

    Egyptian breakfast at hotel.

    Emo Tours – Full day tour from Cairo: Giza Pyramids, Memphis and Saqqara.

    Dinner cruise on the Nile.

    Day 4

    Khan el Khalili.

    Pool time.

    Dinner at hotel.

    Day 5 (travel)

    Transfer to airport 6am.

    Flight from Cairo International Airport to London Heathrow.


    Egyptian museum

    Tickets need to be bought at the booth after the main gate. It’s 120 EGP per adult. If you have a camera you must buy a ticket to use your camera or you won’t be allowed to enter after security. The ticket is 50 EGP and must be shown to the security guard after your bag has gone through the X-ray machine. 

    To get to the Royal Mummies hall, turn right at the museum entrance and head upstairs, there is a small ticket desk on the right and it costs 150 EGP per adult. I had really mixed feelings about the Mummy exhibition. On the one hand, it’s absolutely fascinating, how they have been preserved for thousands and thousands of years, they’re an incredible part of our history and if you’ve travelled all that way they’re worth seeing. However, it’s also quite disturbing, not only because they are dehydrated dead bodies with teeth and hair but because of how disrespectful to the dead it is. The room is tiny with multiple glass displays packed in, there is one paper sign on the wall that asks for silence but no one acknowledged it, and there is no crowd control whatsoever so people are packed in almost shoulder to shoulder.

    Tutankhamun’s exhibition is also on the top floor in the middle, this is where you can see his world famous gold sarcophagus amongst all the other incredible artefacts found within King Tut’s tomb. Speaking of, from 24th March the largest international exhibition of ancient Egyptian artefacts will be touring 10 cities across the world. Keep an eye out for your closest! 

    Emo tours – Full day tour from Cairo: Giza Pyramids, Memphis and Saqqara

    We booked our full day tour from Cairo through Viator. It was with Emo Tours and cost just £28.49 per person (prices vary with dates). You will be picked up from your hotel at 8am, and the tour will last approximately eight hours taking you to the ancient capital of Egypt, the first step pyramid, lunch, the only existing Ancient Wonder of the World and a papyrus shop.

    Memphis

    The tour starts with a brief history of the ancient Gods and Kings of Egypt whilst driving to Memphis, the first stop of the day. This is where the remains of Egypt’s ancient capital are on display in the Mid Rahina Museum. Your guide will tell you all about the meanings behind the stances of the Kings’ statues, how to identify the King using their cartouches and their crowns. On display is the second largest sphinx and one of the most incredible pieces of art I have ever seen, the 10 metre long statue of King Ramses II, which was so big they built the museum around it because it couldn’t be moved.

    Should you wish to visit without a tour guide, tickets are 60 EGP per adult.

    Saqqara

    The second stop is the Djoser funerary complex and the first step pyramid. It is here that you will learn all about how crucial Imhotep’s design for the step pyramid is to the architectural evolution of the pyramids, and how much of an impact the economy had on the size of the pyramids.

    I have listed the Giza Pyramids as the top spot for photos because they are a wonder, but I also think Saqqara is a prime location for shooting. The reflective entrance to the complex and pathway lined with great columns are beautiful places to photograph.

    Should you wish to visit without a tour guide, tickets are 120 EGP per adult.

    Lunch

    We were taken to a local open air restaurant, where you are greeted by musicians playing as you enter. The food is included in the tour but drinks and tips are not. Before arriving you will be given the choice of chicken or beef, I suggest the beef because it will be a traditional Egyptian Kofta. Along with your meat you will be served a couple of sauces each, Ta’meya (Egyptian Falafel), rice, potatoes (in a sauce which is to be poured over your rice), Mahashy Kromb (spicy rice cooked in cabbage leaves) and cold aubergine, followed by fruit for dessert. 

    My advice is not to eat the aubergine as improperly refrigerated foods can cause an upset stomach. Also avoid the fruit if it isn’t sealed or has been pierced. See further down for tips on avoiding food poisoning.

    Giza Pyramids

    I was warned by so many people that I wouldn’t enjoy this place, that it would be dirty and covered in rubbish and camel poop, but honestly I wasn’t really expecting anything else; It’s a sandy and windy tourist site in a less economically developed country. Trust me though, these things really won’t make the day any less enjoyable. 

    On the day we went it was 28 degrees Celsius, our bottled water was the same temperature as a warm bath, the wind was up, I had more sand in my hair than in my shoes, the place was swarming with tourists and the camels would sooner bite than be petted – though I respect that choice because I was so hot I was slapping Michael’s hand away when he tried to hold mine. But honestly, was any of this shocking? No! 

    These incredible structures are 5,000 years old, they have such an extraordinary level of technical achievement that for years people were convinced Aliens are why they exist. If they built these colossal tombs under that burning sun, we can handle taking photos of them with some sand in our hair next to a pile of camel poop!

    My advice: put on some sensible shoes, suncream, trousers, a pair of sunnies and take in the wonder that is the Giza Pyramids and Sphinx. Once you are there you will learn so much from your guide about how they were built.

    Should you wish to visit without a tour guide, tickets are 120 EGP per adult.

    Papyrus Institute

    Just before taking us back to our hotel, we stopped off at the Papyrus Institute on Al Ahram road. It was here that we were shown how Papyrus is made from plant to final product. After this you have some time to look around the shop where the walls are filled from ceiling to floor with paintings on papyrus. You can either buy one on display or you can have one personalised with your name in Hieroglyphics. Should you not wish to purchase anything you can leave after you have been shown how papyrus is made.

    .

    Shout out to Sherif and Mido at Emo Tours, they were two of the best tour guides and chauffeurs we have ever had. Thank you for teaching us more than we ever expected about ancient Egyptian history, helping to create some of these shots, holding my bag for every shoot and holding back tourists so we could get the snaps we wanted. If anyone is going to Cairo to see the Pyramids, I wholeheartedly recommend them.

    PFH Top Tip: Tips aren’t included in your tour ticket, so bring some small change for tipping toilet attendants, restaurant staff etc.

    Nile

    The Nile is the second longest river in the world and plays a big part in ancient Egyptian history, it is considered to be the source of life and fertility.

    There are many Nile cruises operating day and night, but I suggest going during the day as you will be able to see so much more. Find a tour which takes a smaller boat so you can see all around you, a larger boat will obstruct your view. 

    The air is swarming with mosquitos so it is at your own peril if you do not cover yourself in insect repellent. Bring it with you on the boat to top it up should you sweat.

    Avoid dinner cruises, they are not worth the money. Most seats won’t get a Nile view and the view you could get will be obstructed by the other tables, they pack you in like a herd of sheep, the food is a buffet which means you run a higher risk of getting food poisoning, plus their “entertainment” is more like karaoke night at a poorly decorated Wetherspoons. You will be much better off booking a small cruise, during the day and without food.

    Any hotels on the Nile will have an incredible view, ours was in the centre of the Nile and we could see the Giza Pyramids from our balcony, but know that they are subject to noise pollution from the party boats going past. It’s bearable, but you might want to ask for a room higher up to reduce the noise because it will be on and off from about 8pm-3am.

    Khan el Khalili Bazaar

    This is a huge bustling market on the East side of the river which has a mixed bag of stalls selling souvenirs to tourists and others selling day to day objects to locals. Depending on how far you want to venture in, you’ll need at least two hours just to scratch the surface.

    PFH Top Tip: Wear closed toe shoes because the market is very busy and you will be trampled – do your toes a solid and wear some sneaks.

    Chances are you will be harassed verbally to go into their stalls, but it’s part of the experience. Just smile and politely say no thank you and they will leave you alone. The real pushiness will come when you try to barter. If you don’t barter they will rip you off and if you do, be prepared to go hard or go home. I wanted to buy a photo frame and a t-shirt and they asked for 1,400 EGP which is the equivalent of £60 GBP!! Keep in mind that both items were poorly made too. After a lot of fussing I got the photo frame down to 300 EGP which really was still too high, but we had to run to our taxi. As we were heading to our taxi he ran after us saying we could have the t-shirt for 100 EGP, so my point is, no matter what they say, it can always be sold for less.

    It’s only worth getting your souvenirs at this market though if 1. You are willing to spend your time haggling down the price and 2. If you aren’t bothered by the poor quality. Whilst you should definitely go for the experience, when it comes to getting souvenirs you’re probably better off going to a shopping mall or the gift shop at your hotel.

    PFH Top Tip: Make sure your money is in small notes, familiarise yourself with the currency and fold them individually so that when you barter the price down, you don’t hand over more than what you just worked down to.


    What to carry in your bag at all times in Egypt

    Toilet roll or tissues – It’s not in cubicles, if you are given any it will be a couple of squares maximum which isn’t ideal if you are suffering from a funny tummy but also the desert air will make your nose dry up and you might get a nosebleed so it’s good to have something on hand.

    Hand sanitiser and/or antibacterial wipes – Not all toilets have soap and hygiene levels aren’t great so clean your hands now and then throughout the day.

    SPF lip salve – The desert air will dry out your lips and the hot sun can burn them, so keep them moisturised. 

    Suncream – It’s a hot desert climate and those sun rays will be getting you through the clouds and haze so reapply throughout the day.

    Insect repellent – Mosquitos, ants and sandflies all want a piece of you, just like the Paps wanted a piece of Britney.

    Insect bite relief – If you do get bit by one of the above it’s good to have some to hand to relieve the itching and discomfort. Germaline, Lucas Paw Paw and calamine cream are all small great options.

    Sunglasses – The obvious reason is to protect your eyes from the sun but the other reason is to shield your eyes from clouds of sand if the wind picks up. For this reason take some cheap ones that have UV protection but you won’t cry over if they get a bit scratched up from the sand hurling at your face.

    Water – You must stay hydrated in the heat, this is very important. No matter how long you are out for, take at least one bottle.

    Scarf – If you are female you should carry a scarf so that you can cover your shoulders and possibly head whilst out in public. Many Egyptians may tell you not to worry but you will encounter some form of harassment if you don’t.


    School trips

    The working week in Egypt goes from Sunday-Thursday, which makes Friday and Saturday the busiest days if you’re planning on being out and about.

    If you go to the big tourist locations such as the Egyptian museum there will most likely be a school trip going on during your visit. So, if you’re not a local, be prepared to feel like a Disney Channel superstar – in other words, you’re more than likely going to be swarmed with children who are fascinated by how you look and dress. Don’t be alarmed, they’re no different to cheeky school children on any field trip around the world. You will undoubtedly be asked where you are from and if they can have a selfie with you – most of them really just want to practice their English. 

    PFH Top Tip: Friday is the most popular day for school trips so try to avoid planning your visit to the Giza pyramids and the Egyptian museum on those days.

    Toilets

    The toilets at the tourist spots such as Saqqara and the Pyramids aren’t the most sanitary but given where you are they’re not bad. I’ve been to far worst, believe me! They’re kept in a fairly good condition because the attendant wants a tip. 

    Toilet roll is scarce so you won’t find any in the stall, you will need to get some from the attendant upon entering. Speaking of toilet roll, their sewerage system can’t cope with paper so do not flush it, there is a bin provided by the side of the toilet.

    PFH Top Tip: When you’re out and about, bring a stash of toilet roll or tissues because you won’t be given much, and it’s better to be safe than sorry. Also, carry some kind of antibacterial hand cleaner because not all of them have soap.

    Khan el Khalili

    Taxis

    As you would expect, taxis will do their very best to rip you off. The best way to avoid this is to ask your hotel how much a taxi costs to get to where you’re going then confirm this price with your taxi driver before you get in. By saying it before you get in, they are agreeing to the price and so when they try to ask for more afterwards you can say no you agreed to the first price. No matter how nice the taxi driver is, they will always try to ask for more, just stick to the price you agreed, it won’t be met with any hostile confrontation. Every time it happened we just said no and the driver went back to the original price.

    When we went to Khan el Khalili Market we asked the doorman how much it would cost to get there and he said 90 EGP which we confirmed with the taxi driver. However, when he dropped us off back at the hotel after a round trip he asked for 250 EGP, to which we said no it was 90 EGP each way, he then said ok to 180 EGP without hesitation. 

    Something important to note with taxis in Cairo is that they don’t take payment until the end of all your journeys. For example, if you have them for a round trip to the Egyptian museum they won’t take payment until you have returned to the hotel. Taxi’s can’t park outside tourist locations so they won’t be hanging around, this means you can’t just pick one up when you’re done. You will need to take an educated guess at how long you will be at where you need to go and tell the taxi driver what time you want to be picked up. Be there at that time or you will be stuck. Do your best to memorise your driver and the car, but don’t panic because they will be looking out for you.

    The taxi driver will ask you where you have been and suggest places to go, this is just because they want to be your driver for your trip. I wouldn’t try to book them for any day other than the current one, because we found that despite setting a date and time, they never turned up – my thoughts are that they just took the first job they were offered that day, and if you don’t fit in, they won’t show. It’s not surprising given the economy, they need to make money, so my advice is just to say you have a tour booked and then get a fresh taxi from your hotel on the day.

    Saqqara

    Security

    For obvious reasons, security is incredibly high in Cairo. All large complexes such as tourist sites, shopping malls and hotels will require you to walk through a metal detector and your bag to go through an X-ray machine, just like you would at the airport.

    Speaking of the airport, no matter what anyone says, you will need to arrive at the airport three hours minimum before your flight. This is because of the huge amount of security which is incredibly time consuming. It starts right after you have entered the airport, you must load all of your luggage into the X-ray machine before you walk through the metal detector. 

    You will more than likely be asked for a tip by the security staff, this is not professional behaviour and they are just trying to target naive tourists. You are not required to tip, note how anyone who asks will be turning away from their colleagues and muttering it.

    PFH Top Tip: I’ve only come across two airports on my travels that have security right before you board the plane and Cairo International Airport is one of them. For this reason, you will not be able to take any liquids you buy in the airport on the plane, so drink them before you arrive at your gate. You will have to ask for water during the flight to stay hydrated.

    Food poisoning

    Tips for preventing food poisoning


    • Consider all the local water to be contaminated. Use bottled water to drink, make ice, brush your teeth and boil in the kettle for hot drinks.


    • Make sure the lid on the bottled water is properly sealed, they will have an extra plastic wrap around the lid.


    • Wash your hands or use an antibacterial cleaner before eating with your hands.


    • All meat must be freshly cooked all the way through and eaten hot.


    • Don’t eat any salads or cold veg, it may have been washed in local water.


    • Make sure any fruit you eat is properly sealed.


    With amazing destinations such as Morocco and Dubai being top of everyones’ travel bucket lists at the moment, it’s important to know what you should and shouldn’t being wearing. Next week I’ll be talking about this exactly and sharing some pointers for dressing modestly in more conservative countries.

    Aloha, Gabriella

    Pin this post


  • Travel pillows – who you should be sleeping with

    Travel pillows – who you should be sleeping with

    Until I moved to Paris, which involved a fair bit of travel back and forth on the Eurostar, I wasn’t interested in purchasing a travel pillow because I considered them unnecessarily bulky and I couldn’t possibly sacrifice good packing space. But now I’m a smidge older and desperate for comfortable travel I’m like, ok yeah they’re a little awkward but I really can’t travel without one anymore for fear of getting a crick in my neck! Having one has made sleeping through the majority of my travels so much easier on my neck and I feel more refreshed than with broken sleep from a rolling head with no support.

    I’ve only tried four designs so I can’t tell you which is the best travel pillow in the world, but I can offer advice on four of the leading travel pillow designs available, and why I would or wouldn’t travel with them. 

    Micro-bead – U shape

    My first ever travel pillow was a micro-bead one because they are dirt cheap and light to carry. After using it for about a year I upgraded because I wasn’t a fan of endless stitching up of holes, and waking up with hair full of little white balls. I travelled more than the durability of this pillow could handle and it didn’t last very long.

    Pros


    • Lightweight, the little micro-beads are virtually weightless.


    • It doesn’t just have to go around the back of your neck, it can be leant against the window if you find that more comfortable.


    • Really cheap, but this depends on quality, you will find the cheaper ones have less filling. They cost between £3-£10.


    • Because they’re cheap to manufacture, they come in way more patterns and colours than the others do.


    Cons


    • Beads shift under pressure so they don’t support your head all that much.


    • The cover can’t be removed and washed.


    • It doesn’t squash down without exploding.


    • Any small tear or loose stitching means those micro-beads are making a run for it.


    Inflatable – horse shoe shape

    After having a micro-bead pillow I fancied trying something that folded down and wasn’t filled with a nightmare – my thinking was air couldn’t get stuck in my hair! But despite it being easy to pack, I wasn’t feeling the comfort level. I had a Goldilocks moment every time I inflated it – too hard, too soft, but never right! Think about it, who has ever said they got a good night’s sleep on an airbed? I turfed this one out after just a few tries, hence there is no photo of me pretending to sleep at the airport with it!

    Pros


    • The most convenient in terms of packing because it folds away.


    • You can wipe down the surface with a damp cloth.


    • They’re cheap, you’re looking at spending £5-10. Boots sells theirs at £6.50 with a little carry case.


    Cons


    • Not the most comfortable, best for short trips.


    • Some have edges that have been sealed on the outside which can scratch your skin.


    • You have to inflate and deflate it for every use.


    Memory foam – U shape

    This is my favourite style of travel pillow so far because my head will roll from left to right so I prefer to have a pillow that supports both sides of my neck. I sleep with a memory foam pillow at home because I often get a stiff neck and it seems to be the best preventative pillow for me; it’s firm enough to hold up my head, but it has enough give in it that my neck feels supported. The only bummer about this one is, it is fairly heavy for a pillow and it only compresses if you squish it tightly into your cabin case.

    Pros


    • Good support. Being memory foam, it’s designed to mould around your head, neck and shoulders.


    • Just like the micro-bead pillow, it can be leant up against something.


    • Removable cover so you can wash it should you dribble (it happens to the best of us).


    • Compresses down, though like I mentioned, only if it’s squashed down in a case.


    • Price is a little more varied, but still cheap. They will cost around £5-£15. I got mine for £9.99, you can buy the same one on amazon here.


    Cons


    • Heaviest out of them all. Memory foam is dense so it’s going to be weightier than the others which are made with much lighter materials.


    • If you don’t have a case to put it in until you use it, it’s bulky to carry. That said, it does have a loop for you to attach it to the outside of your bag.


    Trtl pillow – wrap around

    Unlike the others, which are just general designs that you can pick up from non-specific brands, Trtl is a unique creation focused on being a scientifically proven supportive travel pillow. What’s great about this design is that it has a much better chance than the others of preventing your head from dropping forward when you’re sleeping. Unfortunately I’m not the biggest fan of having something wrapped around my neck though – I get claustrophobic in a scarf! It’s far less cumbersome than the others though, and the minimal frame means it’s so easy to fit into your hand luggage.

    Pros


    • Lightweight, the frame is plastic and minimal and the rest is fleece so it’s very light.


    • Scientifically proven to support your neck and head.


    • Keeps your neck warm and looks more like a snood than a travel pillow.


    • Easy shape to slip into your bag.


    • Removable cover so you can machine wash the wrap. It wears quite high up the face so this is really handy if you get makeup on in.


    Cons


    • It’s designed to support just one side of choice so you have to move the whole thing around to sleep on the other side.


    • It can’t be used any other way than it is designed, you couldn’t prop it up against something.


    • Wraps around your neck which can feel quite restrictive.


    • It’s the most expensive of the group, the others can be purchased under £10 but this one comes in at £24.95 on amazon here.


    . 

    Which is your favourite type of pillow to travel with? I’d love to hear your recommendations here.

    Aloha, Gabriella

    Pin this post


    .

    *Disclaimer: As an Amazon Associate I earn from qualifying purchases but please know that I recommend all of the products above from personal use which you can see throughout my blog posts.

  • How to get discounted London theatre tickets

    How to get discounted London theatre tickets

    TKTS is the official London theatre ticket booth and it is located right in the centre of Leicester Square. They sell discounted and full price tickets for matinee and evening shows for the day of, the next day and the day after that. Their website lists the shows available for those days but nothing is guaranteed until you are at the ticket desk. 

    If you are planning to buy tickets beyond the three days visible on the website and don’t know what’s on across London, you can take a look here on the official London theatre website to get an idea of what shows may be available on your dates.

    Look for the red and white building, wrapped with fairy lights and topped with a little clock tower at the edge of the park. The queue starts from the side where TGI Fridays is. 

    Getting there

    The closest London Underground station is Leicester Square which is on the Piccadilly and Northern lines. It’s just a 3 minute walk from the station to the booth.

    Getting tickets

    The booth is open 10am-7pm Monday-Saturday and 11am-4.30pm on Sundays.

    Heads up, tickets are sold per person queuing, you cannot hold someone’s place or buy tickets for non-present people.

    There are five ticket desks within the booth so the queue will move swiftly, and if you plan your arrival for when it opens (provided it’s not the weekend or during summer) you won’t have to wait long. 

    As you are queueing you will be able to see a live screen on the side of the booth which lets you know which shows are on sale, the seat categories and prices. Just left of this is a big map indicating where all the theatres are, with free guide books below for anyone who isn’t familiar with the area.

    Paying for tickets

    They accept the following methods of payment:

    They do not accept American Express.

    The amount of discount varies between shows and seating; you might save 45% or you might not get any discount. The percentage saved is shown next to the seat categories on the TKTS website and you can even search for tickets based on discount only if you are looking to save money over seeing any show available. There might even be a variety of prices for the same show depending on what seats are available. When I went to get my ticket for Motown: The Musical there were seats available in the Royal Circle and Stalls. The very helpful salespeople will make sure you get the best ticket available in your chosen category.

    You will receive a physical paper ticket and a receipt attached that needs to be torn off before handing over to the ushers seating you.

    At the theatre

    I recommend arriving at your theatre no later than half an hour before your show especially if you are planning to get drinks in the bar before. There will be a queue outside your theatre whilst bag contents and tickets are checked so make sure you add time for this.

    Intermissions last approximately 20mins so prioritise the toilet as there will be a long queue and you don’t want to miss the start of the second act. If you haven’t been to the theatre before and you are worried you won’t know when your show will start again, there will be one of these two traditional indications, either the lights will dip a few times or a bell will be rung. Both are letting you know it’s time to return to your seat.

    PFH Top Tips:


    • Getting theatre tickets is easiest if you’re a solo traveller and they tend to be pretty decent seats at the end of the row. So if you’re looking for something to do with your time alone why not give the arts some loving and head to the theatre. Your ticket will include a donation to the restoration of theatres too!


    • Matinee shows end roughly the same time as rush hour is beginning so either be prepared to be packed in to the tube like a sardine or think about getting dinner somewhere within a walkable distance so you can skip rush hour all together.


    • If you are planning on going for dinner before your show, you won’t be the only one, try to book a reservation or give yourself plenty of time for being seated and dining so you’re not rushing to the theatre.


    • Don’t bother trying to sneak any drinks in, there are many perfectly stocked bars and ushers selling drinks in the isles before and during the intermission. You can however take in a bottle of water, and you know me, I always recommend doing so.


    .

    I went to see Motown:The Musical which is based on Berry Gordy’s autobiography, which documents how he founded the Motown record label. It is bursting with some of the greatest songs ever written, killer choreography and humour. Expect songs by The Supremes, The Jackson 5, Stevie Wonder, Marvin Gaye plus so much more! It’s a fabulous show and worth every penny – discounted or not.

    Have you seen any good shows recently? I’d love to hear which shows you have seen or recommend. 

    Aloha, Gabriella

    Pin this post


  • How to keep busy abroad whilst your partner is working

    How to keep busy abroad whilst your partner is working

    If you’ve read my last post, 7 free museums in Paris for Europeans aged 18-25, you will know that I moved to Paris after graduation when my partner took a job there. What you don’t know is before I applied for a job as an English Language Instructor (yes, I’m sticking to my fancy babysitter job title), I spent the first few months exploring the city on my own whilst Michael worked.

    At first it was great, I had made a huge list of things I wanted to see and I was quickly making my way through it. After a while though, I got bored of being on my own all the time – Michael worked in advertising which meant very long hours and often working weekends. So, as amazing as solo sightseeing was, it became a bit lonely (if anyone has seen the last couple of episodes of Sex and the City, when Carrie moves to Paris, you’ll get a pretty good idea of how I was feeling, minus the bitch slap). I started looking into more social ways to spend my time, where I could meet new people and add more structure to my week. This eventually led to me getting my job at Babylangues too.

    A dear friend inspired me to write this post after asking how I stayed busy during my time alone (specifically before getting a job – some countries don’t issue working visas straight away). Having seen how my advice has helped, I wanted to share with you all good tips on what you can do. Just because you’ve moved abroad for your partner, it doesn’t mean you are expected to be a fully fledged solo traveler overnight. 

    You might not even have moved country, I still follow Michael on work trips so I can explore somewhere new for myself. in 2017 I spent a week in Dubai on my own whilst he was working there, and even when I published this post I was in a hotel in London whilst he worked in-house. For this reason, my advice below has grown to what it is because I have added to it with experience. You’ll be able to do one of these whether you’re living or just visiting somewhere whilst your partner is working.

    Now then, let’s get into it!

    Museums, galleries, exhibitions

    Though you can consider these as site seeing, exhibitions are ever changing so you won’t necessarily be seeing the same thing again and again. You don’t have to go for the sake of it, just keep an eye out for ones that interest you. I went to numerous fashion exhibitions that popped up across Paris whilst I was there, my all time favourite one was Cartier: Style and History at Grand Palais.

    There’s no need to rush through these either, take your time to read the little plaques to understand what you’re looking at instead of walking past them. They’re a great place to visit when the weather is bad and you don’t want to spend too much time outside.

    Volunteer

    Provided your visa allows this, look into volunteering. It’s rewarding, social, a great thing to put on your CV and it gives you the same structure that a job would. 

    Learn the Language

    This won’t apply to everyone everywhere because you might already be fluent in another language or you might be lucky enough to not have a language barrier. However, if you will be in a country where you don’t speak the local tongue, look into language classes. Or if you want to save money, download an app. My top choice is Duolingo #unofficialad. Obviously speaking a second language is a huge benefit so if you’ve got the will power, give it go! 

    Cooking

    Whether you are a master chef or frequently burn toast, cooking is a great outlet no matter your skill level. There are two ways to go about this; cooking classes or cooking at home. Cooking classes will be more social, provide structure and offer a helping hand if you are a novice. Cooking at home means you can do it at your own pace, cook what you want and avoid possible embarrassment if something goes wrong.

    Try picking up a new recipe book, maybe even a local one, something that takes you out of your comfort zone, but contains things you will actually eat. Instead of just going to your local supermarket, research and take yourself off to a food market somewhere you haven’t been before so you can visit somewhere new with a purpose.

    Try a new hobby

    Take a look at the classes on offer in your local area, maybe something athletic such as yoga or crafty like pottery – whatever takes your fancy. It will be a social experience where you will learn new skills and hopefully have fun!

    Join a gym

    Get yourself a gym membership or even just try some fitness classes. We’re finally seeing the real potential of living a fit and healthy life and gym culture is bang of trend, so most of you are more than likely already hitting up the gym. I was too busy feasting on pastries and cheese in Paris to ever consider going to a gym, but these days my gym classes add structure to my days at home when I’m not travelling, and I’ll definitely find a gym when I’m away from home.

    Join an expat group

    This is a really important one if you’ve moved to a country where you don’t speak their first language. Language barriers are very restricting and though you will feel pressure to speak it, you won’t grasp it straight away, so daily conversations will be limited which can be isolating. Expat groups are a great way to socialise and meet likeminded people who, just like you, have moved to a new country away from home. Look for groups on social media as well as googling it. General ones will do meet ups at coffee shops and bars, but there are themed ones as well – I remember when I was in Paris I found a Glee one on facebook, I was talked out of that one by many, MANY people, but it’s a good example of what you can find.

    Home comforts

    There’s absolutely no shame in seeking out home comforts after a while. A couple of friends and I found an English Pub – I forget the name now – down some backstreets around Pathéon which served fry ups and a pretty decent Sunday roast. Another, fairly embarrassing one I might add, was Starbucks. It sounds stupid when you think of all the beautiful little café choices across the city, but sometimes if I ever felt a little overwhelmed, it was an easy place to be because it was familiar. 

    Video calls

    Make Skype/facetime dates with friends and family as often as you can. I always feel more connected when I video chat with them rather than just messaging or speaking on the phone.

    Invite friends and family to stay

    What’s even better than video chatting? Seeing them in person! Be a tour guide to your new home, showing them the best parts of where you are living.

    .

    You’ll probably have noticed running themes of social activities and learning new skills. The best way to beat boredom is to meet people, make friends, add structure to your days and do things to make you feel good about yourself. 

    Make the most of this time you have when you’re not working, it might not last forever and though you might not see it now, trust me, you’ll miss it when it’s gone.

    .

    Where have you moved to be with your partner, I’d love to hear from you and all about what you’ve been doing to keep yourself occupied. If you’re about to move, I wish you the best of luck in your new home!

    Aloha, Gabriella

    Pin this post