Author: Gabriella Wisdom

  • Packing Guide – What to take on a road trip

    Packing Guide – What to take on a road trip

    I’ve done many road trips over my adult years, but my most recent trip around the West Coast of America has really opened my eyes to how draining and uncomfortable they can be after a while. It all seems good in theory, plotting out routes to get to spectacular destinations. You say to yourself, “it’s only four hours away from this, that’s nothing in comparison to that, we can do it easily!” but eventually it adds up, especially if traffic gets involved, and before you know it you’ve spent 10 hours in the car for one hour’s worth of sight-seeing. 

    It was days like that that made me think about bringing certain items to make the trips more bearable, so with you in mind I’ve put them all together into a check list so that you can road trip in comfort from now on.

    Phone

    Have a whole bunch of playlists downloaded for when the radio gets repetitive, along with your route so that you can get offline directions for where you’re heading. For a great summer playlist check out PFH California road trip mix tape.

    Cables and adapters

    If you’re using your phone to play music, or you have maps up for directions, the battery is going to drain quickly, not to mention if you’re documenting your journey on it too. Most rental cars have a USB port so make sure to bring along your phone charger cable to keep it going on long journeys. If there isn’t a USB port you can buy alternative adapters that plug into the cigarette lighter.

    Water

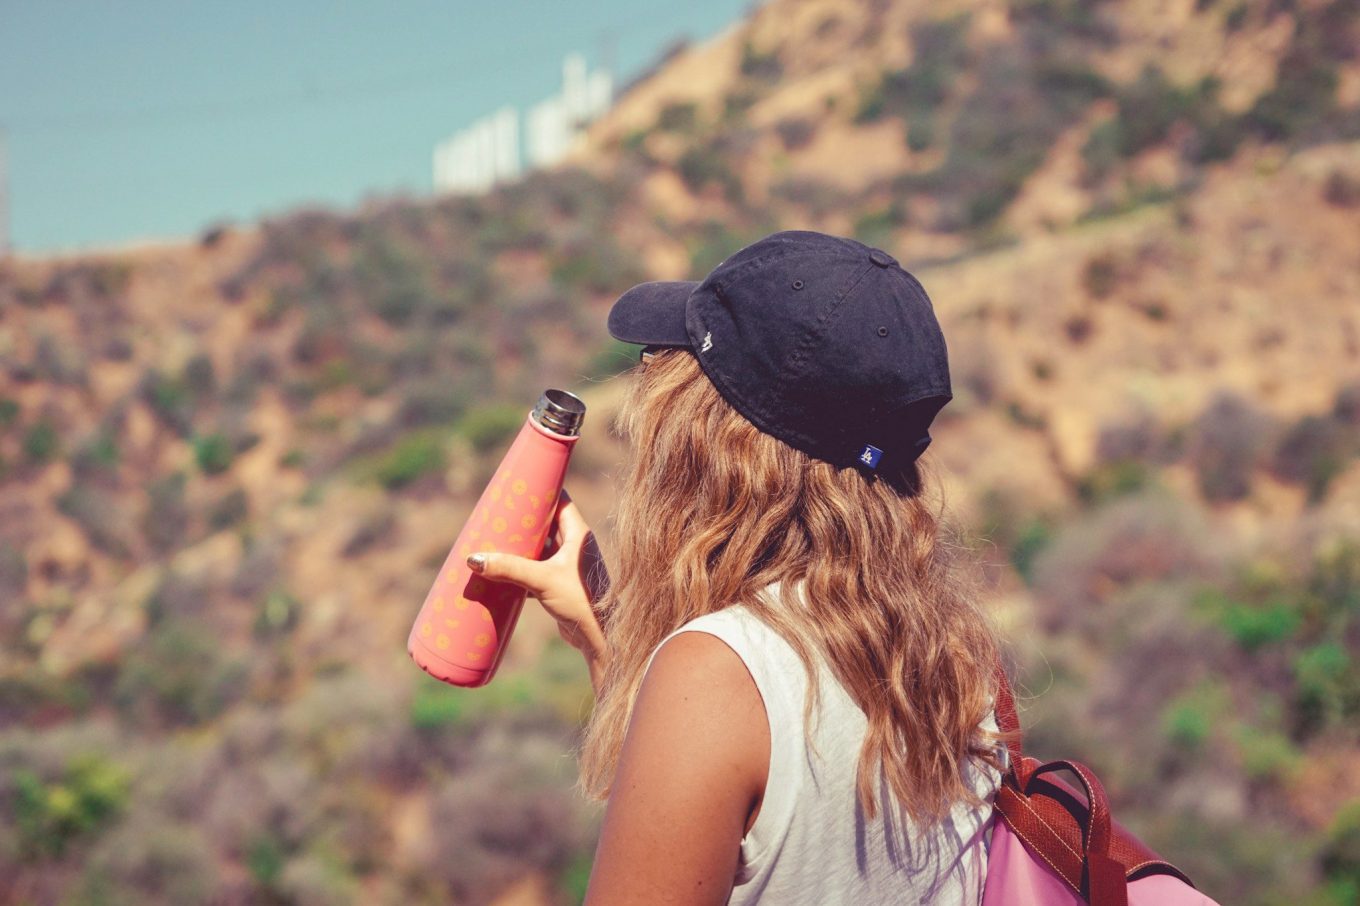
    Stay hydrated (she says for the one millionth time!). If you’re likely to be in the car for a long time you won’t want to be drinking warm water, so I recommend you get a thermal bottle. To read more about the water bottle I have and why it’s amazing take a look at 7 items to buy to become a more sustainable traveller.

    PFH Top Tip: Ask drive-throughs to fill up your water bottle en route. 

    Reusable coffee cup

    If you’ve read my blog post from the beginning of this month, 7 items to buy to become a more sustainable traveller, you’ll know exactly why it’s so important to stop or cut down on single use plastics. It’s not unreasonable to expect a few coffee stops on long journeys so just think of how much plastic/paper you’ve saved by using your own coffee cup!

    Snacks

    Try to be prepared with food so you can pack up some healthy options. You’ll find it difficult to leave your car to eat when it’s full of your luggage which makes drive-throughs and gas station snacks your best option. Unfortunately they’re not synonymous with healthy options so I urge you to be as prepared as possible.

    PFH Top Tip: Pick up a cheap cool bag to preserve sandwiches etc.

    Heartburn relief

    Gaviscon, Tums, Rennies – take your pick, trust me you’re going to need them if you succumb to those drive-throughs.

    Travel sickness preventatives

    Neither Michael nor I suffer from travel sickness during long car journeys but my brother did when we were young so I am fully aware of the consequences of not being prepared. If you or anyone partaking on your road trip does suffer, you’ll want to bring the medication they usually take for it, Sea Bands (for a non medicated alternative) and paper bags just in case the worst happens – to this day I still can’t get over my brother hurling in my beloved Burt and Ernie backpack.

    Toilet roll

    Grab a toilet roll from your hotel room, you never know how well equipped gas station toilets will be so take some in with you. Plus it’s handy to mop up any accidental spills in the car.

    Hand sanitiser

    Speaking of ill-equipped toilets this will keep the situation sanitary plus you can clean your hands before eating.

    Tissues

    It’s always a good idea to keep tissues in the car not just for blowing your nose but to clean up any unfortunate spills.

    Breath mints

    If you’re stuck in the car for a long time it’s a good idea to have something available for freshening your breath, especially if you’re not driving and are likely to fall asleep it’s a good idea to spare everyone else from your morning breath. I encourage mints over gum here because gum has a higher choking risk, which isn’t ideal if you’re driving. 

    Travel pillow

    On the topic of sleep, if you are the passenger or are taking it in turns to drive, it might be ideal to bring a travel pillow so your neck is supported if you need a nap. To read more about travel pillows check out Travel pillows – who you should be sleeping with.

    Sun cream

    You might be thinking “what is she talking about, how can I can burn inside the car?!” I know it sounds a little crazy at first but humour me for a moment. The sun can still get to you through the windows and unlike when you’re out and about, you can’t escape it in the car once it’s on your side. Studies show that commercial vehicle drivers have worse sun damage on the right side of their face (or left, depending on which country they drive in) from being exposed to the sun whilst driving. To prevent sun damage and any unwanted tan lines make sure to frequently top up your suncream.


    Sunglasses

    To save you from squinting on bright days but also to help you see better when the sun is low in the sky and your visor is too high to block it out. I always keep at least two on me because Michael is terrible for leaving his somewhere unreachable. Of course I have my fun with his forgetfulness and make him wear the novelty ones!

    Towel

    This really depends on where you’re going. If it’s somewhere hot or where it’s likely to rain/snow I suggest keeping a towel to hand to lay over your seat to soak up any excess moisture. It’s not a pretty thought I know, but driving on a hot day can be a sweaty ordeal, especially if the sun is on the driver’s side. A towel will prevent extra discomfort and also protects the seat. I suggest a microfibre towel because a) they are compact and lightweight which is perfect for travel and b) the fabric is super absorbent and quick-dry. I got mine from Mountain Warehouse.

    Change

    Keep a decent amount of change in the car (out of sight to avoid break-ins) for parking and toll fees.

    .

    I hope this checklist proves helpful for any road trips you have coming up. It might seem like a lot to take at first glance but (depending on how many snacks you pack) it will all fit into one bag so it’s not really inconvenient, and trust me it will make those long car journeys a lot more enjoyable/bearable. 

    For inspiration on where you can road trip all around the world, take a look at Your Parking Space’s article The Best Destinations For A Road Trip: Expert Round-up. You might recognise number 22!

    .

    Aloha, Gabriella

    Pin this post


  • PFH’s 10 Best Instagram spots in L.A.

    PFH’s 10 Best Instagram spots in L.A.

    Let me take you on a tour of arguably one of the best places to get a huge variety of Instagram shots, my favourite city: Los Angeles.

    1. Hollywood Sign

    There are three amazing places to get shots with the world famous Hollywood sign:

    Hike to the sign

    For shots with the back of the sign you want to hike up to the top of Mt. Lee. To find out exactly how to get there take a look at my post How to hike to the Hollywood sign.

    View this post on Instagram

    A post shared by Postcards from Hawaii (@gabriellawisdom)

    View this post on Instagram

    A post shared by Postcards from Hawaii (@gabriellawisdom)

    Lake Hollywood Park

    With the sign smiling down on it, this park is the perfect place for a picnic and a cute couple shot whilst you’re at it.

    Street parking is free from 6am-8pm, spaces are usually available on both sides of the road on Canyon Lake Dr.

    Hollywood sign viewpoint

    This is actually right next to Lake Hollywood Park, it’s just a few steps further up the sloped footpath.

    Up here there are plenty of spots to get photos. Everyone queues to stand up on the rocks but really you can stand anywhere to get great photos with the sign in the background. For a slightly quieter spot, walk a little further on to where there’s a couple of trees.

    View this post on Instagram

    A post shared by Postcards from Hawaii (@gabriellawisdom)

    View this post on Instagram

    A post shared by Postcards from Hawaii (@gabriellawisdom)

    2. TCL Chinese Theatre

    “Mary’s got the same size hands as Marilyn Monroe, she put her fingers in the imprints at Mann’s Chinese Theatre Show” – Kelly Rowland.

    Miss Monroe undoubtedly brings in more tourists than any other name scrawled in concrete. The proof is in the prints; the colour of her imprints compared to everyone else’s are much much darker and worn.

    To protect Sid Grauman’s legacy the forecourt is roped off every night and is washed first thing in the morning before it opens at 8.30am.

    PFH Top Tips for getting a photo with your hands in your favourite star’s imprints:

    • Know where you’re going, Marilyn is located near the back on the left hand side. I suggest researching who you want to see and where they are before you go so you can make a beeline for them.
    • Wait out front at 8.30am, they open up from the left so stand there to get in first.
    • Bring a towel or tissues to mop up the water, the sun won’t have dried them off at 8.30am.
    • Bring antibacterial hand gel or wipes because your hands are going to look grim when you’re done.

    View this post on Instagram

    A post shared by Postcards from Hawaii (@gabriellawisdom)

    3. Central Perk

    What? Really? Central Perk, as in the coffee shop from F.R.I.E.N.D.S? Yep, you read it right!

    The Warner Bros Studios Tour features a chance to sit on the famous brown couch whilst pretending to sip out of coffee cups the size of buckets. The full Central Perk set was rebuilt for our enjoyment, and there’s even a functioning café where you can pick up a coffee and pose with the Central Perk window shown so many times throughout the show.

    Of course this isn’t the only piece of T.V. history you can get a snap with. The tour includes Rosewood from Pretty Little Liars, Stars Hollow from Gilmore Girls and the exterior of the Full House house!

    You may even be lucky enough to visit one of their current production’s sets such a Big Bang Theory, Fuller House or Ellen – you won’t be able to take photos in these though, but it’s an amazing opportunity either way!

    Tour tickets start from $55 for children aged 8-12 and $65 for adults. You can purchase them here.

    4. Beverly Hills Hotel

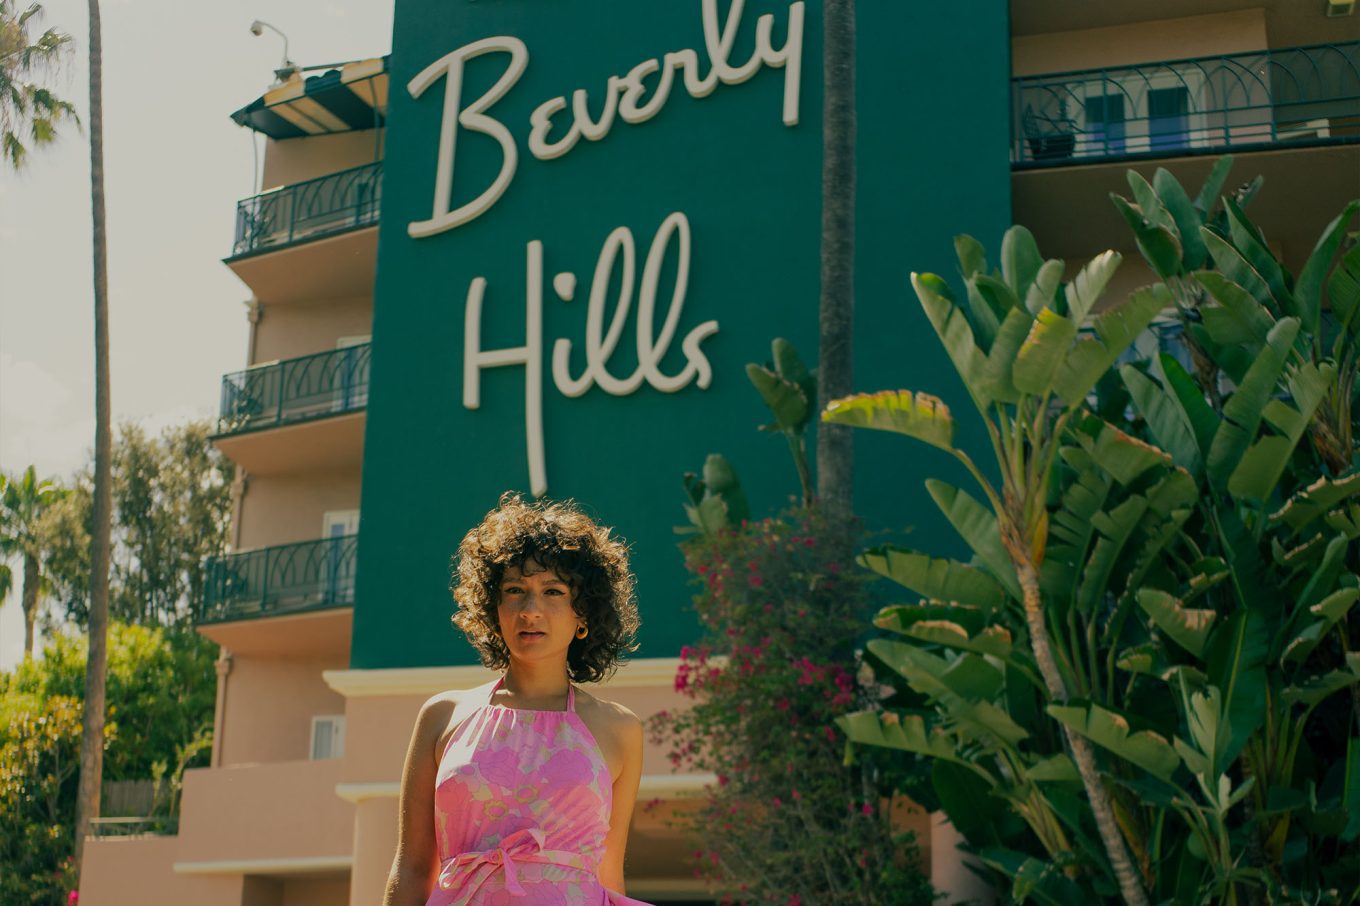
    My favourite photos from my whole three week trip were taken in the driveway to this hotel!

    The Beverly Hills Hotel is part of the Dorchester Collection and oozes Hollywood history and glamour, it’s iconic!

    For the best angle that will allow you to get in the full sign, you’ll want to stand between the first and second lamp posts and keep to the left. SAFETY PRECAUTION: This is the main entrance to the hotel by car so vehicles come through frequently. Keep alert, be patient and you’ll get your shot, but remember no photo is worth getting run over!

    View this post on Instagram

    A post shared by Postcards from Hawaii (@gabriellawisdom)

    View this post on Instagram

    A post shared by Postcards from Hawaii (@gabriellawisdom)

    View this post on Instagram

    A post shared by Postcards from Hawaii (@gabriellawisdom)

    5. Palm tree lined road

    One of the first things that comes to mind when I think of L.A. is cruising towards the Hollywood sign down a long stretch of road lined with skinny palms trees that are reaching up to a bright blue sky, the sun flickering between each tree as you pass.

    For a chance to stand in-between all of this perfection head over to where S Windsor Blvd meets W 5th St, and face North down Windsor Blvd. The sign might not seem close enough for your liking but it’s the best chance you’ve got of framing it between rows of palm trees.

    It’s a pretty quiet residential area but there are still a few cars passing through, the road is also located close to a crossroad so stay alert and make sure it is completely clear before stepping out into the road. I suggest going early in the morning, it will be safer as there are less cars about.

    “June Gloom” was taking over at the time we shot here so not only did we not get that dreamy blue sky but we also didn’t stand a chance of getting the Hollywood sign in the background, but hopefully you’ll have better luck and a clear day.

    There is parking all along these streets but keep in mind where you’re snapping from when you park your car so it’s not in your shot.

    View this post on Instagram

    A post shared by Postcards from Hawaii (@gabriellawisdom)

    View this post on Instagram

    A post shared by Postcards from Hawaii (@gabriellawisdom)

    6. Beverly Gardens Park

    This 1.9 mile park goes from Wilshire and Santa Monica Boulevard to Dohney and Santa Monica Boulevard and features one of the most photographed spots in town! The 40 foot long “Beverly Hills” sign, accompanied by a big water feature, sits between N Beverly Dr and N Canon Dr.

    There is free parking along the back of the park but if those spaces are full the surrounding streets also offer parking. Just make sure you check the time allowance if you’re planning on being in the park longer than just to take photos.

    View this post on Instagram

    A post shared by Postcards from Hawaii (@gabriellawisdom)

    7. Urban Light

    LACMA’s most famous art installation is lit up 24/7 so if you can handle it, arrive as late as you can to get nighttime shots that don’t have people zipping in and out of the background.

    PFH Top Tip: Save money on parking by ditching the pricey LACMA multistories and use the Whole Foods parking lot located on the corner of S Fairfax Ave and W 3rd St. it’s a 15min walk to Urban Light with 1hr 30mins free parking for customers but if you are aiming to shoot late then you shouldn’t have a problem.

    View this post on Instagram

    A post shared by Postcards from Hawaii (@gabriellawisdom)

    8. Colette Miller Wings

    Miller painted a series of wings across the world “to remind humanity that we are the angels of this Earth”. Six years later they’re still crazy popular on the gram.

    As L.A. is where they first made an appearance there are five across the city:

    • Traction and Hewitt in the Arts District.
    • Angel City Brewery.
    • Regent Theater.
    • St. Regis Wine & Liquor.
    • Melrose Avenue.

    View this post on Instagram

    A post shared by Postcards from Hawaii (@gabriellawisdom)

    9. The “Made in L.A.” Wall

    Located on the side of Cisco Home on the corner of Melrose Ave and N Laurel Ave.

    View this post on Instagram

    A post shared by Postcards from Hawaii (@gabriellawisdom)

    10. Paul Smith Pink Wall

    If you want a free fashion show you’ve come to the right place! People really step up their game at the pink wall and bring a multitude of props. In the 10mins I was there I saw flowers being thrown and even a fake picnic being set up!

    Luckily queues go down quickly for this one because the wall is long enough to accommodate at least five people to pose away at one time, with plenty of space in-between so that no one else is in your shot.

    FYI you can’t use any kind of professional camera equipment to take photos with the wall it’s “cell phones only” so make sure to use the best one out of the people travelling with you. Sounds strange I know but there’s actually a man whose sole job is to monitor people at the wall, making sure they only use phones and keep a good distance. I swear the security for this wall is tighter than Beyoncé’s Deréon jeans.

    View this post on Instagram

    A post shared by Postcards from Hawaii (@gabriellawisdom)

    If you make it to the Paul Smith wall there’s an instaworthy coffee shop on the opposite side of the road called Carerra Café. They also have an awesome hand painted mural wall that changes frequently. Unfortunately it was in the middle of being painted with the latest Hollywood mural when we tried to shoot there and couldn’t make it back for when it was finished. The wall isn’t even the best bit though. Here you will find the most snap-worthy coffee in town. Using the Ripple Maker they can print a multitude of images from slogans to Kim KW’s ugly cry onto the foam of your latté or cappuccino! If you’re super prepared you can even download the Ripple app and have any image of your choice printed on your coffee!

    They’re open everyday 8am-6pm.

    .

    For a chance to be featured on my Instastories use #postcardsfromhawaiiblog on your snaps at these locations!

    Aloha, Gabriella

  • Flat Lay Co. makeup bag review for travellers

    Flat Lay Co. makeup bag review for travellers

    You know it’s in there, you packed it. Heck, you even used it yesterday morning. You know that concealer is in your makeup bag but you have rummaged and rummaged looking for it and it’s not showing itself. In fact, it doesn’t show up until you’ve tipped the whole bag out on the bed or counter after you’ve spread it all out, knocking lipsticks and palettes (yep that one hurt) to the floor. Yeah, that’s when you finally find your concealer. Hands up if you’ve been there! Chances are if you’re here reading this then you know that situation all too well.

    This innovative open flat makeup bag by The Flat Lay Co. combines a cosmetic travel bag with a makeup mat into one practical and quite frankly, genius design. The Flat Lay co’s drawstring makeup bag is intended to make applying your makeup on your travels far easier, and less time consuming, by cutting out the need to rummage and preventing any of those pesky roll-aways.

    When I first partnered with The Flat Lay Co. back in 2018 we were both just starting out, I had only been blogging a few months and they only had the one size of their open flat makeup bag available in just black on their own website. Since then they have grown to 6 products including a dedicated makeup brush case and luxury eye masks, they have over 22 different patterns and colours, are available in the UK, USA, Canada, Australia, UAE and Saudi Arabia and are sold on ASOS, Amazon, Oliver Bonas, Feel Unique, Topshop, Pretty Little Thing and Misguided and though I don’t want to encourage you to shop from fast fashion brands, I do encourage you to support The Flat Lay Co. because they make an amazing product.

    I had first discovered their open flat makeup bags from my cousin in early 2018 and though we understood their purpose we were sceptical about whether the lack of structure would provide as much protection to our makeup. Curious, I reached out to The Flat Lay Co. and I took their classic 50cm open flat makeup bag on a 2 week road trip along the west coast of the USA in June 2018. Since then I have used my bag every single day, I also purchased a couple more, bought many as gifts and ran a couple of giveaways with them. Whether I’m on my travels or at home (pandemic or not) I store my every-day makeup and toiletries across my The Flat Lay Co. makeup bag.

    I published this review on The Flat Lay Co’s open flat makeup bag in July 2018 not because I was obligated to but because I wanted to share with you all of the 8 reasons why I loved using it. This blog post has now been updated to include their following products:


    • The original flat lay makeup bag


    • The mini flat lay makeup bag


    • The box bag


    • The standing brush case


    Every point I made for why their products are amazing in the original review is still valid and available to read within this post.

    1. Practical

    Are you tired of rummaging around in your cosmetic bag for what you need? Hopelessly searching for that one thing that keeps escaping you then getting fed up and tipping it all out at the expense of lost and broken items? Palettes and pencils are so fragile and all those times where we’ve tipped them out and hastily rammed them back in is one step closer to ruining a collection that has taken us years to perfect.

    Both the open flat and box bags from The Flat Lay Co. are the answers to your rummaging nightmares. You’ll never have to dig around for something again as both products combine a cosmetic bag with a mat. 

    It only takes seconds to pull up the drawstring to close the open flat bags and there’s a small looped handle to make carrying easier. When laid out flat the mat keeps your makeup in one place, prevents it from rolling away and keeps it clean, plus there’s no more digging around because it’s all set out flat.

    The box bag offers a little less space but a lot more security. The diamond shape opens out to a rectangular box with high sides so you can still find what you need easily whilst taking up less counter space.

    Their standing brush case means you can keep your brushes clean, organised and protected from damage to the bristles. The Flat Lay Co’s standing brush case means you can travel with your brushes knowing they’re secure and when you reach your destination you can zip open and fold back the top of the case to make a pot. I particularly prefer using my standing brush case to a brush pot as they are protected from day-to-day dust between uses.

    2. Drawstring fastening

    You might be thinking “how can a drawstring fastening be secure?” but the toggle is strong and holds it closed with no problems and it means you can fit so much more in. It makes for quick fastening and I’ve found my flat lay bag moulds into free space in my suitcase far better than regular cosmetic pouches.

    Also, when it’s opened out flat the drawstring creates a lip that stops your makeup from rolling out.

    Although I’ve had no complaints about my drawstring flat lay bags, I understand the want for more structure so for you I recommend the box bag which fastens by a zip and velcro and opens out to a makeup tray.

    3. Organised

    The drawstring flat lay makeup bag storage features include:


    • Two external velcro pockets, one at the front and one at the back – I store scrunchies, tissues and a nail file in these.


    • Internal zip pocket – I put hair clips in here and in my toiletry flat lay I store medication and plasters (band aids).


    • Eight elasticated loops – great for brushes if you choose not to use one of their standing brush cases, also liners, tweezers etc.


    The mini drawstring flat lay makeup bag storage features include:


    • Two external velcro pockets, one at the front and one at the back.


    • Internal zip pocket.


    • Four elasticated loops.


    The box bag storage features include:


    • Internal zip pocket.


    • Three elasticated loops.


    The standing brush case storage features include:


    • Two small internal pockets.


    • Six elasticated loops.


    4. Uses

    Of course you don’t have to use the Flat Lay Co’s bags just for cosmetics, it’s great for anything you don’t want to waste time digging for. I use my original flat lay drawstring bags for toiletries and makeup, my standing brush case for brushes and my box bag for my accessories. 

    5. Quilted protection

    I have been travelling the world with my flat lay bags for years, packing and unpacking multiple times, often on the same trip and I’m yet to have any makeup break within them. Even as I or others have dropped my luggage I have never had anything break whilst stored within them.

    The quilting makes a huge difference towards protecting your makeup. It means the layer surrounding your makeup is not only padded but it’s also stronger so you can rest assured that your makeup is more protected than in most makeup bags.

    6. Sizes and capacity

    The Flat Lay Co’s original drawstring bag is 50cm wide when open.

    Their mini bag at 33cm wide when open is perfect for popping in a few essentials to take in your handbag/ day-to-day bag. I keep a few travel basics like plastic-free deodorant, a scrunchie, suncream, some lipstick and hair products (if I know I’m going to get my hair wet) in my lemon print mini.

    The standing brush case is 22cm tall and 10cm wide when closed.

    The box bag is 22cm x 11cm x 11cm when closed and 22cm x 22cm x 11cm when fully opened.

    7. Machine washable

    You can either wipe your flat lay makeup bag clean with a damp cloth or pop it in the washing machine on a 30ºC gentle wash.

    8. Price

    They are very reasonably priced for how amazing they are, all are under £22! 


    • The mini flat lay bag retails at £17.99


    • The original flat lay bag retails at £19.99 (£21.99 for the velvet collection)


    • The box bag retails at £19.99 (£21.99 for the velvet collection)


    • The standing brush case retails at £13.99 (£14.49 for the velvet collection)


    I haven’t purchased another type of makeup, cosmetic or toiletry bag since using The Flat Lay Co’s products and for the time being I don’t see the need to. If you’re looking for a versatile carry case to last you a long time (yay for less waste and longterm use) then look no further than a bag from The Flat Lay Co. 

    Do more on & for the planet, Gabriella

    Pin this post


    Three of five products in this blog post were gifted and I purchased the other two. As an Amazon Associate I earn from qualifying purchases.

  • 7 items to buy to become a more sustainable traveller

    7 items to buy to become a more sustainable traveller

    It is very clear that we are causing great damage to our beautiful planet. Single use plastics are spilling out of landfills, ruining landscapes, polluting our oceans and killing animals. For every plastic water bottle made, 3 tons of CO2 is produced, it takes three times as much water to make it than it will actually hold and worst of all it will take a minimum of 450 years for it to decompose! 

    The amount of damage is terrifyingly unfathomable because you and I won’t live long enough to see the long term effects they will have on our planet, but together we can make a change. By purchasing just a few reusable every-day items, we can reduce the use of single use plastics and begin to take better care of our planet and all those who live on it.

    1. Water bottle

    Yes I have been going on about reusable water bottles, more specifically the Swell bottles, a lot recently but honestly they are the way forward! Of course any kind of reusable water bottles is better than a single use plastic one; they prevent waste, save money and reduce the health risk that comes from drinking out of plastic water bottles, but I really want to home in on stainless steel bottles here.

    They do have a couple of cons, I won’t lie. They don’t have a sports cap lid, so they can spill if you’re trying to drink on the go and they are heavier than plastic but, the pros are amazing. They are more durable than plastic and eliminate the problem of the chemicals used to make the bottles releasing into the water when they heat up. Plus if you get a thermal one they will keep your beverage cold for a whopping 24 hours or hot for 12 with absolutely no condensation. It might not sound very impressive but it means no more wet bottles in your bag and you don’t have to drink what feels like bath water after your rubbish bottle has heated up, instead you get a refreshing cold sip every time.

    I highly recommend Swell bottles not because I have any sort of partnership with them – I don’t – it’s because I have been using them for about four years and they are amazing. They come in all sorts of shapes, sizes, colours and patterns. My most recent addition is the Sip by Swell 450ml Lemon bottle.


    2. Coffee cup

    Obviously given the theme of this post, the main reason for using a reusable coffee cup is to help save our planet from being engulfed by a swarm of single use coffee cups, but did you know it can also save you money? Yes, really! Both major coffee shop chains and independently owned ones are offering discounts on your hot beverage order if you present them with your own coffee cup to use. Some of the big ones in the UK are:

    Pret – Save 50p

    Starbucks – Save 25p

    Costa – Save 25p

    Nero – Gives double loyalty points

    There are plenty of companies making travel flasks, cups, mugs etc so you can easily find one that works for you. Arguably I should have gone for a material that is better for the environment but I chose KeepCup because: 


    • They come in bright colours and team up with franchises such as Star Wars.


    • They are customisable; you can buy different coloured cups, lids, heat protective bands and plugs.


    • They team up with charities, such as Sea Shepherd.


    • The sip hole is really easy to drink from; it doesn’t dribble into the lid like some indented ones do.


    • They’re dishwasher safe.


    • They can be put in the freezer.


    • They can be put in the microwave (with the lid off).


    The lids are designed to fit their own stainless straws in the sip-hole, but as my bamboo straws are wider I simply take the plug off and slot my bamboo straw through the centre of the lid, so I can use it for my iced coffee too.


    3. Straws

    #strawssuck

    It takes up to 200 years for a plastic straw to decompose and yet we have gotten to a point where 1 billion of these monsters are used daily worldwide! 

    Each year 100,000 marine animals and 1 million seabirds die from ingesting plastic. It’s estimated that over half of all sea turtles have ingested some kind of plastic in their lifetime and if that’s not haunting enough there’s a heartbreaking video of a plastic straw being pulled out of a sea turtle’s nose that will make you think twice about using one.

    Of course it would be great if we could drop the need for straws altogether but they have their benefits so here are the three alternatives:

    Glass

    Pro: They are recyclable.

    Con: They are too fragile for travel.

    Stainless steel

    Pro: They are the most durable.

    Con: There are many reports on them piercing the roofs of people’s mouths because they’re so rigid, Starbucks even recalled theirs because of this.

    Bamboo

    Pro: They are completely biodegradable.

    Con: They won’t last as long as the other two.

    I chose to travel with bamboo straws because I felt that if I’m going to make the conscious decision to reduce my plastic usage I didn’t want to go half way. Unlike plastic and steel, which require energy, time and cost to recycle, bamboo is completely natural and will simply decompose just as the plant itself would.


    I bought mine in a set of 6 from The Pure Blue on Amazon, they come with a jute bag and a cleaning brush for £7.95.

    4 & 5. Cutlery & Collapsible silicone bowls

    For years, whilst I have been living out of hotels, I tried to cut down the cost of eating out every day by picking up items that I could make meals out of in my room; I would buy cereal and milk for breakfast, bread and cheese for lunch, salad items for dinner etc. To eat them though I thought I was being really savvy by grabbing extra plastic cutlery and take-away containers but I’ve come to realise what a waste this has been. I always tried to get as many uses out of them as I could but at the end of their use they would get thrown away. 

    To stop this repeated waste I only had to buy two items: 

    KFS camping set

    I got my metal KFS camping set from Mountain Warehouse on sale for £4.99. They are slimmer than daily use cutlery and interlock so they take up very little space.

    Collapsible silicone bowl

    I wanted a collapsible one because it’s easier to pack for travel but it was surprisingly hard to find as they are associated with portable dog water bowls. I did eventually find what I wanted and bought my Lifeventure bowl from Amazon for £7.99. You can trust that it’s good quality because it’s on the Duke of Edinburgh recommended set and for every item sold DOE receives a royalty, so you have two things to feel good about! It has come in so handy for salads and cereal.

    6. Clothing

    There are plenty of ways to reduce clothing wastage: Pass them on to friends/family/charity shops, buy them from charity shops, take them to clothing banks, sell them or up-cycle them. What I want to talk about though is ethically produced clothing or those made from recycled materials. 

    Dock and Bay Cabana Shorts Cancun Green

    For Michael’s birthday I bought him a pair of swim shorts from Dock and Bay. They originally made towels but have recently branched out into men’s swimwear. What’s great about these shorts is that the are made entirely from recycled plastic bottles, they are quick dry, inexpensive and look like something he could wear in the French Riviera. 

    Of course not all your clothing needs to be made from recycled products, that would be unrealistic, but maybe for the next purchase – such as swimwear- take a look as brands who are doing this.

    7. Shopping bags

    Look up stats for plastic bag decomposing.

    A charge for shopping bags has been widely introduced across the UK, and we have now successfully gotten to the point where we mostly head out with a “bag for life” to hand. I say mostly though because I reckon 99.9% of us have begrudgingly forked out 5-10p for a bag after forgetting one at least once!

    Anyway, as amazing as we are doing, not everyone is on the same page. Most of Europe is and has been doing it far longer than we have, but other nations such as the USA aren’t. All you need to to is go on one shopping trip in the States and you’ll realise how much waste there is from all the bags and tissue paper. Now don’t get me wrong I love the luxury of opening tissue wrapped items in lovely boxes and bags, but when it’s for every item it’s excessive and at the end of the day a massive waste. 

    Simply apply the same attitude you have when you go shopping at home and bring your reusable bags but should you forget make sure you reuse the ones you’re given.

    .

    As much as I want to encourage you all to be more conscious of our environment and the effect we have on it, I definitely don’t expect everyone to carry around all of the above all the time. I will admit that there’s been three occasions in the last two weeks where I have forgotten my straw or coffee cup. Sometimes impromptu coffee stops happen or you may be craving a flavoured drink that is pre-packaged, but if we all could just start by purchasing some reusable items to replace single use ones, and consciously taking them when we are certain of needing them, it can make a world of difference.

    .

    I’d love to hear about your efforts to be a more sustainable traveller and what items you’re using to help eradicate single use plastics, let me know here.

    Aloha, Gabriella

    Pin this post


    .

    *Disclaimer: As an Amazon Associate I earn from qualifying purchases but please know that I recommend all of the products above from personal use which you can see throughout my blog posts.

  • How to hike to the Hollywood sign

    How to hike to the Hollywood sign

    In 1923 Harry Chandler, a real estate developer, erected a sign reading “Hollywoodland” to advertise his new housing development. It went bust during the Great Depression so the sign was neglected and it began to fall apart. In 1944 it became city property but by the time the Hollywood Chamber of Commerce took it on, the “H” had fallen over. They propped it back up again and removed the “LAND” but of course priorities changed during WWII and the sign deteriorated once more, but this time much worse, getting to the point where large sections of the letters were missing and the third “O” had toppled over.

    In 1978 the Hollywood Chamber of Commerce decided to rebuild the sign completely, and thanks to a fundraiser organised by the late Hugh Hefner, some of the biggest names in Hollywood collectively put up a quarter of a million dollars to get this done. Since then the sign frequently receives touch ups, as every big Hollywood stars does, including a facelift in 2013 in prep for it’s 90th birthday. 

    This universal icon holds such precedence that it’s considered a high risk area for a possible terror attack and therefore has 24/7 surveillance which includes cameras, choppers flying over constantly and loud speakers. If you want to take a look for yourself head here for a live video feed of the sign.

    Heads up guys, unlike in many popular films including one of my favourites Friends with Benefits, it is NOT possible to climb up the letters. Thanks to the surveillance I just mentioned, you will be spotted straight away and you will face being arrested and fined for trespassing.

    The absolute closest you can get to it (unless you’re making a movie or part of the maintenance crew) is hiking up to the top of Mount Lee. This will take you up and around the back of it, so technically you’ll be looking down on “DOOWYLLOH”. 

    Now that you know a little bit of the backstory to one of the world’s most famous signs, I’ll tell you how to get up there.

    Where to start

    Pop Bronson Caves* into your sat nav device for your starting point. When you get there, continue driving up the road past the children’s play areas which will be on both sides. There are two car parks, the first is a skinny strip on the right (see image below), the second is further up and on the left. If it’s quiet I recommend going to the one furthest on the road because it will take you closer to the start of the trail which you will appreciate on the way back to your car. Both of the car parks are free and are open from sunrise to sunset.

    Looking back at the first car park.

    Directions

    From the car park walk ahead down the path. 

    Not long after entering you will face a gate which closes off the road to unauthorised vehicles. Pedestrians can walk past the gate, this is the trail. 

    Continue on to start the climb up.

    The first sign for directions tells you to go left for the sign, the right will take you to the Griffith Observatory. This one is simple.

    The second sign will show two options for the Hollywood Sign. 

    Follow the direction for the first. Facing the two options, take the one on the right heading upwards.

    The third sign is mildly confusing, it says left to the Hollywood Sign but you actually want to follow the direction for the Mt Lee Summit, so head right. Someone has written on the sign that this trail will lead you to the back, which means behind the sign. It will seem counterintuitive to go right because it appears to lead you away from the sign but after a steep incline you will eventually wrap around the back of it and get up to the top.

    The first sighting you will get once you walk around the corner will be of the sign behind a big wire fence but keep going up and around the left for a tiny but very steep dirt track which will take you up to the best viewpoint, where you will look down on the sign and the city it graces.


    Weather

    I’ve done this hike twice, once when we were doing our RTW 2016 and the other two days ago, 26th June 2018. The first time we went was in July during a heatwave and despite us getting to the top at 6pm it was scorching and we had to keep stopping to catch our breath.

    The second time we went first thing in the morning and it was much cooler and June Gloom is taking hold of LA whilst we’re out here so the mornings have been overcast and therefore cooler than usual. The sun broke through the clouds at about 9am that day so we were comfortable on the way up but by the time we started to descend it was heating up quickly and we were grateful for already being on our way down.

    I mentioned above that you can watch a 24/7 stream of the sign, this is really helpful to see what the weather is doing up there should it be an overcast day like ours started out. The cloud does lay low though so we didn’t have a problem even before the sun came out. Be sure to check the forecast too though.

    You can do this hike all year round but obviously the height of summer during the midday sun is ill-advised. It’s not worth risking heatstroke or sunburn so go when it’s cooler.

    Time to go

    Sunset is a good time to go because the temperature will be cooling down and the views will be amazing, but keep in mind that the carpark closes at sunset, so if you dawdle or don’t leave enough time you might not be getting your car back. The other issue with this is that it will most likely be busy with people trying to get those sunset snaps.

    My advice is to go first thing in the morning. We left our accommodation not long after sunrise and arrived for 7am which was perfect for us. It was still overcast so the temperature was a cool 17 degrees Celsius, but it was still nice and bright for photos. We only passed a few locals on the way up on their morning jogs, and when we reached the top there was only one woman up there. Luckily for us, because we had to do a fair bit of shooting, we were alone up there for about an hour so I could easily get changed and shoot anywhere I wanted. By the time were done and ready to go down, which was 9am, the sun was out, people were starting to arrive up there and it was soon swarming. I counted at least 30 people up there just as we were heading down and in less than 5 minutes into our descent another 13 people passed us on their way up.

    To summarise, go as early as you can.

    How long it takes

    It’s a 7.5 mile hike which takes you 1,003 ft up and is considered a medium level hike, but that is really determined by how fit you are and what the temperature is when you go.

    As I said above we have done this hike twice the first one was on a very hot day which wore us out quickly. That time we started off at 4pm and it took us about 2hrs just to get up there. That includes stopping time because it was a rough go in the sun but also for photos. We didn’t stay up there much longer than half an hour and then we came down. The sun was on its way down as we made our descent so it was much cooler and parts of the trail were shaded so it only took 1hr to get back to the car.

    The second time only took 1hr 5mins to get to the top, it was cooler so we didn’t overheat and we didn’t stop for photos because L.A. was still under a blanket of cloud so there was nothing to see. We did however spend 1hr up at the top taking photos in multiple outfits (a girl’s gotta have options) and then our descent took longer than the climb because the sun was out and we wanted to stop and take photos of the city and the valley views. We got back to the car at 10.30am so it took us 1hr 30mins to get down including the time to take photos.

    I should note that the second time around we were on a mission to get up there before anyone else so we power walked to keep it to roughly an hour, honestly if you don’t need to rush allow an extra half an hour for a more leisurely hike. I’d say on average you’re looking at spending 3hrs not including however long you want for photos.

    What to bring

    There is no shade on the trail once the sun is up which means you are completely exposed to its burning rays, so most of these items are geared up to protect you.

    Sunhat

    Wearing a sunhat does three things: stops your head from burning, shields your eyes from the sun and absorbs sweat from your brow.

    Sunglasses

    It’s really bright even when it’s overcast so protect your eyes. They will also save you from squinting in your selfies.

    Suncream

    No lower than SPF 30 but really just go for SPF 50. You’re exposed and vulnerable so it’s better to be safe than sorry.

    Water

    Bring at least 1 litre. Not only is it hot but it’s a tough hike, plus it’s quite dusty so stay hydrated. If you don’t already have one get yourself a thermal bottle. These babies will keep your drink cold for 24 hours with no condensation, which is a blessing when you are all hot and bothered.

    Comfortable shoes

    Wear a pair of hiking boots or decent trainers (sneakers). I’m talking function over fashion people! There are two steep climbs bookending the trail and the middle is basically a dirt track. If you know the pain of stones in-between you and your sandals you will be grateful for a pair of good walking shoes. 

    If you’re hellbent on getting snapped in a cute outfit do what I did and pack it up to change when you get there. FYI there are no changing rooms up this mountain, strange I know, so bring something that’s easy to get in and out of. 

    Camera

    You’ll want to capture the moment once you’re up there but there are also amazing views of LA on your way up too.

    Selfie stick

    A simple arm out selfie won’t be enough to capture the whole sign so unless you have a wide angled lens or a GoPro, a selfie stick will be your friend. If you’re thinking “ugh a selfie stick, that’s so 3 years ago, I’ll just ask someone to take photos” well, If you take my advice and go early someone might not be there to take photos and even if someone does come up whilst you’re there they might possibly be OUT OF THEIR MIND and not actually capture the sign in the background of your photo. You don’t believe that someone could do something so absurd? Well see the image below…

    Like seriously, how?!

    .

    Check out my California road trip playlist for some Cali inspired hits to accompany a trip to the Golden State, you might even want to listen to it on your hike!

    .

    Aloha, Gabriella

    Pin this post


  • How to recover from jet lag with Anatomicals

    How to recover from jet lag with Anatomicals

    I have been using Anatomicals products for a few years now after spotting their Hawaii five-glow tropical hydrating face mask in Topshop. As you all know I am obsessed with Hawaii so I couldn’t resist when I saw the quirky name. It smelt amazing and left my skin feeling so soft that from then on I’ve been one big fan. You can imagine how excited I was when I found out we were going to be collaborating on this post.

    To start off I want to give you my top four reasons why Anatomicals are worth falling in love with:


    1. The product names are hella funny, even the descriptions make you chuckle. They’re very tongue-in-cheek and not afraid to poke fun at themselves and the lengths we go to to look after our skin. You’ll see what I mean down below.


    2. The products work and I’m not just saying that. I’ve tried many products for my eyes with so much failure but the Anatomicals ones really work, my eyes look renewed and feel great.


    3. They don’t use parabens and the products are completely cruelty free.


    4. They’re so affordable it’s almost unbelievable! With face masks becoming such a fad it’s getting harder to find ones that don’t break the bank but Anatomicals have such low prices it’s easy to treat yourself to more than one, guilt free!


    It doesn’t matter how much of an experienced traveller you are, travelling across time zones will mess up your sleep cycle and can wreak havoc on your skin. Unfortunately there really isn’t a cure but there are definitely things you can do and products you can use to help you recover quicker than you might without. On that note let me take you through what those tips and products are.

    Sleep

    Once you’re seated and strapped in, the first thing you should do before switching your phone to “airplane mode” is change the time to the local time of your destination. This should be the last moment you think about the time difference. You want to get into your normal sleep pattern as soon as possible, so you won’t be doing yourself any favours by thinking about what time it is where you’ve just been.

    Cruisin’ for a snoozin’ sleep balm is available from Superdrug for £2.49.

    Of course it won’t be easy and falling asleep might be a struggle, so to help you out with this Anatomicals has their Cruisin’ for a snoozin’ sleep balm. To quote the back of the box “your insomnia is no match for our knockout sleep balm”, the coconut oil and cocoa butter nurture your skin whilst the lavender and lemon oils help to clear your mind and relax you into a deep sleep. Just rub this baby into your temples and pulse points just before bedtime and you’ll be nodding off in no time!

    Blemishes

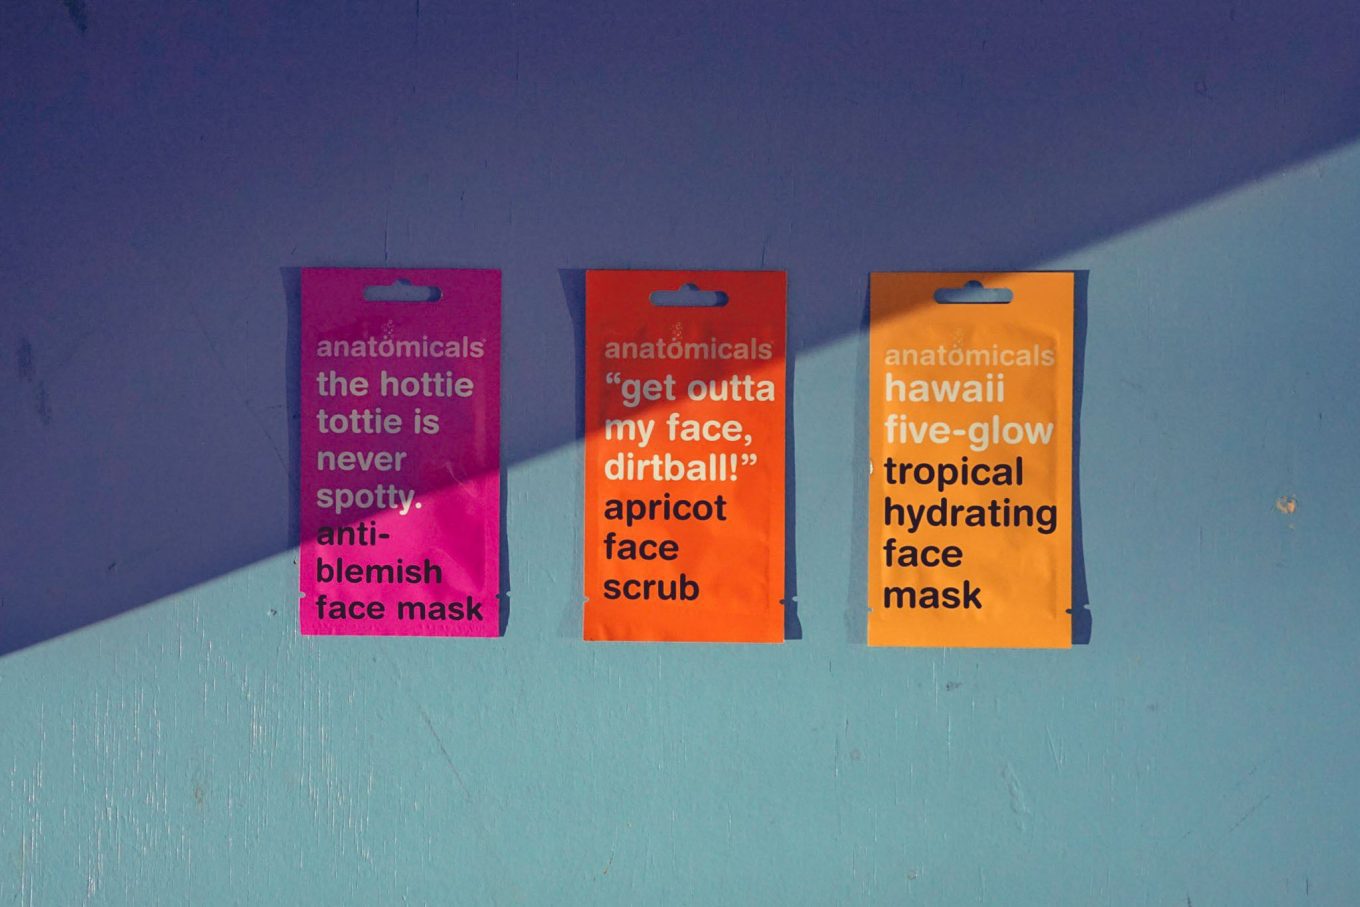
    Travel can be taxing on the skin. Let alone what the stress of it does to our hormone levels, changes in temperature and humidity can irritate it and cause breakouts. If you are prone to the odd breakout then The hottie tottie is never spotty is an amazing anti-blemish face mask which works to cleanse your face. The Kaolin clay unclogs your pores by drawing out impurities and the tea tree oil, which is a natural antiseptic, fights your spots.

    The hottie tottie is never spotty anti-blemish face mask is available from Boots for £1.50…

    You can also save money by buying the Care Complexion set of x3 for £3.49 from Superdrug.

    Eyes

    The skin around your eyes is the thinest and the most delicate, which is why it’s the first place to show signs of fatigue and ageing. Your luggage should be the only bags you come home with, combat those puffy eyes and dark circles with the No old bags allowed eye gel and Puffy the eye bag slayer wake-up under eye patches.

    For the first few days after arrival I start my morning skincare routine by applying a pair of the collagen under eye patches. You need to keep them on for 30mins so I use this time to eat breakfast and/or do my hair. I also pop them on about half an hour before my flight lands so my face seems perkier than I feel.

    Puffy the eye bag slayer wake-up under eye patches are available from the Anatomicals web shop for £6.90, they come in a pack of x3 pairs.

    PFH Top Tip: There’s a lot of liquidy goodness left in the packet once these are on your face, don’t let it go to waste! Pat it into your neck and chest, the vitamins and collagen will help battle ageing.

    Once I take off the eye patches I dab on some of the eye gel. It’s one of my favourite products because it contains orange flower blossom which tones the skin, reduces redness and softens skin. Perfect if you’re suffering from jet lag and your eyes have decided to let everyone know. 

    No old bags allowed eye gel is available from ASOS for £4.

    If you don’t have 30mins to treat your eyes to the eye patches just skip straight to the gel, it can be worn straight under makeup so you don’t have to worry if you’re in a rush!

    Hydrate

    If you’ve read enough of my posts you’re no doubt used to me chewing your ear off about this, but just in case you haven’t, drink water! Drink lots and lots of water. Flying is dehydrating and the very best way to rehydrate again is to drink plenty of water. Now that your insides are being taken care of, let’s move on to the outside.

    Aloha, is it me you’re looking for pineapple body lotion.

    It doesn’t matter if you’ve been out in the sun on your travels or not, you need to moisturise because it protects your skin, improves the tone, fights ageing and helps towards making you look youthful. The Aloha, is it me you’re looking for pineapple body lotion has a rich formula which will leave your skin “super hydrated” according to Anatomicals, perfect! You can use it on your hands and body and it will leave you smelling like a fresh Pina colada!

    Unfortunately at the moment that this blog post has gone live, the Aloha, is it me you’re looking for pineapple body lotion is currently out of stock, but Anatomicals has a few other body lotions and butters including Smoother butts love coconuts coconut and mango body lotion, which equally will make you smell like you’ve been on vacay in Hawaii. It’s available from ASOS for £4.

    Hawaii five-glow tropical hydrating face mask is available from Topshop and Boots for £1.50 and Superdrug as part of the Care Complexion set of x3 for £3.49.

    I pop on the Hawaii five-glow tropical hydrating face mask either in the morning whilst I have my eye patches on or as I’m winding down and getting ready for bed, it depends on the time of day that I arrive at my destination. This face mask is divine! The combination Papaya and Pineapple extracts and Coconut water not only exfoliate and hydrate your skin, but they make you feel like you’re on a tropical get away in Maui. Get one Danno!

    .

    Like I said above in my third reason to love Anatomicals, the products are so reasonably priced! If you did want to purchase all six of these jet lag life savers, you can get them all for under £25 and apart from the two face masks, you will get multiple uses out of them!

    You can purchase Anatomicals products from ASOS, Superdrug, Boots, Topshop and of course their very own website.

    . 

    Aloha, Gabriella

    Pin this post


    .

    Sponsored post.

  • What’s in my travel bag

    What’s in my travel bag

    Most people love a good nosey into someone else’s handbag, am I right? I’m going to take you through what I carry on every flight in both my handbag and cabin case. As you have probably learnt by now I like to be prepared so there’s a fair bit but hopefully you can just take from it what works for you. 

    Bag

    Last year I upgraded my travel bag from my trusty backpack to my Louis Vuitton Neverfull MM. I have always wanted a neverfull because I think LV is the epitome of luxury luggage so I was pleased as Punch to finally get one. It really lives up to its name, I’ve thrown so much into it and it has always been big enough, the only thing to keep in mind is the weight. As it’s so spacious and hold so much it’s easy to put too much weight in it and because the straps are skinny it may dig into your shoulders. Plus you don’t want to put too much strain on the stitching.

    Of course Louis is my baby and I want to preserve him as much as possible, despite his constant use. To do this I pop him in a reusable shopping bag. You might be thinking “why not use the dust bag?”, but there are three great reasons why a shopping bag is better:

    1. I can carry Louis with the handles of the shopping bag, dust bags don’t have handles.

    2. If you for any reason don’t feel comfortable showing that you have a designer bag, the shopping bag conceals this. Dust bags are branded.

    3. The top is open which means I still have access to the contents throughout my flight. Dust bags are designed to seal, the LV ones have a big flap which makes reaching down more awkward. 

    My shopping bag is from Monoprix in France which I realise is not helpful, but these kind of folding reusable bags are everywhere these days, look for them near the counter when you pay and check the size is right for your bag.

    Purse

    If you are expecting to do any shopping in the airport make sure you bring your loyalty cards i.e. Boots or Accessorize. I actually save all of my Boots points so that I can buy snacks or emergency items in the airport using just my points.

    Keys

    When you get to your destination pop your keys in a safe place whilst you don’t need them. When it comes to packing for your return home, make sure you put them back in your bag. The last thing you’ll want to do whilst you’re running on little sleep is open up your suitcase at the door to dig around for your keys.

    Sunglasses

    For the journey to and from the airport on both sides, I don’t want to be squinting if I’m sitting in the sun.

    Travel wallet

    I bought my Aspinal of London Travel Wallet* back when I was working in London, dreaming of travelling the world. I had almost used up my holiday days and I was telling my colleague I had just blown the last of my cash before payday on it. She laughed and said “when are you ever going to use it, you’ve used your holiday days” and inside I thought true I can’t use it now, but one day this baby is going around the world with me, and it did.

    It wasn’t my wisest purchase, the nappa leather damages easily and it was expensive (£120) but that purchase was my way of keeping my travelling dreams alive at a time where I wasn’t sure what I was doing with my life. Of course having a travel wallet, whatever the brand, is incredibly useful for keeping important documents in order, I organise mine as follows:

    Boarding pass

    Well this one is self explanatory, I will keep my printed boarding pass in here.

    Currency

    As you may have read in 8 ways to manage your travel money I like to spread my money across different purses so I’ll keep some cash in the currency section along with my one of my travel cards (either Monzo or Starling) and my Priority Pass membership card.

    Tickets

    I keep any tickets for events/excursions that I have printed in advance (should they not have a mobile ticket option) in here.

    Passport

    I have both mine and Michael’s because he cannot he trusted! The last flight we took, he lost his boarding pass less than 15mins after it was issued!

    Documents

    I mainly use this for medical documents: I currently have the prescription for any medication I’m taking. The box of your medicine is also good because it will have you name, DOB and Doctor’s info. For our RTW I had the document with the updated information for all of my travel jabs.

    Other

    I just have a little love note from Michael, some plasters and a tissue in this part.

    If you’re interested in purchasing a travel wallet with a higher budget check out Smythson and Aspinal of London*. For a lower cost Cath Kidston and Accessorize have cute patterns with plenty of pockets.

    *Please note that “lizard” and “croc” are the texture names, not the leather used.

    Electronics

    Headphones

    I carry two pair of headphones: noise cancelling and EarPods.

    My Bose Quiet Comfort 35 (series I) are amazing! I honestly don’t know how I was flying without them! Say goodbye to crying babies, snoring neighbours and that persistent buzzing, it’s just you and your movie marathon. They’re super comfortable, have a 20 hour battery life when fully charged and they come with a wire and flight adapter so you can plug it into the inflight screen.


    Thanks to the series II coming out, series I is now reduced on Amazon from £329.95 to £279. They come in black or silver.

    Phone

    Prepped with playlists and episodes of my favourite programmes downloaded for offline use.

    Check out my PFH California Road Trip Mix Tape for download on Google Play and Spotify.   

    Phone charger

    You never know when you’re going to get delayed so it’s best to keep your phone charger to hand.

    Power bank

    Just in case there isn’t a plug nearby or a USB port on the plane I keep a power bank to hand. I like to fall asleep listening to music when I’m flying so by the time I get to my destination my phone is usually running out of juice. My Fresh N’ Rebel 3000 MAH Powerbank provides one full charge of my phone, I just need the cable from my phone charger.


    I got my power bank from Amazon for £17.99. They also do 6000, 12000 MAH and 18000 MAH which does three, six and nine full charges, plus they come in really cute colours and they’re safe to fly with because they’re UN38.3 airline approved.

    Travel adapter

    One of the first things I do when I get to my accommodation is plug in my phone to charge. So to save me from rummaging around in my suitcase I keep my travel adapter nearby. I have a universal one to save needing multiple adapters, I got mine as part of a goody bag when I tested Heathrow T5 before it opened so I can’t link it for purchase but I believe you can get a decent one for around £15.

    Liquids

    I carry the following in my ziplock bag:


    • Mini mascara


    • Liquid eyeliner


    • Concealer


    • Hand cream


    • Moisturiser


    • Roll on deodorant (don’t choke your fellow passengers using an aerosol)


    • Mini perfume


    • Gel eye patches


    • Eye gel


    • Face mask


    • Mini toothpaste


    • Bongela


    • Vaseline


    Try to look after your ziplock bag and put it away for your next trip to reduce your plastic usage. Unfortunately not all airports accept reusable clear liquids bags and prefer for everyone to use the regulated ones given out before security, this means there’s a whole lot of plastic wastage, so please try to think about the environment before you toss it out after one use. I keep mine in my cabin case ready for my next trip.

    Cosmetic bags

    I don’t particularly like to have loose items in my bag because I’m terrified of pulling a Carrie Bradshaw when she went flying across the floor in Dior, the contents of her bag spilling out everywhere. Too dramatic? Ok. If by chance I drop my bag, keeping in mind it has an open top, I don’t want the contents to scatter everywhere so I prefer to keep them together in cosmetic/toiletry bags. This also means I can just grab the one I want from my bag and tuck it in the seat pocket for easier access.

    My first one contains the bits and bobs I will need throughout the day:


    • Pen


    • Tissues


    • Antibacterial wipes


    • Deodorant wipes


    • Plasters


    • Sanitary pad


    • Painkillers


    • Pill


    • Gum


    My second one contains the items I need for going to sleep and freshening up:


    • Mini makeup remover wipes


    • Mirror


    • Toothbrush


    • Sleep balm


    • Sleep mask


    • Lucas Pawpaw


    • Lipsticks


    • Compact powder


    • Makeup palette


    • Brush & sponge


    Snacks

    I’m not a fan of plane food and I tend to sleep through meals because I like to pass as much of the flight time as I can by sleeping through it. Of course I’ll wake up peckish so I keep some snacks to hand. I stick to dried food because there’s no risk of them spoiling if I have a long journey and I don’t eat them straight away. Here are my go to items:


    • Urban Fruit dried mango


    • Chocolate covered rice cakes


    • Perkier coconut and chia quinoa bar


    • Crisps


    • Sugar free sweets


    Water bottle

    For far too long I’d been buying bottled water in the airport after security, but I now take my empty water bottle through security and fill it on the other side. You should be able to find water fountains past security if not you can always nicely ask one of the coffee shops to fill it up.

    I have been using Swell for many years now, they are amazing because their triple-walled thermal technology means drinks will stay cold for 24 hours and hot for 12. You can leave it in a warm car all day, take it on a hike out in the sun, or tuck it into your seat pocket all flight and every sip will still be cold. Never again will you have to drink warm water with a Swell bottle to hand!

    .

    I don’t want to overstuff my bag so I keep a few bits in my carry on case:

    Travel pillow

    If you’ve read Travel pillows – who you should be sleeping with then you know that I prefer to sleep on memory foam. I got mine from Amazon for £9.99 and it’s the best pillow I’ve had. It’s soft, supportive and it has a removable cover.

    Laptop and charger

    You cannot put your laptop charger into checked luggage because it contains a lithium ion battery which can short circuit and cause fires. Fear not though the chances are very slim, but you must keep them in your carry on to be safe. You can read more on the Civil Aviation Authority website here.

    Items of value

    I keep anything sentimental or of value in my hand luggage because I don’t feel comfortable being separated from it.

    Change of clothes for flight

    I have some comfies that I change into shortly before boarding.

    Change of underwear

    Let’s be real long haul flights make you feel gross, a change of undies will make you feel a little less grubby.

    .

    Well now you know all of my travel bag’s secrets! Keep an eye out for future posts focusing on what I wear when I’m travelling and what products I use to recover from jet lag.  

    Aloha, Gabriella

    Pin this post

    .

    *Disclaimer: As an Amazon Associate I earn from qualifying purchases but please know that I recommend all of the products above from personal use which you can see throughout my blog posts.

  • PFH California road trip mix tape

    PFH California road trip mix tape

    I always make a playlist for each destination I’m travelling to.

    If you haven’t already listened to my other playlists, click the links below:

    PFH London mix tape playlist

    PFH Rio de Janeiro mix tape playlist

    PFH New York City mix tape playlist

    PFH Hawaiian mix tape playlist

    As my next trip is to Cali I’ve put together a whopping 43 Cali-for-ni-a themed songs into one playlist. It’s an eclectic mix featuring The Beach Boys, 2Pac and some of the La La Land soundtrack.

    To save you the hassle of having to put together the perfect Cali playlist I have made the PFH California road trip mix tape public on Google Play here and on Spotify here.

    If you don’t have access to either of these I’ve listed them down below.

    Beverly Hills, Weezer

    Another Day Of Sun, Justin Hurwitz (La La Land)

    I Love L.A., Randy Newman

    Surfin’ USA, The Beach Boys

    California Love, 2Pac

    California Girls, The Beach Boys

    Going Back To Cali, Notorious B.I.G

    California, Childish Gambino

    Hotel California, Eagles

    Born is the U.S.A., Bruce Springsteen

    California (Tchad Blake Mix) Phantom Planet

    Hollywood, The Kenneths

    Hollywood, Marina and the Diamonds

    San Francisco, The Mamas & The Papas

    Californication, Red Hot Chili Peppers

    Party In The U.S.A., Miley Cyrus

    All I Wanna Do, Sheryl Crow

    California Girls, The Magnetic Fields

    American Woman, Lenny Kravitz

    California Gurls (feat Snoop Dog), Katy Perry

    American Idiot, Green Day

    Dani California, Red Hot Chili Peppers

    America’s Suitehearts, Fall Out Boy

    Hollywood, Madonna

    American Pie, Don McLean

    Hollywood, Michael Bublé

    American Girl, Tom Petty

    Hollywood U.S.A., RuPaul

    American Teen, Khalid

    City Of Stars, Ryan Gosling (La La Land)

    L.A. Woman, The Doors

    California, Blink-182

    California King Bed, Rhianna

    Back In The U.S.A., Chuck Berry

    California, Wiz Khalifa

    California Roll (feat. Stevie Wonder), Snoop Dog

    California, Lenny Kravitz

    Hollywood, Jay Z

    California Waiting, Kings Of Leon

    San Diego, Blink-182

    .

    Enjoy!

    Aloha, Gabriella

    Pin this post


  • Açai smoothie bowl recipe

    Açai smoothie bowl recipe

    Açai bowls are so hot right now! This fashionable way to eat fruit is everywhere you look on social media. Press pause on those #veganlife hashtags for a moment and you’ll realise it’s actually a delicious way to get a whole bunch of fruit into your diet. It’s crazy healthy and it’s super easy to make. 

    I first came across açai smoothie bowls in Rio de Janiero when Michael took a HANGRY (I’m using caps to express that I was ready-to-eat-people hungry) Gabriella to get food but instead made us stop for drinks first, bad start. He then bragged about how well he was doing learning Portuguese with Duolingo and decided to order us drinks in Brazilian Portuguese. It wasn’t a drink that came to my table though, oh no, instead a tiny plate was placed in front of me holding what I could only describe visually as a poo emoji. Turned out it was a “baby açai” which meant a small unaccompanied serving of frozen açai which could be eaten like ice-cream. It was amazing but remember I was raging hungry and now very miffed about that fact that I was promised coxinha and instead had frozen fruit. So keep this in mind when you see my face below… please.

    Since then I’ve grown to love açai, having a whole range of toppings in different spots across the world. The most recent one I had was in Tulum, Mexico where I realised that I need to share how to make this crazy easy dish with you all. You can eat it for breakfast before work, for brunch at the weekend, as a snack between meals or if you add peanut butter it makes a great dessert. 

    Smoothie bowls are something the whole family can enjoy, I made one without nuts and seeds for my 2 year old cousin and she loved it so much she licked the bowl and her fingers (fingers? You try to get a toddler to eat with a spoon!). My point is, unless they don’t like fruit this is a totally family-friendly and versatile recipe.

    The recipe below makes one bowl. Should you not like any of the toppings I used just change them up for what you do like! There are so many options that the possibilities are endless! 

    Smoothie

    1 Banana (frozen)

    3 Tbsp açai powder*

    4 Tbsp almond milk

    1 Tbsp agave syrup

    3 Ice cubes

    3 Strawberries 

    1 Handful of blueberries

    1 Handful of raspberries

    Toppings

    1/2 Banana 

    2 Strawberries

    1 Tbsp almonds

    1 Tbsp goji berries

    1 Tsp chia seeds

    1 Tsp desiccated coconut

    1 Handful of blueberries

    1 Handful of raspberries

    Equipment

    Some sort of smoothie maker/blender such as the Nutribullet or Breville Blend-Active

    Chopping board

    Sharp knife

    Teaspoon

    Tablespoon


    • Prepare the banana going into the smoothie at least one day before you want to make the bowl. To do this, slice your banana, store in a freezer bag and pop them in the freezer overnight.


    It’s best to prep the toppings first because the smoothie will melt quickly once it has been blended. The problem with a melting smoothie bowl is that your toppings will sink and we want them to sit pretty on top.


    • Slice up the half a banana and two strawberries then put to one side.


    • Put the frozen banana pieces into the blender.


    • Measure out the açai powder, agave syrup and almond milk adding each to the blender.


    • Add the ice, strawberries, blueberries and raspberries.


    • Securely attach the lid and blend for about 45 seconds or until you can’t hear the ice breaking anymore.


    • Pour the smoothie into a bowl.


    • Decorate with your toppings. Make rows with the banana, strawberries, raspberries and blueberries and to finish sprinkle over the goji berries, chia seeds, coconut and almonds.


    . 

    If you give this a try let me know how it goes and what you topped it with. Use the hashtag #postcardsfromhawaiiblog so I can see them! 

    Enjoy!

    Aloha, Gabriella

    Pin this post


    *You can ask your local health food store for açai powder but it is cheaper to order on amazon, I buy this one from Sevenhills Wholefoods. You can buy bags from 50g up to 500g.

    .

    *Disclaimer: As an Amazon Associate I earn from qualifying purchases but please know that I recommend all of the products above from personal use which you can see throughout my blog posts.

  • Packing guide – Cancún, Mexico

    Packing guide – Cancún, Mexico

    During the 13 days we were in Mexico, the weather averaged out at 30 degrees Celsius during the day and only dropped to about 26 at night. There was a lovely breeze when you were by the sea though so that made it far more manageable. We were very lucky with the weather, the first couple of days had stormy afternoons but despite it being forecast all week it all disappeared and we had glorious sunshine all day everyday after. This trip was basically our summer holiday, it was mainly to chill out by the sea, eat a lot of food (I gained 5lb on this trip. Yes it shows and yes I’m eating well and exercising more to get rid of it, but no I don’t regret it. I loved it all and I knew the consequences) and do some memorable excursions. My packing list reflects this, it’s mainly swimsuits and floaty dresses and skirts. 

    There are four things from my packing list that I want to highlight because I think they’re really key pieces for a summer holiday wardrobe. 

    1. Swimsuits

    When I’m going on a sunny holiday by the beach or where I’ll be spending a lot of time by the pool, I pack as many swimsuits as I can fit in. My reasons for this are: 


    • I do a lot of water based activities when I’m by the sea so there are usually multiple hanging out to dry which I’ll have to wait a day to use – I hate putting on damp swimsuits.


    • I wear them like underwear under clothes which means I can compensate by packing less pants.


    • For the reason above I wash them after every use obviously! Just because you didn’t go in the sea/pool it doesn’t mean you shouldn’t wash them, would you take your underwear off and then leave it for the next day? I hope not anyway!


    • I want options for photos, plus I have a range of those that are suitable for lounging around only and others that offer more coverage/support for swimming.


    Assuan white – La Reveche

    Amira black pink flower – La Reveche

    Primark

    2. Cover-ups

    Our hotel, and probably many other resorts require you to cover up when walking through inside. It’s pretty reasonable to cover up when you’re not on the beach or by the pool but when you’re wet from the pool or hot and sticky from sunbathing you don’t want to be putting on too many clothes. A kaftan, kimono, playsuit or over sized shirt are all great items to throw on.

    Fringed trim beach cover up with tassel trim – only ASOS Curve sizes left – ASOS

    Contemporary printed kimono – Forever 21

    The tie front beach playsuit in red is sold out although it’s still available in black, but if you have your heart set on red here’s a similar one.

    Men’s striped shirt – Zara Men

    3. Accessories

    I’m still fan-girling over headbands just as I was in Amalfi back in February. My collection has now grown and I have them in different colours, fabrics and designs. They’re perfect for holding back frizzy beach hair and accessorising an otherwise dull bun. I’ve also been tying bandanas into my hair and around my head, my current favourite and the one I took to Mexico was this “Spring Worthy Bandana” from Anthropologie. 

    Spring Worthy Bandana – Anthropologie

    4. Sandals

    Flip flops are great and so practical but a good pair of sandals go a long way. Try to pick a pair that crosses over from daytime to evening but above all they should be comfortable to walk in. I wrote about my custom made Italian leather sandals from Nana Positano in my post Italy itinerary, a six day trip to the Amalfi Coast. I’m definitely not suggesting you get a pair made to fit your feet but I will say your feet deserve a well made and comfortable pair. Cheaper brands are great for changing styles but it’s worth having just one pair that won’t fall apart or cause blisters.

    There were only a few things I didn’t really need to bring:

    1. Makeup

    As I explained in a previous post, My travel makeup must haves, I didn’t end up wearing much makeup for reasons such as the colour being too light after I got a tan, sweating it off or not needing it to go in the sea. You will be able to see how much I brought from my packing list above but I encourage you to read about what I didn’t need/use in the end and what I lived by.

    06

    2. Strappy stiletto shoes

    I really hate wearing heels. “You crazy girl! Why?” I hear you say, well I’ve had two jobs which required for me to wear heels, one had an actual rule that you could only wear flats for one hour of the day and the other where the manager said, and I quote “flat heels, flat career” yeah, imagine that being thrown around these days! Both jobs butchered my feet, I still have the scars. I should point out that I lack balance so I stumble around like Bambi on ice, plus I’m so short (4ft 11”) that if I’m somewhere where I need to wear heels, chances are every other gal is too so I’m still a short arse. Anyway, I only wore them twice so they were just a waste of space. 

    Fear not, my wardrobe was entirely anti-heels, I bought a pair of platform espadrilles from ASOS for just £20 and I wore them tonnes! They give me a bit of height but because they are level I have no wobble troubles! I’m obsessed with them, it’s just a shame they’re a bit clunky for every look.

    The ones I bought aren’t available now but these are really similar.

    .

    Something I wish I did bring that hadn’t even crossed my mind was something to cover my shoulders in the evening at dinner. Not for any cultural reasons but because the air con in restaurants was freezing and I feel the cold more than most (wimp I know). I only had my denim jacket which wasn’t dressy enough so I ended up shivering a tad.

    .

    If you’re interested in planning a trip to Mexico, take a look at Mexico itinerary, a 13 day trip to Cancún.

    If you would like to edit your own packing list like the one above check out My ultimate interactive packing list where you will find a downloadable PDF and help on how to use it.
    Aloha, Gabriella

    Pin this post