Author: Gabriella Wisdom

  • Round the world trip activities itinerary Part 1

    Round the world trip activities itinerary Part 1

    In 2016 Michael and I set off for the trip of a lifetime. We had not long moved out of London, we didn’t know where we wanted to live next, we weren’t interested in settling down but we were desperate to travel.

    Between November 2015 and May 2016 we collectively scraped together every penny we had and booked a 16 week round the world trip (RTW) which mapped out as the following:


    • Kuala Lumpur, Malaysia 3 nights


    • Singapore 3 nights


    • Palm Cove, Queensland, Australia 10 nights


    • Sydney, New South Wales, Australia 14 nights


    • Auckland, New Zealand 2 nights


    • Rotorua, New Zealand 4 nights


    • Taupo, New Zealand 2 nights


    • Tongariro, New Zealand 2 nights


    • Masterton, New Zealand 8 nights


    • Napier, New Zealand 3 nights


    • Wellington, New Zealand 3 nights


    • Ohau, Hawaii, USA 2 nights


    • Maui, Hawaii, USA 12 nights


    • Las Vegas, Nevada, USA 2 nights


    • Grand Canyon, Nevada, USA 1 night


    • Los Angeles, California, USA 7 nights


    • Santa Maria, California, USA 1 night


    • San Francisco, California, USA 6 nights


    • Seattle, Washington, USA 5 nights


    • Portland, Oregon, USA Day trip


    • Vancouver, British Columbia, Canada 7 nights


    • New York City, New York, USA 8 nights


    • Rio de Janeiro, Brazil 3 nights


    Every day for five months I would chip away a little at the massive task of planning out what we were going to do each day to maximise our time in each location. You’ll be able to see from the list above that our round the world trip doesn’t include every continent or major travel destinations like most would. It doesn’t have a lot of South East Asia and it doesn’t include a trip across America. This is because we handpicked all of our destinations based on where we had family and friends and what we wanted to see at the time. We had family and friends in Australia, New Zealand, California and New York, Michael was desperate to visit Rio, I wanted more than anything to go to Hawaii and everywhere else slotted in around that.

    I wanted the first blog post of 2019 to be a significant one to start the year off, so here I am sharing what could possibly be the MOST elaborate and packed itinerary to ever exist, well at least that I have ever made, my round the world activities itinerary from 2016!

    Before I go into it I want to tell you that I was not blogging and had hardly used Instagram up until that point, stories didn’t even exist back then. All of our photos were taken on a GoPro and phones, not a professional camera which means there are far less photography-based locations on the itinerary, you can expect wide-angled warps and funky colours though. Also, I have updated it to have current ticket prices and up-to-date info because it has been almost three years (ooo that hurt) since I first made this itinerary.

    Oh and another thing, this itinerary has been split into two because there is a lot of information that’s about to come at you and it was too long to be one post. Trust me, I’m doing you a favour here! Part one covers Malaysia, Singapore, Australia and New Zealand. I will share part two which covers Hawaii, the West Coast of USA, Canada, New York and Brazil a week from when this post went live.

    Right then, let me take you through all the activities we did around the world organised by country.

    Malaysia

    Kuala Lumpur

    Chinatown

    Our hotel was in Chinatown so we would eat our evening meals there. We picked up a couple of dishes (large ones I should add), a fruit juice and a bottle of beer, that almost looked comical it was so big, for less than £3.

    This is also the place to be if you want a Channel flap, Guci Marmont or a Fendy Baguette… if you catch my drift… Though I no longer use any knock offs I remember the thrill of my Dad coming off a trip and giving me a new bag to add to my collection so you know, there’s a gift idea there somewhere…

    Petaling Street Flea Market

    Petaling Street Flea Market is perfect for your standard souvenirs: pens, magnets, key-rings etc.

    Open 10am – 12am.

    Central Market

    The best place for souvenirs in Kuala Lumpur hands down! It’s Western art deco exterior is a stark contrast to its beautiful Asian handmade goods. If you’re looking to pick up some authentic gifts this is where you need to come. I treasure my little elephant cross body bag which cost less than £4 and I didn’t take off my handmade bracelets, from which the sweetest travel charms hung, for the entirety of this trip…

    Open 10am – 9.30pm.

    Bukit Bintang

    Our experience of Bukit Bintang was insane! The traffic is horrendous, we got soaked to the bone as a torrential downpour hit us, the vast amount of neon lights were in competition with the lightening which lit up the night sky like the World Cup flood lights and the thunder made the city shake. It was a total attack on the senses and it was AMAZING. We picked up some great street food and embraced the hustle and bustle of downtown Kuala Lumpur.

    Petronas Towers

    The Petronas Towers is the most iconic landmark in Kuala Lumpur. Travel up 170m to cross the highest two storey bridge in the world then continue up to level 86 for panoramic views of Kuala Lumpur and a close up of the very intricate top of the sister tower.

    Open 9am – 9pm Tuesday – Sunday.

    Closed on Mondays, Hair Raya Aidilfitri and Aidiladha.

    Closed Friday 1pm – 2.30pm.

    Last admission is 8.30pm.

    Tickets prices are:

    80 Ringget per adult 13-60 yrs.

    33 Ringget per child 3-12 yrs.

    42 Ringget per senior citizen aged 60 and over.

    Children below 2 yrs go free.

    Open Sky Unlimited

    Our jungle trek into the Malaysian Rainforest was not only the highlight of our time in Kuala Lumpur, it was one of the best experiences of our entire RTW trip!

    The day started with a 6am pick up. We drove for 1.5 hours into the countryside where we stopped for breakfast in what I can only describe as the equivalent of a greasy spoon that served up traditional asian dishes. To this day it’s some of the greatest food I’ve ever eaten (excluding my Mum’s of course). We returned here after our trek and not only was it exactly what we needed but it was phenomenal – and I don’t use that word often, mostly because I can’t spell it without autocorrect – we had the freshest Biryani, savoury pancakes cut into the word “Love” and we even had murtabak which we had expressed a desire to try so Amos (our guide) ordered it for us.

    The trek itself was about four hours and took us up into the jungle until we reached our waterfall where we stopped for an hour to swim and sunbathe. It was such a great experience, even if I got mosquito bites that swelled to the size of golf balls (no joke). I should point out that it was no mean feat, the trek involved three steep inclines that hardly levelled out in between. It’s incredibly hot and humid despite being under the canopy and the waterfall is hard to access at first, but it really is worth it.

    They keep the groups small, so ours only had one other couple, we felt well looked after. I could not recommend Amos more! He carried spare bug spray, snacks and water. He answered every question we had about the wildlife surrounding us. He helped us through the really tough parts and he took hundreds of photos of us all with his waterproof camera throughout the entire trek!

    Amos asked us if we had plans to go to the Batu Caves and we said we didn’t have enough time to make the trip out so he stopped there on the way back to our hotel. Talk about going out of your way to make your clients happy! It was the sweetest thing, he parked up and took photos of us (this was before they painted the stairs every colour under the sun) and then took us home.

    The Jungle Mountain Waterfall Trek is now 350 Ringget per person which is approximately £66.50pp, and as mention includes transportation, breakfast and lunch.

    What to wear:


    • Knee-length sports shorts or cropped running tights


    • Quick dry short sleeve top


    • Swimsuit


    • Hiking boots


    • A complete change of clothes (which you get to leave in the car, we encountered a heavy downpour right at the end so we were grateful for Amos’ pop up tent and a fresh set of dry clothes)


    What to bring in a backpack:


    • Dry bag for your wet swimsuit


    • Insect repellent


    • Sunhat


    • Water (1 litre at the very least)


    • Snacks


    • Microfibre towel


    • Camera and/or waterproof case for camera or phone


    • Goggles (the spray is pretty vicious, it will help you to see, Michael teased me but it meant my eyes weren’t closed when we walked behind the waterfall)


    Singapore

    The Long Bar at Raffles Hotel

    Confession: The first time (which was on this trip) that we we went to the iconic Raffles Hotel we knew about Singapore Slings but we didn’t know about the Long Bar. We just stumbled into the courtyard and tried our first Singapore Slings at that bar.

    I did get to go last year though and it is such a fun experience! The moment you walk in you are greeted by the sounds of Bossa Nova, the floor has a blanket of crushed monkey nut shells which crunch under your feet as you head to the bar which is vibrating under the power of the unique cocktail shaker invented to make multiple Singapore Slings. Each table has their own sack of monkey nuts and just in case the sweet nectar of a Singapore Sling isn’t your thing, there’s a menu showing a wide variety of world inspired cocktails.

    Raffles Hotel is currently undergoing a complete renovation so you won’t be able to walk around the grounds or go to the courtyard where we had our first Singapore Slings but the Long Bar opened its doors again last year (thank goodness) so you’ll be able to chow down on peanuts and knock back all the slings your heart desires!

    For a brief history on Singapore Slings and the recipe to making your own, take a look at 5 jet setter cocktails.

    The gift shop is currently located about 5mins away from the Long Bar during the renovations but once you get there it’s filled with lovely little trinkets and all of the hotel’s artwork throughout its 132 year history.

    Merlion

    The Merlion is the official mascot of Singapore and should you get the chance to go to Singapore you’ll see that it’s on every souvenir imaginable.

    It stands proud looking out over Marina Bay opposite the iconic Marina Bay Sands hotel. It’s a mythical creature whose body is a fish but its head is a lion that spouts a steady stream of water into the bay.

    The fish body symbolises Singapore’s origin when it was Temasek, a fishing town which literally translated as “Sea town”. The lion head represents Singapore’s previous name “Singapura” which means “Lion City”.

    Singapore Flyer

    If you’re a fan of F1 you may recognise the Singapore Flyer from the Singapore night race. No? Ah that’s probably because they use the magic of television to make is look like a giant Rolex watch, with me now? Thought so.

    The Singapore Flyer is a large ferris wheel made up of 28 pods each offering 360˚ views of Singapore which includes Raffles Square and Marina Bay. You also get to look down directly on part of the F1 circuit.

    Open daily from 8.30am – 10.30pm.

    Ticket* prices are:

    S$ 33 per adult 13 yrs and over.

    S$ 21 per child 3-12 yrs.

    *Includes one half an hour long wheel rotation.

    Marina Bay Sands infinity pool

    Without a doubt Marina Bay Sands is my favourite hotel in the world. If not for its service, rooms or food, the 200m high and 150m long rooftop pool is one of the most incredible things you can ever experience. It’s the only hotel you will see recommended in this blog post because the pool can only be accessed if you are a guest at the hotel. The security is strict (and so it should be for what it costs) and you can’t even go to the toilet without having your key approved.

    A dip in the infinity pool at the top of Marina Bay Sands will make you feel like you’re swimming on top of the world. Then once you’ve taken a ridiculous amount of selfies, recline under the palm trees with a glass of champagne, the world literally at your feet and spend the afternoon celebrity spotting – the last time we were here Gollum (Andy Serkis), walked right past us.

    The pool is open 6am – 11pm and cannot be used after check out.

    Gardens by the Bay

    Gardens by the Bay is a free attraction that exhibits horticulture from all across Asia. It’s not only beautiful but it’s interactive and educational. A great destination that can be enjoyed by people of all ages.

    The super trees are a thing of wonder, you have to pay them a visit just to see them from beneath.

    The gardens are open 5am – 2am daily.

    Admission into the gardens is free but you will have to purchase tickets for the cloud forest or flower dome.

    Check out the rooftop bar in the Supertree for a chance to sip a glass of vino with a view of Marina Bay Sands. Best seen at night when it’s lit up. When you’re done, head back down into the gardens, take a load off and lay down, it’s the best way to experience Garden Rhapsody, the nightly musical light show.

    Garden Rhapsody is on daily from 7.45pm – 8.45pm.

    Australia

    Palm Cove

    We chose to stay in Palm Cove over Cairns because it was located on the beach and was far quieter. We intended to spend most of our time at the beach snorkelling but a monsoon had us rained out for most of our 10 day stay. It was so bad that our hotel upgraded our room to an apartment so that we could cook because it wasn’t worth going out in the rain. Especially as when we did we both caught a cold.

    The Great Barrier Reef

    Originally we planned to go to Green Island Reef with Big Cat Cruises but we were rightly advised by our hotel to book a smaller tour with Reef Day-tripper. Big Cat cruises go out on triple decked boats and you just know you’re not going to get the best experience in a group that big. I don’t regret our choice to change tours and I want to share three good reasons for you to book with them too:


    1. They don’t take more than 20 people, our tour had 13 people and it was the perfect number. It was easy to keep up with the guided snorkel tour, you could hear what was being said and there was plenty of room for everyone to sunbathe out on the netting.


    2. They are an eco-friendly tour with the lowest carbon footprint of any Cairns operator.


    3. They put on a good spread! We had tea and coffee in the morning, a tropical buffet for lunch and a cheese and fruit platter went out with wine on the way back to shore.


    PFH Top Tip: As good as the food is don’t over eat if you’re planning on scuba diving with them in the afternoon. I cannot tell you how gross it is to burp your BBQ chicken into your breathing apparatus and be stuck with that same taste for the next 5 minutes.

    The tour currently costs:

    $149 per adult.

    $110 per child aged 14 and under.

    An introductory scuba dive can be added at an extra $70 per adult and certified divers can go out for an additional $65 per adult.

    Skyrail Rainforest Cableway

    Take a journey into the oldest tropical rainforest on Earth via the Skyrail Cableway. Thanks to our monsoon we didn’t get to experience so much of the forest below as we did the giant rain cloud, but that’s not to say flying through the clouds wasn’t an experience in itself.

    There are two optional stops on the way up that include complimentary guided Ranger tours (and thankfully the use of umbrellas). See the following activity for what you can expect at the top.

    Open daily from 9am – 5.15pm.

    Closed on Christmas Day.

    Ticket prices for a round trip are:

    $79 per adult.

    $39.50 per child.

    Kuranda village

    When you get to the top of the skyrail you can spend the afternoon exploring Kuranda, a colourful little village high up in the rainforest. Sample natural eucalyptus oils, purchase beautiful Opal jewellery or pay a visit to the butterfly sanctuary. Don’t forget to pack up your waterproofs and some cash for the markets.

    Cape Tribulation

    Out of our 10 days in Queensland, we only had about three dry ones. After being stuck inside for a week with the sniffles and bored of watching the same cooking show reruns, we hired a car for the day and made a trip out to Cape Tribulation.

    The drive from Palm Cove took about 2.5 hours and included a tiny little rope pulled ferry trip across Daintree River. The ferry costs $28 for a return trip and only takes about 10mins. You’ll want to allow extra time for stopping off at the multiple (and well sign posted) view points on the way.

    The beach at Cape Tribulation is remote and totally unspoiled. The best way I can describe it is by asking you to imagine you were stranded on a tropical island. The sea is all shades of turquoise, there’s a wide stretch of golden sand that meets a line of palm trees and rainforest which goes back further than the eye can see. Bring a picnic, you won’t find any shops when you’re there.

    Heads up! It was on the way to the toilets at Cape Tribulation beach that I saw the biggest spider EVER. I mean the kind of spider that you see in Buzzfeed articles designed to scare you away from Australia. I didn’t have much pee left by the time I got to the toilet!

    Sydney

    Sydney Harbour

    Did you even go to Australia if you didn’t pay a visit to Sydney Harbour? It’s home to the most iconic structures in the whole country: Sydney Opera House and Sydney Harbour Bridge.

    We were on a budget so rather than spend money doing the bridge climb we settled for just walking across it because it didn’t cost a penny. If you are interested in climbing it, tickets start from $188 per adult and $158 per child (8-15 yrs).

    PFH Top Tip: If you don’t mind paying for an overpriced drink for the sake of a killer view, try the Opera Bar and the MCA Café at the top of of the Museum of Modern Art (time it when there isn’t a cruise ship docked).

    The Rocks

    The Rocks is a historic neighbourhood with some of the most spectacular views of the Sydney Harbour bridge. Spend a morning strolling the little streets and alleyways that make up The Rocks, shop in the outside markets and pause for lunch and a pint at some of the oldest pubs in Sydney.

    Luna Park

    Australia’s answer to Coney Island, this historic funfair opened in 1935 and still has all of its Art Deco characteristics including it’s debatably scary face/entrance. With 23 rides and games there’s sure to be something fun for all the family.

    Entrance to the park is free but attractions require a pass which is determined by the following heights (I know, way to give kids a complex):

    $25 for 85-105cm.

    $45 for 106-129cm.

    $55 for 130cm and above.

    Order online to save up to $4 per person.

    Vivid festival

    This is something that is dependent on the time of you that you go, we were in Sydney in May so we were able to see Vivid light and music festival. Should you be up for a trip to Sydney in the winter it’s an amazing thing to witness. The whole harbour is lit up from animated displays projected onto the Opera House to boats decked out with neon hashtagged slogans. The bridge changes to every colour in the rainbow and the Royal Botanic Garden becomes enchanted with more interactive light displays than Candy Cane Lane in December.

    Click here for more info on 2019’s Vivid.

    Palm Beach

    Or possibly more famously known as “Summer Bay Beach”. This beach is often converted into the set of Home and Away and chances are you’ll see a scene being shot out front of the “Summer Bay Surf Life Saving Club” or “Alf’s Bait Shop” which we did! Alas I was nine years too late for a Liam Hemsworth spotting!

    The drive out to Palm Beach will take about an hour from Sydney.

    Featherdale Wildlife Park

    Get up close and personal with Australia’s largest collection of native Australian animals including two of their most famous critters: Kangaroos and Koalas. Featherdale Wildlife Park gives you the opportunity to feed and play with all the kangaroos and wallabies you could wish for plus there’s an opportunity to have a photo with their resident Koalas. Fear not, it’s an ethical wildlife park that works closely with both government and non-government conservation groups.

    Open everyday excluding Christmas Day from 9am – 5pm.

    Ticket costs are:

    $32 for adults.

    $17 for children aged 3-15 yrs.

    $27 for students and pensioners.

    $88 for families with two adults and two children.

    $71 for families with two adults and one child.

    $58 for families with one adult and two children.

    Bondi > Coogee Coastal walk

    Thanks to some of the worst weather New South Wales has ever seen, a large section of the Bondi to Coogee coastal path was swallowed by the sea whilst we were there (no we did not have a lot of luck with weather on this trip). I still remember how heartbroken I was when I got to Bondi Beach only to find that Icebergs’ world famous sea water swimming pool had taken quite the bashing from the strong current and was closed.

    We did the walk anyway coming inland for the bits that no longer existed and despite the destruction, the parts of the path that we were able to walk on offered beautiful views. It was a really lovely day out that started with a lemonade at Icebergs and ended with a well earned meal in one of the beachfront restaurants in Coogie. I believe the coastal walk was restored in 2018 which is perfect timing for you if you’re planning a trip!

    Blue Mountains

    Blue Mountains is a national park west of Australia which has views that will knock your socks off! Expect to spend the whole day here as you hike through the mountains from one amazing view point to the next.

    A good starting point is the Three Sisters lookout, Echo Point. According the Aboriginal legend, they are three sisters who were turned into rocks for protection from a tribal battle that started when they unlawfully fell in love with three brothers from an opposing tribe.

    The Three Sisters are far left.

    For more information on what you can do in the Blue Mountains click here.

    We took the train from Sydney to Katoomba, the main town in the Blue Mountains, and it took about 2.5hrs.

    Mrs Jones The Baker

    It’s possible that my recommendation for this is bias seeing as it’s ran by my childhood neighbours’ daughter and husband, but for real if you are after the best baked goods to grace your lips then pay either of the Mrs Jones The Baker locations a visit. I swear I would fly to the other side of the world just to feast on one of their chocolate filled doughnuts. Don’t believe me? That’s cool, maybe ask the Queen of England instead then because she too also enjoyed a baked treat from Lucy.

    Their Freshwater store is open from 7am – 5pm and they also have a stall in Warringah Mall.

    New Zealand

    Auckland

    Skycity

    Our time in Auckland was fleeting so we really only had time to pay the Skycity tower a visit. I’m not a huge fan of heights so I didn’t personally enjoy walking over glass platforms 220m above the ground but it does offer 360˚ views for up to 80km in every direction. I must say I do remember enjoying a cheeseboard in the café looking out on the city from the top which made up for the fear.

    Open all 365 days of the year 24 hours a day.

    Ticket costs are:

    $29 per adult.

    $12 per child aged 6 – 14yrs.

    Children under 5yrs go free.

    $20 per student.

    $23 per senior citizen.

    $65 for a family of two adults and two children with a discounted rate of $9 per additional child.

    From Auckland we road tripped down to Rotorua stopping at the two following attractions:

    Te Henga – Bethells Beach

    Why did we make the 1hr 20mins roundtrip detour out to Bethells beach when we were in fact heading down to Rotorua? I’ll tell you why! Because Taylor Swift shot her “Out of the Woods” music video there so OBVIOUSLY we had to pay a visit.


    Yes I will admit it was a crazy detour just to take a truly awful replica photo, but if you ever get the chance to go all the way out there its volcanic sand beaches are actually something to behold.

    View this post on Instagram

    A post shared by Postcards from Hawaii (@gabriellawisdom)

    Waitomo Caves

    Waitomo Caves is an underground river network famously known for its inhabitants: Arachnocampa Luminosa (that’s glowworms to you and me). Enjoy blissful silence as you float under thousands of glowworms speckling the caves like the clearest night sky.

    Open all 365 days of the year.

    Tours depart every 15mins November – March and every 30mins April – October.

    Summer hours are 8.30am – 7pm.

    Winter hours are 9am – 5pm.

    Ticket costs are:

    $53 per adult.

    $24 per child aged 4-14yrs.

    Children under 4yrs go free although good luck keeping them quiet on the tour.

    Please note that you cannot take photos of the glowworms because they won’t show up without a flash and it will severely harm them if you use a flash, and we’ve all been somewhere with “no flash photography” and seen someone painfully fail and trying to get away with it. So with the glowworms’ safety in mind, all photography is prohibited.

    Rotorua

    To prevent me from repeating myself, especially if you have already read what I’m about to mention, here is a link to my blog post Rotorua, New Zealand itinerary – 4 day long weekend which covers the following attractions in depth:


    • Polynesian Spa.


    • Skyline Luge.


    • Redwoods forest.


    It also features rafting on the Kaituna Cascades which we did late last year and thoroughly enjoyed.

    Here’s what we did in Rotorua that wasn’t in the itinerary linked above.

    Hobbiton Movie Set

    Would you believe that I booked tickets for Hobbiton without having watched any of the films from the Lord of the Rings or Hobbit franchises? That I in fact watched the first LOTR and half of the second Hobbit the day before and understood Hobbiton perfectly and enjoyed every part of it?!

    The tour takes you miles out into the hills where you enter a different world! Wander through life size and miniature hobbit holes belonging to every kind of hobbit you can imagine, play dress up and end the tour with a complimentary drink in front of the fire in the The Green Dragon Inn.

    Tours depart daily from 9.30am until 2.30pm. 

    Ticket costs from The Shire’s Rest (the car park/gift shop/café) are:

    $84 per adult.

    $42 per child aged 9-16yrs.

    Children under 8yrs go free.

    Te Puia

    Te Puia is a centre that exhibits Māori culture at its finest. It’s also home to Pōhutu geyser, hot springs, silica formations, mud pools, Kiwi birds and the national schools of four Māori crafts: weaving and wood, stone and bone carving.

    One of my favourite memories from this trip was during the tour of the workshops, we were walking through the National Māori carving school and all of the young boys broke into song and harmonised – perfectly may I add – along to John Legend’s “I’m Your Puppet” which was playing from a little speaker on the floor. It was a beautiful moment and one I hope to never forget.

    Open 8am – 5pm Winter (April – September) and 8am – 6pm Summer (September – April).

    Tickets including a performance of dance and music and cost:

    $63.90 per adult.

    $32 per child aged 5-15yrs.

    $172 for a family of two adults and 2-4 children.

    Cultural Performances are at 10.15am, 12.15pm, 3.15pm.

    Taupo

    Rapids Jet

    Want to experience the thrill of the rapids without having to do any of the work? Hop on board a Rapids Jet boat for the chance to be thrown around and spun in circles as you hurtle down 653 metres of rapids at 55mph.

    Ticket costs are:

    $129 per adult.

    $75 per child aged 5-15yrs.

    $333 for a family of two adults and 2-4 children.

    Shopping

    Taupo has lots of lovely little design boutiques, take a wander through its streets to pick up something for your house.

    Tongariro

    Tongariro Alpine Crossing

    The Tongariro Alpine Crossing was without a doubt the hardest thing I did on the whole 16 week trip. I legit lost motor function in my legs when we returned back to our lodge, no joke, I have a video on my phone of me crying and dragging them across the floor. Was the 12.1 mile long hike to an altitude of 6,188ft rewarding though? Hell yes!

    We booked a personal guided tour through our accommodation, Tongariro Lodge but unfortunately I cannot give you an up to date cost for this because you will need to contact the lodge directly which you can do here. I can tell you though that the guided walk includes a first aid trained guide, equipment for all weather and terrain conditions, a packed lunch and return transportation from the hotel.

    As with every important excursion on this trip we had awful weather and had no view from the top of the Volcano. Had we been fortunate though we would have seen Mt Ruaphehu, the Emerald Lakes and the actual crater itself.

    What to wear:


    • Sunhat or Wooly hat


    • Thermal base layers


    • Fleece


    • Walking trousers or sports tights


    • Waterproof over-trousers


    • Waterproof coat


    • Wool socks


    • Hiking boots


    What to bring:


    • Sunglasses


    • 2 litres of water (at the very least)


    • Suncream (if the weather is good)


    • Camera


    Masterton

    Paua World

    My number one souvenir to bring back from New Zealand is Paua (pronounced “pah-wa”) Shell jewellery. Of course you can buy it in ANY souvenir shop across New Zealand but it’s at Paua World where you can learn all about the Paua shell and how they transform its beautiful lining into pretty little trinkets.

    Entrance to Paua World is free.

    Wine tasting in Martinborough

    We went wine tasting in winter so not many of the vineyards were open but those that were offered a tasting session that included five tasters for about $20 per adult. I can’t confirm any prices for 2019 because each vineyard is different but that should give you an idea.

    Even if you’re not a fan of vino I strongly recommend going just to read their absolutely absurd tasting note descriptions. To this day Michael and I will still quote what we read which went as follows:

    “…as smooth as Matthew McConaughey in a silk tuxedo”.

    “…masked like a size zero model wearing a pair of baggy dungarees”.

    “Tannis woven from the finest linen combine solicitously with an acidity so soft that the wine rolls over and presents its underbelly for a rub”.

    Don’t you just love how obnoxious the whole thing is!

    Castle Point

    We took a trip out to Castle Point on our first day in Masterton. It’s a beautiful beachside town west of Masterton and it takes about an hour to drive there. Take a stroll along the coastal path up to the lighthouse which is one of only two left in New Zealand with a rotating beam.

    Pukaha Mount Bruce Wildlife Centre

    Catch a glimpse of Kiwi birds scampering around in their nocturnal house, volunteer to feed the eels (if you dare), enjoy the kaka show (bush parrots) as they swoop down between you plus so much more.

    Open every day excluding Christmas Day from 9am – 5pm in summer (October – April) and 9am – 4.3pm in winter (May – September).

    Ticket costs are:

    $20 per adult.

    $6 per child aged 5-15yrs.

    Children under 5yrs go free.

    $17 per student.

    $50 for a family of two adults and two children.

    Napier

    Te Mata Peak

    Standing 399m high Te Mata Peak offers views of Hawkes Bay and beyond. You can reach it by car, foot or mountain bike. Click here for the legend of Te Mata.

    National Aquarium of New Zealand

    We went to Napier to celebrate my cousin’s 21st birthday and one of the things we did was swimming with sharks at the national aquarium. Although it was a great experience, in hindsight I’m not certain that I can recommend it because I’m not entirely sure how ethical it is to encourage people to pester sharks in a unnatural habitat. I’ll let you decide, the link is here.

    The aquarium itself was huge and pleasant to walk around with much to learn about what goes on under the waves.

    Open daily from 9am – 5pm.

    Ticket costs are:

    $22 per adult.

    $11 per child aged 3-14yrs.

    Children under 3 go free.

    $20 per student.

    $15.50 per senior citizen.

    $60 for a family of two adults and two children with a discounted rate of $6 per additional child.

    Wellington

    Weta Workshop tour

    Weta Workshop is the five time academy award winning, world-leading design and effects company.

    Their Weta Cave tour gives you a behind-the-scenes look at their contributions to the tv and film industry.

    “Weta Workshop bring not only world class artistic and technical talent to what they do, they also bring a spirit and a passion which is invigorating for the film-maker.” – JAMES CAMERON.

    Click here for a full list of their projects.

    Tours run every half an hour from 8.30am – 6pm.

    Ticket costs are:

    $28 per adult.

    $13 per child aged 6-12yrs.

    Children under 5yrs go free.

    $72 for a family of two adults and two children.

    Te Papa

    Te Papa is the museum of New Zealand and its free entry must be taken advantage of. It is home to a wealth of information, artefacts and interactive exhibitions surrounding New Zealand’s history across a whopping six floors.

    Open every day excluding Christmas Day from 10am – 6pm.

    Entrance into the general exhibitions is free but a fee may apply to some temporary ones.

    If you happen to be going to Wellington this summer be sure to pay the Terracotta Warriors: Guardians of Immortality exhibition a visit. It’s showing 15 Dec 2018 – 22 Apr 2019. Tickets cost $19.50 per adult and $9 per child aged 3-15yrs.

    Somes Island

    Take a boat out to Somes Island, a predator-free scientific nature reserve. The island is a refuge for tuatara, kakariki, North Island robin, little blue penguins and weta to roam free and as they have no reason to fear anything your chances of spotting them are very high.

    PFH Top Tip: Pack up a picnic because you won’t be able to buy food or drinks on the island.

    There are no rubbish bins on the island to prevent contamination of the wildlife so make sure to leave with everything you came with. You will also have to go through a bag check and boot clean before accessing the nature trails.

    Entrance to the island is free but the return ferry will cost:

    $25 per adult.

    $13 per child aged 5-15yrs.

    $68 for a family of two adults and up to four children.

    Information overload? I feel you, but just think, now if you ever plan to go to any of these destinations you can take a look at this for a starting point to what you can plan to do on your trip.

    I will share part two which covers Hawaii, the West Coast of USA, Canada, New York and Brazil a week from when this post went live.

    Happy New Year everyone! May it be your best one yet.

    Aloha, Gabriella

    Pin this post


  • Winter packing guide – Paris, France

    Winter packing guide – Paris, France

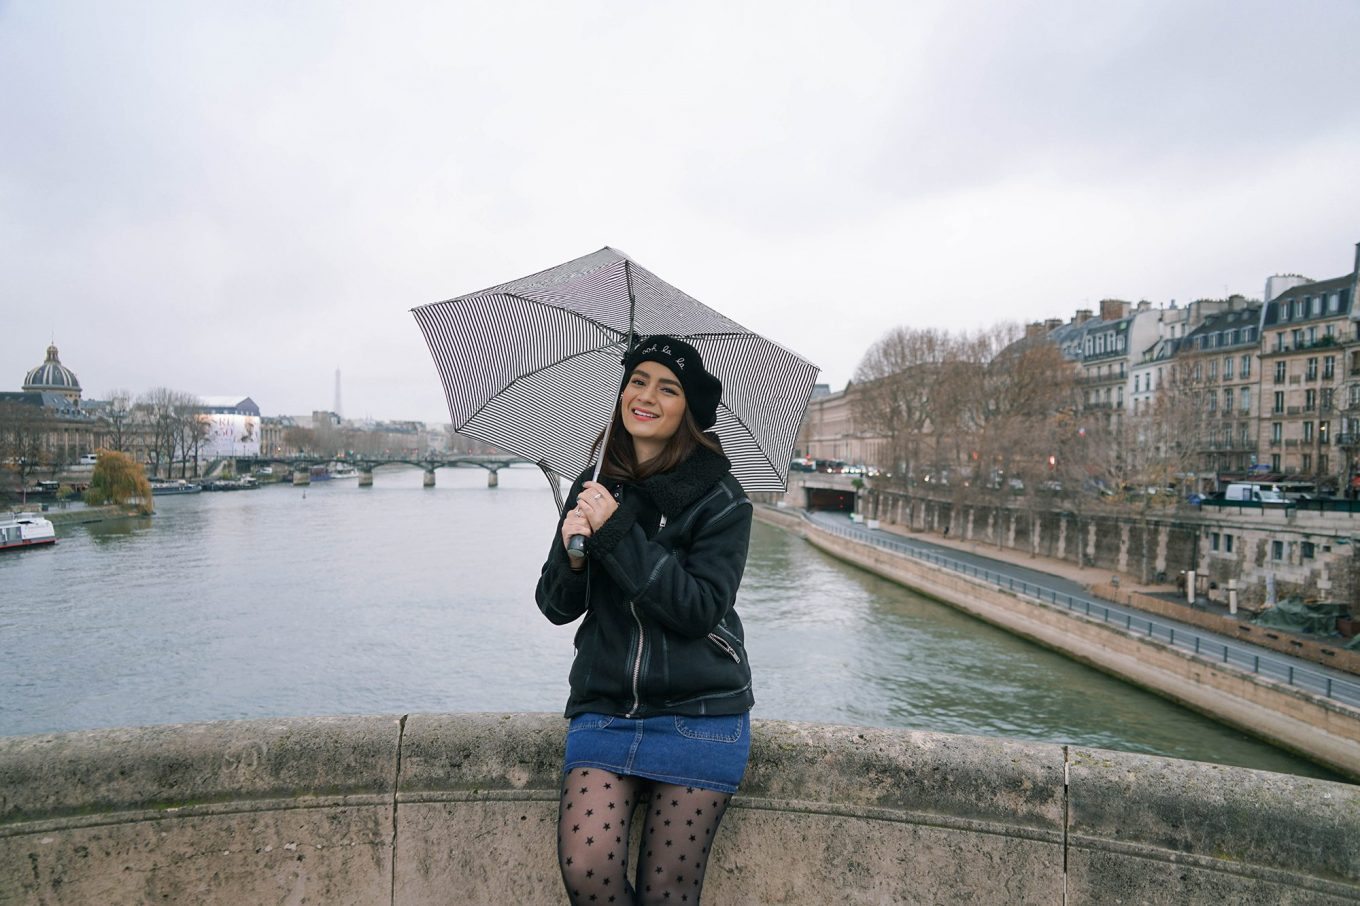
    Winter is my favourite time to visit Paris. Of course, galavanting around the city in little summer dresses, picnicking in the parks and spending warm evenings out drinking wine under the stars is amazing but I particularly love the cooler months. It’s quieter because no one wants to face the cold, all of the terraces are heated so you can cosy up with a hot drink and watch the world go by and the entire city sparkles in the build up to Christmas. Plus a bonus point is that if you plan to do your Christmas shopping in Paris, the chances are your gifts will be unique and you can pick up some festive outfits that no one else will be wearing!

    Paris is one of those inland cities that has hot summers and very cold winters so be prepared to wrap up if you’re going late October to mid March. Our most recent trip was 5th – 12th December and at best the temperature just about reached 9˚C for a few days. It mostly stuck around 4˚C though and was settling at a rather bitter 2˚C when the sun was down.

    Let me start by taking you through the items that made it really easy to create different outfits that were both stylish and warm:

    Coats

    A good selection of coats was key for me. I took three for my trip and wore the thickest one to travel in so I only had to pack two and one of them was a rain coat so it wasn’t too bulky. Each one was a completely different style which meant a different look but also a different level of warmth for varying weather.

    Accessories

    Changing between hats, hair clips and handbags made my look fresh even if I was actually repeating the clothes. Make sure your hats are different styles and/or colours, these are a key factor in making the same outfit look different. My wooly hat with a fluffy pom pom was cosy and fun whereas any of my berets dressed up that outfit and automatically made it chic.

    Hair clips are making a strong return so on days where it wasn’t that chilly I could just pop a couple of 90s snap clips on each side of my hair line or slide across one big barrette. Even better, they sat perfectly under a hat so I could get two looks in one.

    Winter PJs

    You just can’t guarantee that your room will be warm so be safe and pack a pair of warm PJs to lounge around in.

    Statement hosiery

    Is that even a thing? I don’t know, I might have made it up. What I mean by that though is something that’s a little more special than your average sock or pair of tights. The rolled up trouser leg is still a strong look and let’s face it, we’re not all 15 years old and resilient to the cold for the sake of making a fashion statement. So, my way around this is to wear a pair of sparkly socks so that you can keep warm, be festive and still look on trend. Patterned tights are also returning so I packed a couple of pairs and they instantly switched up my dresses whilst keeping my legs warm.

    Capsule Collection

    Of course the downside to Paris in winter means your clothes are bulky and packing light isn’t really an option when you’re going to one of the most stylish cities on Earth! Be smart with your outfits and pack a capsule collection, a selection of clothes that can cross over to make multiple outfits.

    I brought two roll necks, a couple of pinafore style dresses and two pairs of jeans that I rotated and they made up most of my outfits and kept my suitcase fairly light so that I could fit in a couple of bulky jumpers and a choice of coats.

    .

    I’ve taken off the packing list the items I went wrong on because I don’t want to confuse you with things that just weren’t necessary but they were:

    Ballet flats

    I brought a pair of sparkly ballet flats because they looked festive and would go with most outfits but I didn’t take into consideration how cold my feet would be. They basically turned blue the one day I tried to wear them. Although they’re so pretty I wouldn’t bother with them again if I’m going somewhere cold.

    Underwear

    For the first time in a long time I didn’t pack enough underwear. I usually bring less than the amount of days and wash them to save overpacking, but I didn’t consider the fact that the heating wouldn’t be on all day in the room when we were out and therefore wouldn’t dry quickly enough!

    Evening outfits

    In total I brought three velvet dresses a sparkly dress and jumpsuit and a metallic skirt for nights out but in reality I only wore one because we either stayed in to save money or we would sit outside under the heated terraces which were warm but not enough to take my coat off.

    .

    If you’re interest in reading more about Paris, take a look at 7 free museums in Paris for Europeans aged 18-25 and keep an eye out for an upcoming post with an itinerary for a long weekend in the city of lights!

    .

    Aloha, Gabriella

    Pin this post


  • How my Pangea Dreams blogger retreat changed my life

    How my Pangea Dreams blogger retreat changed my life

    To be honest with you all, I have been putting off writing my blog post on my Pangea Dreams experience, not because I didn’t enjoy it or get anything from it, but because I just didn’t know how to do it justice. It has given me so much more than I ever hoped for and I was baffled by how I could put it into words but I’ve done it! I’ve created a transparent blog post that tells you my feelings, my expectations, what I got out of it and why female entrepreneurs should do one.

    I had been eyeing up the Pangea Dreams retreats since I saw Lisa Homsy hosting one in Bali. At the time I didn’t know what was involved but it looked fun and I was intrigued by the idea that you could hang out with your favourite Instagrammers/influencers/bloggers for a week.

    After looking into it a bit I started reading the alumni testimonies and blog posts, following them on Instagram and I could see their audience growing before my very eyes. I decided that it was what I needed to learn the skills to get my career off the ground and boy was I right.

    I got so much out of my retreat: I’m now part of a like-minded community of adventure driven women, I have a new audience of travel bloggers and friends from all around the world who are some of the most supportive people I have ever met, I have creative content to use on my Instagram and blog and I’ve learned so many skills in all the areas needed to make an impact in the travel blogging/influencer industry.

    Use code “GABRIELLAW550” for a $550 discount on your Pangea Dream retreat booking! That’s $50 more than the early bird saving!

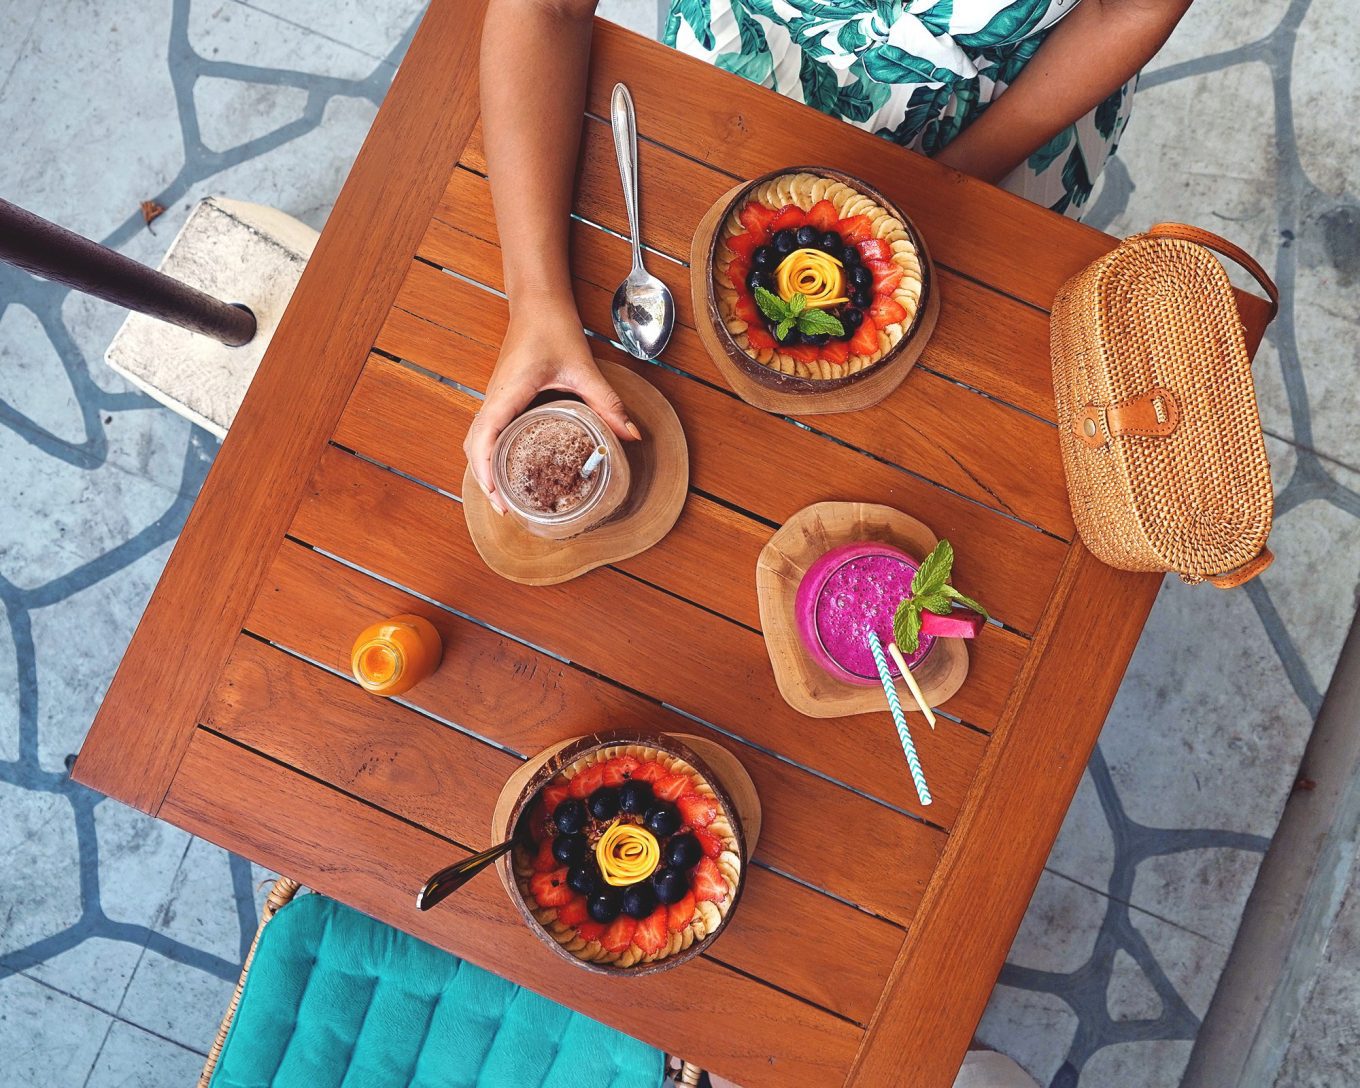
    Now I can’t pretend that it wasn’t a challenging week; the schedule is tight, there’s a lot of information coming at you, it gets emotional as your insecurities come to light and eating vegan felt like I was on a season of I’m a Celebrity (by the 3rd day I was like I’ll eat cockroaches to get a piece of meat with dinner), but if crying over a bad hair day and eating flowers in my salad were my sacrifices for everything I received in return, I’d say it was pretty dang worth it.

    Let me take you through my experience including the application process, what my expectations were, my opinions on our hosts, what I got out of it and where I am now.

    Photo by @light.travels

    Application process

    An application form is necessary but it’s not to vet out the weak by any chance! The application form is there so they can get to know you and have an idea of what it is that you want to achieve from the retreat.

    I’ve decided to share mine with you not because I want to influence what you write but so you can see where my head was when I applied. I applied way back in April this year whilst I was on a trip in Mexico. I had only launched Postcards from Hawaii the month before and I was a newborn to the blogging world. There were a couple of options for retreat locations but I had my eye on Bali because it was a bucket list destination that I hadn’t checked off yet, plus it was a good five months away which would give me enough time to personally establish my brand.

    Click to read my application.

    I remember I was in bed when I saw my “CONGRATULATIONS!!! See you in Bali!!!” email and Michael and I started jumping around! I knew that this was going to be a big investment into my future and I was thrilled.

    Use code “GABRIELLAW550” for a $550 discount on your Pangea Dream retreat booking! That’s $50 more than the early bird saving!

    Click here to apply.

    PFH Real Talk: The deciding moment for my application was when I saw Lisa Homsy was added as one of the hosts to the retreat. Now for one reason or another Lisa pulled out of the trip. Was I disappointed? Yes. Did I doubt my choice to apply when I found out my deciding factor wasn’t going? I can’t lie, yes! The thing is though, while the opportunity to meet and hang out with Lisa would have been awesome and probably would have helped boost followers, I reminded myself that although she might have been the only reason I became aware of Pangea Dreams, she was in no way the only reason why I wanted to go, so that was that.

    Photo by @light.travels

    Expectations vs Reality

    Support network

    As you can see from my application I was so eager to grow and gain a community. I felt so alone in the industry because I didn’t know any bloggers personally. It was very important to me to surround myself with positive and creative people and I walked away with just that. Read on to community for more on that one but I can tell you now that this goal was definitely met.

    Growth and followers

    I was so desperate to grow, I wanted to learn all the ways in which I could get a bigger following and audience. I’m not going to lie, I expected the retreat to bring in a lot more Instagram followers than it actually did, but by no means did I not grow. It was a huge goal of mine to organically hit 1k within my first year and I achieved that literally just as we were going to bed on our last night! Rolling back to community, I messaged the group to tell them and the support I got was amazing! I swore to myself that night that I will never forget to celebrate the milestones, no matter the size. It also taught me that I shouldn’t value my success from followers, it’s the quality of followers and the connection you have with them that counts.

    Feedback

    If you’re aware of the current drama going down regarding a certain travel blogger and her Mastertribe you’ll appreciate the next thing I’m about to say.

    About half way into our retreat we, as a group were concerned that we weren’t going to get as much creative content as we had hoped because between the 21 of us girls we only had two professional photographers, and one of them was actually on the retreat! We voiced our concern and no later than that afternoon had our five amazing hosts planned to each become a photographer for the afternoon to make sure we were all shot. The turnaround for the feedback we gave was astonishing, it just goes to show how important our experience was to them, particularly Tracy.

    Photo by @plume_creative_

    Itinerary

    I’m not going to take you through our actual itinerary, that’s for Pangea Dreams to share and for you to find out should you go on a retreat. What I can tell you though is that it is chock-a-block!

    Each day begins with exercise and an intension setting. At the time I found the intention setting circles difficult, there were days where I just didn’t know what to put down but on reflection I have decided that goal setting and acknowledging what I’m grateful for is something I want to take into the new year. Starting your own business is isolating and I’ve found it easy to forget what I’ve achieved so far. I believe that taking parts of the intention settings into 2019 will be a great benefit to me.

    There were more workshops than you could shake a stick at! With everything from branding to photography, blogging, self love and more. Each host developed more than one workshop that knocked my socks off. Learning from successful people in the industry really is invaluable.

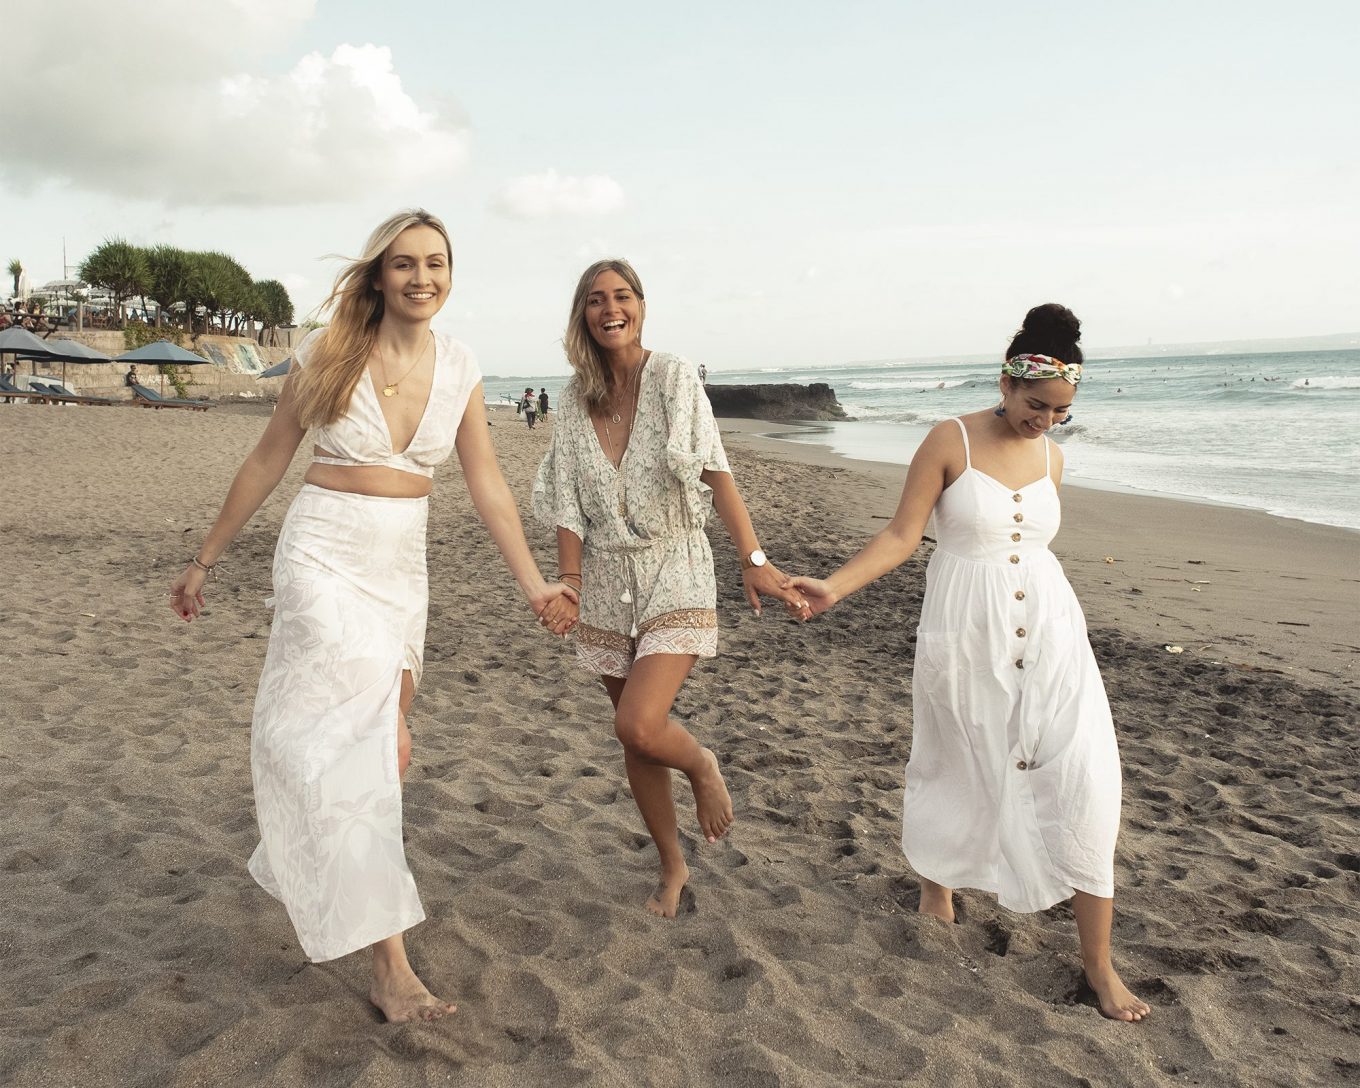
    Despite how intense the week was, we were given a decent amount of time to create some beautiful content with each other. We were able to shoot at our hotel, the beach, a villa, the rice terraces and in Seminyak. As I mentioned above, our hosts really listened to us and made certain that we left the retreat with some amazing photos, just take a look through this post to see what I mean.

    As I mentioned the events for the week were really packed in, which meant our timeframe for getting camera-ready was tight. I struggled with that because my barnet is a tough one to tame and sharing a bathroom wasn’t easy. My advice would be to have as many outfits completely planned out in advance so you’re not fluffing away your 15mins. I also just learnt to get up 30mins earlier everyday so I could put my makeup on whilst my roomie slept.

    Photo by @samkat featuring @plume_creative_ & @gypsyjournals

    Accommodation

    How did the accommodation change my life? Two words: Outdoor bathroom! My retreat had me embracing my inner Mowgli. What first terrified me (I was convinced I would be a bug buffet) soon became my haven. Every day I would look forward to my shower under the moon and stars before bed. Game changer!

    Photo by @samkat featuring @wanderfullyrylie, read about her Pangea Dreams experience on her blog linked here!

    Cost

    As I made the decision to give Postcards from Hawaii everything I’ve got and blog full-time, I function on savings which took a hit from booking a retreat. I made the decision to spend this money on my career because I fully intend to succeed down this path and I wanted to be able to go into it with the right knowledge and tools, and at the end of the day, the saying “it takes money to make money” isn’t wrong.

    At the time I wasn’t as aware of blogger retreats, influencer programmes, masterclasses etc. as I am now. In fact it very recently (as in at the very moment that I am writing this) occurred to me that unlike everything else in life, I didn’t research ANY other options. I didn’t even know online masterclasses were a thing, like I said earlier, I was only one month into blogging when I applied. I just went straight for Pangea Dreams.

    Now that I know a little bit more about the options out there and I’ve had time to reflect on my retreat I can say that my answer for the time-old question “is it worth the money?” would be:

    For a moment, put aside all of the amazing information you receive, the goodies on your bed when you arrive, the food, friendship, workshops and even the photos. Now think about what is the one thing that all Pangea Dreams alumni have in common, no matter their age, where they’re from, what they do or how successful they are? The answer is a love of travel. Where am I going with this you ask? No matter what you learn from the retreat, at the end of the day you are still taking a trip to whichever country you choose and you get to TRAVEL. You’re not paying to sit at home on your computer.

    Now don’t get me wrong, I appreciate that not everyone can afford to spend money on a trip or maybe you don’t have the time. I’m not undervaluing online courses, but in terms of justifying the price, I can’t tell you how many times I heard something along the lines of “I can’t believe I’m in Bali” and that feeling of utter disbelief and gratitude for your travels well, you just can’t put a price on that.

    Photo by @samkat

    Our hosts

    Tracy Komlos @tracy_komlos

    This girl eats, sleeps and breathes work and yet somehow she is still so energised every dang day! She carries a wealth of knowledge on her shoulders and is there to split the load. What she has achieved with Pangea Dreams is truly inspirational and I’m so grateful to her for building this empire and providing a nurturing place for us to learn and grow.

    It didn’t take me long to have a meltdown, Day 2 saw my tears as I got myself worked up over not being good enough but Tracy was there for me. Straight away she began questioning my doubts and fears and as I talked through them she helped me see that it was in my head. She picked me up and helped me realise that my doubts aren’t strong enough to take me out of the game and that instead they are a driving force to make me succeed.

    Lauren @wanderlulu

    The unsung hero of the whole shebang! Lauren is your go-to girl; your cheerleader, your warm hug and your greatest teacher and her most admirable quality is how humble she is. Lauren’s workshops were my absolute favourite! All of our host’s workshops were amazing, but if you’re predominantly blog based and looking to really pursue a career in that, then her two workshops, Blog SEO 101 and How to Drive Traffic to Your Blog Using Pinterest, are going to be life-changing for you!

    Side note, I burnt my leg quite badly one day on the retreat when I walked into the back of a car and seared my leg on the exhaust pipe. It was so painful and has left a very distinct scar (yes that’s right Pangea Dreams scarred me for life! I’M KIDDING!) The moment it happened, Lauren raced to get me ice and thank goodness for her because I was fighting off the tears and trying to play it cool and I swear if it wasn’t for her looking out for my leg the blistering would have been way worse!

    Carly @light.travels

    I never expected to connect with the hosts as well as I did, especially considering there were 21 of us for them to get around. I am so happy I managed to have a moment with each of them where I felt like we were really getting to know each other with conversations that weren’t about work. Carly and I had my favourite conversation of the trip when we realised both of our long-term relationships with our partners were so similar it was freaky! Carly is a total ray of light. She has the kind of laugh that will warm you through even at the top of Mount Batur on a chilly morning.

    Sam @SamKat

    Her talent knows no bounds! Another workaholic, Sam will stop at nothing to make sure you get the shot you envision. It didn’t happen often but the moments where I did ask Sam for a shot, she delivered without hesitation. Sam has so much passion for her line of work that there wasn’t one moment where she didn’t answer any photography question thrown at her. Her workshops broke down the basics of photography and gave me the confidence to try out being behind the camera instead of in front of it. Her heart is huge and her patience is that of a Saint!

    Deddeh @secretofdd

    Deddeh’s life story is mind-blowing! What she achieved, the statement she made, how it made people think twice and the voices that were heard because of her fierce campaign, Black Mirror, is an inspiration to us all. This was Deddeh’s first Pangea Dreams retreat and I hope it’s not her last. Her workshops focused on self love and empowerment and I hope that she shares it with more future alumni because what she gets you thinking about will change the way you see yourself for the better, and that has a bigger impact than you think.

    I am still in contact with each of them, and whether it’s questions about work or just having a chuckle with each other, it is incredible that they are still there for all of us long after the retreat.

    Photo by @samkat

    The community

    Want to know what the best thing I got out of my Pangea Dreams retreat is?

    The answer: community.

    If you’ve been looking into doing a Pangea Dreams retreat you’ve probably seen and heard the word “community” more times than “smoothie bowls” but honestly it’s the best thing that I’ve left the retreat with. It’s not the most meaningful thing to me just because I wrote about wanting one in my application but because they are real connections with genuine ladies from around the world, all with a passion for travel, adventure and creativity. These women understand better than most the ups and downs, the pressure, the fear and how much work goes into trying to succeed in the blogger/influencer world. Better still they have your back! It’s been seven weeks since leaving them and I don’t think a day has gone by where I haven’t spoken to at least one of them. We are still chatting on our group chat, cheering each other on and sharing useful tips and links. Trips are being organised to see each other, hell I’ve already met up with two of them! It’s truly a beautiful thing to be part of.

    Photo by @samkat featuring @misskellyoneill & @aloha_traveler

    If you want to get to know my fellow Pangea Dreams Bali October 2018 alumni then take a look at their Instagrams all linked below:

    Andi @ouiwegirl

    Kim @kimhashai

    Nadia @gypsyjournals

    Sarah @plume_creative_

    Hannah @hannah.rose.says

    Hillary @hilanderson

    Nicole @nicoles.travel.diaries

    Rylie @wanderfullyrylie

    Julie @fit.insight

    Kelly @misskellyoneill

    Erika @aloha_traveler

    Johanna @thiswanderlustheart

    Caroline @carolinevoyages

    Tammi @to.on.the.go

    Photo by @samkat

    The aftermath

    The trip I was on that included my Pangea Dreams retreat was a month long – two weeks in Bali, 10 days in New Zealand and two days in Singapore – so I wasn’t able to able to get stuck in straight away but once I returned to the UK I dove head first into applying what I had learnt.

    Since my retreat I have been the most driven to succeed since I launched Postcards from Hawaii in February this year. Just take a look at just a few of the ways I’ve grown:

    Photo by @samkat featuring @carolinevoyages


    1. Collaborations


      I have a collaboration with Mantra Band, a jewellery brand who makes minimalist pieces engraved with the most beautiful inspirational words and quotes. Their jewellery is more powerful than you’d imagine, which I saw first hand when Lauren told us about them and how her “Trust the Journey” bracelet encourages, reassures and inspires her in both her life and career paths. Her enthusiasm towards her Mantra Band jewellery lead me to reaching out to them and now I have a collaboration with them whereby I have three of their pieces in return for photography work and promotion on my social media.


      I also got my first hotel collaboration. Now it wasn’t for the complimentary stay as I was pitching for but I was offered a complimentary meal in return for photography work and promotion on my social media. I had previously tried to approach hotels for my Bali section of my trip but I was unsuccessful. The collaboration with Le Citizen’s restaurant wasn’t a direct result from Pangea Dreams but it gave me the confidence to keep applying after receiving a lot of rejections from Bali.


      Media Kit


      I had already made my media kit months prior to my retreat and it proved to be successful when it helped land me a watch collaboration – to see more about that take a look at PFH x David Daper – Banff – but it got a major upgrade after my retreat. During one of our workshops we got to see some of our host’s media kits and we were taken through the contents and the great thing about this is that it’s informative but it’s still a completely individually creative product that no matter what will be unique to you because it’s your own content. Also, the hotels/villas you shoot and stay in and brands that sponsor Pangea Dreams (the awesome goodies you get along with your vest on your bed upon arrival) can all go into your media kit as brands and companies you have collaborated with. You can’t say that isn’t a huge help, especially if you’re just starting to pitch!


      Affiliate Marketing


      This wasn’t something that was covered in depth on the retreat but it was definitely a discussion between us on the retreat and I am so grateful for them, especially Johanna for teaching me about affiliate marketing. I had no idea that all the links I was creating to the products that I wholeheartedly recommend could have been making me money (albeit very, very small change) this whole time! I have only gotten around to setting this up on one blog post but so far I have actually made money from it! For any of you who are in this blogging game and know this feeling you’ll know how elated I was to see some profits, and for those of you who are yet to give it a go, well I’m excited for you to know!


      Google Analytics


      I actually understand the data coming through on my Google Analytics now, I’ve had it set up for months but kept getting into trouble with Michael because I wouldn’t look at the numbers – because, you know, numbers – but now I’ve got my business head screwed on and I can figure out what is and isn’t working with my audience.


      SEOs


      I’ve become far more aware of SEOs and I make sure my blog posts are packed full of keywords that are driving a bigger audience to my blog. Now that I know how to use Google Analytics I have actually been able to see how using keywords are benefitting me.


      Pinterest


      I’m also working on setting up my Pinterest that once I figure it out (which is much alike trying to show a parent Facebook for the first time) will hugely benefit my blog in terms of bringing in a bigger audience. I’m not going to go into this because it’s for Lauren to say in her INCREDIBLE workshop, but trust me, it’s a big deal!


      Giveaways


      After learning about the many secret and loop giveaways that you can buy into and how they have worked towards and against growth, I knew that those aren’t for me but I was still inspired. I decided to run my own giveaway and I contacted brands I have previously collaborated with to put together something for my PFH ohana in the lead up to Christmas (it’s coming soon FYI so stay glued to my Instagram). If it wasn’t for the conversations between the women on the trip I wouldn’t have thought to do this so early on in my blogging career, I’m really excited about it and having the opportunity to treat one of you awesome followers!


    Photo by @wanderluluu featuring @carolinevoyages

    If this post or any of my fellow Pangea Dreams alumni have helped you make your decision to go on a retreat then click here to get started on your application, then check out my Pangea Dreams Packing List to see what you should be loading up your suitcase with! It’s for Bali as that’s the one I went on but it can easily be transferable to their other retreats.

    Use code “GABRIELLAW550” for a $550 discount on your Pangea Dream retreat booking! That’s $50 more than the early bird saving!

    If you still have questions regarding the retreat then feel free to email me here or direct message me on Instagram. I did the same thing when I was first contemplating going and now I am the one to receive a bunch of messages on Instagram from fellow boss girls looking to go on a retreat too!

    Aloha, Gabriella

    Pin this post


    .

    Disclaimer: I will earn a commission from qualifying purchases if you use code “GABRIELLAW550” for a $550 discount.

  • Rotorua, New Zealand itinerary – 4 day long weekend

    Rotorua, New Zealand itinerary – 4 day long weekend

    This trip to New Zealand was incredibly sentimental to me because it involved surprising my cousin who I hadn’t seen since the last time I was there which was just over two years ago. It was quite the operation to get everything finalised without giving anything away, a secret that was kept for at least two months. As he was working (and also none the wiser to our arrival) his girlfriend had to trick him into booking a long weekend off work for them to have a little trip away which was really a trip for the four of us to go up north to Rotorua, the tourism capital of New Zealand (not the actual capital).

    We decided to go to Rotorua for our four days off together because there’s such much to do, even more than what you’ll read about below! Rotorua has so much to offer, whether you’re after good food, a relaxing spa trip, seeking thrills or with the kids, there’s definitely an experience waiting for you there.

    We were quite lucky in terms of weather, we went in the first week of November which for those of you unfamiliar with the southern hemisphere is spring. Out of the four days it only rained on one and we went rafting and for a soak in our hotel’s thermal swimming pools so it didn’t effect us. The other three days were clear, sunny and surprisingly warm.

    Below you will find our day-to-day itinerary and beyond that I have broken down each of the most noteworthy activities from the trip.

    Day 1

    5hr drive to Wai-O-Tapu Thermal Wonderland.

    Half an hour drive to Rotorua.

    Check into hotel, Holiday Inn.

    Super market shop for breakfast and snacks.

    Ordered pizza takeout.

    Day 2

    Skyline Luge.

    Polynesian Spa.

    Dinner down the main street in Rotorua.

    Day 3

    Kaituna Cascades Rafting.

    Thermal pools at Holiday Inn.

    Dinner at The Brook Bar and Bistro.

    Day 4

    Walk in The Redwoods.

    1hr Drive to Huka Falls.

    10mins drive to Taupo for lunch and a walk around town.

    4hrs 30mins drive back to Wellington, via Desert Road for photos.

    Wai-O-Tapu Thermal Wonderland

    Wai-O-Tapu is a good walk with plenty to look at, but is it real? Let me put it this way, they claim to have a geyser that goes off at 10.15 every day, geyser’s don’t conform to telling time so when someone writes “the show starts at 10.15 and the geyser is artificially set off” you become skeptical.

    The first time I went here, about two years ago, I thought it was amazing, there’s a geysir, brightly coloured pools and steaming holes with bubbling mud. After seeing a little bit more of the world my second visit questioned whether it was legitimate that there could be so many natural phenomenons all in one place.

    Personally I don’t think it’s worth the $32.50 when there are other opportunities to see natural geysers and geothermal activity – For a great day out that features just that and so much more, take a look at Te Puia – but if you’re looking for a place to walk around with crazy coloured waters, steaming ground, and lots of mud, you’ve come to the right place.

    The trip wasn’t all that negative, the gift shop is one of the best I went to on the North Island. It has a huge variety of Manuka honey and Rotorua mud beauty products, paua shell jewellery, NZ merino wool garments and the usual souvenirs.

    Wai-O-Tapu is open 365 days a year, yes, including Christmas, their hours are:

    1st April – 31st October: 8.30am – 5pm.

    1st November – 31st March: 8.30am – 6pm.

    Christmas Day: 8.30am – 5pm.

    Adult tickets are $32.50, Children from 5yrs – 15yrs are $11 and under 4yrs go free.

    Please note that from 10th December 2018, Wai-O-Tapu will no longer accept cash payment.

    Skyline Luge

    Let your inner Lewis Hamilton come out on the race tracks at the Skyline’s luge.

    Despite being terrified of falling out of it, the luge is great fun. There are three levels of track:

    The scenic route

    My kind of track. It’s easy, quiet, and it twists around beautiful redwood trees. Great for first timers or for those of us who just want to take it slow .

    Intermediate

    This tends to be the busiest of the three because it has a little more going on than the scenic route but it’s also less of a white knuckle ride compared to the advanced.

    Advanced

    For the wimp that I am, I cried all the way down the advanced track because I thought for sure I was going to fall out whilst going round the banked turns. Of course Michael and my cousins thought it was the bee’s knees and proceeded to hurtle down the track racing each other for first place. I can see why it’s a fun track, it’s faster, steeper, has banking and a bump that sends you flying through the air for a moment. It’s great for thrill seekers.

    Even if the luge isn’t something you’re interested in, the view from the top is spectacular! You can see all of Rotorua and its lake which, fun fact, is the crater of a volcano. There’s a café and a restaurant up there looking out at the view below, plus there’s a Jelly Belly store with every flavour you can imagine!

    The opening and closing times are quite varied so check it here before your visit.

    The gondola ride alone is $31 per adult and $15.50 per child. Luge rides with the gondola included start from $45 per adult and $29.50 per child and go up to $65 per adult and $54 per child for the gondola and 7 rides. To see their other price packages click here.

    Polynesian Spa

    Between all of the action that Rotorua has to offer, it’s nice to take break and relax your body and mind at the Polynesia Spa. They have a total of 28 hot mineral pools filled with acidic and alkaline waters that will relieve aches and pains whilst nourishing the skin. The challenge however is staying in them without cooking as their hottest one goes up to 40˚C!

    PFH Top Tip: Stay hydrated (I know, here she goes again). The heat of the pools will dehydrate you much faster than you think. There are water fountains dotted around so make sure to drink from them as often as possible.

    They offer a variety of packages for adults, families and couples. The Adult Pools are the best bang for your buck, for $30 you can relax in six pools and go for a stimulating reflexology walk. However, towels are not included, the storage for your belongings are tubs kept in the pool area and the changing rooms are also communal.

    If scenic, peace and a little bit of extra luxury is what you’re after then the Deluxe Lake Spa is for you. This one is my favourite! For $55 you have access to five hot mineral pools, one cold plunge pool for hydrotherapy, geothermally-heated poolside recliners (which are amazing when it’s cold outside), an indoor lounge with a complimentary smoothie, plus all of it looks out onto the lake and is surrounded by a beautiful display of rocky waterfalls and living walls. The changing rooms are private and you get free use of towels, toiletries and hairdryers.

    Again the gift shop here is great if you’re looking for a big selection of Manuka honey or Rotorua mud skin products. There is a also a café offering revitalising juices and smoothies and a good selection of gelato and sorbets.

    The pools are open from 8am – 11pm so you have the option to start your day refreshed, chill in the afternoon or relax under the stars.

    To see the full price list click here.

    Kaituna Cascades Rafting

    By far the best thing we did all weekend was rafting down the Kaituna Cascades. Unlike the Luge I was crazy excited for this, unlike everyone else who was bricking it. Kaituna Cascades Rafting are the original Kaituna rafting company, have great reviews and are a great bunch of people!

    Want to raft the world’s highest commercially rafted waterfall? Then look no further! For $95 per person you can ride down 14 rapids, including the world famous 7m Tutea Falls. One of the rapids you can go down standing up in the raft and another you can go down on your own without the raft, which let me tell you is an unforgettable experience! The best part is that you need no prior experience!

    They set off three times a day throughout the year at 9am, 11.45am and 12.30pm with an extra tour at 4.30pm in summer. Allow about 2hrs for your visit, the tour is about 1hr and you’ll need time to change in and out of your wetsuits.

    The ticket price includes wetsuits, fleece tops, splash jackets, wetsuit boots, lifejackets, helmets and paddles. Bring your own towels and wear your swimsuits underneath. Wear a chest harness if you want to bring your GoPro.

    We had such a great time doing this, it was a real adrenaline ride, a classic Kiwi experience and our guide was an absolute hoot! I strongly recommend this!

    Book tickets online using the discount code CASCADES to receive $10 off* per person.

    The Brook Bar and Bistro

    I’m going to be honest with you here, I know the owners of this amazing little restaurant, it’s run by just two very hard working people who happen to by my cousins’ aunt and uncle.

    Mary-Ann is the excellent chef who works solely to provide the best seasonal menu in Rotorua whilst Keith tends to the bar and offers up great conversation.

    Despite the fact that I could have a biased opinion I can tell you that doesn’t matter because the food served up at The Brook Bar and Bistro is delicious from the very first to the last bite. The small menu means that every dish is perfection and when we went there was a vast variety from steak et frites with the juiciest mushrooms you’ll ever have to duck stacked high with veg, a Malaysian dahl curry and *quote* the best veal Michael has ever had.

    If you’re in Rotorua looking for a luxury home cooked meal for reasonable prices, make a reservation at The Brook Bar and Bistro.

    The Redwoods and Whakarewarewa Forest

    The Redwoods and Whakarewarewa Forest are breathtaking. Spanning over 5,600 acres you can walk, cycle or ride on horseback through this spectacular natural wonder. The ancient giants that are the Redwood trees are a treat to walk through but look even better when you look up! Their majestic stature is enough to humble you when you think of how long they’ve lived on our planet.

    PFH Fun Fact: The biggest Redwood in the forest is approximately 72m tall and 169cm in diameter. In California, the Redwoods can grow as tall as 110 metres and the average lifespan is 600 years but they can live to over 2000 years!

    The Redwoods and forest are free to visit every day except Christmas from 8.30am – 6pm in summer and 8.30am – 5pm in winter.

    View this post on Instagram

    A post shared by Duke and Duchess of Cambridge (@dukeandduchessofcambridge)

    If you were keeping up with the Duke and Duchess of Sussex’s first overseas tour as a married couple you will know that they ended it with a trip to the Redwoods forest. I couldn’t resist copying the photo that Harry took of Meghan with her baby bump but NO I am not pregnant, this is not an announcement photo.

    For something extra that’s both fun and educational, take a trip up to the Treewalk. 21 suspension bridges connect between 22 Redwood trees taking you on a journey through the tree tops, with information points at every connecting tree.

    Tickets for the Treewalk are $29 for adults, $19 for 5yrs – 15yrs and under 5yrs go free.

    .

    There is much more to do in Rotorua that we didn’t do on this trip but have done previously. The two tours I strongly recommend that aren’t on the itinerary above are Te Puia, the centre for New Zealand’s Māori culture and geothermal wonders and the Hobbiton Movie Set. You can read more about them and what else I got up to on my 24 day road trip down the North Island in Round the world trip activities itinerary Part 1.

    .

    Aloha, Gabriella

    Pin this post


  • The ultimate Christmas gift guide for travellers

    The ultimate Christmas gift guide for travellers

    It’s that time of year again! The decorations are going up, people are in a better mood than they have been all year, and the ability to resist mince pies and gingerbread is out of the window!

    With this comes the mad panic – no matter how organised we actually are – that we haven’t got a hold on our Christmas shopping and that time is running out, despite the fact that we have another month to go.

    Well I can’t stop you from eating all the pies and as much as I would love to, I also can’t hang baubles on your tree, but what I can do is help you find the best gifts for the well travelled people in your life!

    I’ve picked out 30 useful, practical and, for the most part, sustainable gift ideas that I have personally tried and tested. Organised in price categories depending on how much you want to spend, there’s sure to be something in this Christmas gift guide that you can add to your basket!

    £10 and under

    Lucas Pawpaw

    This little red tube is a traveller’s best friend. Considering it’s just some squished up fruit, its list of healing abilities is staggering. Australia’s genius product, Lucas Papaw Ointment, will treat chapped lips, minor burns, sunburn, cuts, insect bites and nappy rash.


    Memory foam travel pillow

    This is my favourite style of travel pillow because it’s the most supportive and moulds to my head, neck and shoulders. This one in particular from Wuku Tree has a removable cover so you can wash it, it compresses down and it’s cheap! To read more and compare different types of travel pillows check out a post I wrote earlier this year, Travel pillows – who you should be sleeping with.


    Tangle Teezer

    A change in water, weather and environment can sometimes make even the sleekest mane unmanageable, but Britain’s favourite hairbrush is here to save the day! These babies are compact so they save space, they battle knotted hair and they come in a variety of colours.


    Bamboo straws

    It takes up to 200 years for a plastic straw to decompose and yet we have gotten to a point where 1 billion of these monsters are used daily worldwide! I travel with bamboo straws because unlike plastic and steel, which require energy, time and cost to recycle, bamboo is completely natural and will simply decompose just as the plant itself would.


    Cutlery

    I can’t tell you how many times I’ve used my Mountain Warehouse Knife, Fork and Spoon set! I’ve been able to save so much money on food because I can make food in my hotel room instead of eating out. Not to mention how many plastic utensils they’ve prevented me from using!

    Collapsible bowls

    Much like the cutlery I’ve listed above, these bowls have also saved so much money. I now eat cereal for breakfast in my hotel room and salads for lunch and/or dinner. A really great gift for the environmentally conscious traveller who also loves to save money!


    Anatomicals

    Travel-friendly toiletries always go down a treat, they’re practical and luxurious gifts, besides who can resist good smells with funny names! Anatomicals’ facemasks are particularly great gifts, they have a large selection, they smell great and they work wonders with your skin. Read more about Anatomicals in my blog post How to recover from jet lag with Anatomicals.

    Lavender pillow spray

    For the ultimate natural remedy to insomnia and jet lag, Norfolk Lavender’s Linen Spray will soothe those jet setting eyes and send them off into a relaxing deep sleep. It’s a truly thoughtful gift for anyone who needs help de-stressing at the end of the day.

    Muji travel bottles

    Without a doubt in my mind, Muji has the best travel bottles for decanting any of your larger toiletries into a more manageable size. They vary from pumps to squeeze bottles to flip caps, a good selection of sizes and they’re so cheap!

    Dry bag

    A dual functioning item, dry bags will either keep your items inside dry or they will prevent wet items from getting anything else wet. My cousin gave me my first dry bag (Karrimor 10 litres) as a present and honestly it’s one of the best presents you can give someone who travels often. I can’t tell you how many times I’ve thrown a wet swimsuit in there and packed it because I didn’t have time to dry it before moving on to the next location. They’re particularly great for keeping your belongings dry on excursions out to sea.


    Hiking socks

    Contrary to popular belief, getting socks isn’t the worst present in the world. Who really doesn’t find a new pair of socks useful? Why not fill their stocking with a few pairs of fun patterned hiking socks that will keep their feet warm all around the world.


    Sephora Magic Makeup Remover Cloths

    Sephora Black Magic Makeup Remover Cloths are the absolute best way to remove makeup. Their special knitted structure and fabric means that they only require water to gently break down your makeup. No extra removal product is needed which saves on a significant amount of toiletry weight. Not only this, they save the environment from daily wipes and cotton pads being thrown away and they are reusable, just thrown them in the washing machine.

    Bamboo toothbrush

    A bamboo toothbrush is the perfect stocking filler for the one who wants to travel as responsibly as possible. It’s estimated that 3.5 billion toothbrushes are sold each year, can you imagine how much space they’re taking up in landfills, incapable of safely breaking down. Bamboo toothbrushes are the way forward! They are biodegradable plus The Humble Brush Co. has partnered with heaps of charities that are working to improve the dental hygiene of underprivileged children all around the world.

    Toothbrush head covers

    Whether they’re living the life of luxury in a 5 star hotel, or saving pennies for more adventures in a hostel, no surface can be trusted when it comes to a toothbrush. A toothbrush head cover is an undervalued gift that will prevent bacteria and general yuck from making a home in their toothbrush. They’re great stocking fillers!


    Microfibre towel

    The only towel a traveller should have is a microfibre one. Compared to the average fluffy towel they are drastically smaller and easier to pack plus they are mindblowingly absorbent. No trip to the beach or day out snorkelling should be done without one of these!


    £10 – £50

    Sip by S’well thermal water bottle

    Of course any kind of reusable water bottles is better than a single use plastic one; they prevent waste, save money and reduce the health risk that comes from drinking out of plastic water bottles, but I highly recommend S’well bottles because I have been using them for about four years and they are amazing. They come in all sorts of shapes, sizes, colours and patterns, they’re more durable than plastic, they’re thermal which means they will keep a beverage cold for 24 hours or hot for 12 with absolutely no condensation. It might not sound very impressive but it means no more wet bottles in their bag and imagine their delight when they can sip on ice cold water no matter how hot it is outside.


    Lonely Planet travel guides

    Arguably the best travel guides of all time, a Lonely Planet book focused on any of their upcoming travels is a very touching gift. If you can’t pick a location, why not go for the whole world instead? We received the Lonely Planet world guide and it might actually be one of the most thoughtful gifts we were ever given, I’ve used it many times over the years.


    Packing cubes

    For the ultimate organised packer, packing cubes will help to keep all their belongings in order. Plus it makes packing and unpacking super easy!


    Mantra Band

    For the traveller who really sees the beauty in the world, who inspires you to do the same, why not gift them with a piece of jewellery from Mantra Band. Their little boosts of encouragement are sure to touch their heart.

    Flat Lay makeup bag

    I swear by my Flat Lay drawstring makeup bag. What started as a collaboration has turned into a full on, die-old-together kind of love. I’ve taken it on every trip I’ve made since receiving it, whether it’s a weekend away or a full on month trip to the other side of the world. It’s just the most practical way to not only travel with makeup but to put it on. No more digging, yay!

    KeepCup reusable coffee cup

    The gift that keeps on giving. Not only does a reusable coffee cup help save the environment but it will also save them money. Most coffee shops offer discounts on hot drinks if you present a reusable coffee cup. KeepCup comes in a bunch of cool colours and even better, they’re customisable so you can build the perfect colour scheme for your conscious traveller.


    Universal travel adapter

    For the real world traveller, a universal travel adapter is a must have. They save so much space because they will no longer need multiple adapters for all the countries they visit.


    Charlotte Tilbury Instant Look in a Palette

    For the makeup lover who packs light (or needs to) these Charlotte Tilbury palettes have all the basics in one place, making cosmetic packing lighter and more refined. They have three eyeshadows which can be worn individually to brighten the eyes during the day time or combined to create a smokey look for the evening. There’s a bronzer which can be used to bronze or contour. Two tones of blush give you a rosey glow and finally the highlighter is so pigmented that it gives an incredible high shine across the cheekbones.

    WACACO Nanopresso Portable Espresso Machine

    We all know that one person who literally cannot function without coffee, right? The type of person who is so sweet they cause cavities, provided they get their coffee, because without their frequent caffeine fix they’re breathing fire and stroppier than a toddler who has been told to do, well pretty much anything? Well this gift will help protect the world from the wrath of coffee addicts suffering from withdrawal by providing them with their regular hit of coffee, wherever they go. I mean it, earlier this year I watched Michael, my partner, make himself an espresso on a canoe in the middle of Moraine Lake in Canada.


    £50 – £100

    Longchamp Le Pliage bags

    Longchamp’s Le Pliage collection is made for the stylish overpacker, the kind of person who needs to save space for more outfit options than you can shake a stick at, or better, souvenirs that they are bringing home to you! Whether it’s a tote, backpack or weekend bag these gloriously coloured and Parisienne glam bags will NOT disappoint.

    £100 and above

    Raybans

    They are without a doubt the most iconic eyewear brand of all time, so if you’re in the business of spoiling someone this festive season get them a timeless pair of classic Ray Bans. Why not go the extra mile and get them personalised too?

    Aspinal of London Travel Wallet

    Shopping for the luxurious traveller who has the most organised carry on you’ve ever seen, not to mention stylish? A travel document wallet from none other than Aspinal of London is the way to go. Available in a variety of colours, this chic accessory will keep all of their travel documents, currency and passport in order.

    Bose QuietComfort Noise Cancelling Headphones

    Probably one of the best presents I have ever received were my silver Bose noise cancelling headphones. I can’t tell you how much better my sleep is whilst I’m up in the air now that I can no longer hear crying, sniffing, snoring or the general white noise of the aircraft. This present is the gift of sleep as well as a really decent way to listen to your music. There’s a bonus feature too, they come with an adapter for aeroplanes so they can use them to watch/listen to whatever in-flight media takes their fancy.


    This is Ground

    This is Ground is the epitome of leather organised travel accessories. With a range of products that will organise your necessities from technology to toiletries, you can definitely find a gift worth giving. To read more about the products I recommend check out This is Ground – leather goods for the organised traveller.

    Away carry on

    For the pièce de résistance, I’m talking the biggest present under the tree, knock their socks off with a carry on case from Away complete with the best portable charger I’ve ever used. Available in two sizes, Away’s carry on cases will turn everyone’s eyes green as they glide through the airport with their phone charging as they go.

    .

    I wish you the best of luck with your Christmas shopping this year and hope you find the perfect gift from one of the above.

    .

    Mele Kalikimaka, Gabriella

    Pin this post


    *Disclaimer: As an Amazon Associate I earn from qualifying purchases but please know that I recommend all of the products above from personal use which you can see throughout my blog posts.

  • PFH’s 5 most Instagrammable restaurants in Seminyak, Bali

    PFH’s 5 most Instagrammable restaurants in Seminyak, Bali

    More and more Instagrammable hot spot cafés and restaurants are popping up all over the world but is a good photo really worth mediocre food and terrible service? I can’t tell you how many places I’ve been this year in London that looks so good on the gram but when I got there the food has come out cold, wrong or sometimes not even at all!

    I haven’t instagrammed or recommended any of those cafés so you can trust me when I say I found five places in Seminyak, Bali, that have Instaworthy walls, and have amazing food and friendly people who actually enjoy brining you your food!

    1. KYND

    Undoubtedly the most iconic place to eat on the whole island, let alone Seminyak, KYND has the prettiest walls and food to compliment. You’ll get a real bang for your buck in terms of photo opportunities because every wall and every corner of KYND is worthy of the gram. Whether you want to be pretty in pink against their famous palm leaves or beaming under their sunshine wall, it’s sure to get likes.

    PFH Top Tip: KYND does not take bookings and will get busy from 7.30am. To get a seat under one of their best painted slogans, arrive no later than 7am.

    Open daily 6am – 5pm.

    Plant based/vegan

    View this post on Instagram

    A post shared by Postcards from Hawaii (@gabriellawisdom)

    2. Balibola

    Located barely two minutes from KYND, Balibola is ideal if your plan is to café crawl to get your snaps in one day. Outside is a world of pastel, simplicity and grammable slogans whilst inside is a riot of colour as patterns and paintings are everywhere you look. Their menu looked so good I’m gutted we only went once.

    This place is still new to the Instagram scene which is good because it’s easier to get a seat but I have seen it popping up more recently so get there before it really takes off.

    Open daily 8.30am – 10pm.

    Flexitarian

    View this post on Instagram

    A post shared by Postcards from Hawaii (@gabriellawisdom)

    3. Kin Café

    One thing to note about Kin Café* is that they take the quality of their food very seriously and thank the Food Gods for that because it is hella good. Whether you’re a vegan looking for a hearty meal, an Instagrammer in need of a good painted wall, a group of friends who want to learn how to cook a traditional Balinese dish or have kids that want the best chocolate milkshakes in town, this place won’t disappoint. Located right next to a flea market it’s the ideal place for lunch after a spot of shopping.

    PFH Top Tip: If the idea of having to beat the hoards at KYND isn’t working for you but you still wan’t a pink wall with tropical leaves try Kin Café instead.

    Open daily 7am – 10pm.

    Vegan

    *working in association with Kin Café.

    View this post on Instagram

    A post shared by Postcards from Hawaii (@gabriellawisdom)

    4. Motel Mexicola

    Motel Mexicola holds a very special place in my heart. Not only does it serve some of the best Mexican food I’ve had outside of Mexico but the music is great, the decor is photo worthy and it’s nighttime scene is one that will struggle to be rivalled.

    I went here twice during my time in Bali, once for lunch so I could get my photo on their oh so extra staircase and another at night for dinner and dancing with the Pangea Dreams girls on our last night together. It was probably the best night out I’ve had in the longest time and not just because all of my Coyote Ugly dreams came true. I don’t mean that I started working in a bar and was too shy to sing my own songs, I mean the part where they danced on the tables. YES! Come a certain hour (that I forget thanks to a couple of cocktails) you are encouraged to get up on the benches and tables and dance the night away, and with an eclectic mix of Elvis, The Macarena, Las Ketchup and Taylor Swift, there is definitely something you can get down to!

    Open daily 11am – 1am.

    Caters for Vegan, Vegetarian, gluten free and meat eaters!

    View this post on Instagram

    A post shared by Postcards from Hawaii (@gabriellawisdom)

    5. Mad Pops

    With their “ice ice baby” neon sign they are probably the most Instagrammed ice cream shop in the world. Mad Pops is located on the main street in Seminyak. They sell a range of vegan ice creams and lollies made from locally sourced fruits that change each season. The best part is that they use no preservatives or additives and only the smallest amount of raw sugar goes in so you can have more than one a day and feel guilt free!

    PFH Top Tip: Know your pose before you go in because you are limited to just two minutes to take your snap as the shop is tiny and you really can’t squeeze in much more than four people.

    Open daily 11am – 10pm.

    Vegan

    View this post on Instagram

    A post shared by Postcards from Hawaii (@gabriellawisdom)

    If Instagrammable places is your jam check out PFH’s 10 Best Instagram spots in L.A. or if you’re here to find out more about Bali take a look at my Packing Guide.

    .

    Aloha, Gabriella

    Pin this post
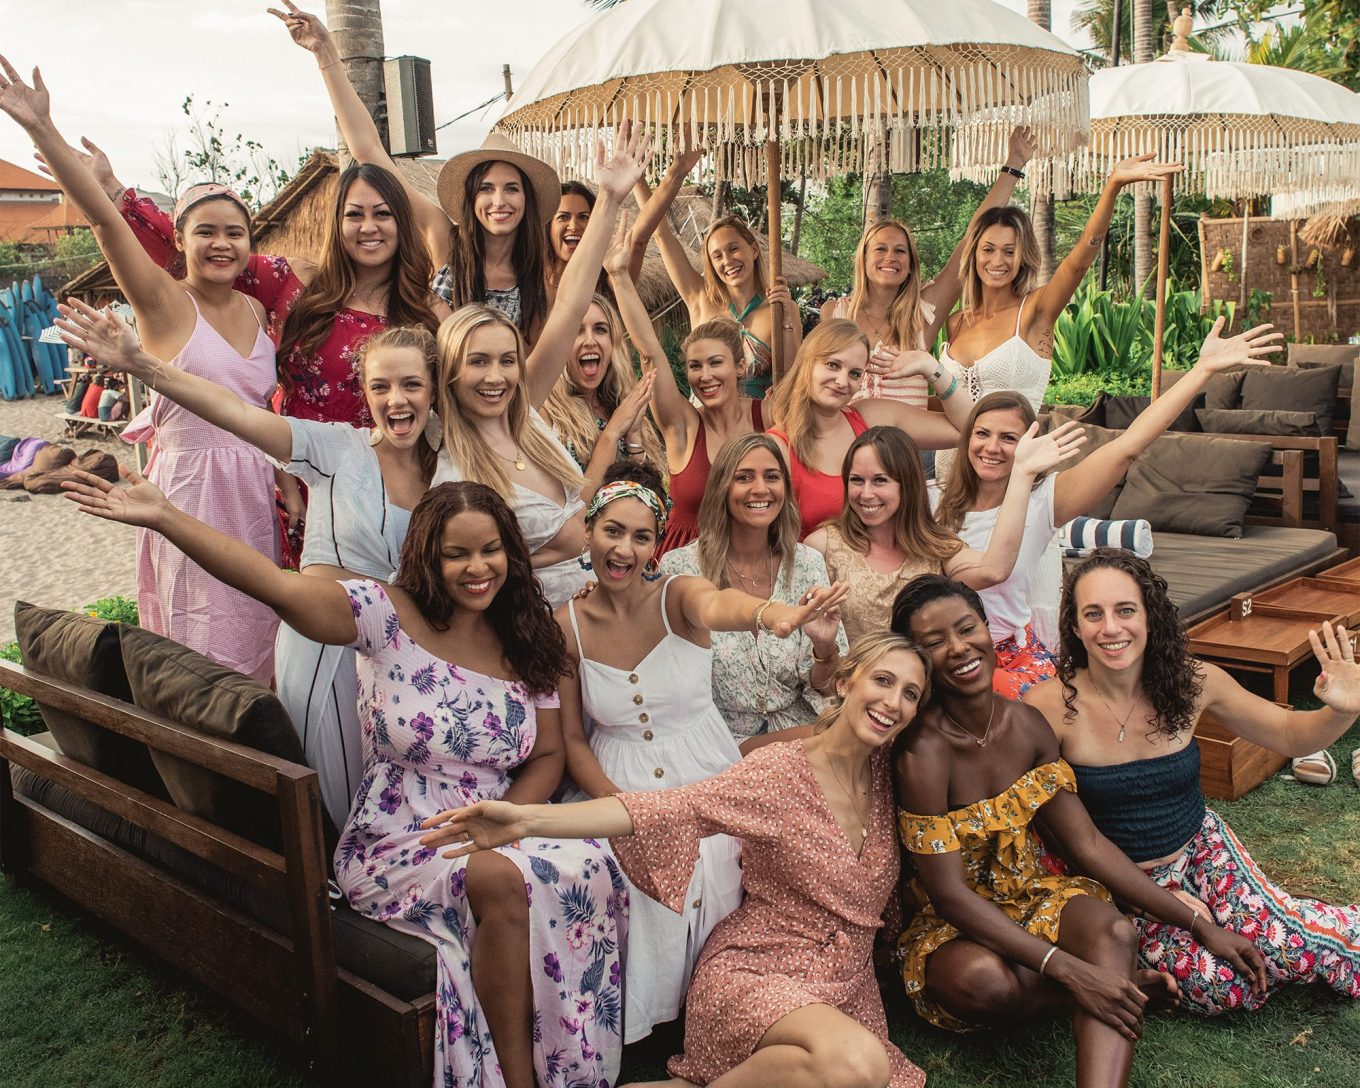

  • Packing guide – Pangea Dreams, Bali

    Packing guide – Pangea Dreams, Bali

    Firstly I want to start by saying that this blog in particular isn’t reviewing my experience of my retreat, this is a packing list for ladies who are looking to book or have booked a place on one of Pangea Dreams’ Bali retreats and need a little help with what to pack. If you do want to take a look at How my Pangea Dreams blogger retreat changed my life go ahead!

    This blog post is to help you pack for your trip if you have decided to do one, or advise you on what you’ll need if you’re still thinking about doing one.

    Packing for a bloggers retreat is a little trickier than the average trip. You’ll be starting your mornings with yoga or a hike so you’ll need an adequate amount of activewear, you’ll be shooting every chance you get and therefore will require a multitude of outfits that suit your surroundings (and of course your style) and you’ll want a variety of accessories to interact with in your photos.

    Photographer: @samkat | Featuring @wanderfullyrylie

    Bali is a tropical island in Indonesia so you can pretty much expect two seasons: Summer and the rainy one! Expect it to be hot, I mean having a constant sheen of sweat kind of hot, or as I preferred to call it, Bali highlighter. Luckily for us, despite us going in the low season (October) it only rained at night during our retreat (17th – 23rd October) but the temp could have done with being a few degrees cooler. The days were mostly 27˚C (81˚F) and nights were only dipping to 23˚C (73˚F).

    Luggage wise I had a large handbag (better described as a small weekend bag) and my Away The Bigger Carry On as hand luggage and my 75cm Aeris Samsonite Spinner as checked luggage. I can’t really suggest how much luggage you should take because it depends on whether you’re a heavy or light packer. I know a couple of girls who had as much as me but then there were others who only had a handbag and a suitcase not much bigger than my carry on. I will say though that half of my carry on was empty and there was a good quarter of my checked bag that was empty because I was prepared for some excessive market shopping, which I will get into further down.

    Use code “GABRIELLAW550” for a $550 discount on your Pangea Dream retreat booking! That’s $50 more than the early bird saving!

    Let’s start with what I couldn’t live without:

    Basic flip flops

    Cute sandals that are versatile enough to go with most of your outfits are ideal because you won’t get a lot of time to switch outfits and the easier you can make things for yourself, the better. What’s more ideal though is having a pair of basic flip flops because you’ll be heading to places like the beach and the rice terraces which are high risk areas for mucky feet. Shoes that can be washed easily such as flip flops should be your go to.

    Floaty dresses

    There is no more interactive outfit for photos than a floaty dress; the more fabric, the more to play with. Whether it’s being swirled, twirled, lifted or pulled out, blowing in the wind, or floating behind you on one of Bali’s famous swings, it is the perfect outfit for almost any shoot.

    Photographer: @samkat | Featuring @aloha_traveler & @misskellyoneill

    Activewear

    Most mornings start with yoga and of course there’s an optional hike so you’ll want some cute matching sets because even when you’re feeling less than perky from a 6am start, you’ll still be in front of the lens.

    Straw hat

    This was a vital accessory for two reasons, the first is because it protected my head from the sun which in places like the rice terraces, is necessary because there’s just no shade to escape to. The second is because it’s a great prop to play around with in photos and it was leant to a few of the girls for that reason.

    Photographer: @samkat | Featuring @carolinevoyages

    Pit stop toiletries

    What do I mean by this? Well there are going to be times where you’re out and about in the heat and melting beyond reason. Not to mention the day where you start with a sunrise hike up Mt. Batur to continue onto a long day of shooting. This day is a whirlwind let me tell you and going from being encased in a layer of volcanic dust to frolicking around a villa in swimsuits is not an easy transition so here’s what I recommend you keep on you to make going from icky to instagram ready heaps easier:


    • Wet wipes


    • Deodorant


    • Perfume


    • Gel eye patches


    • Moisturiser


    • Makeup kit


    • Sun cream


    • Bug spray


    • Dry shampoo


    • Toiletries


    It’s likely that your retreat hotel won’t have the basic toiletries that most do such as: shampoo, conditioner, body lotion so if you don’t usually pack these make sure you have a back up or be prepared to buy them upon arrival.

    If you have unruly natural hair like I do (naturally big and curly) and usually spend a lot of time on your hair you will need to be prepared for the opposite so bring the products that will create a do in very little time. In my case these are curl gels and finishing creams and when that fails me I keep a headscarf/band to hand.

    VIPoo!! Girl you’re sharing a bathroom… enough said.

    Photographer: @samkat

    Bags

    You really only need three bags for this retreat:

    A backpack

    for the hike and outfit swaps.

    A cross body

    For days (and nights) out to keep your phone, cash and bug spray in.

    A shopping tote

    This one you’ll want every day for workshops so that you’re not fumbling around carry things back and forth from your room, to yoga, to breakfast etc. In here you’ll want:

    Workbook

    You’ll get it upon arrival.

    Notebook

    There’s space for notes but if you want to make a lot I suggest an extra notebook.

    Pen

    Wherever you workbook goes, a pen should too. I took my Seven Year Pen which I’ve had for four years now and it’s still going strong. It’s my ultimate travel pen because I know I can take it with me everywhere for a good seven years without worrying if and when it’s going to run out.

    Lip balm

    Keep your lips protected and hydrated out in the heat.

    Suncream

    This depends on where your workshops are held. The sun crept round into a couple of ours and it’s better safe than sorry.

    Bug spray

    This should just be on you all the time. Bali is riddled with mosquitos and ants, especially close to the rainy season and it’s never just one bite, my shoulder alone had four! None of us stood a chance, Mosquitos 100 : PD girls 0.

    Calamine cream

    For the suckers that ate you, deet and all.

    Water bottle

    Water will be provided but it’s hot and heat stroke is a strong possibility so stay hydrated.

    Hotel room key

    Duh.

    External hard drive

    You never know who has photos for you. Stay on top of sharing photos because you don’t want to be doing it in a mad rush on the last day as everyone is leaving.

    .

    For the first time I feel like I really nailed it with this packing list. There really wasn’t much that I over packed by or didn’t need. In fact the only thing you could say I overpacked was swimsuits and that’s based on the fact that we didn’t get any downtime so unless you plan on shooting A LOT of swimwear, you won’t need as much as I packed. At the same time, you want a few options because you are likely to shoot a floating breakfast, petal bath, at the beach and around the hotel pool.

    Considering I didn’t overpack, instead I want to tell you my outfit mistakes because if you’re anything like me, this is one you’ll want to pay attention to:

    Beach shoot + white dress = disaster

    Had I not been used to taking my white button down Urban Outfitters dress all over the world I would have been far more upset about my dress getting a good coating of sand and sea as a massive wave took a few of us girls out during our beach shoot. Luckily I brought a second outfit so I wasn’t going home in a very heavy and wet dress. My advice to is wear something that floats in the wind but won’t get mucky if you have to sit and fluff around in the sand for photos. Maybe consult your retreat besties on what they’re wearing too because Nadia, Sarah and I all wore white which unintentionally grouped us together for a shot and it’s one of my favourites from the trip!

    Photographer: @samkat | Featuring @plume_creative_ & @gypsyjournals

    Workshops

    Dressing for the workshops is a tricky one because you don’t get much time between breakfast and them starting to get ready and you don’t want to be stuck in your sweaty yoga clothes all day but you also don’t want to be full glam. One day I sat through a workshop in a strappy maxi dress and I was so uncomfortable, the straps started to dig and my legs got too hot. I suggest swapping into a little summer dress or a pair of shorts.

    Rice terraces

    As I mentioned above the rice terraces are a high risk area for getting dirty feet. My feet were caked in mud after an afternoon here and I was not proud of myself for wearing my Italian leather sandals that can’t get wet let alone muddy. I was fortunate enough to meet a lovely lady working at the fields who took me to wash my feet but if it wasn’t for her my sandals would have been ruined.

    Photographer: @michaelwilliamlester

    .

    Like I mentioned above I left a good amount of space in my suitcase for inevitable shopping trips to the markets. Of course you’re not looking at purchasing high quality items here but what you can get are some really cute outfits and bags for a steal – depending on your bartering abilities.

    Photographer: @michaelwilliamlester

    After an hour of bartering at the Ubud markets (opposite the rice terraces) I had bought the following for a total of about £40 (750,000 IDR)


    • Wrap dress


    • Children’s printed trousers


    • Children’s top and shorts set


    • X2 adults printed trousers


    • Crochet top


    • Basket cross body bag


    • Painted plaque


    • Dream catchers


    • Rice worker triangular hat


    Of course if it’s quality that you’re after, the streets of Seminyak are lined with boutique shops selling the most gorgeous outfits. My favourite is Beachgold, I’d seen Tracy and Sam wearing these gorgeous outfits with a little gold pineapple stitched to the back and I’m so grateful that Tracy took us there because I bought a gorgeous sundress that I’m totally obsessed with.

    Jasmine Marilyn midi in Sage from Beachgold
    Photographer: @michaelwilliamlester

    .

    If you’re still contemplating going on a Pangea Dreams then take a look How my Pangea Dreams blogger retreat changed my life and if you still have any questions regarding my experience contact me here or DM on Instagram.

    If you’re ready to apply then click here.

    Use code “GABRIELLAW550” for a $550 discount on your Pangea Dream retreat booking! That’s $50 more than the early bird saving!

    Aloha, Gabriella.

    .

    Disclaimer: I will earn a commission from qualifying purchases if you use code “GABRIELLAW550” for a $550 discount. 

  • My most comfortable and practical travel outfit

    My most comfortable and practical travel outfit

    Let’s face it no one really has a great time on their flight, unless you are making it rain all over your first class cabin. Seats at the back are cramped, basic and nine times out of ten the button that makes your seat go back won’t be working. So make that #travellife easier on yourself and dress in these comfortable and still very practical clothes.

    What’s great about this outfit is that apart from the bra it’s totally gender neutral and anyone can wear this.

    Underwear

    Bra

    How many of you ladies know the pain of your underwire digging in to your sides or the hooks rubbing against your back? It’s not ideal in any circumstance but definitely not if you’re sitting down for hours on end trying to get in as much sleep as possible surrounded by a bunch of strangers.

    My solution? A bralette! Bralettes are a Godsend for comfortable support. Now don’t be fooled these are definitely not a long term solution for a life of painful bras, they will not provide you with enough to support to stop the girls from drooping later in life. They will however be perfect to preventing sagging whilst staying soft and “dig” free on your travels.

    My one is an oldie from H&M, it is just a soft cup pull on bra that I picked up on sale, but I’ve found these which are pretty damn close.

    Ideally you want one that is soft, doesn’t have a lot of structure and has no fastening.

    Socks

    I wear two pairs of socks when I’m flying, a pair of ankle socks and a thicker pair usually hiking or thermal.

    I keep my ankle socks on all the time under my shoes and they will preferably be black because they won’t get too dirty if I have to take my shoes off in security.

    My second pair of socks is to keep my feet warm on the plane which is always cold. I’ll always throw in a pair of either hiking or thermal socks in my carry on so that I can whip them on as I’m settling into my seat.

    The pairs I rotate between are from Mountain Warehouse or one of these cute pairs from Amazon which I purchased recently for my trip to Ireland which you can read about here.

    Compression socks are another alternative.

    Tops

    T-Shirt

    If the destination you are leaving from or arriving to is warm then you will want the option to keep cool. A low neck is ideal so it doesn’t show up under your hoody (see below) and loose is best because it won’t feel restrictive when you inevitably bloat during your flight.

    Hoody

    Once you realise how practical a hoody is for long haul travel you will soon forget about any social stigma this garment bears.

    Hoodies are perfect for travel for three reasons:


    1. The cabin is always cold so they will keep you warm. Get a pullover one and you don’t have to worry about zips digging into you or breaking.


    2. The hood is the perfect for shielding bed head, concealing your headphones, pulling over your eyes for extra privacy when you sleep and it will keep your head warm.


    3. Get one with a pouch at the front so you can keep your phone in it for easy access without it falling down between the seats. It’s great for stashing tissues and sweets too.


    Mine is from Roots (I’m shocked it doesn’t have a beaver too) and has the biggest and best hood for keeping my headphones hidden.

    Tracksuit Bottoms

    Over the last few years I have been wearing tracksuit bottoms on my flights because they are the most socially acceptable way of wearing PJs out in public. I swear by trackies to travel in so much that Michael finally got a pair because they are just the most comfortable thing you can wear on your travels. They don’t have to look cheap and out of place though, try to avoid something that looks like you are heading to the gym and it will pass more an athleisure wear than “chav on tour”.

    I prefer a pair that has the elasticated band at the bottom because I roll it up to make them look more like trousers in the airport, and roll them down on the plane so they tuck perfectly into my thick socks.

    It’s entirely up to you how much you want to spend on a pair of trackies. Originally I started off with a pair from Forever 21 because they were cheap and cheerful but after constant use the knees stretched out of shape, so I invested in a pair from Tommy Hilfiger. Mine were from an outlet so I can’t link you to the exact pair but these are pretty close.

    Shoes

    Trainers are your best option for two reasons:

    They’re comfortable, though you won’t be walking around much on the plane, you will be on your feet in the airport and God forbid you need to leg it across the terminal should you be running late or the gate changes, it’s a good idea to have something practical on your feet!

    Aside from boots they are likely to be your bulkiest shoes so it’s better packing wise to have them on your feet rather than taking up a bunch of space in your suitcase.

    The shoes I’m wearing are Converse Dainty Low Top in White. They’re comfortable and look good with both jeans and dresses.

    Face

    GO MAKEUP FREE!

    Not only does it make your beauty regime on the plane low maintenance but it’s also so much better for your skin.

    To read more about looking after your skin on a flight check out 10 hand luggage items for staying fresh on a flight.

    Accessories

    No outfit is complete without accessories right? I’m not talking statement earrings or headbands though, nope, these are the three accessories you need if sleep and comfort are top of your list:


    • Sleep Mask


    • Pillow


    • Headphones


    To see exactly which ones I use take a look at What’s in my travel bag.

    .

    I wish you the most comfortable of travels!

    Aloha, Gabriella

  • Ireland and Northern Ireland itinerary – an eleven day round road trip

    Ireland and Northern Ireland itinerary – an eleven day round road trip

    Ireland! The land of Guinness, lucky locals and the best soda bread you’ll ever eat. My trip to Ireland came to be because my half Irish Godson’s naming day happened in Dublin, giving me the perfect excuse to turn a weekender to Dublin into an extended road trip around the island.

    Over 11 days Michael and I took it in turns to navigate us and our little VW Polo, Maui, through manic city traffic and rural roads that had more sheep than Earnie’s dreams. Starting in Dublin we then went up into Northern Ireland to Belfast, back down into The Republic to Connemara National Park, Galway, then right down the bottom to Cobh before heading back up and round to Dublin for the ferry back to the U.K.

    I have to say September was a great time to go, there were more cold and rainy days than dry but we were treated to some sunny spells, plus in terms of crowds most of the places we went were fairly quiet because it was out of the school holidays and the weather was starting to turn cold and wet.

    Below you will find our day-to-day itinerary and beyond that I have broken down each of the most noteworthy tours of the trip.

    Day 1

    Ferry from Holyhead, Wales to Dublin, Ireland.

    Check into hotel, Rochestown Lodge.

    Day 2

    Taxi into Dublin.

    Dublin Castle.

    Trinity College and Book of Kells.

    Temple Bar.

    St. James’ Gate Guinness Storehouse tour.

    Viking Splash Tour.

    Dinner and drinks at Sheehan’s pub.

    Taxi back to hotel.

    Day 3

    Dunnes Stores.

    Powerscourt and Avoca.

    Drinks out in Dalkey.

    Day 4

    My Godson’s naming ceremony (this could be another day out exploring Dublin).

    Day 5

    Drive to Belfast.

    Titanic Afternoon Tea.

    Titanic Experience tour.

    Check into hotel, Etap by Ibis.

    Day 6

    Giant’s Causeway.

    Dinner out with an old uni friend.

    Day 7

    Explore Belfast.

    Drive to Connemara.

    Check into hotel, Delphi Lodge.

    Dinner at hotel’s restaurant.

    Day 8

    Hike around Connemara park.

    Drive to Galway.

    Check into hotel, Maldron.

    Day 9

    Hooker Statue.

    Kelsey Montague’s wings at O’Connells pub.

    Lynch’s Castle.

    The Long Walk.

    Spanish Arch.

    Coffeewerk and Press.

    Thomas Dillon Claddagh Gold.

    Day 10

    Cliffs of Moher.

    Blarney’s Castle.

    Drive to Cobh.

    Dinner at The Titanic (restaurant).

    Drinks at Kelly’s pub.

    Day 11

    Deck of Cards houses.

    Drive back to Dublin for ferry.

    St. James’ Gate Guinness Storehouse tour

    I have to say despite not being able to touch a Guinness without an unprecedented amount of Ribena, the storehouse tour was my favourite thing that we did on our trip. It’s more than just a chance to drink stout, it’s a very interactive and educational tour that tells the story of Guinness’ origin covering the founder and creator, its ingredients, how it’s made, advertising campaigns and not only do you get a lesson in how to taste the flavours of it’s ingredients, you also get the opportunity to pull your own pint, which you get to drink – if you can stomach it!

    The tour ends at the very top of the world’s largest pint glass, where you’ll be welcomed into a bar with a 360˚ view of Dublin. As you can imagine it gets busier as the day goes on. Up here you can get a variety of Guinness cocktails such as Guinness and Black (Ribena) or you can have it mixed with Prosecco. There is also a restaurant with Guinness inspired dishes, and their enormous gift store will satisfy all of your merchandising desires.

    We spent about 2.5 hours in the storehouse but that can easily be shortened or lengthened depending on how thorough you want to be (or how much drinking you aim to do). The tour is self guided after a quick introduction at the start so it can all be done at your own leisure.

    The Guinness Storehouse is open 7 days a week 9:30am – 7pm (last admission is at 5pm).

    Ticket prices for adults start from €18.50 per person but vary depending on the time of day, as you can imagine the morning tours are cheaper because realistically not many people want to drink a pint of Guinness for breakfast.

    Children aged 13-17 have a fixed price of €16 and children under 13 go free.

    Powerscourt and Avoca

    “Oh my god can we talk about Avoca, have you guys been to Avoca? You have to go to Ireland just to go to Avoca, it’s just heaven. How it’s described in the bible is inaccurate, heaven is what Avoca is… it’s just hand weavers and amazing pastries and it’s just heaven.” – Blake Lively.

    Powerscourt estate, house and garden located in Wicklow are approximately 40mins (drive) outside of Dublin.

    The Terrace Café offers a wide variety of salads, entrees and cakes filled with more butter than a Lurpak factory! Seriously though, that chocolate rice crispy cake took me three glorious days to eat because it was so rich!

    My favourite part of this trip out though was going to the Avoca store. In 1723 a handweaving mill, Avoca Handweavers, was founded in a rural Irish village, Avoca. Over the years Avoca’s popularity grew and the company expanded from woven blankets and garments to food, home decor and a fashion label, all of which is available to buy in their store in Powerscourt.

    I am obsessed with my Avoca blankets, both of which you may have noticed me using as scarves on Instagram. They are so soft, warm and have beautiful designs.

    July Bug Cashmere Throw in Coral, Small £85.45

    Bridget Cashmere Blend Throw in Teal, Small £85.45

    If Powerscourt doesn’t quite make it onto your itinerary but you still want to pay a visit to an Avoca store, don’t worry because there are 12 stores located across the country.

    You do have to pay for access into the gardens but if you have the time for a leisurely stroll it’s worth it because they’re beautiful.

    Tickets to the gardens are as follows:

    March – October

    Adult: €10.00

    Student: €8.50

    Senior: €8.50

    Children aged 5 – 13: €5.00

    Children aged 5 and under: Free

    Family Ticket €25.00 (2 adults & up to 3 children)

    November – February

    Adult: €7.50

    Student: €7.00

    Senior: €7.00

    Children aged 5 – 13: €3.50

    Children aged 5 and under: Free

    Family Ticket €18.00 (2 adults & up to 3 children)

    Titanic Experience tour (with afternoon tea)

    Tissues at the ready people! Of course we all know about the tragedy that was the sinking of RMS Titanic but the Titanic visitors centre in Belfast is so much more than the story of how it came to sink. This fantastic exhibition takes you through the Titanic’s entire history over nine galleries including her design, construction, launch, journey and sinking, but what’s more is how the exhibition continues on to show the aftermath; Titanic’s appearance in the media and the explorations made to the wreck as it lies today.

    Ticket costs for the standard Titanic Experience are:

    Adult: £18.50

    Student: £15

    Senior: £15 (Monday – Friday)

    Children aged 5 – 16: £8

    Children aged 5 and under: Free

    Family Ticket €45.00 (2 adults & 2 children)

    Audio guides are available to book in advance or rent on the day at £3 each are definitely worth it for a more immersive experience into Titanic’s history.

    The Titanic Experience self guided tour included entrance onto SS Nomadic – we completely lost track of time and spent about three hours walking around the exhibition and ran out of time to go onto the Nomadic, which was a real shame. The lesson here is to keep in mind what time the exhibition closes and what it is that you want to get done.

    Titantic Belfast is open every day excluding 24th – 26th December. The opening times are:

    January – March: 10am – 5pm

    April – May: 9am – 6pm

    June – July: 9am – 7pm

    August: 9am – 8pm

    September: 9am – 6pm

    October – December: 10am – 5pm

    The only thing about our visit that really disappointed me was the Sunday afternoon tea. We booked the afternoon tea because it is the only chance you get to be able to stand on a replica of the famous staircase which was also featured in the blockbuster film James Cameron’s Titanic. You really are just paying for this opportunity though. At a cost of just £27.50 you’re not paying out big bucks but even at this price the food served has much to be desired. There may be a large selection on the menu but it is very poorly done, the pastries and cakes were stale, the sandwiches and wraps were soggy and the only thing prepared well was the scone but unfortunately it was not far off the size of a button! A crumb fell off mine and I lost a quarter of my scone! Such a shame, however if it’s the photos you want, just suck it up and get some real food after.

    Giant’s Causeway

    Check out Everything you need to know about visiting Giant’s Causeway to learn more on how to get there, entrance fee, what to wear and more.

    Cliffs of Moher

    These 214 metres high, five miles long and 300 million years old Cliffs of Moher are breathtaking, a lovely place to walk (provided you’re not afraid of heights) and a great photo opportunity.

    I believe the best direction for photos of the cliffs is to go left from the visitor centre and follow the path beyond the walled section. Continue on for about 20mins to a grassy section that starts to ascend higher than the rest of the path. From here you will be able to look back on the section of the cliffs that ends with a lonesome sea stack.

    SAFETY WARNING: The barrier does not go all along the cliffs which is great for getting beautiful photos but not if you are nervous over heights or have young children. To go beyond the walled path is at your own risk, but having done it myself and not being a fan of heights I can say it’s not an unreasonable thing to do provided you DO NOT get too close to the edge and you are very mindful of how much room there is when passing other people. Please do not take this lightly, a woman’s body was found at the base of the cliffs just days before my visit.

    Adult tickets are €4 each for the morning (8am – 10.59am) and evening (2pm – 7pm) visits and €8 for the afternoon visit (11am – 3.59pm). Children under the age of 16 go free. If you will be visiting in the morning or evening make certain to book online because the ticket cost at the gate is €8 regardless of the time you arrive.

    Blarney’s Castle

    The 600 year old castle and garden is located just 15mins from Cork (by car) and half an hour from Cobh. Let’s face it, as beautiful as the grounds are, people come here for one thing and that’s to kiss the Blarney Stone (and the millions of strangers who came before you). I’m kidding, luckily they sanitise the stone between kisses.

    Legend has it that kissing the Blarney Stone will give you the gift of the gab, which unlike I was led to believe is actually not to be a chatterbox, but instead it’s to be able to speak with eloquence and charm. Whether this is a negative thing or not I’m going to pretend that every time my school teachers said “Gaby by name, gabby by nature” throughout my youth, it was actually a compliment to my charming and eloquent way with words… yep for sure that’s why I got so many “time-outs”…

    As you can see from the itinerary above, on the day we went to Blarney’s castle we were driving from Galway to Cobh which in itself is a 3hr journey plus we stopped at the Cliffs of Moher before arriving at the castle. We were pushed for time to arrive before the last entrance which was 5.30pm, we made it though and under advisement we were told to go straight to the stone to be able to kiss it before the grounds closed at 6.30pm. We ran straight there past all of the signs that counted down the queue length, scaling the most narrow and steepest spiral staircase I’ve ever had the displeasure of climbing to get to the top. I honestly don’t know how much of a factor the date of our visit played into the fact that NO ONE was in the queue ahead of or behind us, but for sure rocking up near closing time definitely helped, it was dead!

    I really can’t speak for what the queue is like on a busy and no doubt summer’s day, but arriving at 5.30pm on a Friday in September was ace! It meant that we could leisurely take our videos and photos, and that we could actually stop to take in the sights from the top of the castle, something which is forbidden when there is a queue. I have to say after going and seeing the “one hour from here” sign and fearing that people actually have to queue in that hamster tube of a staircase I WOULD NOT want to go when it’s busy.

    As for actually kissing the stone, it’s a bucket list item checked off but it was by no means pleasant! Please know that’s my fear of heights talking in association with my limited height, as unlike me who wailed the whole time and was practically playing with death when I dragged a good 60% of my body upside-down over a 27m drop, with nothing but quivering arms to hold me up and the trust of a stranger holding my waist, Michael literally did it in five seconds. Just in case you think I’m exaggerating, check out my Ireland Instastories highlights on Instagram, it was all caught on film.

    The actual grounds are beautiful and the signage throughout is very informative. Should you be in the area it’s definitely not one to miss.

    Admission into Blarney’s Castle and Gardens is:

    Adult: €16 online (€18 on the door)

    Student & Senior: €13 (€14 on the door)

    Children aged 8 – 16: €7 (€18 on the door)

    Children aged 8 and under: Free

    Family Ticket (2 adults & 2 children): €40 (€45 on the door)

    They’re open every Monday – Saturday unless the 24th 25th of December fall upon those days. The opening times are:

    January – Feb: 9am – 5pm

    March – April: 9am – 6pm

    May: 9am – 6.30pm

    June – August: 9am – 7pm

    September: 9am – 6.30pm

    October: 9am – 6pm

    November – December: 9am – 5pm

    .

    To see what I packed take a look at Packing guide – Ireland, North and ROI.

    Aloha, Gabriella

    Pin this post


  • My ultimate pre-trip to do list

    My ultimate pre-trip to do list

    In just two days I’ll be departing for my next trip. With not much turn around between each one, I end up with a lengthy to do list with not a lot of time to get it all done. Each trip has a personalised to do list that expands and differs slightly from my basic list that I made for any trip I go on, for example, I usually have “book airport parking” because most of the time we drive to the airport because of how far away we live from it. For longer trips though we get a lift to the airport and therefore booking parking won’t be necessary so I will take that off.

    My ultimate pre-trip to do list

    Plan
    ☐ Make a trip itinerary
    ☐ Enter flight details into airline app
    ☐ Write packing list
    ☐ Download area on Google Maps for off-line use
    ☐ Transfer money to cash cards
    ☐ Wash and iron clothes

    Bookings
    ☐ Buy Visas
    ☐ Book flights
    ☐ Book hotels
    ☐ Book rental car or transfers
    ☐ Book activities, tours and excursions
    ☐ Order currency

    Shopping
    ☐ Online shopping for new trip outfits
    ☐ Return any online shopping packages
    ☐ Make alterations to new clothes
    ☐ Toiletry shop
    ☐ Snack shop
    ☐ Get some new makeup samples

    Health & beauty
    ☐ Book personal training sessions
    ☐ Get Mani Pedi
    ☐ Get eyebrows shaped
    ☐ Haircut
    ☐ Pick up any necessary prescriptions

    Days before
    ☐ Check into flight using app
    ☐ Make a playlist
    ☐ Fuel up the car
    ☐ Fill the windscreen wash
    ☐ Charge electricals
    ☐ Pack

    Plan ahead
    ☐ Post birthday cards for the ones I am away for
    ☐ Throw/give away food that will go off in the time I’m away
    ☐ Arrange for someone to water the plants and check on the house

    Final checklist
    ☐ Fill up water bottles
    ☐ Grab phone charger
    ☐ Get travel snacks out of the fridge
    ☐ Empty the bins
    ☐ Turn off all unnecessary plugs, especially wifi


    I hope this comes in useful and maybe even encourages you to be a little bit more organised so you don’t miss something before you go on a trip.

    .

    For more pre-trip planning posts check out My ultimate packing list, which includes a downloadable PDF that you can edit to personalise for your trip.

    Aloha, Gabriella

    Pin this post