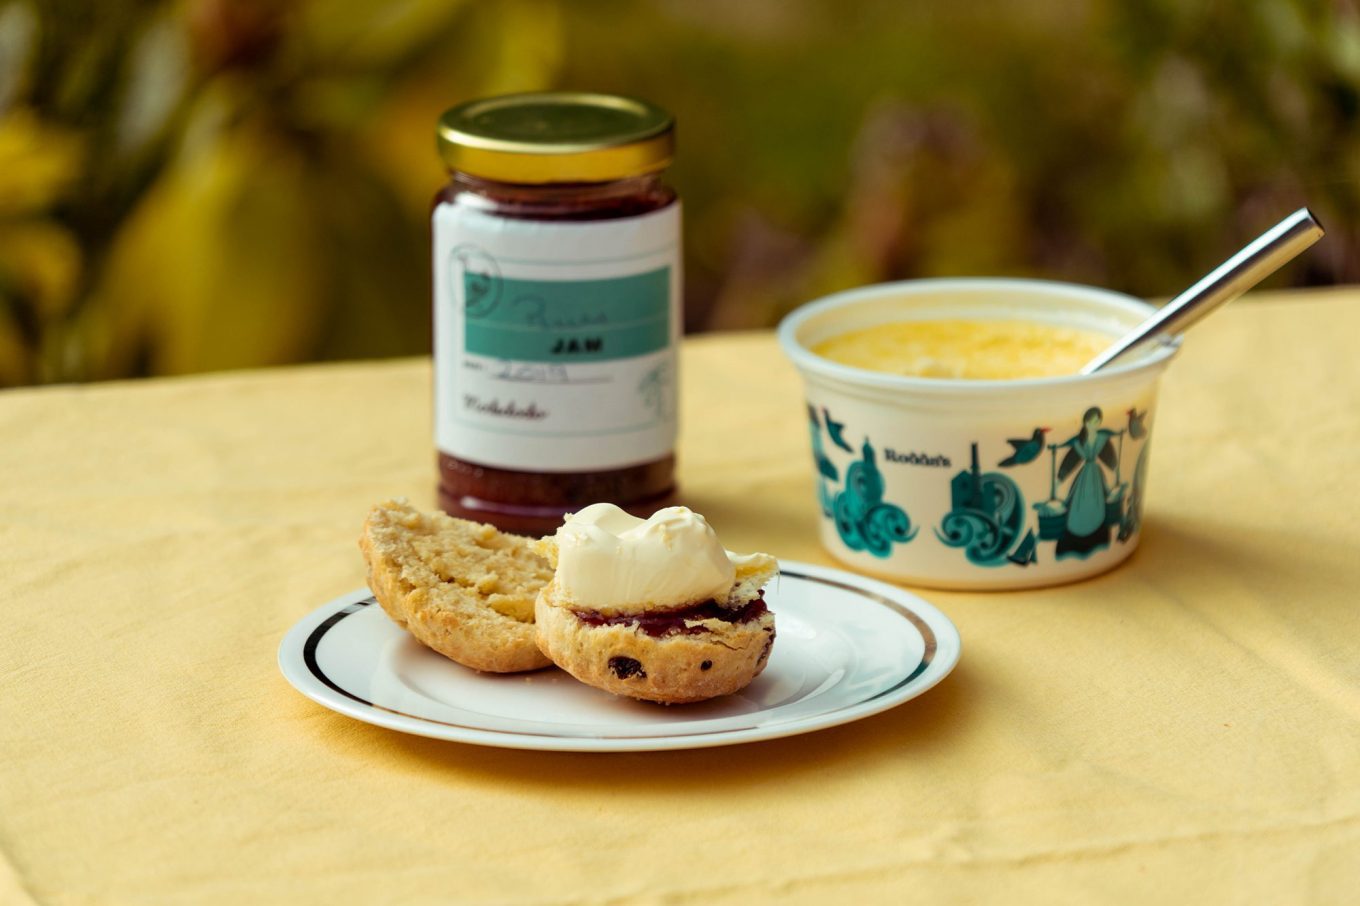
Tell me a more quintessentially British thing to do in the afternoon than indulge in a cream tea or afternoon tea? Of course, absolutely no afternoon tea is complete without good old fashioned fruit scones served with jam and clotted cream. So here I am to bring a little British culinary culture to your home with a very simple and easy recipe for baking fruit scones.
Usually my recipe blog posts are inspired by my travels, but the recent glorious sunny days we’ve been having out in the Norfolk countryside has got me thinking about the Great British Summer and it inspired me to look a little closer to home this time.
Remember everyone, it’s “scone” like “gone” not “scone” like “bone”.
Scones can come in many shapes and tend to be made using family recipes that have been passed down. So I will be sharing the recipe my Mum uses.
The recipe below makes approximately 10 scones.
Ingredients
225g self raising flour (plus extra for rolling)
1 level tsp baking powder
40g softened butter
25g caster sugar (and a couple of pinches for sprinkling over the scones)
1 egg
150ml milk (plus a dash extra for brushing the scones)
55g currants
Jam
Clotted cream
Equipment
Measuring scales
Sieve
Large mixing bowl
Tsp measurement
Wooden spoon
Bowl
Fork
Rolling pin
Round cutter (approx. 6cm wide)
Pastry brush
Baking tray
Reusable tray liner (or greaseproof paper, but try to buy a reusable greaseproof liner)
Wire rack
Method
1. Preheat the oven at 180˚C
2. Measure out all of your ingredients
3. Sieve the baking powder and flour into a large mixing bowl
4. Add the butter to the flour mixture and rub ever so lightly with your finger tips until the mixture resembles breadcrumbs
5. Stir in the sugar
6. Break the egg into a separate bowl and whisk with a fork whilst adding the milk
7. Stir the egg mixture into the large mixing bowl to make a soft dough
8. Stir in the currants
9. Your dough should be in-between dry and sticking, if it is too wet and sticky sprinkle flour over it until it is soft rather than sticky
10. Lightly flour a flat surface for rolling out the dough
11. Once you have gathered the dough into one lump, remove it from the mixing bowl and place it on your floured surface
12. Knead the dough very gently
13. With flour dusted on your rolling pin, roll out the dough to a thickness of 2cm (3/4”)
14. Using a 5cm (2”) round cutter, cut the dough into as many rounds as you can, placing each one on your lined baking tray
15. Gather the remaining dough, roll it out to the same thickness and cut what’s left
You should have approximately 10 scones, I managed to get 11 out of mine so it can vary
With the scrap of dough left, roll it into a ball to bake – don’t waste anything!
16. Using the pastry brush, brush the tops of each scone with milk and sprinkle with a very small amount of caster sugar, this will make the tops of the scones go golden brown
17. Place the tray on the middle shelf of the preheated oven to bake for 10 minutes, if they are not golden brown quickly turn the tray around and bake for 2-3 more minutes, but no more than that
18. Remove them from the oven and place the scones on a wire rack to cool down
To serve
Cut in half
Spread jam on each half
Top with clotted cream
There you have it, your perfect addition to your afternoon or cream tea.
Remember, proper afternoon tea etiquette is to keep those pinkies down and never bang your spoon on your tea cup!
If you give these a try let me know how it goes. Tag me using @gabriellawisdom and the hashtag #postcardsfromhawaiiblog so I can share it on my Instagram.
Banff and Jasper National Parks are, without a doubt, one of the most beautiful places I have ever been. You know those places that you see on Instagram and then when you actually get to stand in front of it in real life it leaves you speechless and needing a good pinch for a reality check? That’s Alberta, Canada!
Some of my best memories (and content) came from our trip to Banff and Jasper so I want to take you through everywhere I have posted on Instagram from those two national parks since my visit so you know how to get there and where to go to get your best photos for Instagram.
This is a guide for getting your best snaps for Instagram, but of course I implore you to hike, explore and really enjoy your time here! We packed up picnics everyday and spent every waking hour roaming these parks. Get your shot by all means, but come prepared with appropriate footwear and snacks for hikes out in the wilderness!
Moraine Lake
If you aren’t feeling a crazy early morning, aim to be at the road leading up to the car park for about 6.45am – I’m not making any promises that the road will be open, but even at the busiest time we were in by then – the road should be open but chances are the car park will be full. The first time we went we were in the car park at 7am with no spaces and a lot of car circling, defeated we headed back down to find the road had been closed to cars trying to enter. Quick thinking led us to turning around to head back to the car park. If no one could get in but people were leaving we would eventually get a space! That’s exactly what happened, we got to the top, waited no more than five minutes and got a space. This worked for us at least six times at various lakes including Lake Louise.
Alternatively they offer a shuttle service.
Canoes
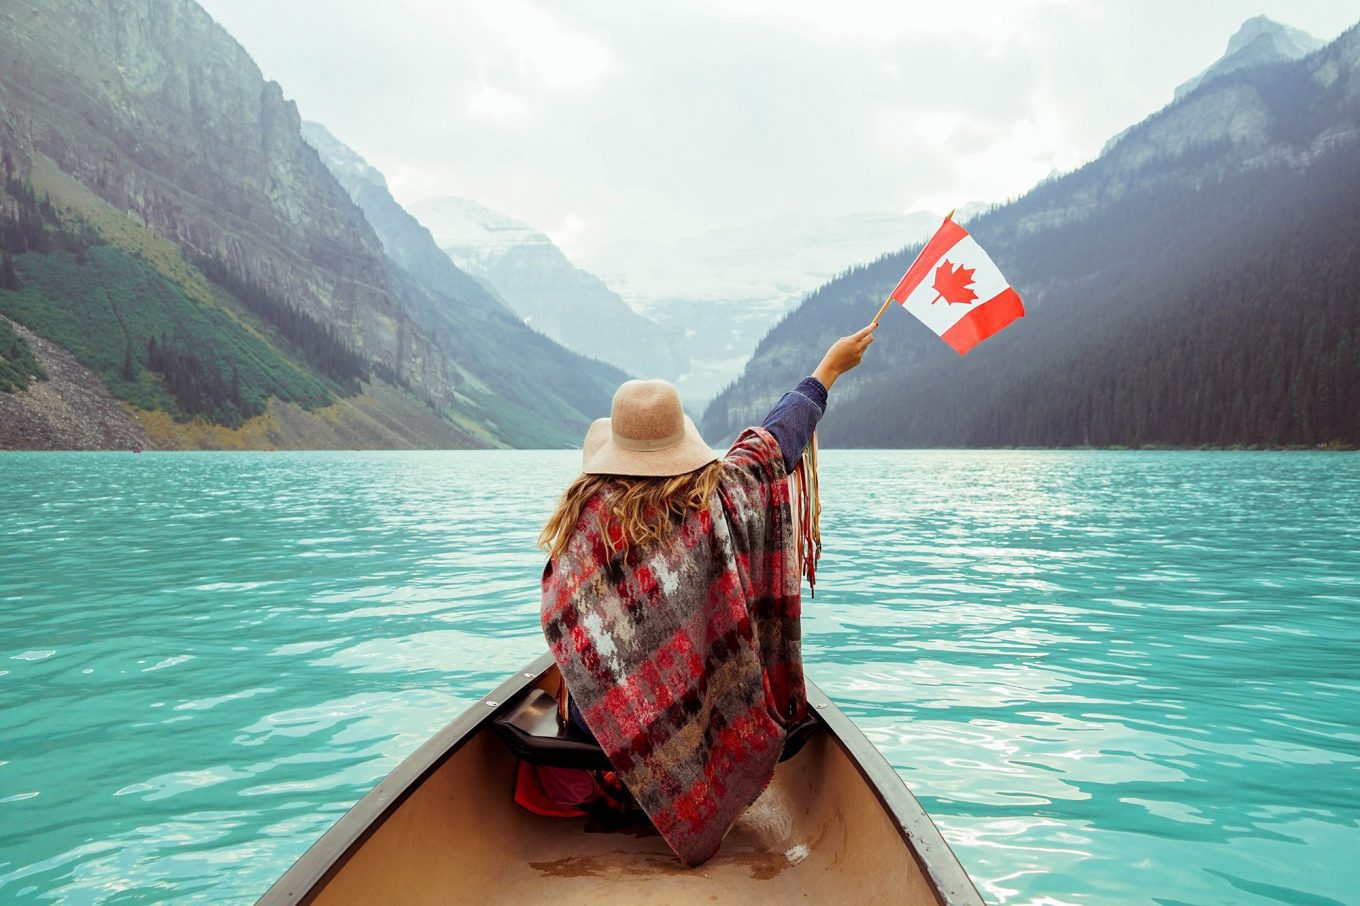
Taking a canoe out on either Moraine Lake or Lake Louise has to be the most Instagrammable thing to do in Banff. It was seeing other people’s photos out on the lakes that made Banff go to the top of my destination wish list.
Unfortunately we didn’t have a whole lot of luck with the weather whilst we were there. We were there at the end of August and beginning of September which, on the plus side, meant everyone went back to school and the lakes became so quiet, but on the down side it meant the season changed pretty much over night and the temperature dropped drastically, bringing wind. The smallest gust over the lake means that the canoes won’t be going out and we had a lot of windy days so we only had one chance on each lake to get out on them, which of course was enough, but Moraine Lake was the last day so it was cutting it pretty fine.
If you are concerned about the canoes going out, they are ran by Moraine Lake Lodge, so check with them at reception, not the gift shop, they won’t know. The canoes can be rented for $110.25 CAD per hour, one hour is plenty of time to get out, take your shots, enjoy the view and row back.
When I was first trying to figure out where these kinds of shots were taken, from such a height looking down on the lake, I figured you had to take one of the hiking trails. I soon realised that there is a viewing platform set high up on the rocks right at the lake entrance. As you reach the lake, there is a pathway on the left, opposite the Moraine Lake souvenir shop. Take this path up as it curves around the back of the rocks and it will take you up to the top. Trust me there is a path, we saw so many people trying to clamber up the rocks, it’s not necessary, there is a very clear pathway up.
This is a beautiful spot to watch both sunrise and sunset so I suggest making more than one trip.
The lake isn’t the only direction worth taking photos of whilst you’re up there, just turn around and take in the sweeping mountains and thick forest. You won’t see many photos looking the other way, but it’s so worth it, the scenery is breathtaking, even if I’m standing in front of it…
Don’t fancy climbing, hiking or rowing? That’s ok, you can still get great photos from the water’s edge between the rocks on the left and the canoes to the right.
If you do fancy a little stroll along the water, the easiest hiking trail will take you along a flat trail that hugs the edge of the lake along the right hand side. It will take you to the end of the lake where there’s a small waterfall. Along this trail you will be gifted with some beautiful spots to take photos.
As I mentioned above, the canoes are entirely weather dependent, and the slightest gust of wind means they will be closed with very little notice.
The canoes are located round to the left of the lake, there is a large hut and a bunch of canoes out front, you can’t miss it. They are operated by the Fairmont Chateau Lake Louise so hotel guests get priority and a discounted rate at $85 CAD per hour. Non hotel guests are charged at $125 CAD per hour.
You can walk around a little to your right where it will be a bit quieter too.
Banff Gondola
Sulphur mountain can be accessed by the Banff Gondola and the view is entirely worth the trip up there. From the top you’ll be able to see Bow Valley and a whopping total of six incredible mountain ranges, it is breathtaking. For the best view that doesn’t require too much effort in terms of walking, take the boardwalk up to Sanson’s Peak where along the way you can learn all about Canada’s first national park and the man who walked up to the top once a week for 30 years to check the weather, only stopping at the unbelievable age of 84!
Costs
Tickets for the gondola return journey cost $58 CAD per adult, $29 per child aged 6-15 and is free for children aged 5 and under.
The gondola ride itself will take just under 10 minutes. It’s enclosed but the windows do open if you are brave enough to stick your camera out.
The viewing platform is only about 10mins uphill from the carpark and it offers a big open area which is great for taking photos. It can get busy and there’s one rock that everyone is after so I suggest walking a little further by 15mins to get to more secluded spots up the mountain. There’s a hiking trail, so just follow it until you see a space open up where you can get a clear shot.
Parking is free but a lot more limited than Moraine or Louise, so I suggest getting there as early as possible. We arrived here just after sunrise so we stood a good chance of getting a spot. It was empty when we arrived but it was full within a couple of hours of us being there.
The swing that will give you the wedgie to end all wedgies, but amazing shots of you gliding over the tree tops!
The footpath that takes you up to the swing is located on Ridge Road*. If you come from Canyon Rd off Elk Run Blvd you will want to drive about 100m past the children’s playground which will be on your left. See the screen shot from Google Maps below of what the path up looks like. Head up here and when you reach the top there will be an option to go left or right. You want to go right and keep walking through until you reach the swing amongst the trees. It will take you less than 10mins.
*This is a residential area so 1. Street parking is limited and 2. Respect the area. Go for a walk whilst you’re up there, enjoy the scenery, don’t just go to get the shot. Whilst you’re parking, be respectful of people’s driveways, and go slow because there may be children around.
We went a couple of hours before sunset and had to wait for a family to take their photos, but after that we had the swing to ourselves for about 40mins.
Take care on the swing, especially when pushing. I nearly lost Michael over the edge when an over-the-top push turned into a swan dive. Just watch your footing.
Lac Beauvert is a very quiet lake, tucked away within the trees. It isn’t as bright as Moraine, isn’t shaped like a wolf like Peyto, it doesn’t have a mountainous backdrop like Medicine Lake and it isn’t as popular as Lake Louise, but the water is so calm and clear that it looks like you could step out onto it and expect to be standing on glass.
We stopped here to have a picnic because it was so peaceful. You can trust that it is an area that isn’t overrun by people because within 10mins of being there were joined by a wild female Elk who strolled past us only a few metres away. Of course they’re huge and you don’t want to mess with them so we kept our distance, but it was amazing!
Honestly at first glance, we weren’t too impressed by Medicine Lake, once you’ve experienced first hand the bright turquoise waters of Moraine and Peyto, it’s a little tough to appreciate anything else. I encouraged Michael to stick around and we got some of my favourite photos here. The big grey mountains that are almost camouflaged against the sky create such a dramatic backdrop combined by the scattering of boulders in varying sizes. It was so quiet and peaceful compared to most of the other lakes we had been to.
On a one day road trip from Lake Louise we headed out to Peyto Lake in Banff and on to Jasper to visit Lac Beauvert, Medicine Lake, Maligne Lake and Mount Robson. In that trip we crossed national parks, provinces and time zones! As it was such a long day we didn’t get a chance to go out and explore around Mount Robson, the day was getting on and we had to make the journey back, so we took a few photos and had dinner in Café Mt Robson.
There is a free carpark near the information centre.
Banff and Jasper are so beautiful it’s possible to pull up at any lake and get great photos. I have absolutely no idea which lake is in the photos below. We were on our way back from Peyto Lake and we pulled up to have a picnic, google maps didn’t know where we were so I can’t tell you, but there are beautiful lakes all over Banff and Jasper, so even if you don’t plan to go to every place in this blog post, you are sure to find a great shot somewhere.
Though our main reason to take a trip to Croatia was because the final season of Game of Thrones is out and we wanted to visit the filming locations whilst it is literally still the talk of the town, we also decided to go because it is out of season and so cheap! Read on to see how we planned a 7 day road trip in Croatia and Venice for two people for just £1,089.37 and what we did each day. That price excludes food costs as food, especially on holiday/vacation, is a personal thing and varies depending on whether you’re a foodie or want to save money. As we were looking to save as much money as possible on this trip, we mostly made food in our hotel room, once we had sampled the local cuisine of course. For tips on how you can do this, take a look at 6 items for making food in your hotel room.
All prices excluding hotels, flights, airport parking and rental car (as they were pre booked online in the UK) have been converted to GBP and rounded up to the nearest pound.
Public beach in Split
Day 1
Park car in Jet Parks car park Stansted airport
Standsted airport > Dubrovnik airport
Pick up rental car from Sixt
Park car in Dubrovnik Public Parking Garage
Check into Irundo apartment
Day 2
Check out of apartment
Game of Thrones filming locations
City walls walk
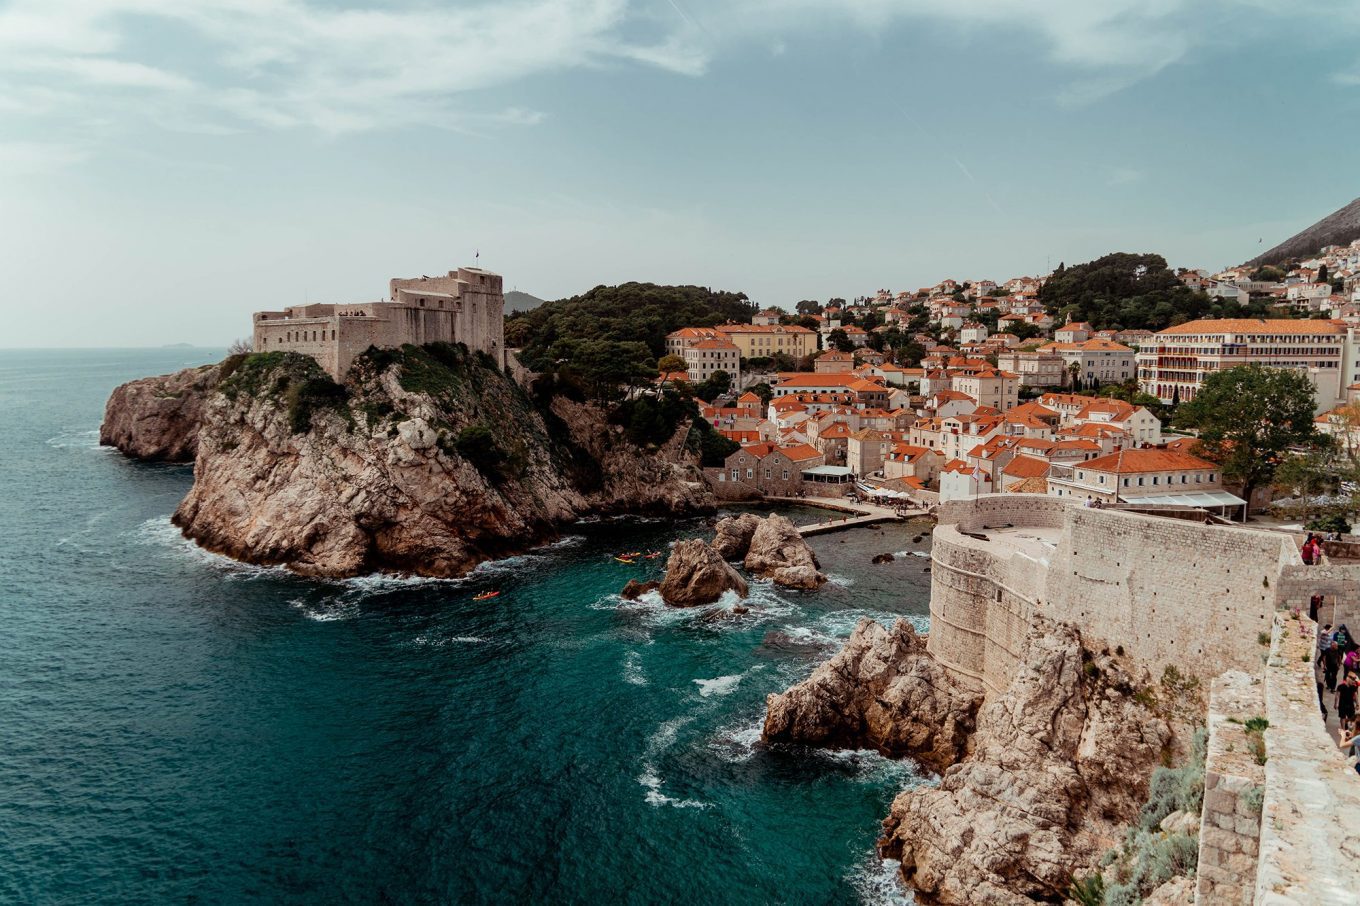
Fort Lovrijenac
Drive to Split
Check into Lugo apartment
Day 3
Marjan Forest Park
Explore town centre of Split
Day 4
Diocletian’s Palace
Beach
Check out of Lugo apartment
Drive to Lovran
Check into Hostel Link
Day 5
Check out of Hostel Link
Drive to Venice
Park in Garage San Marco car park
Water bus into Venice
Check into Dimora Dogale
Rialto Bridge
Bridge of Sighs
Piazza San Marco
Caffè Florian
Wander the streets of Venice
Day 6
Rialto bridge at sunrise
Bridge of Sighs
Check out of Dimora Dogale
Libreria Acqua Alta
Gondola ride
Gelato at Suso
T Fondaco Dei Tedeschi (DFS)
Drive to Plitvice Lakes
Check into Rustic Lodge Plitvice Lakes
Day 7
Check out of Rustic Lodge Plitvice Lakes
Plitvice Lakes
Drive to Dubrovnik
Check into Carol apartment
Day 8
Check out of Carol Royal apartment
Return rental car
Dubrovnik airport > Stansted airport
A view of Split from Marjan Forest Park
United Kingdom
Jet Parks car park
We used the official Stansted Airport website to compare car park prices for the seven days that we would need parking and chose Jet Parks. Jet Parks tends to be one of the cheaper options for the following reasons:
It’s further away from the airport
The buses only run every 15mins
You have to pre book
If you are satisfied with the above then it is worth saving money and parking with them.
Cost
£39.99 for 7 days
Flights
We always use SkyScanner to compare flight prices (to check out why, take a look at Essential apps every Jetsetter needs). We chose Croatia based on the fact that the flights were ridiculously cheap! Before all of the add ons our return flight was just £7 per person! Of course this means you’re flying with budget airlines and the chances of encountering a hen/stag do is HIGH but it’s less than four hours on board and again, it was cheap.
Cost
£148.20 x2 people with one checked bag with Jet2
£36.29 x2 people with one checked bag with Easy Jet
Dubrovnik
Sixt rental car
We used the comparison website Rental Cars to find the cheapest offer on the lowest class of four door cars for seven days. We made sure it was big enough to fit one large suitcase and two carry-on cases in the boot without them being seen so that we could leave the car safely whilst making pitstops on the way.
Costs
£53.94 for the rental car
£98 for a full tank of diesel and foreign use charge, which is the charge for driving the car from Croatia to Venice.
£37 for tolls (the tolls we paid for this exact itinerary)
£64 for fuel
Dubrovnik Public Parking Garage
As Old Town Dubvrovik is built on a slope down to the sea and cannot be accessed by cars, we had to park our car above the city in a car park before taking our luggage down to our apartment. As we were leaving our car overnight and not close by, we chose to park in an underground and secure car park, which meant it was expensive.
PFH Top Tip: There are a lot of stairs leading down from the car park to the water front, so pack light, you’ll appreciate it when you have to take your bags back up!
Cost
£35 for overnight
Irundo Apartment
As with all of our accommodation on this trip, we booked through hotels.com as we have discounted prices with our membership and we collect the nights towards a free one. Like I mentioned we were looking to save money on this trip, so we didn’t want to stay in lavish hotels. Luckily for us though, as it was out of season, the prices for accommodation were very cheap plus the majority of what’s on offer are apartments which means you can do self catering. Of course, one night here-and-there doesn’t exactly help, but you can easily grab a few ingredients from a local market and cook for yourself which we did for most of ours.
Irundo had many apartments located all around Dubrovnik so I suggest you request apartment DT1 which is what we had and it was right on the water front over looking West Pier and Harbour (which you’ll see below are Game of Thrones filming locations). It was so ideal and had a beautiful view!
Cost
£50.58 for 1 night
Game of Thrones filming locations
Rather than pay for a walking tour of Game of Thrones filming locations which though you may learn something, are operated in big groups and on a timed schedule, we decided to wake up early before the tour groups started and do our own tour. It’s pretty easy, all you have to do is google filming locations, mark them on google maps and head there yourself. There’s heaps online telling you exactly which scenes were filmed where. Here are the spots we took ourselves to, plus there are more under the city walls below and whilst we were in Split.
Jesuit staircase
The Jesuit Staircase leads up to the Church of St. Ignatius and was designed by the same architect as the Spanish Steps in Rome, Pietro Passalacqua. To Game of Thrones fans they are known as the steps in which Cersei starts her walk of Atonement from season 5, episode 10.
If you want photos here without anyone else, you will need to arrive between 6.30am – 7am and even then, you might be met by a few other hardcore fans.
West Pier and Harbour
In Game of Thrones, West pier and harbour are Blackwater Bay. The stone pier is featured in season 3, episode 1, where Sansa is watching ships and is approached by Littlefinger who offers her a “way out”.
If you stand to face Fort Lovrijenac from West Pier, you will see a couple of green doors in the rocks with steps leading leading down into the water. These doors are featured in season 2, episode 1 shortly after the Gold Cloaks were ordered to murder all of King Robert Baratheon’s bastard children. One of whom is drowned in the water below these steps.
Ploče Gate
This gate is used multiple times throughout season 2 and 3 as the entrance to King’s Landing.
Dominican Monastery
The steep staircase out front of the Dominican Monastery was the location where the protest speech against the Lannister family was made in season 2, episode 5.
City walls and Fort Lovrijenac (The Red Keep)
For the best views of the city, take a walk along the old city walls. There’s no doubt in my mind that this is the best way to see the old city of Dubrovnik. Walking along the old city wall will take you full circle around the sea of terracotta tiles whilst giving you the best views of the harbours, Fort Lovrijenac, the Cathedral and the mountains which form Dubrovnik’s dramatic backdrop as it slopes down towards turquoise waters.
Plus it’s also where you will find a couple of Game of Thrones filming locations such as Fort Bokar and Minčeta Tower.
The ticket to the walls also includes entrance to Fort Lovrijenac, or to Game of Thrones fans, the interior of the Red Keep in King’s Landing.
What to take
Shoes with grip (over the years, footfall has smoothed the surface of the stones making up the footpath on top of the wall, which means it’s very slippery. Though my sandals were comfortable for walking in all day, they had little grip on the sole which meant I was clinging for dear life when the path started to slope down.
Water, especially if you are visiting during warmer months. There are places to stop and have a drink or ice cream along the way but they are few and far between.
Sunhat. There aren’t many shaded areas so you are, for the most part, exposed to the sun, so don’t burn your head.
Suncream, for the same reason as a sunhat.
Cost
£47 x2 adults
400 Kuna
–
50 Kuna 5-18 yrs old
Under 5yrs go free
Opening times
Jan – March 10am – 3pm
April & May 8am – 6.30pm
June & July 8am – 7.30pm
August & September 8am – 6.30pm
October 8am – 5.30pm
November & December 10am – 3pm
Split
Lugo Apartment
The apartment we had in Split was the nicest of the trip, it is either newly refurbished or kept in very good condition. As we had two nights, we chose to be located just outside of the old ground of Split, by opting to walk just 10mins into the centre of Split, we were able to get a modern and spacious apartment surrounded by supermarkets.
I have to say that I personally preferred Dubrovnik to Split so I would recommend saying two nights there and one night in Split, but the apartment interior was lovely. Should you wish to stay in Split for a few nights with the option to self cater, the Lugo apartment is perfect. Plus it had free parking on the street out front, just be sure to leave at least one metre of space on the pavement for pedestrians to avoid a parking ticket.
Cost
£77.87 for 2 nights
Marjan Forest Park
Marjan Forest Park is a sore spot for us for sure because thanks to Google Maps making a mockery of us, we spent an hour walking up hill in the sun to a viewing platform that doesn’t actually exist! At first I thought it was Michael’s fault (because it usually is) but later I found out from others that there is a viewing platform marked on Google Maps that can’t actually be found!
However, don’t be put off this park entirely. If you don’t have limited time in Split, it’s great exercise, a pretty park and there are chances to look out over the bay. Plus with multiple benches dotted around, we found a good spot to enjoy our picnic.
Entrance to the park is free.
Diocletian’s Palace
“WHERE ARE MY DRAGONS?” Remember when Daenerys’ dragons were stolen by the House of the Undying in season 2, episode 6? Well you can stand in the basement where Daenerys kept them during her time in Meereen, by visiting the ruins of Diocletian’s Palace.
In real life though, Diocletian’s Palace was built at the end of the 3rd century for Roman Emperor, Diocletian. Most of the palace is in ruins but it is still possible to walk around the basement rooms.
Cost
£10 x2 people
90 Kuna
Opening times
8.30am – 9pm
Lovran
Hostel Link
As the name suggests, it is a hostel, however this one has the option of a private room and bathroom. As we knew we were getting in late and leaving extremely early, and by that I mean getting in at midnight and leaving at 5am for Venice, all we were looking for was a bed and a shower. Of course, I wasn’t quite expecting a bunkbed but it was a bed all the same! Parking on the street opposite was free and it was clean, so for under £30, I have no complaints.
Cost
£29.31
Venice
Garage San Marco car park
We chose to drive to Venice because we were travelling out of season and the ferries that go across from Croatia to Italy weren’t running a regular schedule, and I really wanted to go to Venice. By driving it meant that we could stop off at other locations in Croatia such as Split and Plitvice so it ended up working out well, and thanks to a few well placed accommodations, we could break up the driving so we weren’t exhausted.
As Venice is navigated by narrow footpaths, bridges and canals, it’s impossible to drive into Venice. So we parked our car in a garage overnight at Piazzale Roma, opposite the water bus terminal, and took that boat into the centre.
Upon entering you will be given a ticket with your floor number and as you get to that floor, stewards will come and take your car and keys and park it for you. When you return, pay first and then hand your ticket to the steward on that floor and they will hand your car back to you.
Costs
£57 for 2 days
€64
Venice water bus
At the sacrifice of being crammed in like sardines, the water bus is your cheapest option for accessing the centre of Venice. As we had arrived by car and were only spending one night, we left our shared large suitcase in the car (concealed in the boot) and only brought our carry-on cases which made it far easier to board the boat.
Even out of season, it isn’t cheap to stay in the heart of Venice. I could see from hotels.com that to save money without sacrificing location, I would have to aim to find one between £80-100 per night.
The room decor in Dimora Dogale is delightfully gaudy and typically Italian. As I am learning from my trips to Italy, older hotels do seem to favour fabric wallpaper and baroque/rococo styled furniture and finishings. What I particularly loved about Dimora Dogale, aside from its central location, is that it is located on the canal so provided you book a room with a canal view, you will have three windows looking out onto the canal to watch the gondolas float by.
Cost
£93.24 for 1 night including breakfast
£4 additional city tax for 2 people (paid at the hotel)
Rialto Bridge
Rialto Bridge is not only the most famous bridge in Venice, but it is also the oldest one crossing the Grand Canal.
On our first day, our stop on the water bus was Rialto Bridge, so it was the first landmark we saw, but we made sure to return a few times. For the best photos of the Grand Canal, head to the Rialto Bridge not long after sunrise, at this time it will be significantly quiet and the sun with be creeping up over the buildings casting a dreamy light across the rooftops.
Bridge of Sighs
The Bridge if Sighs gained its name because it was the sound that came from the prisoners walking across it who were en route to their cell. The small windows offered them their last glimpse of Venice before being locked up.
The best way to view the Bridge of Sighs is around 7am from the bridge behind it if you were looking towards the Grand Canal. Though Ponte della Paglia is closer, it is the most popular bridge for looking at the Bridge of Sighs, so I suggest viewing it from Fondamenta della Canonica which will be empty at that time in the morning. For a great shot, get your photographer to snap you from the next bridge along, on Calle de la Canonica, whilst you stand on Fondamenta della Canonica.
Piazza San Marco
Piazza San Marco or St. Mark’s Square is the main public square of Venice. It is where you will find the following famous landmarks: Doge’s Palace, Saint Mark’s Basilica and St Mark’s Campanile.
Caffè Florian
Though I haven’t included food in the budget for the reason I explained at the begging, I couldn’t not go into detail about the hot chocolate I had in Caffè Florian.
Located in St. Mark’s Square, Caffè Florian is a luxurious place to stop and enjoy a hot drink and possibly a sweet treat. Thanks to its ornate decor and tourist trap of a location, it isn’t cheap, and had the weather been more favourable on our first day, we wouldn’t have stopped here. However, it was raining and we were cold, damp and in need of a pick-me-up, so we sat in and enjoyed an expensive thimble of the best hot chocolate I have ever had! I had the Cioccolata Casanova which is a hot chocolate topped with a mint cream and it was heavenly. I have since learnt that Florian’s chocolate is regarded as one of the best in the world, so if you have the extra pennies to splurge, I do recommend treating yourself.
Libreria Acqua Alta
Though I was aware there was an Instagrammable book shop in Venice I hadn’t researched it nor intended to visit, but thanks to Michael’s thirst for old books and artsy fartsy stuff he had Libreria Acqua Alta on his list and took us there after we had seen the Bridge of Sighs.
The shop itself is quite unique albeit rather smelly thanks to the stacks of decaying books outback. There is a gondola in the centre of the shop, filled with books whilst either side sees books piled up to the ceiling.
Outback, where the books have clearly gone to die (judging by the smell) is also where you will find the Instagrammable staircase made entirely from books.
Opening hours
Daily from 9am – 8pm
Gondola ride
You won’t have a tough time finding a gondola in Venice, they are everywhere. What is important though is where you pick it up as that will determine the route you take. We got ours from the street that out hotel was on (literally just a few meters away) because we wanted to travel through the little back canals rather than the Grand canal as they are much more picturesque. Plus the Grand Canal has far more traffic from bigger boats making deliveries or the water taxis which aren’t attractive boats. The water bus does travel under the Rialto Bridge so if you follow this itinerary you will get to see it from the water without having to pay for a Gondola.
Cost
£68 for half an hour
€80
If you are looking to cut down on the cost, gondolas rides are paid for per gondola not person, so you could rally a few people to split the cost but I would strongly recommend you budget the €80 to have a private ride with your loved one(s).
I have been told that night time rides are the most romantic as you float under the stars, however if you are planning on taking photos, I recommend going during the daytime for better lighting. I can also tell you that half an hour is plenty of time to sit together and enjoy the ride and get your photos.
Gelato at Suso
Michael found Suso by Googling “best gelato in Venice” and the search result was not wrong. Suso was very close to our hotel so we passed it often and learnt that even out of season the queue is consistently 15+ people long from 11am onwards. For that reason we decided to eat breakfast gelato which successfully avoided the queue. What’s great about Suso aside from their delicious gelato (Michael told me he would leave me for their pistachio and chocolate gelato he thought it was that good) is that they have Vegan gelato and gluten free cones.
T Fondaco Dei Tedeschi (DFS)
We hadn’t actually planned to go up to the viewing platform on the rooftop of DFS, it was by chance that we walked past it about 12pm and heard someone saying there was a viewing platform. So we went up to the top floor where we found an iPad where you could reserve a complimentary time slot for access to the roof. At 12pm we were offered 3.15pm so we went for lunch and a stroll before returning in time for our booking.
When we did arrive for 3.15pm there was a sign saying that there were no more slots available so I suggest getting there to book a slot as early as you can.
Plitvice
Rustic Lodge
Despite the bathroom smelling of smoke (make sure you request a non smoking room) our bedroom at Rustic Lodge was lovely. It was bright and spacious with a fridge which meant we could keep our milk chilled for our breakfast the next day.
The lodge is family owned and run, they are so accommodating and generous. Knowing we had come in late from a long drive they allowed us to check out a little later and offered us complimentary tea and coffee.
As we had a lot of hours on the road we chose to stay in Plitvice so we didn’t have to drive far to the park. The drive to gate 2 was only three minutes so it’s perfect if you are planning on getting in a full day of hiking in the park.
Heads up, type the postcode/area code into your directions because it is not where “Rustic Lodge” is listed on Google Maps.
Cost
£47.51 for 1 night
Plitvice Lakes
We arrived at 12pm and due to popularity on a sunny day everyone buying tickets around 12pm had to wait until 1pm to access the park, which created such a traffic jam on all of the paths throughout the park. For this reason I suggest you arrive early or late afternoon. As beautiful as it was I didn’t enjoy the first part because it was so busy that you and being pushed left right and centre, and considering there a very few barriers on the path, it is not a pleasant experience. We were bashed around by a lot of stroppy hikers who couldn’t understand that people ahead with strollers and children don’t walk as fast as them…
The park however is a great chance to go chasing waterfalls, I can’t even recall how many we saw because they are in abundance. From frizz-inducing super soaker falls to small trickling ones, there’s plenty to see.
The paths are mostly man made so you don’t necessarily need trainers or hiking boots, but keep in mind you will be on your feet for at least three hours.
PFH Top Tip: Put a pin in the map on Google Maps for where you parked the car, or at least take notes of exactly how to get from your car to the ticket booth. The car parks are just open spaces in the forest, there are no signs for sections or zones, it goes on forever and everything looks the same! If you were watching my Instagram stories that day, you will know that it took half an hour of walking around to find the car and it didn’t help that Michael walked straight past it! You only get 20mins to get out of the car park after getting your ticket and it took a fair amount of explaining how we got lost before we were allowed out of the car park.
Cost
£23 x2 people
200 Kuna
November – March
60 Kuna per adult
30 Kuna 7-18 yrs old
Under 7yrs go free
April – May & October
100 Kuna per adult
50 Kuna 7-18yrs old
Under 7yrs go free
June – September
250 Kuna per adult
150 Kuna 7-18yrs old
Under 7yrs go free
Opening times
8am – 7pm
Konavle
Carol Royal Apartment
We didn’t have long here as we got in late after spending our day in Plitvice Lakes and we had to leave early for the airport, but after waking up and stepping out to the swooping views of the bay, I would say it is a lovely area to stay if you are planning on renting an apartment for a week and driving around. There is complimentary parking out front of the property and it even includes a pool so you can enjoy the sunshine and views should you have more time there. The kitchen is equipped but the shower is pretty basic and like many European ones, is hand held. For the price and view though, it is worth it.
Cost
£39.44 for 1 night
.
Total Cost
£1,089.37
I realise that to keep this trip down to a low cost it means a lot of late night driving and short stops but I don’t for a second feel like we didn’t explore each place we went to the max. You can definitely hot up the main spots of Dubrovnik in one day, and Venice can easily be enjoyed in two. Of course I would still recommend going for a little longer so you can make good use of Croatia’s beautiful beaches, but if you are looking for a quick and cheap trip to Europe, this is definitely a great option.
As important and enjoyable as eating national dishes and trying new food is when you’re on a trip, we all love saving money right? Eating out for three meals a day adds up, especially if you travel often. Realising that food costs were getting a little out of control with the trips we have been on in the last year, I started looking for ways we could save money. I built a kit that not only helps the environment by eliminating the need for single use items, but it also saves us so much money by allowing us to prepare breakfast, lunch and dinner in our hotel rooms.
These six items are a game changer and now go on every trip with us:
1. Water bottle
Save money and unnecessary plastic waste by bringing your own water bottle. So many hotels provide water in the lobby now, so you can fill your water bottle. This way you have water to start the day with or you can take it back up to your room. You no longer need to buy bottles of water. I never realised how dehydrated I would let myself get by not having water to hand in my hotel room, keeping a reusable water bottle to hand has definitely changed my life, I’m never caught out thirsty.
2. Coffee cup
My KeepCup was one of the first reusable items I bought for my travels. Aside from my reusable Starbucks red cup (it’s the only way to drink gingerbread lattes on the go) it’s the only one I have and I take it everywhere.
In addition to saving the world from more single use wastage and saving you money in certain coffee shops who reward you for bringing your own cup with a discount, a reusable coffee cup also has multiple handy uses for eating and drinking on the cheap.
Hot drinks
Save yourself from spending money on buying your morning hot beverage by making it up in your room before heading out. Ok it might not be as good but many hotels are stepping up their game by putting coffee machines in rooms or are offering complimentary tea and coffee in the lobby.
Water
Sure, I’ve already mentioned a water bottle, but if you’re going somewhere hot or don’t fancy making another trip down to the lobby to fill up your water bottle again, then bring your coffee cup down and fill it up along with your bottle. Stay hydrated folks!
Pasta in a mug
Of course these aren’t the most nutritious of dinners, but they offer an easy and quick hot meal whilst travelling. Mug Shots are always on offer in our local supermarket so we pick up 6 (for £1) and take them on every trip. Accompanied with snacks, you won’t go hungry. Plus they’re flat and light so they’re so easy to pack.
You will need a kettle to make this and the following, but virtually every room comes equipped with a kettle now. If you don’t have access to one, head out to a coffee shop and ask them to fill you coffee cup with boiling water.
Cuppa soups
Another hot option is a cuppa soup. Like the pastas above they are flat and easy to pack, plus supermarkets have heaps of options for flavours. Pick up a bread roll from a nearby bakery or supermarket and you’ve got yourself a meal.
3. Cutlery
When I first started travelling more frequently and for long amounts of time, I used to stash plastic cutlery from the aeroplane to use in hotel rooms. Last summer I bought a metal camping cutlery set and I can’t tell you how useful they have been! I am now never caught short without cutlery in my hotel room so I can make sandwiches, eat pasta or yoghurts etc. Better than that, by swapping to a reusable set, I am saving so much plastic waste.
Whether they’re metal or bamboo, a reusable cutlery set will not only prevent the use/need for plastic cutlery but it will come in more useful than you could ever imagine. These three utensils are amongst the best travel products I have ever bought!
4. Swiss army knife
I bought Michael his Swiss army knife about seven years ago and it took him about two years to use it as something other than a glorified nail file. It now comes with us on every trip because you never realise how much you need something until you don’t have it. There’s always something that needs cutting or opening etc.
Knife
Before I bought us cutlery to travel with we were getting by with the knife in Michael’s Swiss army knife. We would sterilise it with boiled water from the kettle and use it to make sandwiches. It worked a treat!
Corkscrew
Of course having a drink in a restaurant or bar is one of the joys of being on holiday/vacation, but marked up prices and tips mean that can add up pretty quickly. Say you have a lovely view from your balcony, well what’s stopping you from picking up a bottle of vino and enjoying that view? With a cork screw in your Stanley knife and a couple of coffee cups, you’re good to go.
Bottle opener
For pretty much the same as the corkscrew but you can open bottles or beer, cider or soft drinks.
Scissors
Honestly, I mostly used these to cut tags out of clothes when they annoyed me or thread if button needed stitching back on. They’re also super handy to open tricky food packaging such as cheese.
Can opener
I both love and hate this can opener. When we were living in Paris we lived in a shoe box (no joke, our entire apartment was smaller than my current bedroom) and there wasn’t much in the way of kitchen utensils, I think it came with four plates, bowls and tumbler glasses. Michael was an intern and my job didn’t pay much either so we owned one saucepan, one frying pan, the smallest chopping board ever, one enormous sharp knife (courtesy of my chef brother) a serving spoon, three mugs and two wine glasses (which I bought when a friend came to visit and I wanted to look classy, of course). I digress, what I was saying is, we didn’t have a lot of money for a long time and as the sensible 21 year old that I was I would rather spend it on Monacos than spring for a can opener. So, I used the can opener on the Swiss army knife, it was character building to say the least, but it worked. I guess what I’m saying is, if you want to open a can of sweetcorn, you can…
5. Collapsible bowl
The biggest thing that I have saved money on by eating it in my hotel room is breakfast. Buying a carton of milk, which we keep in the mini bar fridge, and a box of cereal (or two because Michael and I don’t approve of each other’s cereal choices) and eating it out of our collapsible bowls with our metal spoons has saved us a ridiculous amount of money!
I started eating cereal in my hotel room for breakfast in 2016 when I did my round the world trip and was looking to save money anyway I could. When we were in America we were getting our dinners from the Whole Foods salad and hot food bars, whilst there I would put a couple of small cardboard soup containers in my bag and use them as cereal bowls until the bottom fell out and then I’d get a couple more. Eventually I developed a conscience and bought a couple of collapsible silicone bowls that we could take everywhere with us so not only would I stop using cardboard ones (or nicking them in my case) but I am also always prepared.
Cereal isn’t the only thing you can use them for, we also use ours to make up salads for dinner.
6. Beeswax wraps
Last year I realised I was using plastic sandwich bags on every trip. I only ever took a couple and washed to reuse them, but when I learnt about beeswax wraps, the switch was a no brainer! We have one each and use them to make and wrap up our lunch. I always pack up sandwiches in my hotel room and take them out with me.
Using the beeswax wrap as a surface and the cutlery mentioned above to cut the bread I make sandwiches. We usually buy a pack of bread rolls, butter/spread or mayonnaise, cheese, turkey slices and lettuce which we keep in the mini bar fridge (not the bread).
PFH Top Tip: If you have breakfast included in your hotel pocket a few peanut butters/butters OR if you’re really brave, and I’ve done it more times than I could count, make up a couple of sandwiches at the table then craftily put it in your beeswax wrap and drop it in your bag with a banana. Voila, lunch for the day!
Think of all the plastic waste you’ll be preventing by not using sandwich bags or cling film/plastic wrap. Plus keep them on you and anytime you need to wrap up something for later, you can!
I have been to Hawaii both in the height of summer and winter. I have experienced endless days of sunshine and blue skies and relentless rainstorms and chilly winds.
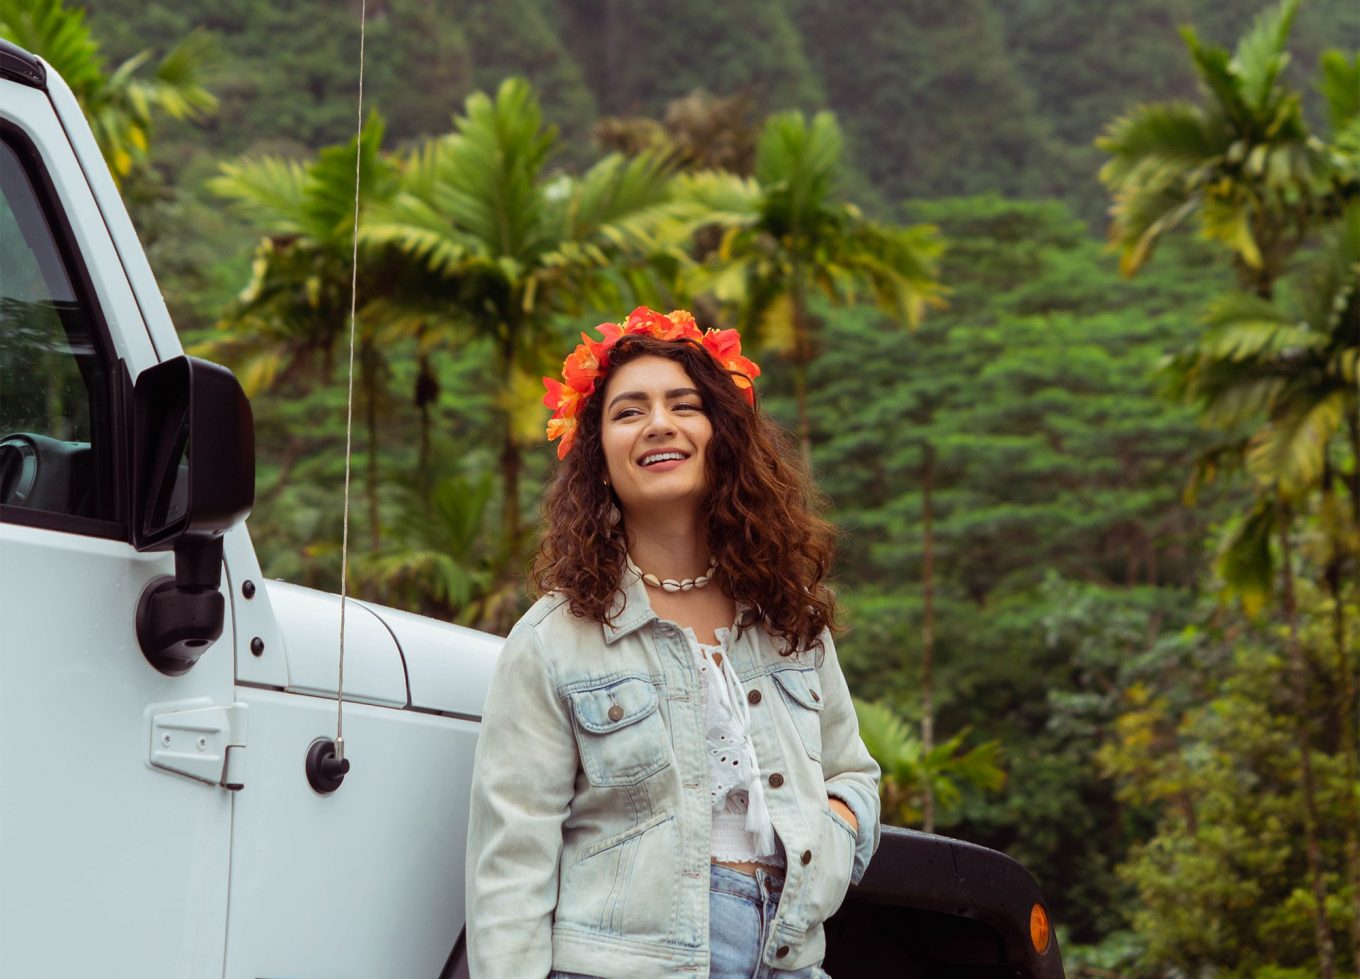
From my time in Hawaii I have learnt that it’s better to be prepared for both ends of the seasonal scale because you don’t always know what you’re going to get. Plus, there are certain excursions you can do that warrant clothes you wouldn’t quite expect to wear in the Rainbow State.
Hawaii is made of glorious tropical islands, so even in the winter the temperature doesn’t really dip much below 20˚C in the daytime and it will pretty much sit around 24˚C. During the summer months, you’re looking at an average low of 24˚C and a high of 30˚C. As you can imagine you won’t need to make space in your case for a bunch of wooly knits! So let me take you through my packing list and the essential items that I couldn’t do without.
Swimwear
Bring a good selection of swimwear, and I don’t just mean different patterns of the same stringy bikinis (or in my case high waisted ones, they flatter everyone!), I mean different types that suit a range of activities! If you are fully able to go into the ocean, you’d be a fool to stay out of it with so many reasons to enjoy it from cooling off to swimming with turtles! Here are the staple swimsuits I think you need:
Women
A rash guard for three good reasons, the first is if you go surfing you’ll want to protect your chest from a board rash. The second is if the waters are cooler it will help you keep warm in the water. The third is if it’s really hot, it will protect your back from burning in the sun whilst swimming.
A full coverage swimsuit or even better a surf suit for going surfing. I wore a very practical Roxy swimsuit with a rash guard but if you come off your board and get thrown about a bit, your rash guard might ride up and if your swimsuit doesn’t have a high neckline you may or may not have a nip slip… I may or may not be speaking from experience, thank God for those rash guards, hey I guess that’s a fourth good reason to have one!
A bikini, if you’re confident wearing one, to avoid leaving the islands with a pale tummy. I spent two weeks in Mexico in mostly swimsuits and my stomach was a stark contrast to the rest of my body! FYI I don’t like being in bikinis but in Hawaii I realised anyone judging me for a roll or two when I sit up has more insecurities than me, and so I sat out in my bikini and embraced the body I have.
Something cheeky! This is hard because virtually every swimsuit in the shops these days are encroaching on wedge territory. I’m not encouraging it just for fashion’s sake though, I like them because you get a more even tan on your tooshie!
Swimsuits for posing, I’m talking about the really impractical ones, the ones that are meant for sun loungers and cocktail sipping, why not, you’re on holiday/vacay!
Men
Shorts, because you don’t really have a lot of options, sorry.
Rash guard, for the three same reasons as above – if you go surfing, you’ll want to protect your chest from a board rash. If the waters are cooler it will help you keep warm in the water, and if it’s really hot, it will protect your back from burning in the sun whilst swimming.
Cover ups
I am assuming you’ll be spending a lot of time going between the glorious beaches and maybe the pool so I recommend bringing a couple of cover ups to go over your swimsuit. Men, you just need a T-shirt so you’re easily sorted, Women, a tunic is a great option because it can be worn over a swimsuit or with shorts if you’re heading away from the beach (you don’t want to feel like you’re in your undies). A sarong is always a solid cover up but if you’re looking to buy one, wait until you’re in Hawaii and grab a pareo, it’s a traditional Polynesian sarong that can be worn multiple ways.
Shorts
You can’t go wrong with a good pair of shorts, denim is my preference because they go with anything, but bring something that is comfortable so that you can go anywhere in them from hiking to shopping.
Tops
Even though I felt like I wore more than just the same outfit over and over again, I pretty much wore the same top almost everyday! With so much to do, you’ll end up being quite active and wearing a lot of swimwear so don’t stress about brining a lot of tops. Of course bring more if you won’t be wearing many dresses, but I really only needed a few that I would wash and put out to dry on the days I would be mostly on the beach.
Outerwear
I brought a denim jacket to Hawaii both in summer and winter and it was welcomed on both trips. Even in the summer, the nights can be cool so having a versatile jacket is smart, plus you can wear it in air conditioned restaurants and shops, you know, the ones that overcompensate and feel like you’re walking into the Artic circle. That jacket will definitely be needed for winter evenings and some cooler days.
A lightweight shower proof jacket is a great one for both seasons too. The are far more rainy days in winter, obviously, but those glorious rainbows need a little help from a shower or two so it’s not the worst idea to have one to hand.
Haleakala is a chilly ordeal no matter what time of year you go. We went in the middle of summer and it was shockingly cold and wet! Despite wearing thermals, warm layers and waterproofs, we were not prepared for how cold it was and we felt like we had frozen to the bone! Hours later when we returned down from the clouds, we were roasting again. If you are planning on going up to watch the sunrise or sunset from Haleakala, bring layers!
Trousers
Like I mentioned in outerwear even if you’re going in summer, if you’re planning on making a trip up to Haleakala, you are going to need to wrap up so bring a pair of trousers. It could be smart trousers that you can wear in the evening for dinner or a pair of jeans. Honestly even when I went in winter it wasn’t cold enough for trousers, but as I travelled from England with a pair of jeans I wore those on some cooler evenings but again, it wasn’t terrible cold that I felt I had to wear them.
Jewellery
Shell jewellery is so hot right now! I made a bracelet, anklet, choker and earrings after purchasing a jewellery making kit and a box of cowrie shells from Amazon. It’s way cheaper than buying them in any highstreet store! If you don’t fancy making or buying them, wait until you get to Hawaii, there are shops everywhere selling cowrie shell jewellery for just a couple of dollars if that.
Shoes
Really you only need two pairs of shoes for a trip to Hawaii and those are a pair of flip flops for the pool, beach and avoiding awkward tan lines and a pair of trainers or hiking boots for walks, hikes and anything else active. Of course I brought four other pairs of sandals and sneaks just for styling with various outfits, but if you’re aiming to pack light, you can live off two. Maybe bring one nice pair of sandals for any special nights out, at a push.
Mosquito Repellent
If you’re planning on driving the road to Hana you’ll need bug spray! Those nasties are ready to pounce the second you get out of the car, so be prepared.
.
There’s a good chance you’re here because you’re either taking a trip to Hawaii or planning to so here are some other blog posts that might be of use to you:
If you like the look of my packing list and want to make one for yourself, take a look at My ultimate interactive packing list. You can download my template and personalise it to your trip!
Here are another ten places to get killer shotS for Instagram in and around L.A.
1. Angels Point
Elysian Park is home to three amazing locations to shoot, all of which I wouldn’t have known about had it not been for Kim from Dear Darling Kim, so thanks girl!
The first is Angels Point which offers an unobstructed view of the city skyline. Park on the road and walk down to where you see a funky red and yellow art installation and from there you will see downtown L.A.
Continue up the hill from Angels Point until you see a stretch of road lined by palm trees on both sides of the road. I used to think Beverly Hills had the best palm tree lined roads (see PFH’s 10 Best Instagram spots in L.A.) but after seeing the ones on Angels Point Rd, it’s clear that this is the ultimate road to take photos with palm trees that reach up to the stars. Park up on the side of the road to get your shot. It’s much, much quieter here for taking photos than say, Beverly Hills, but do be mindful of cars. We were there fairly early on a weekday in March and we were the only people shooting, I would advise going first thing in summer though.
The last gem in Elysian Park is the “secret swing”. It’s basically a ratty old tree swing that offers views of L.A. from behind the hills. It’s a popular swing so be prepared for a wait. We arrived late morning and were the second group of people up there when we started, but by the end we had another two groups waiting in line to shoot. The best thing about this swing is so long as there’s daylight it doesn’t matter when you go because once you’re on the swing you’ll get your shot.
The Walt Disney Concert Hall is such a fun place to snap because thanks to its many curves and edges it serves up a multitude of options for perspective. To see where we got ours, scroll down to beneath the Instagram posts where I’ve pointed it out on Google Maps.
PFH Top Tip: try to go before it gets too warm outside because the metal of the building will become too hot to touch.
To get to where both of the photos above have been taken take a look at the Google Maps screen shot below. You’ll see the main entrance and front steps are in the top right of the image, facing those you need to walk to the left of the building, keeping it to your right hand side. Stop about half way and a staircase will appear, take those stairs up (there is a box around the stairs highlighting them on the screen shot), the stairs lead to nothing but a small platform, a bin and a locked door but the building itself serves up some good angles for photos.
5. Grand Central Market
Get your photo against the neon wall, sure, but don’t come here just for that! The culinary options at Grand Central Market requires an empty stomach. With such a diverse choice it’s hard not to be pleased. Is it a super special food market, probably not, but what’s not to love about having so many options, made so well, under one roof.
The neon wall is located at the entrance to the market, on the left hand side. What’s neat about it is that it isn’t just another Instagrammable wall or a fun advert for whiskey. No, it’s actually a fundraiser! The neon artwork has been sponsored by Bulleit Whiskey and is a fundraiser for the Museum of Neon Art in Glendale, CA. Every time someone posts a photo of this wall to social media, and tags it with #FrontierWorks, Bulleit Whiskey will make a donation to the museum for neon restoration! So get snapping and tagging!
Probably one of the most photographed signs in the world, the Venice sign, hangs between the buildings of Winward Ave, and is best seen and snapped from the crossing where Windward Ave meets Pacific Ave. Taking photos here is risky business because it means walking out into the middle of a crossroad, posing and legging it back again all in the approximately 20 seconds you get before the cars start moving again. Oh and I forgot to mention that along with 6 other eager people desperate to get their photo for Instagram, it’s a six way crossing so people can walk diagonally out across the best place posing, so be prepared to walk out and pose on multiple red lights before getting a clear enough shot. Patience is key here, just have fun with it, and don’t be silly and hang out in the road when the lights change!
There will always be cars and pedestrians here so even if you’re the only one shooting (which has happened to me once before) you can’t be certain that you won’t get people walking in the shot.
There’s heaps of options for shooting on Venice beach, there’s the sea, lifeguard stations, art installations, the boardwalk, muscle beach, you’ll find the odd painted wall too! Sunset is a particularly wonderful time to shoot because you get golden hour and then you can sit with a drink and watch the sun go down over the water.
What’s better than taking great photos for Instagram? Taking great photos somewhere where you can have heaps of fun doing it! Santa Monica pier is home to Pacific Park, a theme park at the end of the pier which is bursting with colour, rides, food stalls and games. Split your day between Venice and Santa Monica. They’re walking distance from each other. You start in Santa Monica making the most of the rides in Pacific Park, grab some food on the pier, rent a bike or scooter or simply walk along the boardwalk to Venice to shoot the sign and on the beach.
Rebel Without a Cause (1955), La La Land (2016), Jurassic Park (1993), The Terminator (1984) and Gangster Squad (2013) are amongst many films that have been shot at Griffith Observatory. So not only do you get to take a few pics for the gram, you also get to experience a little bit of film history and learn about space and time. Take a look here to see what future events are on at the observatory.
Visiting is complimentary but be warned, it gets very busy here and as it’s an old building with no air con, so it is stifling come summer. We actually went in one summer’s afternoon where it was packed with people, hard to park and so very hot yet still managed to get the photos below very easily but I suggest you arrive here early for easy parking and before the sun reaches the top of the sky so it’s more comfortable for you.
What’s more classic than grabbing a burger and shake at a diner in the USA? Or so every teen-drama has ever led me to believe… Mel’s Drive-in has been visited by numerous bloggers and Instagram sensations, many of whose photos you’ll be able to see on the walls across their multiple locations. I’ve gone for breakfast in winter and dinner in summer and neither time has it been too busy to get a clear shot.
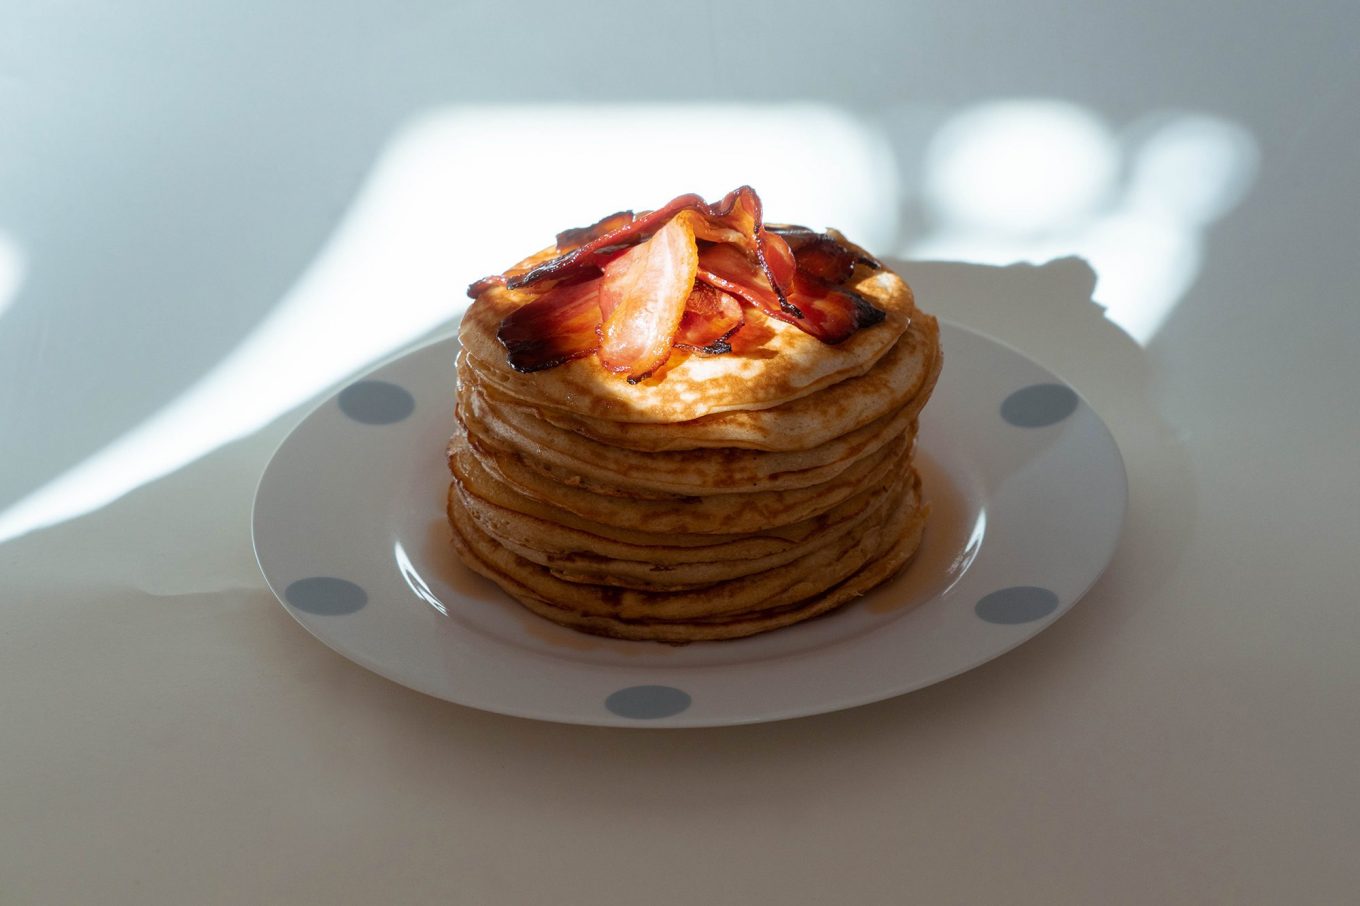
Buttermilk pancakes are thick, fluffy and savoury American pancakes that are best known for being stacked up and served with butter, bacon and heaps of maple syrup. They can be served as a sweet or savoury dish and for that reason they themselves are not sweet. Made with very little sugar, this breakfast staple can be eaten with eggs, sausage and bacon or with fruit, cream and chocolate.
Why buttermilk? The acidity of the buttermilk activates the bicarbonate of soda to make the batter rise and become bubbly, so that when the batter is cooked it creates a light and fluffy texture on the inside despite being so thick.
When I say this pancake recipe is easy, I really mean it. For years I struggled to make pancakes. In fact, they never even resembled pancakes, I basically made what looked like scrambled eggs. Crêpes were out of the question, I just couldn’t get the batter to pancake ratio right or the technique down. Buttermilk pancakes however, well, they’re a game changer! Thanks to the thickness of the batter and weight of the cooked pancake, flipping them doesn’t end in carnage and really if you go a little over with the batter to pancake ratio you just end up with a bigger and bolder pancake, you can’t lose! I would rather make a stack of buttermilk pancakes over crêpes because they are always a hit.
Having not long come back from the States where I enjoyed a few pancakes for breakfast and brunch, I wanted to share this simple, versatile and delicious recipe for the perfect weekend brunch. As the sugar content isn’t high, this recipe is suitable for children and adults, it’s up to you how to you want to serve them!
This recipe will make approximately ten thick and fluffy pancakes. Estimate making 2-4 per person, depending on appetite.
Ingredients
350g self raising flour
1tsp bicarbonate of soda
1/2 tsp salt
2 tbsp caster sugar
200ml buttermilk
400ml semi-skimmed milk
2 eggs
85g unsalted butter (plus extra for frying)
12 rashers smoked streaky bacon
50ml maple syrup
Equipment
Scales
Saucepan
Butter-knife
x2 Mixing bowls (one large, one medium)
1/2 tsp measurement
1 tsp measurement
1 tbsp measurement
Whisk
Wooden spoon
Ladle
Frying pan
Fish slice
Baking tray
Pastry brush
Method
1. Turn the oven on to a low heat, I have an AGA which you will see in the photos, but it makes no difference other than not needing to preheat or switch on anything.
2. Sift the flour into the large mixing bowl and add the salt, sugar and bicarbonate of soda.
3. Melt the butter in a saucepan over a low heat.
4. Hand whisk together the buttermilk, milk, eggs and butter in the medium mixing bowl.
5. Pour the wet mixture into the dry whilst stirring to combine. The mixture will be thick and gloopy.
6. Melt a small knob of butter in the frying pan over a high heat, making sure to cover the base of the pan.
7. Using a ladle, pour about a ladle and a half’s worth of batter into the saucepan, making a circle that fits almost to the edge of the saucepan.
8. Cook the pancake for about a minute, until the sides stop sticking, the underside is golden brown and the top is bubbling.
9. Using a fish slice, lift the edges of the pancake and gently flip it over to cook for another minute. Heads up, the first one is always a disaster because the pan hasn’t reached the optimal temperature. Remove from the pan once both sides are golden brown.
10. Continue to cook each pancake the same way, melting a small knob of butter between each one. Keep the cooked pancakes warm in a plate in the oven.
11. Once all of the pancakes are cooked and keeping warm in the oven, you can cook the bacon. Preheat the grill whilst you line a tray.
12. Lay the strips of bacon onto the tray and grill until the top side is crisp, then turn the strips over and grill until crisp.
13. Serve the pancakes stacked on top each other, topped with the bacon and drizzled with maple syrup. Or, if you prefer a healthier alternative, they taste great with sliced banana, strawberries and mango with a light honey drizzle.
.
If you give them a try, let me know how it goes. Use the hashtag #postcardsfromhawaiiblog so I can see it!
Why not accompany your stack of pancakes with a zingy matcha shot to wake up your tastebuds. Take a look at my Matcha shot recipe to know how to make one.
With brands bringing out new products faster than we can keep up with, I’ve rounded up five beauty picks that I am loving this season. They’re all products that will give your face that fresh, dewy spring look for your travels, whether they’re enhancing your complexion whilst you’re away or helping your skin to recover when you return.
1. Charlotte Tilbury’s Pillow Talk blush
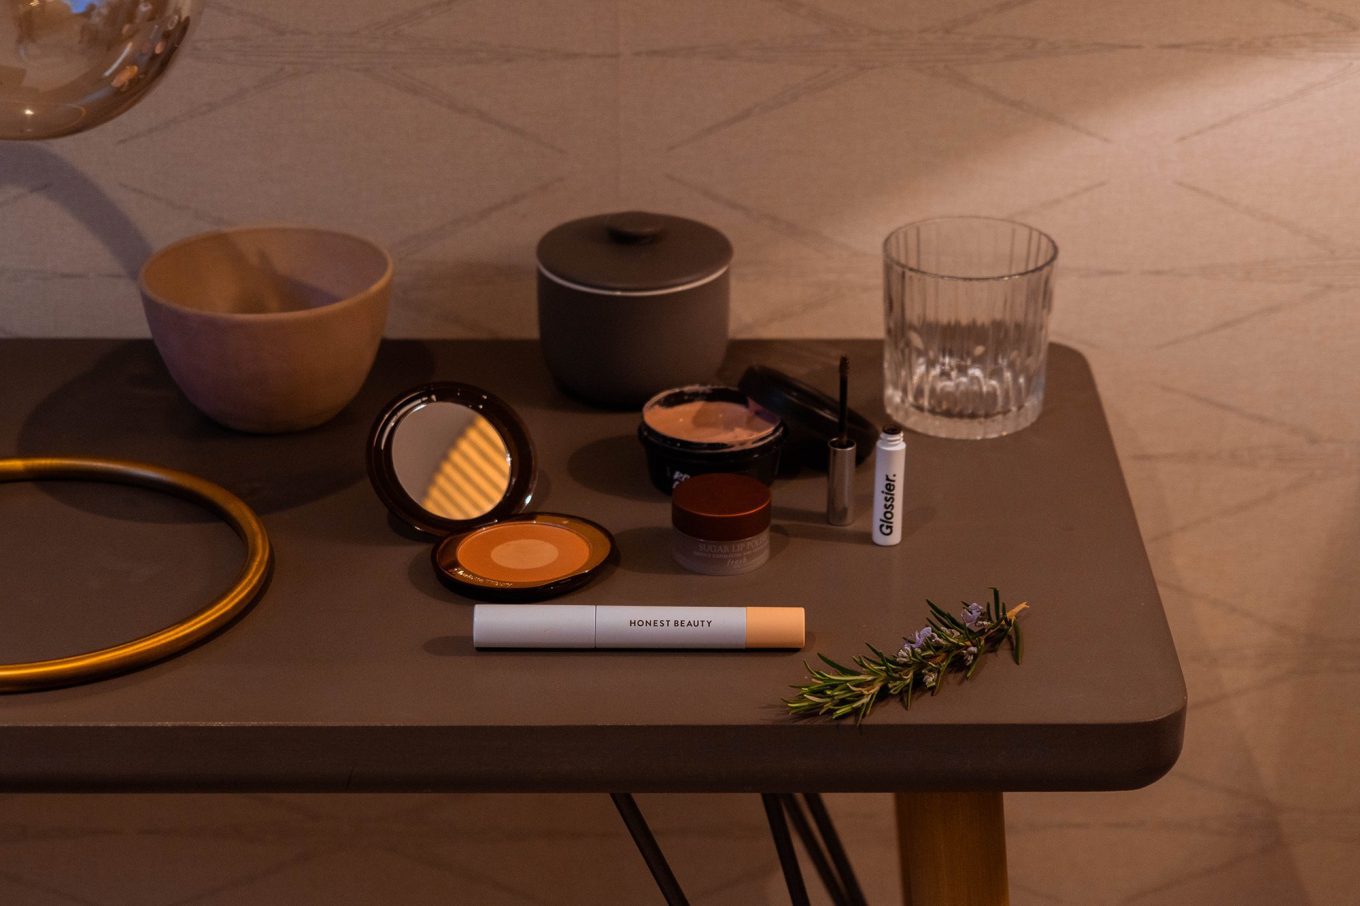
I am a HUGE fan of Charlotte Tilbury, and having recently picked up a few of her products it was hard to pick just one to recommend but I decided to go for the Pillow Talk Cheek to Chic blush because it is one product that doubles up as two, which is very handy for space saving when packing for a trip. This gorgeous, glowy blush is part of her top-selling Pillow Talk collection. It pairs a dusky pink blush with a subtle champagne highlighter, combined they give the apples of your cheeks that lit from within glow.
In all honesty, I am not the biggest fan of her Pillow Talk Lipstick, I bought it with the lip liner and it is ever so slightly too baby pink for me, so I find it hard to wear as an every-day shade. The blush however is beautiful on my olive skin tone.
It’s perfect for creating a dewy glow for spring and it’s easy to apply.
This product is free from parabens, alcohol, fragrance, gluten and nuts. It is also vegetarian and vegan-friendly.
Price
£30 GBP
$40 USD
2. Honest Beauty’s Extreme Length Mascara and Primer
I’ve been using Honest Beauty products for three years and I love everything I have ever purchased. They don’t have a big collection but everything is clean and so gentle on all skin types. I mean, if it was good enough for Meghan Markle on her royal wedding day…
I was so eager to get my hands on their Extreme Length Mascara and Primer and when I did I was not disappointed. Just like the Pillow Talk Cheek to Chic Blush, it’s a dual product that combines the mascara at one end and a primer at the other. I am lucky enough to have naturally dark and curled eyelashes but I am still quite particular about mascara; it needs to thicken but separate, lengthen whilst curling, not go clumpy and absolutely under no circumstances should it transfer to my lids or under my eyes. Really, I’m not asking for much! It is possible, I found it in Honest Beauty’s mascara, and trust me I’ve tried more mascaras than you can imagine!
The primer conditions your lashes and also helps to thicken them when you apply the mascara over the top, giving you a fuller lash-look. The brush is precise, not bushy, so it separates each lash without clumping them together and it lifts and lengthens the lashes so they widen your eyes for that ideal bright-eyed, bushy-tailed look for spring. Oh and it hasn’t once transferred to my skin, even after a full day!
This product is free from parabens, paraffins, silicones, mineral oil and synthetic fragrances.
Price
£11.50 GBP
£14.99 USD
3. Glossier’s Boy Brow
If you’re a daily IG scroller and you haven’t heard of Glossier, I’m shook. Glossier is the epitome of an Instagram brand, its targeted marketing on the app has caught the attention of gals and guys worldwide, despite that fact that they only have two permanent stores. The Melrose Place store opened a year ago and it still has a queue for entry.
Boy Brow is their best selling product and I fully support that. It actually brushes on a full, fluffy and tinted brow much like the ones my boyfriend naturally grows on his face! I’m not exaggerating, I’m really unskilled when it comes to drawing on my brows, not to mention I have a bald patch on my right eyebrow so filling it in without it looking overdone is a mission. The first time I put Boy Brow to my bald patch, it was as if it never existed. Application is so easy, I brush the front of my brows up and beyond the arch I tame the hairs down. No more slug brows, just perfect bushy brows.
I wear Boy Brow in Brown.
Despite the formula itself being thick and waxy, it still leaves your brows feeling soft and it doesn’t flake. I have tried Benefit’s Gimme Brow Volumising Eyebrow Gel and although it fluffs, it still leaves my brows looking sparse and it doesn’t hold the shape I create all that well.
Boy Brow is great for travel because it’s such a small product so it doesn’t require much space, plus it’s so easy to apply that you can spend less time on your face and more time exploring. Also, thus far, I haven’t sweat it off under the sun!
This product is alcohol free, fragrance free, paraben free, cruelty free, appropriate for all skin types, hypoallergenic, ophthalmologist tested and dermatologist tested.
Price
£14 GBP
$16 USD
4. Lush’s Rosy Cheeks Fresh Face Mask
As I mentioned at the beginning of this post, there are also products here to help you out when you return from your travels, though if it wasn’t for the fact that this is a fresh product and needs to be kept in the fridge, I would travel with it!
I was given Lush’s Rosy Cheeks Fresh Face Mask as a present for Christmas and I loved it so much that the same friend bought it for me for my birthday. I have many face masks from various brands currently on the go, but Rosy Cheeks is my absolute favourite. It is so calming right from application to removal and that’s thanks to one of the main ingredients: calamine powder.
I love using Rosy Cheeks to unwind, pamper, cleanse, soothe my skin should it break out and simply make my face smell like a bouquet of roses. It was particularly helpful when I returned from my trip to Los Angeles which resulted in a little break out after I spent a week eating donuts to write The best donuts in L.A. I needed to cleanse, soothe and calm down the mess I’d caused on my forehead and chin, and it did just that.
Travel wreaks havoc on skin, especially flying. Due to recirculated air, flying dehydrates the skin which in turn can make it irritated and more susceptible to damage, so it requires a helping hand. Calamine powder will calm the skin (it works a treat on sensitive skin), kaolin cleanses to get rid of any blocked pores and rose works as a toner to rebalance skin tone and restore radiance and elasticity which is lost when it’s dehydrated. Never mind the fact that the three rose ingredients: petals, clay and oil, makes it smell like you’re actually laying in a bed of roses.
The ingredients have antiseptic and calming qualities so this face mask will also work a treat soothing insect bites and could possibly be one of the greatest products to put on sunburn. I put calamine cream on bites and burns and it soothes itching and helps to restore my skin tone, so Rosy Cheeks is ideal to put on a burnt face should you catch a little too much sun.
It’s no secret that Lush products are made from entirely natural ingredients, are vegan, cruelty free and use recycled packaging.
Price
£8.50 GBP
$12.95 USD
5. Fresh’s Sugar Lip Polish
I bought this just over a year ago and I have taken it on every trip so far. Changing climates, being active and sea salt causes my lips to dry out more than normal so I use Fresh’s Sugar Lip Polish 2-3 times a week whilst I’m away to restore my lips.
Like Rosy Cheeks it is perfect for restoring your skin after travelling too. Lips dehydrate whilst flying too, which leads to cracking and dead skin. A gentle exfoliant such as a sugar scrub is the perfect cure to damaged lips. Gently rub it over your lips, you only need a smidge, and if you can resist licking off the sugar lightly dab it off with a damp towel. The sugar will work to remove dry or dead skin whilst the shea butter and jojoba oil condition, moisturise and nourish the lips. Your lips will be soft and plump in a matter of minutes.
Though I love Fresh’s Sugar Lip Polish, it’s pricey so once it’s finished I’m going to have a go at making my own using coconut oil, brown sugar, honey and essential oils. Why not try it yourself at home to save some pennies!
This post goes out to all of you curly haired people who are either shying away from your natural curls, just learning to embrace them or wanting to fully enhance your voluminous do. In this blog post I’m sharing my curl story. I’ll take you through a step-by-step guide on how I style my natural curls with Umberto Giannini, you’ll find out what my favourite Umberto Giannini products are and I tell you which products I can’t travel without.
My curl story
So I mentioned that this post is for people at any stage of their curl-appreciation. Me? I’m somewhere in-between learning to embrace and fully enhancing. It’s taken me all my life to get to a point where I appreciate my naturally big, curly hair. You see, I grew up in the English countryside in a white community which made it awkward to style my hair naturally. Though there were always a few who told me to embrace my curls and show them off, there were more people ready to bash them. To this day I still can’t wear my hair curly in my hometown without someone making a comment like “What have you done to your hair?”, “Why is your hair so big”, “Your hair looks like a bird’s nest” or “You look like Brian May”. No young person wants to be compared to a 70 year old person!
During my shorter hair phase in college/uni I was able to wear my curls more often because they weren’t as big or wild as when I have longer hair. The longer my hair got though, the less inclined I was to go au natural.
It really is my increased amount of travel that has led to me celebrating my curls. Not once, in all of my travels, have I ever had someone say something negative about my curly hair. Instead I am complimented on it, and as I have come to wear it curly more often the compliments are coming in from all over. I realised that the community I grew up in isn’t the opinion of the world, and I am so grateful for that realisation that came from a life of travel. In Norfolk I went to a salon where the hair dresser took an afro comb to my hair (I never went there again), in Maui I am mistaken for being Polynesian.
Travel helped shape a new perspective on my hair, but the one thing bigger than perspective in building the confidence to embrace who you really are, is using the right products.
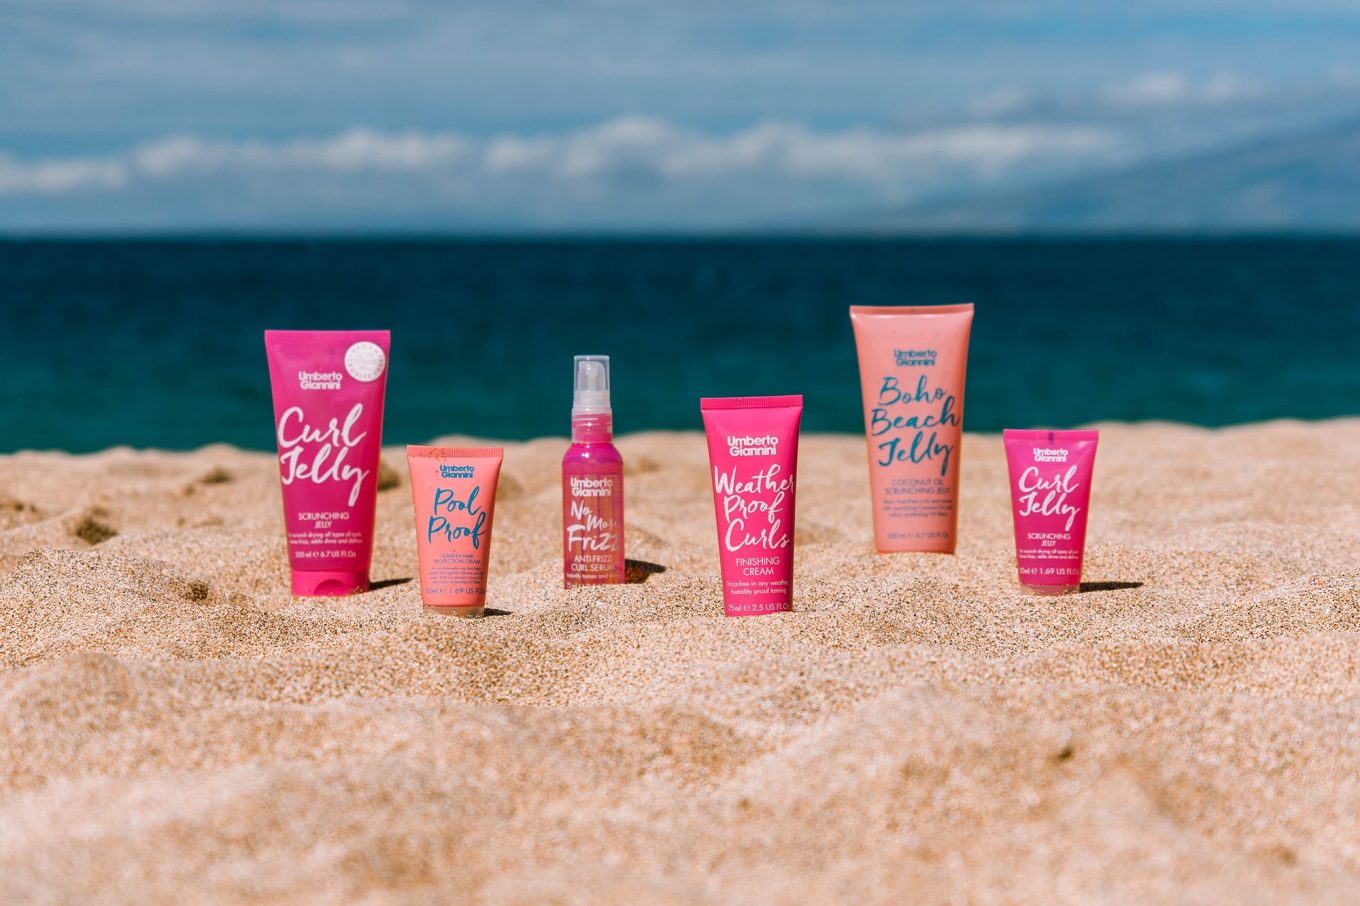
I have tried a lot, and I really mean A LOT, of curly hair products; Bed Head, Schwarzkopf, Label M, Pantene, John Frieda, Wella and so much more! Those products made my hair hard, flakey, greasy or worse, that wet hair look (which wasn’t in fashion at the time), I’m talking Ross Geller level of wetness. About five years ago though, I was buying travel minis in Boots and I came across a little bottle of Umberto Giannini curl jelly. I gave it a go and it did wonders for defining my curls, I was so impressed I bought the bigger bottle to refill the little one for trips. I wasn’t wearing my hair curly all that much so it lasted a long time. About two years ago though, I picked up that same bottle and started using it more often, then last year I added the weather proof curls finishing cream to my curly hair stash and the two of them blew my mind. For the first time I was seeing defined, voluminous and bouncy curls with far less frizz than before.
Partnering with Umberto Giannini is a dream come true because their products really changed the way I feel about my curly hair. They have given me the confidence to wear my natural curls proudly. It also gave me the opportunity to try more products from their curly hair range (which is huge by the way) and now I can’t imagine wearing my hair curly without their help. Since expanding my use of Umberto Giannini products, I have received so many lovely comments on my hair that it made me wonder why I let the bad ones stop me from letting my hair live its best life! The very first time I used the curl jelly, weather proof curls finishing cream and no more frizz serum I had comments flood in on my stories instantly! I ended up wearing my hair naturally for most of my last trip and almost every day since I’ve been home, and my hair has never felt so good!
Those are just a few of the messages I got on the FIRST day that I started to use more than just Umberto Giannini’s curl jelly; it was noticeably bouncier and defined.
My Step-by-step curl guide with Umberto Giannini
1. When I’m going to wear my hair curly I wash my hair over the sink or whilst bent over the bathtub. This is because I scrunch my hair to enhance the curls, and it’s easier to get to all of it with my hair upside down rather than standing upright. I actually don’t use any curly shampoos or conditioners, I haven’t found that I have needed to. I cannot wear it curly without conditioner though, my curls are dry and need to be moisturised for them to not completely frizz out.
I shampoo, rinse and then with conditioner in both palms, I move it through my hair by scrunching. Taking sections of my hair in my palms from the ends, I lift and squeeze the conditioner into my hair. Once I’m done, I rinse it very lightly, making sure to leave some product in my hair so it doesn’t dry out.
2. I wrap my hair in a towel, loose enough that it doesn’t prevent my hair from naturally coiling up but tight enough that the towel doesn’t fall off my head. This is to prevent it from dripping everywhere before I am ready to style my hair. When I am ready, I flip my head over and use the towel to squeeze excess water out of my hair in the same scrunch method as when I was conditioning my hair.
I then spread a good tablespoon amount of the scrunching jelly over my palms and scrunch it in through my hair. I’ll keep scrunching my hair until I’ve put the product on all of my curls. Then I’ll put the towel back on top for it to dry a little more. I usually use this time to apply my makeup.
3. When I’m ready to go back to my hair I flip my head over again and take off the towel. I spread about a pea sized amount of the weather proof curls finishing cream across my palms and scrunch it into the curls that frame my face because I want those to have the most definition. Then I put the same amount into the rest of my hair, always scrunching.
4. Keeping my head upside down – I’m not exactly sure why hanging my head upside down whilst it’s wet makes my hair curlier. My theory is that my curls aren’t weighing down on each other so they spring up more, either way I’ve gotten pretty used to walking around like Cousin Itt whilst I style my hair.
I pop a couple of squirts of the no more frizz serum into my palms and work it into my hair starting at my ends to stop any dry and split ones from frizzing, then I apply a few more squirts worth onto my hair line and the hair that sits on the top of my head, which is where I frizz the most.
5. I plug in my hairdryer and attach the diffuser. It took me a long time to truly appreciate what a diffuser does to my hair. A diffuser prevents the air flow from being so direct and therefore prevents curly hair from frizzing as much as it would if it were to dry naturally or be blasted by a hairdryer without one.
With the hair dryer set on a low heat I dry it using the same action as I would when scrunching. I cup the ends of my hair in the diffuser and bring it up to my scalp. I don’t leave it there for longer than a couple of second because I don’t want my hair to frizz under the heat. I’ll continue to scoop up my curls in the diffuser until it’s virtually dry.
Side note, I’m yet to stay in a hotel that has a diffuser attachment so I have to skip this part out on my travels so I tend to keep my hair upside down, drying naturally for longer. If I’m somewhere hot and by the beach though I won’t need a hairdryer because the salty water and warm air has magical dryer powers for curly hair.
6. It’s time to see the world the right way up again! I flip my hair back (with a classic bend and snap if no one is around to judge me) and give it a bit of extra volume with my fingers by doing what can only be described as zhuzching – A word I have used so many times but had to google its spelling! I wear my hair parted over to my left, unless I’m in Hawaii and wearing a flowers in my hair.
7. I don’t have to finish my hair with hairspray because my curls will hold – I haven’t used hairspray in any of the photos in this blog post except for the one that shows me using it – but if the weather is damp, as it often is in England, I will use the weather proof anti-humidity hairspray to prevent my curls from frizzing up if they get a little wet.
Umberto Giannini products I can’t travel without
Aside from the reasons I gave in my curl story, two of the best reasons to love Umberto Giannini products is that they’re vegan and cruelty free. They’ve formulated some incredible products for curly hair but that’s not all. Although this post is focused on my journey to embracing and styling my curls, Umberto Giannini also has a full range of products for all textures of hair. Their new Grow Long range is very popular, the exfoliating grow scrub was recently featured on This Morning as part of their recommended “ultimate hair care guide”.
Aware that there is more than one type of curl out there, Umberto Giannini have got you covered with their Coily Curls range, and it doesn’t stop there. If you don’t have curls or want to style your hair straight, they have a full collection of products for every which way you want to style your hair.
My ultimate curl products that I travel with are:
No More Frizz, anti-frizz curl serum
Curl Jelly, scrunching jelly
Weather Proof Curls, finishing cream
Depending on the length of my trip I will take either the 200ml bottle or the 50ml travel bottle (which can be refilled using the full sized product, patience and the desire to save the world from additional plastic waste).
With these products alone I can style my hair to show off my voluminous curls wherever I am.
You can save money by purchasing these three in a travel set, Curl vegan travel trio, from the Umberto Giannini website.
The following products are perfect if you and your curls are travelling to a hot destination where you can guarantee that your hair is going to be out in the sun.
Boho Beach Jelly, Coconut oil scrunching jelly
Pool Proof, Leave-in hair protection cream
They both have built in UV filters* which protect your hair from sun damage (it’s like suncream for your hair) and coconut oil which will prevent your hair from drying out when exposed to the sun or chlorine.
*Please refrain from using these products if you are swimming in the sea, particularly in reefs, as the UV filters are harmful to coral. They are however perfect for protecting your hair from chlorine damage.
.
Umberto Giannini products have changed the way I feel about my curly hair, and I hope that it can do the same for you. The confidence that comes from finding and using the right products is inexplicable, so I encourage you to experience it for yourself.
Umberto Giannini products are sold on their website, in Boots stores and online.
Help support these amazing Maui businesses who have suffered from the wildfires that swept the town of Lahaina.
In August 2023 huricane winds blew the deadliest wildfire in the US for 100 years through the historic town of Lahaina on Maui. More than 100 people have died and cultural landmarks, business and homes have been destroyed, leaving nothing behind.
Lahaina, as it is for many, is a special place that held cherished memories.
It is also where many of the recommendations on this list of 6 best things to do on Maui are located.
As these incredible business have suffered huge loss I have updated this blog post to include the ways you can donate and help them recover from the devastating Maui wildfires.
Responsible tourism is encouraged once again to help the economy of the island recover.
If you are able to please donate and when the time is right and these local businesses are able to operate again, be sure to book with them to help them bring joy to the world once again.
Thank you.
—
I had the very best time in Maui despite the weather not cooperating 100% of the time, my birthday in particular. It was all down to the experiences we had whilst on the island. I do want to clarify that we were celebrating Valentine’s day, my birthday and the first anniversary of Postcards from Hawaii, so we spent a fair amount of money on the experiences below. We wouldn’t usually do many big excursions and activities as they are costly, but each one was incredible and I would be foolish not recommend them.
So here are six of the best things to do in Maui, Hawaii, in my opinion:
1. Open door helicopter tour over Molokai
An open door helicopter ride in Hawaii was recommended to me by a follower on Instagram and the second she told me I was desperate to do it! Michael is scared of flying though – he just about stopped digging his nails into my hand in October 2018, he still squeezes my leg during turbulence though – so I thought this was a no-go. I just about got him in a helicopter over the Grand Canyon three years ago and I thought it would never happen again, let alone with the doors off. The gem that he is though surprised me with it for my birthday!
We took the Doors-off West Maui & Molokai tour with Air Maui which is the only doors off helicopter tour on the island. The helicopter takes off from Kahului Airport Road, Hangar 110, and flies over the Pailolo Channel (if you’re lucky and it’s the right season you’ll see whales from above) to the island of Molokai, where you will fly over the 4,000ft high cliffs, cascading water falls, luscious forests and through deep valleys.
There’s no radio for passengers so you can’t really communicate but when your pilot has a playlist including soundtrack numbers from Top Gun, Avatar, Jurassic Park and Weezer’s Island in the Sun, you don’t really have a reason to speak. I could not stop crying with complete and utter joy as we swooped down to fly past the 3,500 ft high waterfalls crashing down to the sea below whilst John William’s “Theme from Jurassic Park” was playing. It was incredible! It was one of the most thrilling and memorable things I have ever experienced.
Price
$325 (£245) per person if you book through Air Maui.
$300 (£225.70) per person booked through Viator – which is what Michael did.
My only gripe is that there are only 3 doors available but there are six seats and they charge the same price for all tickets, so 3 people pay for a doors open experience and don’t get one. Be prepared for not everyone getting seated on the edge, they won’t send the helicopter up with two or less people.
Flight times
8am – 12pm
12pm – 5pm
*flights last approximately 45mins, check in 30mins prior.
What to wear
Air Maui will provide wind-breaker jackets.
Shorts – it is windy but we went in winter and my legs were warm in the sun.
Hair must be tied back.
You are provided with googles and a headset.
You mustn’t have anything in your pockets or be wearing any jewellery.
You must wear closed toe shoes.
Suncream
You aren’t allowed to bring a camera. Only phones are permitted and you are given a lanyard to prevent them from falling,
One of their surf instructors, Richard “Tricky Ricky” Yeckley has lost his job and home along with all of his belongings, saving only his cat and the clothes he wore in the early hours of the morning. Here is a link to his Venmo and Go Fund Me page.
Before our helicopter ride which was in the afternoon, my birthday (which was delayed due to rain) started with a private surf lesson for Michael and I. We booked with Lahaina Surf Shack and had a great time!
Before this trip I had mentioned to Michael that I wanted to try surfing again so he surprised me with a surf lesson for my birthday. We had a semi-private lesson which is for two people and one instructor. “Tricky” Ricky took us out and we had a blast!
Our lesson started on the beach where he briefly broke down how to get up on our board, the correct way to fall that won’t hurt us (and I’m happy to report I didn’t hurt myself) and where to position ourselves on the board.
We spent 2 hours in the water catching endless waves, moving out further so they were bigger and I caught the majority of mine! It wasn’t until Michael got out to take photos that I missed a bunch, typical! Check out my Instastory highlight “Maui part 2” to see what my instructor had to say about me catching a 5ft wave!
What I really admire about learning to surf with Lahaina Surf Shack is that after every wave your instructor encourages you to analyse how you did and gives you pointers so you can improve the next time. This was invaluable because we continued to get better on each wave doing this!
Price for surfing on Maui
Private one on one lessons are $150 per person
Semi private lesson which is for two people are $100 per person
Group lessons are $75
Obviously group lessons are cheaper and make more sense if you are on a budget, but I strongly recommend taking a private/semi private lesson if it’s your first time out because your instructor will be solely focused on you, plus you will get to catch more waves because you won’t be waiting for others to surf theirs.
They also rent out a selection of longboards, short boards, beginner boards and stand up paddle (SUP) boards at a discounted rate if you have had a lesson with them.
What to wear for surf lessons on Maui
Swimsuit
Reef safe suncream
They will provide you with a rash vest and reef booties
3. Hula dancing lessons on Maui
Since publishing this blog post I have learnt that Jordan Saribay, who taught my hula lesson mentioned below has started his own production company called Kupu Productions. His company teaches hula, ukulele and lei making lessons.
Jordan was born and raised in Lahaina and sadly his family lost four of their homes during the wildfires in August 2023.
Here is a link to his family’s Go Fund Me page, donations will be split across the family to help them after their loss.
“In ancient Hawaii, a time when a written language did not exist, hula and its chants played an important role in keeping history, genealogy, mythology and culture alive. With each movement – a hand gesture, step of foot, swaying of hips – a story would unfold. Through the hula, the Native Hawaiians were connected with their land and their gods.” – Taken from the official Hawaiian tourism website.
I really wanted to learn hula dancing, but I didn’t want to get lost in a group. I have zero hand-eye coordination but I also wanted to absorb as much as I could, in groups you risk getting left behind or the class can focus on other people and you don’t end up learning much, so I chose to do a private lesson.
We booked a private Hula lesson with Hawaii Hula Company which lasted an hour and included:
Dancers coming to a location of your choice.
Music.
Use of a pareo which they will show you how to tie.
Fresh flowers and a lesson in making your own rosette for your hair, which you get to keep.
Of course the lesson and brief history of the hula.
The dancers that came out to me were Jordan Nelson Keali’i Kūpule Saribay and his cousin Annastaceya Kau’iokalani Saribay Arcangel-Pang, aren’t they beautiful names! They are both professional dancers in Luau shows at local hotels, in fact Annastaycea dances in the Luau at the hotel we were staying at, Myths of Maui Luau at the Royal Lahaina Resort.
The lesson started with Jordan teaching me to make a rosette for my hair out of plumeria (frangipani) and then he showed me how to tie the pareo (a large sarong) into a dress and a skirt whilst giving me a brief history of the dance. Annastaycea then took me through the routine step by step, putting it together without music at a slow pace, and then we put it to music, picking up the pace. Both Jordan and Annastaycea explained the meaning behind the moves – I was telling the story of a woman’s beauty; her eyes, her hands, her body. They were incredibly patient whilst I fluffed up and very supportive when I remembered the steps! Close to the end, they encouraged Michael to join in and Jordan took his place as photographer, then we all danced together. It was such a joyous experience, and even though I don’t look as gracious as I felt, I enjoyed every moment dancing out beneath the trees with two really lovely instructors.
PFH Fun Fact: If you are in a relationship you wear your flower behind your left ear, and if you are single you wear your flower behind your right.
Price for hula lessons on Maui
$286.46
That is the price we paid for a private lesson for one person.
You can also contact Jordan directly at jksari9@hawaii.edu or on 808 264 4082 which I recommend doing.
What to wear to a hula dance lesson
Bare feet.
Free flowing hair because it feels and looks good when you dance.
A cute top if you plan on wearing the pareo as a skirt.
Shorts so you can hide them under your skirt or dress.
A huge smile! I have the song I danced to playing as I write this and I have a big smile on my face.
4. Whale watching on Maui
My experiences whale watching with Ultimate Whale Watch and Snorkel have been some of the most magical moments of my life.
Sadly most of their vessels were lost in the wildfires that swept Lahaina in August 2023. Some of their crew have also lost their homes and all their belongings in the fires too.
Here is a link to the Venmo Ultimate Whale Watch and Snorkel.
We had always intended to book another snorkel trip with Pride of Maui, especially as we had such a good time with them before but as it was whale season during our trip, we decided that we would use that budget to go on a whale watching tour, and it might have been one of the best decisions of the trip.
Humpback whales migrate to Hawaii’s warm water from November – May to escape the freezing conditions up north. The peak of the season is January – March, and as we were there in February it seemed foolish to pass up the opportunity to go.
The truly amazing thing about humpback whale season is that you can see them from Kāʻanapali beach with the naked eye. In fact, we soon learnt (and I mean from the very first moment we stepped onto our balcony) that it is impossible not to see one! Thanks to them spouting water from their blowholes to such a great height, they are forever catching your eye, even when you’re not looking for them. Plus they are so happy! They spend all day breaching and slapping their pectoral and tail fins but better than that, on a good day you can hear them in the water. Yes, you read that correctly, you can HEAR them in the water! Michael went swimming in the sea and moments later he was dripping on me panting something about how he could hear the whales. Well of course I went running in after him and I can confirm that all you had to do was put your head under water and you could hear the whales communicating. It was wild!
We booked our whale tour for our last night. It was a sunset tour which set off at 5pm and lasted two hours. We chose to book with Ultimate Whale Watch and Snorkel because they offered a small boat tour which only carries 26 people maximum and is a low vessel so you are close to the water. The tour is also led by marine naturalist guides, which I know from previous tours means that you are going to learn heaps about marine life and their enthusiasm for it is unprecedented.
We were out on the water for less than 10mins before our guides spotted our first whale which was a mumma with her calf who were joined by three bottle-nose dolphins. Our guides were so excited you couldn’t help but be filled with joy. We then headed further out where we came across a male whale who was just diving. Disappointed at first because that usually means they won’t resurface for a while we were then treated to his beautiful singing which, and I kid you not, we could feel through the hull of the boat! An experience you wouldn’t get if you were on a big tour boat. Our tour guide then put a hydrophone in the water for us to hear the whale’s song and it has to be one of the most magical experiences of my life. We listened for 12 minutes and I cried for most of them. In those 12 minutes you could hear a pattern in the song as he repeated sections almost like verses and a chorus. We continued on to meet more whales and the highlight was when a youngster swam beneath us and then came up for air beside us before diving again, breaching his tail as he went down. Well, I was a mess! It was breathtaking.
PFH Fun Fact: Did you know a whale’s song is as loud as a jet engine at 140dB, to put that into perspective, humans can reach 70dB when shouting and our tolerance for sound before it is too painful is 120dB.
Price for whale watching on Maui
Adults: $54 plus tax per person
Children: $33 plus tax per child aged 4-12yrs old
What to wear on a whale watching tour
Water proof jacket or something you don’t mind getting wet, it can get splashy.
Bare feet, shoes are left at the harbour so don’t bring anything pricey.
Shorts so you dry quickly.
Tie up hair, it is windy and you don’t want anything obstructing your view.
Sunglasses because until the sun sets, the sun will reflect brightly on the water, and when the boat is going it gets windy so they will prevent your eyes from watering too much.
Suncream.
PFH Top Tip: The guides will say there are no “best seats” because they are all front row seats, and to be fair, they are. However all but two face either left or right which is tricky if the whale is spotted out to one side or the other. We were the last to board after the group was told that the front seats on the bow of the boat are the “splash zone” so everyone avoided them and we got them. I was NOT disappointed! Turns out our seat was best in the house because we had just shy of a 360° unobstructed view, we saw everything! I can only assume they don’t want people fighting for the seat so they make it out to be a bad one but it was incredible!
5. Driving the Road to Hana
We saved driving the road to Hana until a couple of days before the end of our trip because we figured if we’re going to die doing it that it should be at the end of our trip. What am I talking about? Well we received a warning of death from just about everyone we spoke to about driving the road to Hana. Even the lady at our hotel’s guest services told us about guests from the hotel who died doing it or as she put it, “guests who are no longer with us (checked out?)…on earth (oh cool, so dead).
Of course we were worried but we were set on doing it, I wanted to go to a black sand beach and it was sure to be a thrilling experience. I have to say though, the actual road itself did not live up to the hype. Sure, it’s a seemingly never-ending winding road with one sharp apex after the other, but to my surprise it’s very well paved, it has two lanes wide enough to easily fit two cars – aside from the areas where it narrows to one lane but those parts are easy to navigate because each side can be seen so you know when to give way – and there is a wall up on the edge. Never mind the fact that it’s in the jungle which feels less threatening than driving along a cliff edge. Now, maybe it’s because we have driven far worse roads in terrifying conditions that we weren’t as scared as we could have been (I’m talking through the mountains of the Amalfi coast, at night, in a torrential downpour which turned the road into a river and our visibility was non existent, oh and there were land slides all over the shop), but honestly I really got the impression that tourist are warned off it because they just want to keep the road quiet and the land in good condition, which of course is understandable.
The actual road aside, the points to stop off are beautiful! We didn’t managed to stop off at all of the ones recommended below that we were told to stop at, but the ones we did see were amazing!
Hookipa beach park to see turtles on the beach (if you’re lucky, we weren’t)
Twin falls
Nailiili-Haele Falls (bamboo forest)
Rainbow Eucalyptus
Halfway to Hana store for freshly baked warm banana bread – it’s so good!
Waianapanapa (black sand beach)
Hana
Kaihalulu Beach (red sand beach)
PFH Top Tip: Though you can go anywhere else on the island and not get eaten, the mosquitos in Hana have an attitude and they will get you the second you step out of your car if you haven’t sprayed. Trust me, I know from experience. I didn’t want to spray in the car so I stepped out to do it and I had a whopping five bites in the time I was spraying! Not cool! Spray before you go!
6. Snorkelling at Molokini & Turtle Town
During the wildfires that destroyed the historic town of Lahaina ion Maui, captain Patrick Grady from the Pride of Maui crew lost his home and all of his possessions.
Here is a link to his Go Fund Me page to help him.
Whilst on a snorkel trip in Waikiki, Oah, a few years back we witnessed the crew throw chocolate chip cookies into the water, and last time I checked wheat and chocolate don’t grow in the sea and are therefore not part of a natural diet for turtles or fish. There were only four turtle in the water, one was young too, and another three boats came to join us, including a boat loaded with scuba divers and even a glass bottom boat! At one point there were approximately 40 people both on and beneath the surface surrounding these poor turtles. You’re supposed to stay 10ft back from them to prevent the turtle from being scared, harassed or harmed and yet people were swarming them whilst the crew did nothing. I had to stop at least five people from chasing the turtles when they surfaced and I even pulled a person away after they TOUCHED one of the turtles. It was incredibly distressing!
It is important that people do not harass turtles when they surface because:
They surface to breathe. If they feel threatened they will be reluctant to surface which could lead to asphyxiation and therefore death
Sea turtles are an endangered species
It is illegal!
I reported the tour company, Holokai, to the authorities and I do not under any circumstances recommend you use them.
If you would like to learn more about responsible tourism and swimming with sea turtles take a read of my blog post How to practice responsible tourism.
The company I do whole heartedly recommend is Pride of Maui and this is for five very good reasons:
They are incredibly conscious of the environment you’re in, they do not and will not allow chasing or touching of the animals.
They provide ocean friendly suncream which doesn’t release harmful chemicals into the reefs
They also provide vests to keep you warm in the water. The water temperature can still be cool in summer.
The crew are great company and they make good cocktails!
They have a BBQ on the boat and will make you the best lunch you can have out on the ocean.
The tour lasts about 5hrs and includes breakfast, a BBQ lunch, cocktails or soft drinks, snorkel equipment and they take you to two snorkel sites: Molokini Crater to swim with the fishies and “Turtle Town” to float with the green sea turtles.
Price for snorkelling in turtle town
$99 per adult aged 13yrs and over.
$69 per child aged 3-12yrs.
Children under 2yrs go free.
Tickets are $25 cheaper (the price quoted above) if you book online. Fuel cost and tax not included.
I didn’t do the Molokini snorkel tour on this trip, but I have used them in the past and it is still one of my top recommendations for things to do in Maui.