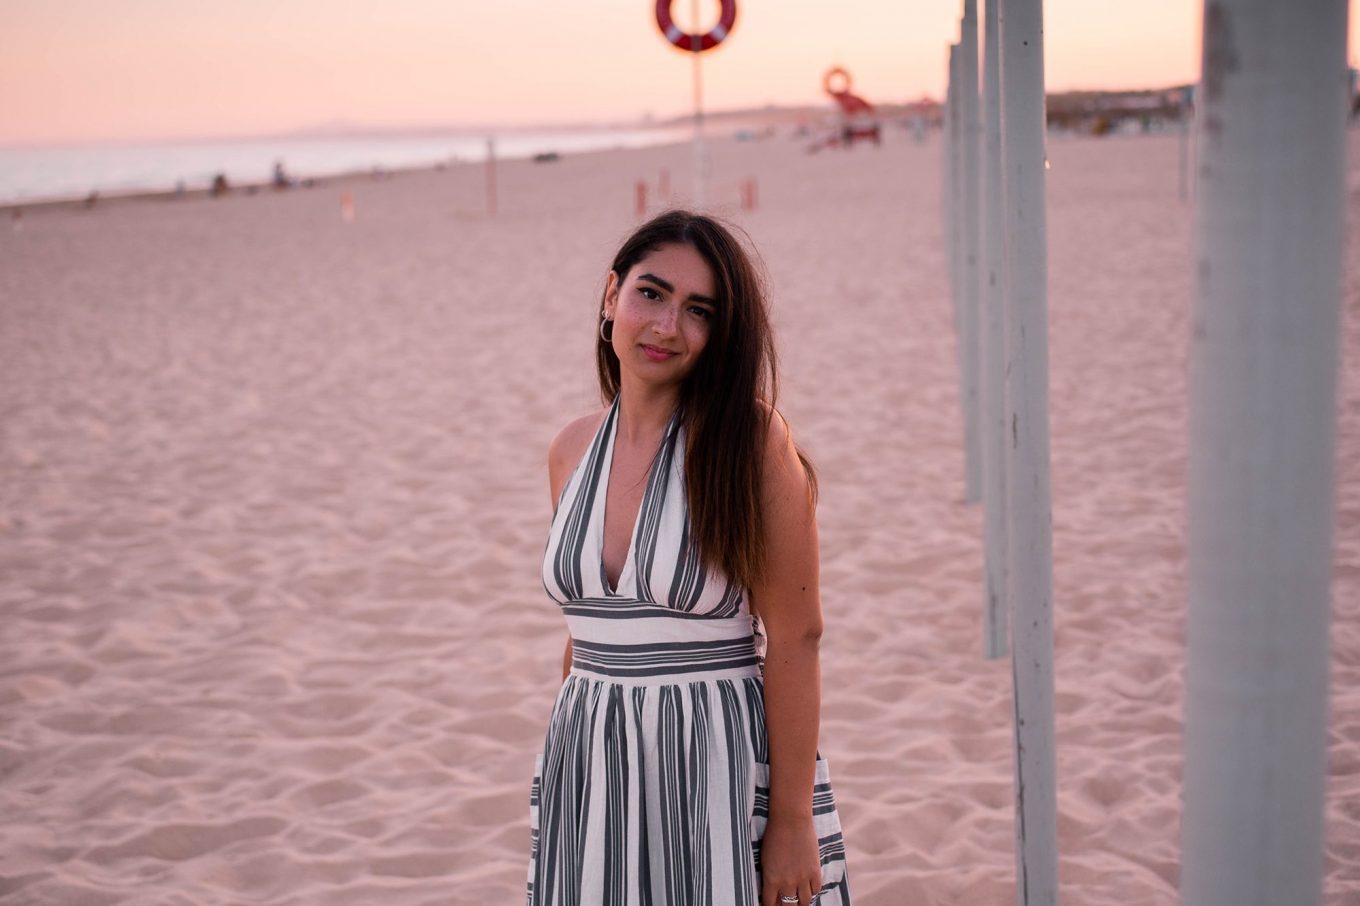
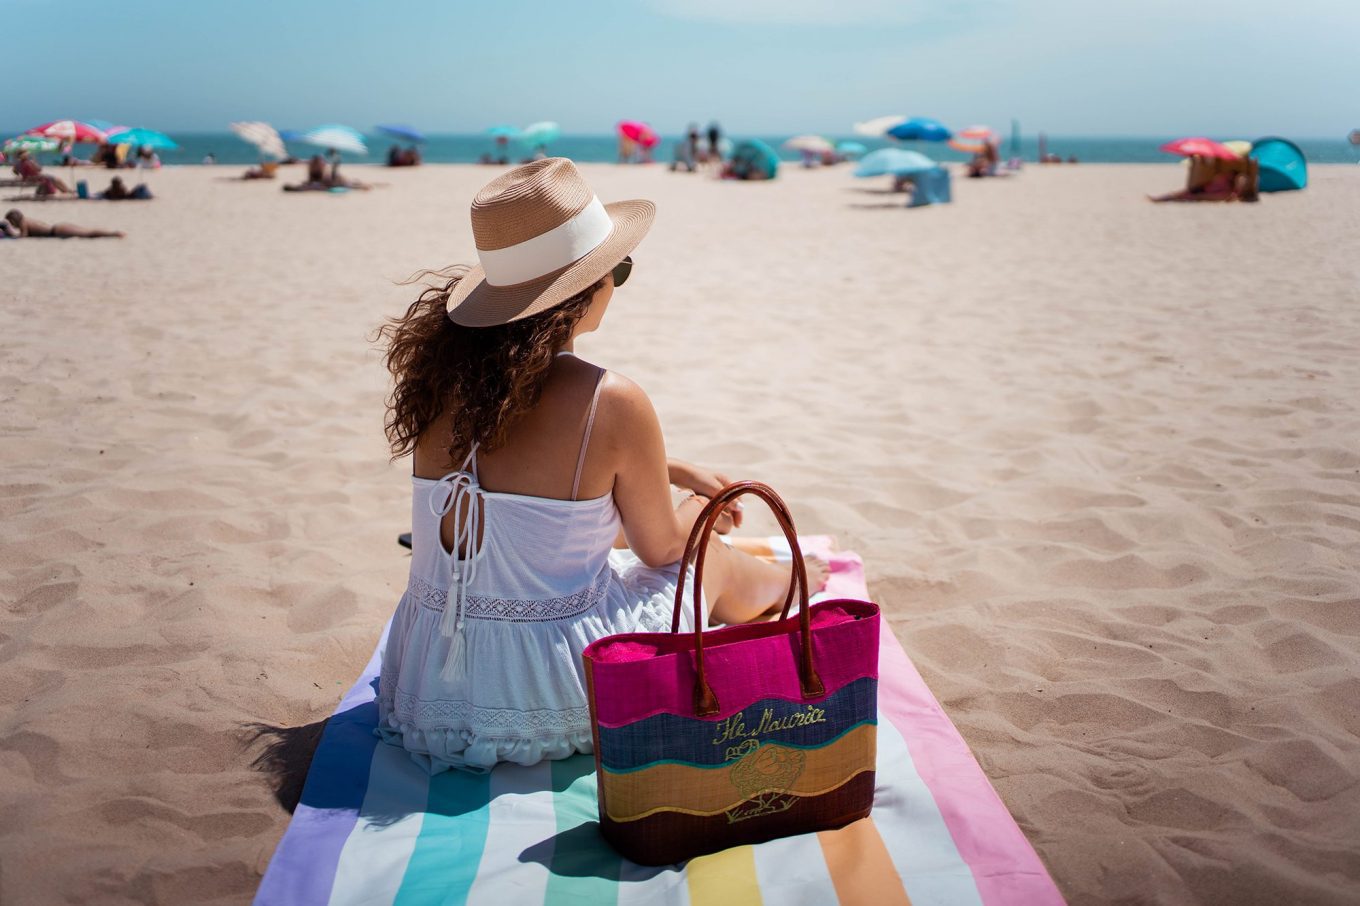
The summer holidays are well and truly here and the Algarve Coast has stayed a solid favourite spot to vacation. Whether it’s a girls’ trip, guys’ trip, a romantic getaway or family fun, here’s a guide for what you should be packing to get the most out of your time on the Algarve Coast.
Clothing
Swimwear
Let’s face it, if you’re heading to the Algarve Coast, it’s because you’re after a cost-effective sunny holiday, which means you’ll be spending most of your time soaking up rays on the beach. Make sure you bring a few options in case they don’t dry over night; no one likes to put on a damp swimsuit!
Cover up
Bring plenty of cover up options, I’m guessing you will spend most of your time on the beach, but not all of the hotels and apartments are on the beach front. So, bring something light that you can throw over your swimsuit so you don’t feel like you’re walking around in your undies when there isn’t sand between your toes.
Men, you can just wear a t-shirt over your swim shorts. Keep in mind that going shirtless isn’t desired by most bars and restaurants.
Evening wear
Whether you’re going on for a night of drinks in Lagos or simply out for dinner with loved ones, it’s always nice to dress up in a little something extra than the swimsuit you’ve no doubt been in all day. A couple of floaty dresses or cocktail numbers should do the trick.
Men, bring a couple of smart short sleeve shirts, a pair of tailored shorts and a pair of driving shoes.
Shorts
Bring a pair of denim cut-offs, they go with pretty much any top and all swimsuits!
Footwear
Flip flops
For getting to and from the beach. Nothing too fancy if you’re planning on leaving them unattended on the beach if you go for a dip in the sea.
PFH Top Tip: Turn your flip-flops upside down and put them under your towel to stop them from heating up in the sun. This way, when you’re ready to go, you don’t run the risk of burning your feet on your shoes.
Trainers/sneakers
There are a few spots along the coast such as Ponta Da Piedade, that require walking up and down steps. These steps are made of stone and frequent footfall has smoothed them to a treacherous degree. I was taking them very slow in my flip flops but I still slipped and fell down about three or four steps, so I recommend bringing a pair of shoes with a little more grip. Maybe Converse or Vans.
It can get a little windy so either bring a bag with a zip or one that can easily be shaken out. When the wind picks up on the beach, you can guarantee that sand is going everywhere.
Guys, it wouldn’t hurt to bring a backpack so your other half isn’t lumbered with carrying everyone’s towels.
Evening bag
Whether it’s a clutch, shoulder bag or a Bali-inspired round basket bag, a little bag for the evening is more ideal than hauling out your beach bag for dinner.
Accessories
Straw hat
Not only are straw hats the ultimate summer accessory but they are also perfect for shading your face from the sun whilst you’re working on that tan, and they look great in photos.
Men (or anyone else who doesn’t want to wear a straw hat), I recommend you bring a baseball cap. The sun is harsh and nobody wants a burnt head.
Sunglasses
Obviously they serve their purpose to shield your eyes from the sun but they also make a great accessory. Bring a couple of pairs to mix up an outfit, and maybe a cheaper pair that won’t break your heart if the sand scratches them up a little.
Hair accessories
Bring a couple of headbands or scarves for the days where you want to keep your hair off your neck but still looking cute. These are particularly handy for days when you can’t be bothered to spend time on styling your hair, perfect for a beach day!
Statement hair clips are trending now too, so pop a few of those in. They will also help to keep your hair out of your eyes.
Toiletries
Shampoo, conditioner and shower gel
Don’t take for granted that every hotel is equipped with the basics such as shampoo, conditioner and body lotion, so if you don’t usually pack these make sure you include them this time. A good way to always be prepared and to reduce your plastic usage is to travel with solid shampoo and conditioner bars.
Sun cream
Under no circumstances should you be going out under the sun before dusk without suncream.
Aftersun
Bring a large bottle of aftersun gel to cool and hydrate your body after a day out in the sun.
PFH Top Tip: If your room has a fridge/cooler/mini bar, put your aftersun in there. That way when it comes to applying it after being out in the sun, it will be cool and soothing to your skin.
Technology
Adapter
To make sure you are prepared for every day ahead, bring a couple of adapters so you can charge your phone, camera etc.
Portable power bank and cable
If you are relying on your phone to collect photographic memories of your trip, it might be an idea to take a portable power bank so you don’t have to panic about a dead battery.
.
So there you have it, everything you will need to pack for a trip to the beautiful Algarve Coast in Portugal.
If you would like to edit your own Postcards from Hawaii packing list, check out My ultimate interactive packing list where you will find a downloadable PDF and help on how to use it.
This year we decided to make more trips to Europe. We realised that most of our trips are to far-flung places and that we are missing a lot of what is right under our noses (well, and a channel away). So on the hunt for cheap flights, the Algarve Coast in Portugal came up with budget airline easyJet.
Our trip was only five days (though it was actually four because our arriving flight was very late). We wanted long enough to enjoy Portugal and nip over to Spain while keeping it short and cost-effective. In this blog post I have listed what we did each day and then gone into detail with certain activities, sharing tips, costs, opening times etc. I should note here though that the Algarve, Lagos in particular, is known to be a party destination and a very popular location for British summer holidays. We noticed that where we stayed, despite it being a small town away from Lagos, lacked Portugal’s cultural identity and was instead geared up for family holidays and British tourism. For example there were very few shops and they were all packed with plastic beach toys, and the majority of restaurants boasted a large variety of pizza, pasta and sandwiches: ideal for family holidays on a budget.
With that said, the Algarve is incredibly beautiful with its hidden beaches and huge caves and rock formations. The weather is beautiful and the sea is all shades of turquoise. My itinerary mostly covers exploring the beautiful beaches and a day in Seville, Spain, rather than bar recommendations, so if that’s what you’re looking for, you’ve come to the right place!
Day 1
Park at Luton long term car park
Flight from Luton to Faro
Pick up rental car from Avis
Check into hotel: The Prime Energize, Monte Gordo
Day 2
Praia do Camilo
Ponta da Piedade
Rooftop lunch at The Prime Energize
Praia de Monte Gordo
Dinner at Fuel
Day 3
Drive to Seville
Park at Puerta de Jerez
Setas de Seville
Plaza de España
Sangria break
Reales Alcázares de Sevilla
Souvenir shopping
Dinner at Osaka
Day 4
Breakfast at hotel
Morning by the rooftop pool
Praia de Monte Gordo
Dinner at Osaka
Day 5
Check out of hotel
Praia dos Estudantes
Praia de Benagil
Kayak to Benagil Caves and along the coastline
Praia do Camilo
Ice cream from O Camilo
Lagos
Souvenir shopping
Pasteis de nata from Padaria Central
Return to hotel to shower and pick up luggage
Return rental car to Avis
Flight from Faro to Luton
Luton long term car park
I have only flown from Luton a handful of times, and this is the first time I have parked in the long term car park. Though I believe you should try something more than once before you knock it, I have to say I do not recommend parking in Luton’s long term car park. The buses are small and come few and far between so they fill up quickly. Imagine the tube at rush hour.
On the way back we waited at the front of the queue for the bus back to the car park for 45mins. At 1.30am when the bus eventually arrived, I had counted 60 people in the queue behind us. Not everyone got on, and goodness knows how long they had to wait.
I understand that our flight was delayed and that there wouldn’t be a reason to have as many buses at that time as you would in the afternoon, but a 45 minute wait that should have been 20mins is too much. Their buses need to be more regular. My advice is to book an airport car park where the pick up time runs more regularly than 20mins.
Rental car
We chose to rent a car with Avis because we have a loyalty membership with them. We rented the lowest category to keep the cost down which got us a Toyota Aygo at £95.13 for four days, which isn’t cheap, but it is necessary if you want to explore more of the coast.
Though there were many tolls along coast and over to Seville, they were cheap so with all of our trips out in the car our toll bill came to just €8.26. They are electronic, so you don’t have to worry about having cash on you, just check with your rental company how they expect you to pay for them so you know in advance.
We only had to fill up the tank twice before returning it which cost just €30 each time. There were plenty of petrol/gas stations on the way to the airport.
The Prime Energize, Monte Gordo
The Prime Energize hotel in Monte Gordo is a health-conscious hotel located just seven minutes from the beach by foot.
There is a rooftop pool with a bar and restaurant, a spa pool, a gym, stand alone restaurant and the parking is free.
We paid £418.60 for four nights which included an extensive breakfast buffet. Breakfast ran from 7.30am – 10am but if your plans for the day involved an early start you could order a breakfast box which would be ready for you at the front desk before you leave. Heads up, you must order your breakfast box before 8pm the day before.
PFH Top Tip: If you have a late flight, pick up dinner either at the airport or somewhere close to the airport as most of the restaurants will be closed and unfortunately, our hotel did not offer late night room service.
One of the best things about The Prime Energize is that you can use their spa to freshen up before your flight should you have a later one. They have two private showers with complimentary use of toiletries (which are refillable and not little single use plastic minis) and towels, which is ideal for a late flight – the cheapest flights in and out of Portugal are typically the very late ones.
As for their restaurant, Fuel, scroll down to read more.
Praia do Camilo
Praia do Camilo was my favourite beach to visit in Portugal. We went for sunrise on our first morning and returned in the afternoon on our last day after we rented kayaks at Benagil beach.
Sunrise at Praia do Camilo was amazing! There were only two other people on the beach for the hour we were there, it was very peaceful.
The second time we went to Praia do Camilo was for lunch at the clifftop restaurant O Camilo, but unfortunately we didn’t know that you had to have a reservation due to its popularity, so instead we bought ice creams from the little shop attached and went for a walk.
The clifftops at Praia do Camilo offer incredible views of the coast, but it is unclear as to whether it’s an official footpath or not. Along the main road, left of the beach entrance, there is a space between the fence to walk through to the path. The path is clear and full of people walking it so it seems like it’s an ok thing to do, but the gap in the fence doesn’t look official. So I can only say proceed at your own caution.
Parking at Praia do Camilo is free but will become more and more limited the later you arrive. The first time we went, there were only three other vehicles; both of the car parks were empty and so was the road leading to them. The second time we visited the car parks were full, the road leading down was lined with cars and the top road was also lined with cars for as far as the eyes could see. With that said, the beach was significantly packed the second time around too. You may notice that we didn’t stay in many destinations for long, but it’s because they get so busy, so we opted to do our sunbathing at Praia de Monte Gordo (see below) because it was close to our hotel and we didn’t have to fight for space.
Ponta da Piedade
Ponta da Piedade has one the most beautiful rock formations along the coast. Though it doesn’t have a beach that you can spend the day at, it is worth a visit just to walk down the stone steps to admire the views. We arrived at 8am and there were only a few other people but when we left an hour later, a few more had started to arrive.
Please be careful, the stone steps are worn and can be very slippery, so watch your footing.
Praia de Monte Gordo
Monte Gordo beach was only a 7min walk from The Prime Energize hotel. It’s an ideal beach for a holiday because its golden sand stretches out along the coast for miles, it’s wide and the waters are safe. It’s big enough that even in the height of summer you won’t have a problem finding a spot to set yourself up for the day. Plus, animals aren’t allowed so you can lay back assured that wet dogs aren’t going to come bounding over to you.
The raised boardwalk is dotted with many bars and restaurants which offer views of the sunset, but personally I recommend watching it from the beach whilst searching for some of the prettiest shells I’ve seen for a long time.
Fuel restaurant
Fuel is the restaurant at The Prime Energize Hotel, where we stayed. I have to say it was the most impressive part of our hotel. The à la carte menu has a wide range of health-conscious dishes, whilst the buffet looked incredible.
Unfortunately I am trying to figure out a food intolerance issue so the buffet wasn’t suited to my current dietary requirements, but had I no problems, the buffet would have been my top choice. Instead I had the Roasted Sea Bass fillets with sweet potatoes & sautéed asparagus and it was absolutely delicious and so reasonably priced at just €16 and Michael had the Superfood Wonder salad at €13. Both were great, nutritionally balanced dishes and for that reason I highly recommend eating there whether you are staying at the hotel or not.
After realising how close to the border of Spain we were in Monte Gordo, we decided to take a friend’s recommendation and drive to Seville for the day. Seville, or Sevilla in Spanish, is the capital of Spain’s Andalusia region, and is most known for its oranges, olives and flamenco dancing. We only spent half of the day in Seville so we didn’t see everything it has to offer, but we definitely got a taste for Andalusian culture in that time.
Puerta de Jerez parking garage
As Seville is quite big, we chose to park in a central underground carpark so we could leave the car there for most of the day knowing it was safe. The car park was just a 18min walk to Setas de Seville in one direction and 11mins to Plaza de España in the other, so it was pretty ideal.
It was €15.80 for +8hrs.
Setas de Seville
Had I not been trying to get to Setas de Seville for when it opens I would have enjoyed breakfast at our hotel but as it was 1hr 45mins away by car and there is a +1hr time difference, we left the hotel with a breakfast box. If you’re in no rush, I recommend you have the breakfast buffet before leaving for Spain.
Setas de Seville is an interactive sculpture with walkway that offers sweeping views of the city. It is 150 x 70 metres and is approximately 26 metres high, and though it doesn’t much seem to compliment the city’s architecture, its design is based on the arches of Seville’s cathedral and Plaza del Cristo de Burgos.
Though the full walk of the structure won’t take you long, there is no shade away from the starting point so come prepared with suncream and water.
Opening hours
Sunday -Thursday: 10am – 10.30pm
Friday and Saturday 10am – 11pm
Ticket costs
€3 per adult
Free admission if you are born in or a resident of Seville
PFH Fun Fact: Setas de Seville translates to Seville Mushrooms in English which makes sense given the structure, but the city wants you to think of it as silk billowing over the city: setas also translates to silk.
Plaza de España
Built in 1929 for the Ibero-American Exhibition (world fair), Plaza de España is one of the most important landmarks in Seville. At 50,000 square metres it is the size of six football pitches and has its own canals, north and south towers, four bridges to cross the canals which represent the four ancient kingdoms of Spain (Castille, Aragon, Navarre and Leon), and 48 alcoves: one for each of the Provinces in Spain.
You can rent a rowing boat on the man-made canal for €5 for 45mins but personally the best thing to do there is to watch the flamenco street performers in the square. With so much passion, they will put on a show for you in return for a simple tip. If you aren’t staying in Seville for the evening, it might be your best chance to see traditional flamenco dancing.
Reales Alcázares de Sevilla
The Royal Alcázar is a palace in Seville and is a UNESCO World Heritage Site. It was originally built in the 10th century by Muslim leaders and has a very distinct Moroccan Berber design with many beautiful tiled floors and walls and ornate carvings. As the years went by and each Monarch took over, they continued to expand the palace adding period elements from gothic to renaissance, making the palace a diverse exhibition of architecture throughout the years.
Opening hours
Sunday -Thursday: 10am – 10.30pm
Friday and Saturday 10am – 11pm
October – March, every day 9.30am – 5pm
April – September, every day 9.30am – 7pm
Closed on 1st and 6th of January, Good Friday and 25th December
Ticket costs
€11.50 per adult
€3 per adult 65+
€3 per student aged 17-25yrs
People with disabilities go free (but do have limited access)
Free admission if you are born in or a resident of Seville
Souvenir shopping
The souvenir shops in Seville were far greater than those back in Portugal (see below). In hindsight I wish I had bought gifts from Seville rather than Lagos. Of course there’s a plethora of your usual tack (I’m not judging, I collect pencils and the ugliest photo frames I can find) but between that is your Spanish silver jewellery, espadrilles and hand-crafted lace flamenco fans. I picked up a beautiful silver ring and pair of hoop earrings for the best prices I’ve seen since Mexico and wish I had bought more.
Unfortunately I can’t name the store I bought my jewellery in because we found it after getting lost in the back streets surrounding Real Alcázar, but I can say that you are guaranteed to find one by just exploring the streets of Seville.
Osaka restaurant
My dietary restrictions made eating out a little difficult and limited on this trip, but we did find Osaka, a sushi restaurant, down Alameda de Índia in Monte Gordo. Despite being a sushi restaurant, unlike many of the other surrounding restaurants it appeared to be genuine and very popular with the locals. The menu isn’t extensive but it is all fresh and delicious.
Praia dos Estudantes
On our last morning we rose very early to catch the sunset from Praia dos Estudantes. We arrived at 5.30am and made our way over to the beach.
The best place to park is in the bays on the right of the hill leading down into Lagos. There is a set of concrete stairs that takes you straight down to the beach with the most dramatic rock formations, rock tunnels and the Roman Bridge. By taking this route you will avoid all of the drunk adolescents stumbling out onto the street from their night out, but unfortunately you will need to keep your eye out for discarded condoms on the steps (there are some things that I just won’t pick up to dispose of).
Parking charges apply from 9am for these parking bays along Av. dos Descobrimentos.
If you want to find the Roman Bridge, turn right at the bottom of the stairs and pass through the rock tunnel and it will be right in front of you. Please make sure you check the tide times before you visit. The tide was out when we visited but it can come up quite a way onto the beach past the bridge.
PFH Top Tip: the shells on Praia dos Estudantes are amazing so be sure to collect a few (they’re the best souvenirs I brought home from Portugal).
Praia de Benagil and Kayak rental
Visiting the Algarve in the first week of July meant that it would be quieter than the end of July and August when the children have broken up from school for the summer. However, it is still a busy time because everyone who is able to visit during school term time are making their trips there. Benagil Caves is a popular destination and this small space gets filled with people very quickly.
Now there are four options for getting to Benagil Caves:
Swim – it’s a short swim but the water is deep and it’s not ideal for young children or camera equipment.
Paddle Board – if you aren’t in much of a rush, enjoy the exercise and have very good balance (the tour boats are reckless and create less than ideal wakes). You can rent a paddle board from 9am.
Boat tour – they are the quickest way to see many of the caves along the coastline, but this is because they don’t stop to let you off. If you want to get out and explore the caves, do not book onto the boat tour. Boat tours depart from 9am.
Kayak – unlike swimming you are limited to leaving at 9am, but you can keep your belongings dry. The kayaks are available from 9am.
We chose to kayak as it was the fastest solo option where you could keep belongings dry and actually get out to explore the caves.
The kayak rental booth is on the right hand side (if you are looking out to sea) of the concrete slip way. They open at 9am but the queue builds from 8.45am so arrive early. Annoyingly they are rented out per 45mins but if you pay for 90mins you will get 2hrs which is plenty of time to get out and take photos in the caves and then paddle further along the coast and back to the beach.
Single and double kayaks are available but it’s cheaper to rent a double. Unfortunately both Michael and I didn’t seem to document the cost and cannot remember what we paid. The only figure we can come up with is €35 for 45mins for a single and as they only take cash, we don’t have a bank statement to help us. I am aware that they bump up the prices during peak seasons so this might not even be what you pay depending on when you go.
The parking is free however and there is a cash machine outside the restaurant at the top of the hill not far from the car park entrance.
PFH Top Tip: Use a dry bag to keep your belongings from getting wet. The kayaks can take on water and the tour boats can get a little too close for comfort causing a lot of splashing.
Souvenir shopping in Lagos
As I mentioned before, the souvenir shopping in Lagos was not ideal. Unlike Seville there weren’t many authentic gifts. The Algarve Coast is known for its cork, so there are plenty of items made from cork, but aside from that, you are looking at your usual worldwide selection of souvenirs.
Pasteis de nata from Padaria Central
Of course we couldn’t leave Portugal without trying one of their world-famous egg custard tarts: pasteis de nata. I couldn’t eat more than a bite of mine because of the ingredients, but I can say that I know why they are loved by so many. The pastry casing is flaky whilst the filling is much creamier and sweeter than an English egg custard tart.
Like I mentioned, the Algarve is incredibly beautiful and I definitely think it is worth a visit but keep in mind that it won’t be a quiet holiday during the summer months. I strongly recommend hiring a car so that you can explore the beaches along the coast, and go with the understanding that you will have to hunt down good food.
This blog post came about when I was preparing to answer the questions you had sent in about using a menstrual cup, after I did an unboxing on my Instagram stories of the products I received from Saalt. As I was preparing, I realised I had so much I wanted to say about menstrual cups that it only felt right to put it in a blog post where you can always reference it.
The amount of positive feedback I received from speaking about and educating you on Instagram about using menstrual cups has been mind-blowing. I had so many girls and women reach out to me saying that they want to start using a menstrual cup after watching my stories, I can’t even begin to put into words how happy that makes me. I hope that this blog post educates and encourages you to make one of the best decisions you’ll ever make.
It doesn’t matter whether you are male, female or non-binary, menstrual education is a global issue which affects everyone. There are 2 billion people on earth who have periods, but did you know that millions of girls and women miss school and work because of it?
#passthesaalt
Saalt was founded by two amazing women and sister-in-laws, Cherie Hoeger and Amber Fawson. Their story starts with a phone call to Cherie’s aunt in Venezuela when she learnt about the staggering amount of girls and women who don’t have access to menstrual hygiene products. With this information at hand and a burning passion to turn these numbers around, Cherie and Amber teamed up to create Saalt. Saalt creates hypoallergenic, non-toxic, BPA and latex free silicone menstrual cups that simplify period care.
Aside from the beautiful packaging and positive engagement on social media, the reason I was really sold on buying a Saalt menstrual cup was that they are partnered with Her International, an organisation dedicated to keeping girls in school when they get their periods. With every cup sold, a portion of the profits go to Her International.
“When a girl gets her period in the United States, she may miss a class. When a girl gets her period in a developing country, she may never go to school again.” – The Pad Project.
Giving girls the opportunity and means to stay in school during their period gives them the education they deserve which will lead to a better quality of life.
Now that I use a cup that can be left in for 12 hours, I never have to skip a period again. I just pop my cup in and sit on flights without worrying about getting up to change it. I have been on 14km hikes, gone swimming, kayaking, worn white swimsuits, sunbathed on the beach, been to places with limited toilet access and so much more! Nothing phases me with my cup in, I even forget I’m on my period!
Travelling on my period used to be such a dreadful thought and now I don’t give it a second one!
Why use a cup rather than single use tampons and pads?
They will save you so much money long term. The average box of 18 tampons costs £3 or $4 and you will be lucky if that’s enough for one period. A Saalt cup costs £23 or $28.99 and it will last you 10 years!
Did you know that over 4.3 billion menstrual hygiene products are thrown away every year in the UK and 20 billion pounds in the USA? Or that it takes longer than the lifetime of the user for just one to decompose? Cups eliminate the need for single use pads, tampons and applicators so they are saving the environment from a lot of unnecessary waste.
You don’t have to change them every 4-6 hours like a tampon. Cups can stay in for 12 hours! The small size holds the amount of three regular tampons and the larger size holds four.
You can swim with your cup with far less risks than a tampon. Tampons absorb water, chemicals and bacteria which increases the risk of infection and toxic shock syndrome.
Speaking of TSS, the risk of getting it with a cup is far lower than with tampons. Leaving a tampon in too long creates the perfect environment for bacteria to thrive which can be absorbed into the blood stream from abrasions caused by frequent use of tampons. The cup collects blood rather than absorbing it like tampons and won’t leave any chemical residue behind.
They are made with no BPA, latex or chemicals. They are non-toxic, odour free and maintain natural PH.
How is wearing a cup different to wearing tampons?
Let me run you through what I got up to on my last period:
Day 1
I inserted it and went to my 9am spin class. I then showered with it in, if I was using tampons I would have taken it out and had to put in a new one the second I had dried myself. After work I went shopping, out to dinner and to the cinema, I didn’t have to think about how many tampons to take in my bag or when I should change them. I only emptied, washed and reinserted my cup before going to bed.
Day 2
I went to the gym and showered. I removed the cup in the shower, tipped the contents down the drain, washed it with soap and water and reinserted it. You know that race you have with your body to get a tampon in after you’ve showered before the blood makes its way onto your towel? With a cup in, you don’t have to worry about that! I removed my cup, washed it and reinserted it before bed.
Day 3
I removed my cup, washed it and reinserted it before my 9am spin class. I was on one of my heavier days so I wanted to empty it before leaving the house. Again I was able to shower with it vs having a tampon. I went for a run with Michael and packed my suitcase before removing, washing it and reinserting it ready for bed.
Day 4
I removed, washed and reinserted my cup in the shower before heading to the airport to fly to Portugal. We didn’t get to the hotel until 10pm. I didn’t worry about a long car journey, sitting on a plane or driving to the hotel. I removed, washed and reinserted my cup in the shower.
Day 5
I left the hotel at 5am to go shoot photos on the beautiful beaches along the Algarve coast in a white swimsuit. I am never worried about leaking past my cup because I don’t leave it in for more than 12 hours and I always make sure I have a good seal. We got back to our hotel for lunch and then headed to the beach for a few hours of sitting out in the sun, I came back and went to the gym and for a swim, showered and went out for dinner before removing my cup in the evening. Back in the days of using tampons I would never have gone for a swim or felt comfortable in a swimsuit, I would be so conscious of leaks, but with a cup, my period is the last thing on my mind! Plus, I didn’t have to worry about my tampon string soaking up the chemicals in the pool water and entering my body.
Day 6
This was a very long day! We went to Spain for the day so I was in the car for about four hours there and back and we walked around all day exploring and sightseeing. It was the last day I used my cup because I had started back on the pill on day five. I had it in all day and the only blood was on the rim, and unlike a dry tampon, it wasn’t at all uncomfortable to remove. I washed it with soap and water and put it in its bag. When I got home from Portugal, I washed it with the cup wash that Saalt sent me ready for my next period.
In those six days, I never had to worry about finding a toilet to change my tampon, carrying around the right amount of them or packing them. I never had to worry about leaking whilst I sunbathed in my white swimsuit, getting my tampon string wet whilst I swam, changing a tampon on the plane and road trips, or the string getting sweaty when I worked out in the gym. In just one period, using my Saalt cup saved the environment from 21 tampons and applicators.
Questions you, my followers and readers sent me to answer:
How long have I been using one?
I have been using my Saalt menstrual cup since the start of 2019 I have not used a tampon since! It has been not only my favourite sustainable swap but one of the best decisions I’ve ever made.
Why do I use one?
For all of the reasons I listed under “Why use a cup rather than single use tampons and pads?”. I have been making huge efforts to swap to as many sustainable and reusable products as possible so I finally made the swap at the beginning of this year when I had reached the point where I had only a few tampons left and the choice was to restock or finally start using a cup.
Is it hard to insert?
The first time I was nervous so I called my friend who had been using them for years and she talked me through it. I wet the cup to lubricate it then folded it into a “C fold”.
Image belongs to Saalt.
To my surprise, I never found it difficult to insert my cup the first time, and once it was in, I couldn’t feel it. Don’t get me wrong, not every time is a breeze. There have been a few times where it has been a little trickier to insert, just like with tampons every now and then you have a rogue insert which feels uncomfortable from the get go. If this happens I just remove it, wet it, and try again. The first time I inserted my cup, I went to a spin class 30mins later and I actually think it was more comfortable than a tampon!
How do you put them in?
First I wash my hands.
Then I check the four holes are clear.
Then I wet the cup to lubricate it.
I do the “C fold”.
I either squat down or prop up a leg on the toilet seat or side of the bath and insert it into my vaginal canal.
Once I have inserted it, I let go when I can feel a little pop as the cup opens up. I run my finger around the base of the cup to check it opened out.
If it hasn’t, I give the cup a little twist and wiggle until I feel it pop open.
I then very lightly tug on the stem to make sure the suction seal has formed so it won’t leak or move.
I then wash my hands and I’m ready to go!
Is it comfortable?
It is! I trimmed my stem so it didn’t poke me so I can never feel when it’s in!
How do you know whether to cut the stem?
Every vaginal canal is different so the cup might sit higher inside you or lower. For me it’s lower so I noticed my stem poking within the first day. I stuck with it for a second day before trimming it back to be certain but after day two I cut to the second notch. The stem is there to locate the cup inside you so it doesn’t matter if yours is long or short. Make sure you cut on these notches using a pair of scissors and make a clean cut.
Where do you buy it from?
As I am based in England, I bought mine on Amazon with Prime delivery.
If you are based in the United States you can also purchase them in store in Target as well as Urban Outfitters and Revolve. Click here for more retailers.
Their website also offers global shipping and a 10% discount on your first order.
.
Some evenings I want a break from inserting my cup so I use HighOh’s reusable pads**. These are great environmentally conscious products for girls and young adults who haven’t used tampons and aren’t confident with inserting a cup just yet.
.
So there you have it. A full blog post educating you on why making the switch from single use menstrual products to a sustainable Saalt cup is the right decision for yourself and the planet. It turns out your period holds more power over this world than anyone ever imagined, here is your opportunity to use it to make the world a better place.
Do more on & for the planet, Gabriella
Pin this post
.
* I was gifted two menstrual cups and cup wash from Saalt, but I had purchased and used their menstrual cup before working with them. Please know that I only recommend products I love and use myself. I wrote this blog post because I wanted to share this information to encourage you to make a life-changing decision that will benefit you and the environment. I was not paid to create this blog post.
** I was also gifted a pack of reusable pads from HighOh. They are far more absorbent than cotton pads and you just need to pop them into your regular dark wash in your washing machine.
.
As an Amazon Associate and Saalt Affiliate I earn from qualifying purchases.
Summer is well and truly here so bring on the BBQs, long hazy nights under the stars, ice cream in abundance and those unforgettable “salty hair, don’t care” beach days!
Are you curious about what I pack in my bag for a day at the beach? I thought so, that’s why I wrote this blog post, lucky you!
Money
Aside from ice cream and possibly lunch, I don’t see much need for money on the beach. Of course I don’t like being caught out so I carry a small amount of cash and a card. I NEVER leave these unattended though and if I do go for a swim where I’m leaving my bag on the beach, I will put it in my waterproof phone case along with my phone, which I have written about a little further down.
Phone
For photos, music, emergencies and googling when I’m trying to prove Michael wrong about something or another.
Waterproof phone case
I only bought this in early 2019 and honestly I don’t know why I didn’t get one earlier! Now I never have to worry about leaving my phone or bank card unattended on the beach again. Plus I can take photos under water, which is a novelty that, let’s face it, never wears off.
Headphones
As lovely as kicking back on the beach is, I mostly love listening to music. Especially a playlist I have made especially for the destination such as my PFH Hawaiian mix tape playlist or PFH California road trip mix tape. As I might be leaving my bag unattended to frolic in the sea, I don’t bring my noise cancelling headphones, never mind the fact that it’s dangerous to be that unaware of your surroundings in public. So instead I bring the pair that came with my phone; they do the job and the chances of someone nicking something that has been inside my ears are pretty slim.
To make sure they don’t get tangled in my bag I wrap them in my This is Ground cord taco.
Book
Hair tie
If I get too hot with my hair down, or don’t fancy getting heaps of sand in it, I will tie it up.
Lip salve
What with all of that salt water and sun, my lips get pretty shrivelled on the beach, so I always have a lip salve on me. I particularly recommend popping one with SPF in your bag for extra protection.
Makeup
Wearing makeup on the beach is pointless. I always sweat it off or it gets washed off in the sea, but if I’m going out somewhere when I come off the beach, I keep a few bits in my Flat Lay Co.
These bits are usually concealer, mascara, blush, highlighter (to enhance that beachy glow) and a brightly coloured lip product.
Deodorant
I don’t know about you, but I don’t exactly come off the beach after a day of lounging in the sun smelling like a peach…
I recently switched to all natural deodorants and am currently using this one from Neal’s Yard.
Suncream
Long gone are the days where I didn’t give a hoot about skin safety! I would NEVER go for a day out on the beach without wearing suncream and having it in my bag for multiple top ups. If I am going somewhere where the sun is particularly harsh I will bring SPF 50 and 30 with an additional facial suncream (it is less greasy) which is SPF 30. If there isn’t a high risk of burning I will bring SPF 30 and 15 with the facial suncream.
I swear by Hawaiian Tropic for the following reasons:
It is “reef safe” which means it doesn’t contain oxybenzone and octinoxate which are harmful to coral reefs. When worn on humans they convert harmful UV rays to safe heat on our skin, but when they wash off into the water, they have the complete opposite effect on corals. Instead, it strips them of the layer that protects them from bleaching under the sun.
It’s moisturising as well as protective, so it has a better chance of preventing your skin from drying out under the sun.
It smells so good! It will take you to a tropical paradise wherever you are.
It has a bronze shimmer to it which really enhances your summer glow.
Sunhat
Lorem ipsum dolor sit amet, consectetur adipiscing elit. Ut elit tellus, luctus nec ullamcorper mattis, pulvinar dapibus leo.
Sunglasses
Squinting in the sun is a look that serves no one, I like to see, plus I want to protect my eyes from harmful rays. I don’t like to bring my best pairs to the beach because I’m worried they will get scratched up by the sand.
Towel
If you’ve been a PFH reader for a while, you probably know by now that I swear by microfibre towels. They are the ultimate travel towel for the following reasons:
They are antibacterial, so they won’t smell
They are sand resistant, so you can lay out on them on the beach and not have to worry about sand sticking to you after a swim or getting in your bag when it’s time to go home
They adsorb moisture quickly, so you can spend less time drying and more time having fun
They dry quickly, so you don’t have to worry about folding up a damp towel to put back in your bag
They fold down to a compact size
I was recently gifted towels by Dock and Bay and I am obsessed! Not only do they have all of the amazing qualities I’ve listed above, but their towels come in fun and bright colours, plus they only use biodegradable packaging! I bought my partner a pair of swim shorts in 2018 from Dock and Bay because they are made from recycled plastic bottles and they are one of his favourite pairs. Plus all of their products in the Cabana collection are named after some of the hottest travel destinations, so how could I resist a Waikiki Coral hair wrap!
Their XL size is perfect for sharing if you want to save space and just bring one!
Hair Wrap
This little item is a big deal! I don’t know about you but when I come out of the sea, I don’t mind drying my body off in the sun, but I can’t stand how my hair drips all down my back and face. With my hair wrap from Dock and Bay (also gifted) I never have to worry about that! I can just twist my hair into the wrap and pin it up so not only is it out of my face and drip free but it also look super cute! It is made from the same microfibre as their towels so it dries hair so quickly, it is a brilliant product!
Dry bag
Hopefully I will be able to dry off in the sun, but just in case I don’t and my swimsuit is still wet when I’m planning on heading somewhere after my time on the beach, I will pop in into a dry bag so it doesn’t get anything else in my bag wet. It’s the environmentally friendly equivalent of putting your swimsuit in a plastic bag.
Water
It is very important to stay hydrated under the sun. To prevent my water from heating up on a warm day, I use a thermal bottle such as S’well. My one is from the Sip by Swell collection, I love their colourful prints and I’ve been using them for 5 years now so you can trust that they do a very good job of keeping your drinks cold. Last summer I went to the hottest place on earth, Death Valley, and when all the fluids in my body evaporated, my water stayed as cold as it was when it went in.
Food
Right up until the beginning of this year, I used to be so self conscious about eating on the beach. I didn’t want to sit up and have belly rolls whilst I ate my bread rolls, and I most definitely didn’t want to bloat in my swimsuit. It took me 27 years but eventually I came to terms with the fact that if anyone is judging me for how I look on the beach, it says more about that person than it does me.
Now I don’t care about eating on the beach, and thank goodness because after a morning of sunning myself and taking multiple dips in the sea, I get hungry!
What I bring depends on where I’m going. If I’m on the beach in the UK then I am most certainly getting fish and chips because let’s face it, chips always taste better sprinkled with sand and under the threat of losing it to seagulls.
If I’m anywhere else though, I will pack up a picnic which will consist of sandwiches, crisps/potato chips, fruit and a snack bar. My favourites are Perkier and KIND.
BBQ season is officially here and I for one am pumped! Sometimes it gets a bit boring having the same food every year, so why not put a twist on your traditional coleslaw with my Mum’s purple coleslaw recipe? Surprise your guests with this whimsical yet delicious homemade coleslaw! Is it unicorn food? It could be to the kids coming to your BBQ this summer!
I’ve had the pleasure of spending two 4th of Julys in the States and have had a blast! The first time we were in Waikiki, Hawaii and it was such a joy walking through the local parks and seeing families and friends cooking up a storm on their BBQs. I hope you all have a great summer filled with good food!
This really quick and minimal ingredient coleslaw is a great addition to your summer BBQ and takes very little time to make.
4. Finely chop the garlic chives and add to the cabbage, leaving a few behind for garnishing.
5. Add six tablespoons of mayonnaise to the cabbage mixture and stir through.
Lorem ipsum dolor sit amet, consectetur adipiscing elit. Ut elit tellus, luctus nec ullamcorper mattis, pulvinar dapibus leo.
7. Spoon out the coleslaw into a serving bowl and sprinkle the garlic chives on top.
One small cabbage can make a surprisingly large amount of coleslaw so if you and your guests don’t manage to finish it, it will be good for another week if kept covered in fridge.
So here I am blogging about all these wonderful far-flung places around the world and I’ve somehow managed to overlook somewhere a little closer to home, which also happens to be one of the best cities in the world. I recently realised that with every reason I’ve gone to London in the last year I have been collecting content and so I’ve put it together for you to bring you my 10 most Instagrammable places in London.
The thing I love most about shooting in London is that unlike most popular Instagrammable locations, you don’t need to be there at the crack of dawn to get the shot. I have shot at all 10 of these places in the middle of the day, and yes of course they are busier than at early morning, but I have never had a problem shooting at them. In fact with London you have to be more mindful of the traffic in the background than people, with that said, maybe avoid shooting during rush hour.
Don’t let me hold you back anymore (if you haven’t scrolled past this to get to the photos already), here are my top 10 places:
1. Tower Bridge
Not to be confused with London Bridge which unfortunately it is on Instagram, all of the time. Tower Bridge, famous for its two 213 feet tall towers is London’s most iconic, and therefore Instagrammble, bridge.
PFH Fun Fact: In 1977 Tower Bridge was painted red, white and blue to celebrate the Queen’s Silver Jubilee. Before then it was always painted brown.
If you’re making the effort to get photos with/of Tower bridge there are two spots you want to snap from. The first is on the bridge and the second is along the River Thames on the promenade between City Hall and the bridge itself.
Even though these two locations are always busy because it’s such a hotspot for tourists, it’s not one that you need to get up early for. You will always be able to get a spot on the wall along the thames, and as for being on the bridge, the only thing you have to be mindful of is what traffic you want passing by in the background. Although everyone (including myself) makes it seem like red buses are passing by in the background all the time, they’re actually not as frequent as you think. So although the timing of the day doesn’t matter too much, you may have to wait around for a good five minutes between each bus’s appearance.
2. Buckingham Palace
Tell me what is more quintessentially British than the palace which the Queen of England calls home.
The usual tourist snap is taken out front of the gates, but the best angle is to get a higher perspective over the bars, so more of the palace is in your photo. To do this, head up the steps of the Victoria Memorial.
Just like the bridge this is a very popular location for tourists but it doesn’t matter what time you arrive for photos. Unless you are planning on visiting on the day of a royal wedding, the Queen’s birthday or other momentous days, you won’t have a problem getting a clear spot on the Victoria Memorial.
3. Oxford Street
It’s the busiest shopping street in London but it’s also where you’ll find the most frequent stream of red buses. For the best place to stand, cross safely to the centre island. The best time of year is Christmas when the street is lined with festive lights, although there’s a good chance the rain will get you. The solution to that though is to simply purchase one of the most cliché souvenirs in the world: a Union Jack umbrella, from any of the souvenir shops surrounding you.
4. St. Paul’s Cathedral
For the best view of St. Paul’s Cathedral head up to the viewing platform at the top of One New Change shopping centre.
The viewing platform isn’t big but it’s rarely busy because most people head up there to go to Madison roof top bar, so you won’t have a problem getting photos here whatever time of day you go.
5. London Eye featuring red telephone boxes
There are four key places to get photos of/with the Coca Cola London Eye all without spending a penny on actually having to go on it. They are all conveniently located in a loop so it doesn’t really matter what order you do them in but I did it as follows:
The red telephone boxes
There are two red telephone boxes along the River Thames on the opposite side to the London Eye. From here you will be able to get a shot with a couple of England’s iconic telephone boxes with the London Eye in the background.
To get here, get off at Westminster tube station and walk along the river away from Westminster Bridge for just 3mins.
Just to prepare you, red telephone boxes might be cute in photos but most of them are used more as a urinal than for making phone calls, so if you plan on opening the door, do yourself a favour and hold your breath. Also the doors are surprisingly heavy.
The earlier you can shoot here, the better, because there will be a lot of foot traffic in the background especially as the boat tour piers are here. I have been here twice in the afternoon and it is possible to shoot with a break in the crowd, you just need a little patience. For the best shot, get your photographer to stand on the island between the main road and the cycle path.
Riverside
Walk just a little further along the river just beyond the Battle of Britain RAF memorial so that you stand directly opposite the London Eye.
Please be aware that although this wall is not high, the river is on the other side so don’t lean back and just be careful.
Jubilee Gardens
When you’ve finished taking your photos along the riverside, walk further along the river and cross the Golden Jubilee bridge then walk towards the London Eye. It will take you less than 2mins to get to the Jubilee Gardens from the bridge.
There really isn’t a best spot here, it’s all good and depends on how much of the London Eye you want to feature in your photos.
Westminster Bridge
Once you’ve got your shot in Jubilee Gardens and hopefully enjoyed an ice cream on the grass (there’s an ice cream truck located in the park, treat yo’self), walk past the London Eye and onto Westminster Bridge. The best angle is on the right side of the bridge, facing the London Eye standing between the fourth and fifth lampposts.
Believe it or not, the bridge was packed when we got this shot. You just have to wait for a break in the crowd, it will come, just be patient.
6. Shoreditch
To the average onlooker, Shoreditch is a dump. It’s grubby, there’s graffiti on every wall and bin bags line the streets but it’s one of the greatest parts of London. Shoreditch is London’s creative hub; it has all the vintage shops your heart desires, the graffiti walls are works of art (you can book graffiti tours to learn more), the food is some of the best in the city (seriously don’t leave London without getting beigels on Brick Lane) and there is always some kind of festival, show or exhibition going on there.
Just wander around and take your pick of graffiti, but if you want the same one as me, you want “Lets Adore and Endure Each Other” by Stephen Powers on Great Eastern Street.
7. Notting Hill
Notting Hill has been one of London’s most photographed locations long before the birth of Instagram. The uniformed rows of colourful pastel houses have captured the hearts of people all around the world.
The best streets to head down are Farm place (the one featured in my photo), Farmer Street, Hillgate Place and Hillgate Street.
There are plenty of pastel houses to go around but these days Notting Hill is always scattered with bloggers, photographers and tourists. So although you don’t need to arrive early, you can do if you want first pick of the houses. Please just be mindful and considerate of the fact that these are people’s houses so don’t be loud and don’t stand on their doorstep.
8. Peggy Porchen
Peggy Porchen is unmistakably the most Instagrammable café in London. Its candy floss pink shopfront, seasonal floral display and the most beautifully decorated cakes draw people in from all over the world.
For the best photos sit outside to the right of the door so you can get the floral display behind you in the shot.
Choose your cakes wisely. I’m not a big fan of cake so I chose a sweet little hand-iced biscuit from the counter and it cost £10! As lovely as it was, it most definitely was not worth £10.
9. Saint Aymes
Heads up, as gorgeous as everything on the menu is, and it really is, it comes with a pretty steep price tag. My lilac unicorn 24ct gold latte was the prettiest drink I have ever had and was absolutely delicious but it’s a cool £8.45. What I will say about the price is that not only is everything photo worthy but it’s also delicious. We also had the 24ct Unicorn Waffles to share and they were worth every penny at £16.99.
aint Aymes had Instagram in mind when they designed the decor, every corner of this café is picture perfect. Where you go depends on the vibe you want, outside has Parisienne charm with its floral terrace whereas inside has floor to ceiling floral walls.
Sky Garden is London’s highest public garden, sitting comfortably 37 floors high above the central business district. Surround yourself with tropical plants whilst looking over the city skyline.
Access to the sky garden is free but you will need to book a time slot in advance here.
The best shot is to get your photographer to head up the steps to the restaurant in the middle of the garden and look down at you standing on the steps against the railings, with London’s vast landscape stretched out in the background.
The best time to go to get the most out of your experience is about an hour before sunset, so there’s enough light to get photos but you can sit in the bar with a drink to watch the sun go down over the city. If you want the best time for just getting photos, head up there when it opens at 10am on weekdays and 11am on weekends, so there are less people to avoid in your photos.
So there you have it, 10 of the most Instagrammable places in London, England. The great thing about big, trend-setting cities like London is that they will always be evolving and new spots are constantly popping up so you can be sure there will be a part 2 to this blog post in the future.
If you find this guide useful and take photos at any of these locations, use #postcardsfromhawaiiblog and I will feature them on my Instagram stories!
Do more on & for the planet, Gabriella
Pin this post
If you loved this post, check out my following London guides:
Bruges (or Brugge in Flemish) is a small city in North Belgium. What makes Bruges so unique is its magnificent gothic buildings that define the city from the towering Belfry to its city hall which is one of the oldest of the Low Lands. It’s no wonder that in 2000 the entire city centre was named a Unesco World Heritage city.
Though rather touristy, Bruges is an idyllic location for a quick break if you have an interest in architectural history, waffles, praline chocolates and delicious food!
Day 1
Drive to Calais
Ferry from Dover to Calais
Drive from Calais to Bruges
Park at train station
Walk 20mins to hotel
Check in to Rosenburg Hotel
Lunch at Jilles Beer & Burgers
Waffles on a Stick
Explore
Day 2
Rozenhoedkaai View
Markt
Bonifacius Bridge
Windmills of Bruges
Poules Moules for dinner
Day 3
Choco Story – Chocolate museum
Amuni for lunch
House of Waffles
Chocolate shops
Day 4
Check out of hotel
Minnewaterpark
Duvelorium
Pietje Pek for lunch
Pick up bags from hotel
Drive to Calais
Ferry from Calais to Dover
Drive home
Parking
A good friends of Michael’s who had previously visited Bruges helped us save €60 by recommending we park in the multi-storey car park at the train station at €3.50 for 24hrs, rather than the car park opposite our hotel which was charging €20 for 24hrs!
Though there is a bus station next to the car park, we chose to walk to our hotel because it was only a 20min walk on google maps and actually took us less. Definitely consider parking here to save money should you drive to Bruges.
Jilles Beer & Burgers
Having been on the road since 2am after arriving at lunchtime our priority was to find food ASAP. Luckily, a very short walk from our hotel was Jilles Beer & Burgers. We had darted in there because of hunger and an unexpected downpour but it ended up being one of the most amazing finds!
The menu is extensive and covers a huge selection of beef, chicken, vegetarian and vegan burgers! Not only this, every single burger has a recommended paired beer which is chosen to enhance the flavour of your burger. Despite not actually being a traditional Flemish meal like the others we had on following days, it was insanely delicious and if you go to Bruges you must go here!
PFH Top Tip: I ordered the Rolls Roy, which is actually a chicken burger but I swapped it for beef and it is hands down the best burger I have ever eaten! The Rolls Roy is filled with melted brie, cheddar, Emmental, Parmesan, BBQ mayonnaise, tomato, watercress and is served with an apple coleslaw. Perfection!
Waffles on a Stick
For €4 you get a waffle on a stick, coated in a chocolate of your choice and a topping of your choice. Though I highly recommend eating one yourself fresh so the chocolate coating is still warm and melty, you can always pick one up pre packaged for later, or as a souvenir for someone back home.
Rozenhoedkaai View
This little spot offers darling views of part of the city’s canal network. On a sunny day it’s a really lovely look out. It’s incredibly busy during the daytime because the opposite side of the street is lined with souvenir shops, chocolatiers and cafés, so if you want to appreciate it without being stepped out, head there before 8.30am.
Markt
Markt is the prettiest place in Bruges thanks to the architecture surrounding the main square, The Historium, Belfry and colourful guild houses. Not only is it beautiful but it’s also rich in history. In medieval times his market square was where festivals, jousting tournaments and executions took place.
It is named Markt as it has hosted a fresh produce market since the year 958. Market day is Wednesday and is open 8am – 1pm. Unfortunately the weather was awful when we were there so there wasn’t much to see, but on a good day there are stalls selling fresh fruit, veg, meat, cheese and flowers.
Bonifacius Bridge
This early-20th century bridge is tucked away behind the Church of our Lady Bruges and interestingly is actually one of Bruges’ youngest bridges. It’s a pretty spot to pass through or take photos.
2be beer wall
Visiting the 2be beer wall in Bruges is an absolute must. It’s a quirky spot for photos of course, but it’s also fascinating to see so many beers and their corresponding glasses (which is a big deal in Europe) on display in one place. Once you’ve strolled past the beer wall, order your drink of choice at the bar and sit out either in front of the wall or in their courtyard which overlooks the canal.
If you want to try something particularly different, order their coconut beer. It’s so creamy you’ll forget it’s actually beer!
Windmills of Bruges
Depending on where you’ve been and what you’ve eaten, may I recommend taking a stroll over to the Windmills of Bruges to work off some of those waffles, chocolates and glasses of beer you may or may not consume?
There are four to see on a walk along the canal: Bonne Chiere, Sint-Janshuismill, Nieuwe Papegaai and Koeleweimill. Not all of them are functioning now but there is a museum in Sint-Janshuismill.
Poules Moules
Though we went for mussels and chips, we were each talked into trying an alternative national dish of Belgium. My brother and I enjoyed a very rich and creamy mixed seafood gratin whilst Michael had their beef stew. Both meals were delicious and I strongly recommend them but be warned, the portions are huge so come with a big appetite.
Choco Story – Chocolate museum
Our visit to the chocolate museum is the thing I enjoyed most on our trip. To be honest I thought it was going to be as much of a gimmick as the cat museum is in Amsterdam (don’t ask), but it was actually very informative and as easy to digest as the many, many free samples.
Yes that’s right I said FREE chocolate samples! All tickets include a complimentary chocolate bar and the chocolate demonstration ends with complimentary samples but where you’ll make your money back is on the chocolate dispensers located throughout the museum. Of course I know they are there to educate you on the different types of chocolate cocoa beans will make but as they are unlimited and free, Michael and my brother made sure to get their ticket’s worth on their way through the museum.
Moving on from the notion of free chocolate, the actual museum is fascinating. Over four levels you are taken through the history of the cocoa bean and how it was consumed by the Aztecs right the way through to present time. If you are interested in knowing more, take a look at my Bruges Instagram story highlights. I can guarantee a visit here will make you appreciate chocolate a lot more than before.
Ticket costs
€9.50 adult
€5.50 for children aged 5yrs – 11yrs
Children aged 5yrs and under go free
€7.50 seniors 65+
€7.50 students
Amuni
With a craving for pizza we found Amuni, an Italian restaurant that specialises in slow food. Their pizza sourdough is made with unrefined flour and they don’t use artificial yeast which means your body digests the carbohydrates rather than storing them as fat. So in a nutshell, it means your pizza is good for you and it tastes great!
I will say it was quite pricey for pizza so if you’re not bothered about slow burning good-for-you ingredients, maybe save money and eat your pizza somewhere less fancy pants.
House of Waffles
Having been to Belgium two times before it wasn’t until my trip to Bruges that I learnt there are two different types of traditional Belgian waffles: Brussels and Leige. Brussels waffles are rectangular and the one you see the most of, they are light, fluffy and have deeper holes. Leige waffles are round, dense and sweeter. The first time I tried a Leige waffle I thought they hadn’t cooked it properly because it was the complete opposite to any Belgian waffle I had eaten before, so my advice is go for the Brussels waffle if you want something light and a Leige waffle if you have a major sweet tooth.
House of Waffles offers you a choice of both waffles and all the best toppings from fruit to ice cream. You can either build your waffle with your choice of toppings or order one of their popular ones, either way they are good!
Minnewaterpark
Minnewaterpark is a small park so there isn’t much to see but if you still need to walk off your waffles and praline chocolates, it’s a pleasant stroll.
Duvelorium
Fancy a beer with a great view? Duvelorium is your place. Located on the first floor of the Historium, the outdoor seating looks right out on Markt.
Pietje Pek
I couldn’t leave Belgium without enjoying their famous national dish moules-frites which in English means mussels and chips/fries. We found this restaurant after attempting to go to Lizzie’s Waffles which was closed. Pietje Pek was opposite and boasted a lengthy mussels menu from cream to four cheeses, though I’m not sure if a mussel fondue is the greatest combination…
I ate mussels in garlic and my brother had them in cream and they were lovely, although his cream was much tastier to eat after than my garlic.
Though Bruges is a very small city this isn’t everything you can do, there are a few more activities you can do here which we didn’t get around to. For example, you can go up the Belfry to see the bells that chime frequently in the square, take an interactive tour around Historium to learn more about medieval Bruges, visit the very questionable chip museum (maybe just on a rainy day) and take a masterclass in making your very own praline chocolates – my brother makes them at work so he didn’t fancy doing this for fun.
If you’re based in England and fancy a quick trip into Europe, Bruges is definitely a good option, especially if you’re a foodie.
Venice, Italy, is without a doubt one of the most unique cities in the world. This floating city made up of 118 islands and over 400 bridges, has been inhabited as far back as the 10th century and is now listed as a UNESCO World Heritage Site. Italy is already a dream with its warm people, romance language, some of the most beloved dishes in the world and Roman history, but what makes this iconic Italian city so extraordinary is that there are absolutely no road vehicles operating within the city; the only method of transport is by foot or via the complex canal system. Even the emergency services operate on the canals of Venice!
Venice is definitely a city that you must get lost in, which is fortunate, because thanks to its ancient network of canals and bridges, it’s easy to do so. Virtually every corner of this fairytale city is photogenic, so you won’t have a problem getting beautiful photos by simply wandering around. In fact, I have heard many people say it’s impossible to get a bad photo in Venice, but just in case you want a few pointers for some extra special spots around the city, read on for 10 of the best photo locations for Instagram in Venice, Italy.
1. Bridge of Sighs
Legend has it that the Bridge of Sighs gained its name because it was the sound that came from the criminals walking across it who were heading to prison. The small windows supposedly offered them their last glimpse of Venice before being locked up.
It’s one of the most famous landmarks in Venice which means the neighbouring bridges – Ponte della Paglia and Fondamenta della Canonica – on either side that offer the best views/photo opportunities, get very busy. To beat the crowds arrive around 7am. Personally I believe the best way to shoot it, should you wish to be in the shot, is for you to stand on Fondamenta della Canonica and have your photographer shoot you from the next bridge along, on Calle de la Canonica.
Rialto Bridge is not only the most famous bridge in Venice, but it is also the oldest one crossing the Grand Canal. For this reason, it gets very busy from quite early on in the day. To get the best photo for Insatgram on the bridge, head there straight after you’ve got your photo of the Bridge of Sighs; it only takes 7mins to walk there.
The best view is south facing, as the Grand Canal stretches out further in that direction, so there’s more to see and therefore more in your photo. If you’re there in the early morning the sun will grace the tops of the buildings that line the Grand Canal of Venice giving them a warm glow.
This will be your trickiest location to shoot out of the ten in this list because it is an operating jetty all day long, and unlike many locations, the earlier you arrive won’t benefit you. These jetties are mostly used by delivery boats and they are piled high with multiple boxes which takes often close to an hour to unload so a) you don’t want to get in the way of them doing their job and b) there’s an unattractive boat in the forefront of your shot.
The only thing I can suggest, seeing as it’s what we did, is to keep returning throughout the day to check if the jetty is clear. As we only had one day, we had to settle for the delivery boat being in my shot once it had been unloaded. I don’t mind the flash of colour, but it’s not the most glamorous of boats.
To get here, you want to be on the side of the corner where the Hard Rock Café shop is. With that shop behind you, walk down the steps and the jetties are all along the right hand side. To get your bearings before you go, take a look at the screen shots from Google Maps below to know where I mean.
With the Hard Rock Café shop behind you, walk down the steps. The jetty is the first on the right.
To the right of the blue boat.
4. Gondola ride
You won’t have a tough time finding a gondola in Venice, they are everywhere. What is important though is where you pick it up as that will determine the route you take. We got ours in the backstreets because we wanted to travel through the little canals rather than Grand Canal as they are much more picturesque. Plus, the Grand Canal has far more traffic from bigger boats making deliveries or the water taxis which aren’t attractive to have in the background of your shots.
Cost
€80 for half an hour
If you are looking to cut down on the cost, gondola rides in Venice are paid for per gondola not person, so you could rally a few people to split the cost but I would strongly recommend you budget the €80 to have a private ride with your loved one(s).
I have been told that night time gondola rides are the most romantic as you float under the stars, however if you are planning on taking photos, I recommend going during the daytime for better lighting. I can also tell you that half an hour is plenty of time to sit together and enjoy the ride and get your photos for Instagram.
5. Libreria Acqua Alta
If you’re following a bunch of travel bloggers, the chances are you’ve seen the staircase made of books out back of the bookstore, Libreria Acqua Alta, all over your Instagram feed.
The outdoor area where the book-stairs are is very small so you don’t have to worry about any one getting in your shot because everyone has to wait for their turn.
One of the most wonderful things about Venice is that virtually every corner of the city is photogenic. Stray away from Grand Canal, get lost in the back streets and you’ll be able to get a pretty bridge that’s good enough for your Instagram in moments. Take the opportunity to get creative with perspective when you come across parallel or interconnecting bridges.
Whether you’re holding it towards the camera, away from the camera showing off your fresh mani or just straight up eating it, gelato with the canals as your backdrop is always going to make a good Instagram post.
If you want to eat the best gelato after you’ve got your photo for the ‘gram then you want to be getting yours from Suso. Not only is the gelato worth the queue out of the door, but it’s steps away from a bridge so you can get your Instagrammable photo before it melts.
This is one of the best gelaterias in Venice so in order to avoid the queue, you want to be getting here as early as you can stomach gelato in the day.
Got diet restrictions? No problem! They have Vegan gelato and gluten free cones.
8. Jetty at the end of Piscina S.Moise
At the end of Piscina S.Moise, there is a very small jetty that looks out on a small canal with a couple of bridges. It is becoming quite the popular spot for photos because it’s a quiet area, away from the crowds that flock to the Grand Canal. Not much passes through here besides a few gondolas and delivery boats so it’s a really neat place to get a photo of a canal.
The viewing platform on the rooftop of T Fondaco Dei Tedeschi, formerly known as DFS, offers some of the most spectacular sweeping views of Venice. Entrance to the viewing platform is free but you do need to book it in advance. To do so, arrive as early in the day as possible and head up to the top floor where the entrance to the rooftop is, here you will find a few iPads. All you need to do is book a time to return and enter your name and contact information and your tickets will be emailed to you. When you come back for your time slot, show your tickets to the security guard.
This little bridge is one of only two in Venice that doesn’t have a parapet.
What’s particularly great about this one in terms of taking photos, is that it can only be accessed from one side, so you don’t have to worry about too much foot traffic. It’s located in a much quieter neighbourhood in Venice so despite going there in the middle of the day, there was only a couple of other people in the area – perfect for getting photos for the ‘gram!
Travel has completely opened my eyes to how much waste there is in the world and the effects that my contributions were having. Seeing real life mounds of discarded single use plastics, videos of animals’ tummies full of plastic and rubbish, animals being harassed for tourists’ amusement and beaches scattered with rubbish – it’s hard to ignore what irresponsible behaviour can lead to. It’s important that we all do our part to stop being so wasteful, to protect our planet from the damage we’ve caused so that future generations of animals and humans don’t suffer because of what we’ve done.
My experience of irresponsible tourism
In February I returned to Hawaii and whilst in Oahu I decided to book an excursion to swim with turtles, something I had done a few years before in Maui and thoroughly enjoyed. I chose to book with a company called Holokai Catamarans based in Waikiki and was gravely disappointed by the behaviour of both the crew and the passengers on my tour.
We witnessed the crew throw chocolate chip cookies into the water, and last time I checked, wheat and chocolate don’t grow in the sea and are therefore not part of a natural diet for turtles or fish. There were only four turtles in the water, one was young too, and another three boats came to join us, including a boat loaded with scuba divers and even a glass bottom boat! At one point there were approximately 40 people both on and beneath the surface of the water surrounding these poor turtles.
That situation had multiple things wrong with it:
The turtles were heavily outnumbered and surrounded. If they feel threatened they will be reluctant to surface for air, which could lead to asphyxiation and therefore death.
Glass bottom boats are extremely dangerous for sea turtles as they can get confused and try to surface beneath the boat. This can damage their head, fins or their shell and even lead to panic and suffocation.
Sea turtles are an endangered species and it is very important that you respect them and their environment. For this reason you legally must stay 10ft back to prevent the turtle from being scared, harassed or harmed. Turtles are curious creatures so there is a good chance that whilst you are observing them that they will surface near you to do the same to you. In this situation, you must remain calm and very slowly give them space, then count your blessings for a beautiful moment you shared with such a magnificent animal.
Unfortunately the situation worsened and not only were the turtles encompassed by far too many tourists, some groups of people then did the worse thing imaginable, they started to grab at the turtles and chase them, whilst the crew did nothing. I personally had to stop at least five people from chasing the turtles when they surfaced and I even pulled a person away after they touched one of the turtles. It was incredibly distressing! So, for these reasons I cannot recommend taking this tour; their lack of responsibility for their passengers and respect for the turtles was heartbreaking.
Once I returned to my hotel I wrote a letter of complaint to the company and I also reported them to Hawaii’s tourism board via their government’s website. Since then I have been far more vigilant over choosing tours, doing my best to make sure they are environmentally conscious and responsible.
Tips for finding responsible marine tours
With so many tours available over the internet it might seem like a daunting task to find operators that are responsible. Here are a few pointers for finding tour companies that you can trust to be environmentally conscious:
Always take a peek at their own website, even if you’re using a comparison site. You’ll get a better idea of their priorities and what they pride themselves on. For example, if they mention that they are “the most eco friendly tour operating out of that harbour” you know they’ve got their priorities in order.
If you’re booked to stay in a hotel, ask the concierge or front desk if they can recommend any responsible tours. Then research them before making a booking.
Look for companies that provide or encourage the use of reef safe suncream only.
Small tours are always the better choice. They have a smaller impact on the environment and it means you are going to have a much more personal experience with them. Larger tours are mostly operating to make money and don’t take care of individuals or the environment. Whilst on a whale watching tour in Hawaii, we chose to go on a very small dinghy and because of that it meant we could hear the whales singing through the hull of our boat. Moments later we were joined by a large boat with two decks which was blasting out its own music. Not only was that precious moment lost on those people on the larger tour, but they are discouraging people to truly experience their surroundings.
Take note of companies that partner with nature conservationists, charities and organisations. You know they care for the environment and everyone’s personal experience over masses of paying passengers if they have a strong focus on marine biology and research.
Reach out to travel and environmentally conscious bloggers. Ask them if they know of any trustworthy tours, or if they can recommend any companies. You can always contact me through my Instagram, @gabriellawisdom, or email, if you have any questions or want recommendations.
If a turtle surfaces near you, remain calm so you don’t antagonise it, do not reach out to it, and when it is safe, put distance between yourself and the turtle.
Extra measures that you can take
Of course, responsible tourism doesn’t start and end with the tour operators. We all have a responsibly to protect and preserve our beautiful environment. Here are the ways you can help:
Bring your own reusable water bottles to prevent the use of plastic ones.
Wear and bring your own reef safe suncream. Oxybenzone and octinoxate are harmful chemicals to coral reefs and are often found in suncream and UV protection products. Many leading brands such as Hawaiian Tropic, Australian Gold and Banana Boat are now reef safe. Check the label before purchasing your next bottle.
Be respectful of your environment. Don’t touch or harass any animals, don’t take anything with you except memories and photographs (if it’s appropriate) and don’t leave anything behind such as rubbish. If you see any rubbish, pick it up.
If you do see something wrong, don’t be afraid to voice it and report it. I recommend you report what you witnessed to authorities and sending a private email over blasting them on the internet, the situation will be taken more seriously if you go about it sensibly.
Responsible marine companies I have used around the world
Since my experience in Oahu, Hawaii, I am more determined than ever to make sure I book responsible and environmentally conscious tours. Here are some companies from around the world that I whole heartedly recommend because, each one of them have a passion for the world we live in and the animals we share it with:
Ultimate Whale Watch & Snorkel for whale watching in Maui, Hawaii.
Pride of Maui for swimming with sea turtles in Maui, Hawaii.
Wild Whales Vancouver for whale watching in Vancouver, Canada.
Reef Day-tripper for swimming in the Great Barrier Reef, Cairns, Australia.
We are all accountable for making sure we protect and preserve our environment. Together we can make great strides towards responsible tourism by acting upon the tips I have highlighted above and booking tours based on their environmental impact and awareness over what costs less.
Dubrovnik is not only a beautiful coastal city that looks out over the Adriatic Sea, but thanks to the old town’s historically rich architecture that ranges in style from baroque to gothic, it became the ideal location for Game of Thrones’ King’s Landing: the capital of the seven (although now I suppose it’s six) kingdoms in Game of Thrones.
Due to Game of Thrones’ global success it’s no wonder that people from all over flock to Dubrovnik to visit the filming locations featured throughout the seven seasons. For this reason there are many paid tours available that take you through the streets of Dubrovnik in groups. Now I’m not saying not to take one of these, especially if you’re a super fan and want those extra tidbits, but if you want to save money, a quieter experience and time to take your own photos, why not do a self-guided tour?
Rather than pay for a walking tour of Game of Thrones filming locations, which are operated in groups and on a timed schedule, we decided to wake up early before the tour groups started and do our own. Here are the spots we took ourselves to and what was filmed there.
Jesuit staircase
Start your day early at the Jesuit Staircase out front of the Church of St. Ignatius. These stairs were designed by the same architect as the Spanish Steps in Rome, Pietro Passalacqua, but despite being memorable in their own right, they are also the steps in which Cersei starts her walk of Atonement from season 5, episode 10, Mother’s Mercy.
If you want photos here without anyone else, you will need to arrive between 6.30am – 7am and even then, you might be met by a few other hardcore fans.
West Pier
In Game of Thrones, West Pier and harbour make up Blackwater Bay. West Pier is featured twice across the series: the first is in season 3, episode 1, Valar Dohaeris, where Sansa is watching ships and is approached by Littlefinger, but thanks to the final episode of the whole series, season 8, episode 6, The Iron Throne, it is now far better recognised as the place where John Snow says his goodbyes to Sansa, Bran and Arya before leaving to return to The Wall.
As you can image this is a very popular spot on the Game of Thrones tours operated in the city. I strongly suggest you arrive here before 8am if you want the place to yourself. The apartment we were staying in looked out on West Pier and we saw first hand how incredibly busy it gets once the GOT tours arrive.
West Harbour
Whilst you stand on West Pier, you will also be able to see another filming location from season 2, episode 1, The North Remembers. If you face Fort Lovrijenac, you will see a couple of green doors in the rocks with steps leading down into the water. In the episode these doors are featured shortly after the Gold Cloaks were ordered to murder all of King Robert Baratheon’s bastard children, one of whom is drowned in the water below these steps.
The steps leading up from here go to another filming location, Fort Lovrijenac or to Game of Thrones fans: The Red Keep. Although it makes sense to head up here first, I suggest doing the city walls walk first because as far as I’m aware you can only buy tickets for the wall and Fort Lovrijenac within the city walls.
Dominican Monastery
This little but steep staircase out front of the Dominican Monastery was the location where the protest speech against the Lannister family was made in season 2, episode 5, The Ghost of Harrenhal.
As this location is small, you don’t really have to worry about it being busy, people will wait to get their shot.
Ploče Gate
This gate is used multiple times throughout season 2 and 3 as the entrance to King’s Landing. The gate gets incredibly busy as it leads out of the old town so if you really want a clear shot I suggest returning first thing on another day.
City walls
For the best views of the city, take a walk along the old city walls. There’s no doubt in my mind that this is the best way to see the old city of Dubrovnik plus you get to visit a couple more filming locations whilst looking down on others such as West Pier and Fort Lovrijenac.
The following two filming locations are also included in the city walls:
Fort Bokar
Fort Bokar is featured in season 2, episode 8, The Prince of Winterfell for shots along the sea wall of Kings Landing.
Minčeta Tower
Minčeta Tower is used in season 2, episode 10, Valar Morghulis as the House of the Undying. Daenerys’ dragons were stolen so she searches the tower for the entrance into the walls.
Cost
200 Kuna per adult
50 Kuna 5-18 yrs old
Under 5yrs go free
Opening times
Jan – March 10am – 3pm
April & May 8am – 6.30pm
June & July 8am – 7.30pm
August & September 8am – 6.30pm
October 8am – 5.30pm
November & December 10am – 3pm
Fort Lovrijenac
Tickets to the city walls also includes entrance to Fort Lovrijenac, or as it’s known to Game of Thrones fans, the Red Keep. As I mentioned before, the steps leading up to Fort Lovrijenac start at West harbour. It’s quite steep but should only take you about 5mins to get up.
Fort Lovrijenac is used as the interior for the Red Keep in episodes season 3, episode 1, Valar Dohaeris and season 3, episode 5, Kissed by Fire, but it is best recognised in season 2, episode 1, The North Remembers, as the setting for King Joffrey’s naming ceremony where a tournament is held in his honour.