We’ve all fallen victim to a souvenir right? Whether it’s a snow globe, shot glass or keyring, we’ve all purchased something either for ourselves or someone else. Some of us even collect certain souvenirs, even though it makes for more expensive travels, awkward packing and opens us to disappointment when we can’t find what we want. My souvenir weaknesses: pencils and wait for it… photo frames. Born out of vanity and the desire to show (prove to) the world (or really just the people that entered my home) that I had a boyfriend, came the desire to collect photo frames from the destinations Michael and I travel to. Yes I collect one the heaviest, most expensive and impractical souvenirs there are, in fact athere is a stack of 18 on my bedroom floor right now waiting for photos!
There is something else though that Michael and I have been collecting over the years we’ve been travelling together that is far more practical and creative: travel patches and stickers.
Luggage labels
Back in the glory days of travel, when any travels abroad were a luxury, when you were not only expected to but wanted to dress up and there was no such thing as budget airlines, travel stickers were in fact luggage labels. Their purpose wasn’t to document your travels or personalise your luggage, no, they were actually a marketing technique for grand and prestigious hotels to advertise their properties around the world. They would hire artists from all over the world to create their stickers for their guests, only the best would do.
This wasn’t their only purpose though, they were also the means for porters of ships, aircraft and trains to identify luggage according to both the class of the passenger and final destination. Hotels would send their luggage labels out to their guests in advance to add it to their luggage so that the porters could direct their luggage on to the right location.
Eventually they become an artistic representation of status and indicated how well-travelled you were. Then as the times changed, travel became cheaper and more accessible and suitcases dropped in quality, luggage labels became a thing of the past.
In 2016 Louis Vuitton released their “my LV world tour” collection which features a range of travel stamps that at an extra cost could be pressed onto a choice from 18 pieces of Louis Vuitton luggage and accessories. With this new personalised service came a book written by Francisca Mattéoli titled World Tour: Vintage Hotel Labels from the Collection of Gaston-Louis Vuitton. The title is pretty self explanatory but it documents a selection from Louis Vuitton’s vast luggage label collection from around the world, which tell a story of the history of graphic design; it truly is a visual beauty.
Travel stickers with TouchNote
These days travel stickers are an affordable and creative souvenir, plus with a throw back to the golden era of travel, it’s an instant way to show off your travels by displaying them on your suitcase, laptop, notebooks etc. Travel stickers aren’t just a memento, they’re an expression.
TouchNote has tapped in on this notion and has created a collection of wanderlust-inspired travel stickers from popular destinations all the way from quaint little Spanish towns to the bright lights of the Las Vegas strip.
Pick from 47 different travels stickers on the TouchNote app!
Now you have the opportunity to add their fun travel stickers to your TouchNote postcards to add that well-travelled, golden-age-of-travel finishing touch to your cards!
How to use TouchNote travel stickers
Tap “Add Stickers”
Pick from their selection of “Everyday” or “Travel” stickers
Drag it with your finger to move it around
Pinch it with you fingers to make it bigger or smaller
Download the TouchNote app here today to get started on your own creation and start your free 14 day membership trial where you will get full access to all of their stickers!
To read about why I use TouchNote or to get more information on how to order your postcard, delivery and memberships, take a look at Postcards from the world with TouchNote.
I would love to hear what ephemera and/or souvenirs you collect on your travels! Let me know via email or DM me on Instagram and I will share them on stories! Even better, tag me – @gabriellawisdom – in photos of the postcards you make with TouchNote so I can share them!!
Spread the love!
Aloha, Gabriella
Pin this post
.
Disclaimer: This is a paid post in partnership with TouchNote UK. Please know that I have been using them since 2014 and I only recommend brands I personally love and use myself.
As you may know by now I always make a playlist for each destination I’m travelling to that includes songs sang about where I’m going. If you haven’t already listened to my previous playlists you can do so at the following links:
This time however it’s Michael, my partner, who has put together one of the very best Rio themed playlists you will ever hear. Michael has been obsessed with Brazil for as long as I’ve known him and has been listening to Brazilian music such as Bossa Nova and MPP (Música Popular Brasileira) for many, many years, so he very kindly curated his massive playlist to create one for you that features 36 of his favourite Brazilian songs that perfectly express that world-famous Carioca spirit which you can listen to on Google Play here and on Spotify here.
If you don’t have access to either of these I’ve listed them down below:
Bat Macumba, Os Mutantes
Juca, Chico Buarque
Tim Dom Dom, Jorge Ben
Ferro Na Boneca, Novos Baianos
Você Não Entende Nada, Gal Costa
Preta Pretinha, Novos Baianos
Bicho Do Mato, Jorge Ben
A Minha Menina, The Bees
The Answer, Marcos Valle
Take me to (Aruanda), Astrud Gilberto
Ela E’ Carioca, Tom Jobin
The Girl From Ipanema, Frank Sinatra with Antonio Carlos
Cantiga da Vida (ft. Caterina Valante), Luiz Bonfa
Brazil (AKA Aquarela do Brasil), Antonio Carlos Jobim
Whilst researching what do to in Nashville for my road trip in September 2019, one theme that kept recurring was murals in Nashville. Aside from being known for its live music scene, Nashville is surprisingly colourful with painted walls almost everywhere you look – from the playful What Lifts You wings mural to the iconic I Believe In Nashville mural there’s an Insta-worthy wall all over Music City.
There are so many murals in Nashville, some ever-changing and updating, that it is impossible to list them all but whether you’re just interested in the artwork or looking for a snap for your Instagram, here are six of the best murals in Nashville, Tennessee and where to find them:
1. I Believe In Nashville mural
The I Believe In Nashville mural is probably the most famous street art in Nashville. It was painted in 2012 by Adrien Saporiti and since then its popularity has led to a few more of them popping up around the city, but this one is the OG.
I Believe In Nashville mural location
2702 12th Ave S, Nashville, TN 37204, United States
I Believe In Nashville mural artist
Adrien Saporiti for DCXV Industries
2. Draper James mural
Unintended to be so, the Draper James blue stripes out on the right hand side of the shop have ended up being one of the most popular walls to Instagram in Nashville. Its simple Draper-James-blue and white stripes are a must whether you’re shopping in store or not. Although, I do recommend a visit because a) Reece Witherspoon is life b) the clothing and accessories are darling and c) you are offered a complimentary glass of sweet tea, which on a hot day in Nashville, is a necessity.
One of the best parts about the location of the Draper James mural and the I Believe In Nashville mural is that they share the same address. They’re located directly opposite each other so you can check off two in one stop!
Draper James mural location
2608 12th Ave S, Nashville, TN 37204, United States
3. Looking Pretty, Music City mural
This huge, colourful wall is Madewell’s, mural and sits on the side of the clothing store on 12 Avenue. The Looking Pretty, Music City Madwell mural is the most colourful one on this list of Nashville murals. What I particularly love about this wall art, aside from the pretty pastel tones, is that you can be creative with it. Due to its size it’s not an easy one to get the whole thing into one frame so instead pick sections of this mural and make it abstract.
Looking Pretty, Music City mural location
2709 12th Ave S, Nashville, TN 37204, United States
Looking Pretty, Music City mural artist
Emily Eisenhart
4. Make Music Not War mural
Down a little alley between Epice and Green Pea Salon is the Make Music Not War mural. Though very simple in design, this Nashville mural’s statement is powerful and very in keeping with the vibe of Music City.
There is another mural opposite the Make Music Not War wall that features a collage of wild flowers, but it’s not as iconic as the six famous wall art pieces in this list.
Make Music Not War mural location
2902 12th Ave S, Nashville, TN 37204
Make Music Not War mural artist
Relax Max
5. Nashville Looks Good On You mural
Located on a small wall in the back of Frothy Monkey’s parking lot, next to a few scuzzy dumpsters, stands one of TheNash.TN’s four “Nashville look good on you” walls.
Nashville Looks Good On You other sign locations
2311 21st Ave S, Nashville, TN 37212
1911 Nolensville Pike, Nashville, TN 37211
700 S 14th St, Nashville, TN 37206
This one of 12th South is the best in terms of location to the others on this list if you’re planning on checking off all six of these in one day.
Nashville Looks Good On You mural 12th Avenue location
2509 12th Ave S, Nashville, TN 37204, United States
Nashville Looks Good On You mural artist
TheNash.TN
6. “What Lifts You” angel wings mural
Kelsey Montague’s “What Lifts You” angel wings mural (not to be confused with her butterfly wings mural that Taylor Swift Commissioned for her single, ME!) is the only one on this list that isn’t on 12th South, sorry about that, I tried to make this list as easily navigable as possible but I just couldn’t leave out the famous Nashville wings mural!
The people of Nashville have a love-hate relationship with these wings, you’ll often hear things like “the stupid wings” or “ugh those wings” groaned in a long (deeply attractive might I add) southern accent, but they also bring people from all around the world to The Gulch, as Montague’s “What Lifts You” campaign is global, with wings in Ireland all the way to Australia. You’ll find people’s hang ups with the wings mural is the amount of day-drinking-squealing bachelorette and birthday girl gangs disturbing the peace to get their photos here, so totally understandable. If you are here to get your photo with the What Lifts You angel wings mural maybe keep the volume down so not to give them an even worse reputation. Everyone wins that way, we get to take our photos with Nashville’s angel wings in peace and locals don’t get disturbed too.
Read on for where to find Nashville’s angel wings mural.
What Lifts You angel wings mural location
302 11th Ave S, Nashville, TN 37203, United States
What Lifts You angel wings mural artist
Kelsey Montague
Mural map of Nashville
One great thing I learnt about being in Nashville is that it’s super laid back so unlike places like New York or Paris where you have to be an early riser to stand any chance of getting a clear shot in popular locations, in Nashville you can rock up at pretty much any time to get your photo with any of these murals. The only one you might have to wait for are the What Lifts You wings but it won’t be a long wait. Plus murals are one of the easiest things to get a clear shot of because people take it in turns unlike say in front of Tower Bridge or the Eiffel Tower where it’s a free-for-all.
If you take any photos with or of any of the six murals in Nashville listed above after reading this blog post, tag me using @gabriellawisdom or use #postcardsfromhawaiiblog and I’ll share your photos on my Instagram Stories.
Our trip to Boston came about because we wanted to holiday/vacation with our friends from Canada. They had the idea of road tripping down from the east coast of Canada to Boston so we flew over there to meet them. We then headed on to New York City, which you can read about here, New York City, USA itinerary.
Boston Cream Pie -the official dessert of Massachusetts.
In total we had six nights, but a late arrival and early departure meant that we only had five days in Boston. Without tooting my own horn (which I completely am by the way) I would say we did a really great job of seeing what Boston had to offer. In those four days we learnt way more about the American revolution and civil war than I ever thought we would, rooted for the Red Sox at Fenway Park and ate enough chowder that I was probably about 70% Gaby and 30% soup by the end of our trip.
Day 1
Flight from London to Boston
Check into Aloft Marriott hotel
Day 2
Fenway Park
Red Sox baseball game
Day 3
Old Town Trolley Hop-on-hop-off tour
MIT (Old Town Trolley)
Cheers Bar (Old Town Trolley)
Boston Common and Boston Public Garden (Old Town Trolley)
Boston Public Library (Old Town Trolley)
Boston Tea Party ships and museum
Day 4
Harvard University tour with Hahvahd
Quincy Market
Faneuil Hall
Day 5
Freedom Trail walking tour (part 1/2) with National Parks Service
Old State House Museum
Quincy Market
Freedom Trail walking tour (part 2/2) with National Parks Service
Harpoon Brewery
Day 6
Civil rights walking tour with National Parks Service
Quincy Market
Souvenir shopping
Day 7
Amtrak train from Boston to NYC
Fenway Park
As you read this you will come to learn that Boston holds a lot of firsts. The first largest public library, the first city park, and Fenway Park is no exception. Fenway Park has been home to the Boston Red Sox – Boston’s Major League Baseball team – since 1912 and was the first MLB ballpark, making it the oldest.
PFH Interesting Fact: Given the context of this one, it is not a fun fact – Fenway Park opened the very same week that RMS Titanic sank and therefore received very little coverage in the media.
I believe the best way get to know a city is by foot, but of course that isn’t an option for everyone so I understand that it is an ideal mode of transportation for seeing a new city. As I mentioned we were travelling with friends who love hop-on-hop-off tours so I found Old Town Trolley who are top rated on Trip Advisor. They have 18 stops, all of which you can see here.
Of the 18 the following were the stops we got off to explore further:
MIT
Cheers Bar
Boston Common and Boston Public Garden
Boston Public Library
Cheers bar
Altogether now, “Where everybody knows your name”…
The Cheers bar on Beacon Street might look like the bar from the outside but heads up, don’t expect the interior. Inside you will find a large gift shop with a great selection of Cheers merch and a “set bar” which means it’s a bar that looks like you’re on the film set of Cheers, except that the bar actually functions, but it’s surroundings aren’t the same as the actual set of Cheers.
Pick up some merchandise and grab a beer if you’re a hardcore fan but if not, head somewhere else as it gets very crowded here.
Boston Common and Boston Public Garden
Opening in 1634, Boston Common – located in downtown Boston – is the oldest city park in the United States.
Located opposite Boston Common, Boston Public Garden is also a first of its kind: established in 1837, it was the first botanical garden in the United States.
There are two centuries between these two parks and the eras of their creation shine through their design. Boston Common was designed with practicality in mind: it had walkways that made travelling across town easier, and it was used for grazing livestock. Boston Public Garden however was decorative and representative of Victorian flair. The pathways were meant for strolling and appreciating nature.
Both are popular spots for both tourists visiting the city and locals seeking a break from the day-to-day.
Opening hours
The parks open every day from 6.30am – 11pm but are open to pedestrian access 24 hours a day.
Boston Public Library
In the late 1800s, the Boston Public Library was the first large free municipal library in the United States. It is home to some of the world’s most famous pieces of work such as a collection of William Shakespeare’s first editions and Mozart’s original scores. The 2018 figures for the library showed that they have over 23,421, 600 items in the library’s collection.
Those stats also show that in that one year the library received 3,590,293 visitors, but if you are one of them, be mindful of the people working and studying and be respectfully quiet as you gaze up at the beautiful architecture and admire their staggering collection of written pieces.
I’m not entirely sure that I would recommend doing this particular tour, it didn’t offer much information about Boston or the drop off points whilst en route and although the free and discounted access to local museums and attractions are useful, I’m not sure that it justifies spending the money on the Hop-on-hop-off ticket.
Opening hours
9am is the first pick up and 5pm is the last of the day.
Ticket costs
$41.54 per adult
$22.64 per child aged 4-12yrs
Under 4yrs go free
Ticket includes complimentary admission to the Old State House Museum and Dreamland Wax Museum.
Order the tickets online here for the cheapest price.
Boston Tea Party ships and museum
This interactive and experiential tour of the Boston Tea Party ships and museum will leave you knowing everything about the infamous Boston Tea Party right from the meeting that sparked the idea through to the aftermath of the rebellious actions that took place in Boston Harbour on 16th December, 1773.
Due to the museum’s immersive tour, this is definitely a great option for children who want/need to learn more about this important part of American history that was a defining factor in the country’s fight for freedom.
Opening hours
In Season: Monday – Sunday 9am to 6pm
Off Season: Monday – Sunday 9am to 5pm
Ticket costs
$29.95 per adult
$21.95 per child aged 5-12
Under 5yrs go free
If you do choose to do a tour with Old Town Trolley, remember you get $7.50 off Boston Tea Party Ships & Museum admission.
Harvard University tour with Hahvahd
Originally we were planning on taking the complimentary tour of Harvard led by students through the university itself but as we were there during the summer break, the tours weren’t running. Our friend found Hahvahd (a play on the Bostonian accent), an independent tour company which is still led by students.
The two downsides to the Hahvahd tour are that it is much bigger than the university-ran one is, so you have to stay close to be able to hear what they’re saying and you have to pay but I can honestly say I’m not mad at the cost. We learnt a lot of about the university and the tickets are reasonable.
The tour takes you around the campus (please note that you cannot enter any of the buildings unless you are a student or teaching faculty) whilst you learn about the pivotal points of the university’s history, its notable alumni, the architecture and traditions.
PFH Fun Fact: Women did not receive the same stature of degree upon graduating as men until 1999!
Legend has it that if you rub the toe of John Harvard’s left shoe you will be accepted into Harvard University.
Meeting point
Harvard Square
Opening hours
Daily, every half an hour between 10am – 4.30pm
The tour typically lasts 70mins.
Ticket costs
$14 per adult
$11.50 seniors (62+)
$11.50 children aged 7-17yrs
Free for children under the age of 6yrs
Quincy Market
Quincy Market gets its name from its creator, Mayor Quincy. In 1825 Mayor Quincy decided to build a market that would house the ever growing trade vendors who could no longer be housed in the small market place beneath Faneuil Hall.
Quincy Market has seen many changes over the years, all of which you can read about here, but its current usage is a food market which is home to 18 restaurants and 35 colonnade eateries of all cuisines at very reasonable prices. I have to say, I have been to a lot of food markets around the world and hands down Quincy Market is my favourite one!
As you can see in the image above, the building is called Quincy Market and locals still call it that, but if you search for it on Google Maps, it will come up as Faneuil Hall Market place (see map at the end for reference).
It’s very important whilst travelling that you try the local specialities so that you may broaden your horizons and better understand the location. As such, you cannot leave Quincy Market without trying the following Bostonian delights:
Boston cream pie (official dessert of Massachusetts)
New England clam chowder (especially from Chowder Co.)
Lobster roll
Opening hours
Monday – Thursday 10am – 7pm
10 am – 7 pm (Winter)
Friday – Saturday 10 am – 9 pm
Sunday 11 am – 7 pm
12pm – 6 pm (Winter)
Freedom Trail walking tour (part 1/2) with National Parks Service
Whilst taking a stroll through the shop stalls in Faneuil Hall the day before, I overheard an announcement about free walking tours covering parts of the Freedom Trail being led by the National Parks Service, whose hub is in the centre of Faneuil Hall. I had originally wanted to do the full Freedom Trail but as we didn’t have a lot of time and were travelling with a toddler, the short walking tours with NPS worked out to be the best option.
There were two Freedom Trail tours running that day:
Tours of the Freedom Trail: Meetings, Mobs & Martyrs
Tours of the Freedom Trail: Enemies to this Country
The Meetings, Mobs & Martyrs tour takes takes you to the following locations:
Faneuil Hall – a summary of tax and who didn’t have the right to vote
Old state house – an account of the Boston Massacre
Old South Meeting House – Boston tea party summary
Opening hours
Daily, May 27 – October 26, 2019 10 am
Daily, July 4 – August 31, 2019 10 am and 11 am
Meeting point
Faneuil Hall, downstairs
Ticket costs
Free
Old State House Museum
As the tickets for the Old State House Museum were free with our Old Town Trolley tour ticket, we decided to visit between our National Parks Service walking tours. To claim your ticket, show your Trolley ticket/confirmation email at the ticketing desk.
Built in 1713, The Old State House is the oldest surviving public building in Boston. Its purpose was to be the government offices of the Massachusetts Bay Colony. The Council Chamber of the Royal Governor, located upstairs, is open to those who hold a ticket to the museum.
The museum is home to both permanent and featured exhibitions covering moments in both Boston’s personal history such as the Boston Massacre, to larger events that shaped the United States Constitution.
Opening hours
Daily 9am – 5pm
Ticket costs
$12.00 per adult
$10.00 seniors (62+) & students
Free up to 18yrs
Freedom Trail walking tour (part 2/2) with National Parks Service
The Enemies to this Country tour takes you to the following locations:
Faneuil Hall
Rose Kennedy Greenway
Paul Revere’s house and Rachel Revere Square – personal history on the Revere family
Old North Church – a summary of the battles
Opening hours
Daily, May 27 – October 26, 2019 2pm
Daily, July 4 – August 31, 2019 2pm and 3pm.
Meeting point
Faneuil Hall, downstairs
Ticket costs
Free
Harpoon Brewery
I strongly recommend an afternoon/evening at Harpoon Brewery and beer hall if you enjoy drinking or sampling beer. It is a local brewery situated in Boston’s Seaport District that offers a guided tour of the brewery. Alternatively, you can choose to sit in the beer hall and sample/drink any of the beer from their full range. I don’t drink beer unless it’s fruity and Belgian and even I enjoyed the IPA UFO flight which featured grapefruit, peach and raspberry flavoured pale ales.
The beer hall is a great social setting with such a fun vibe through its top notch 80s playlist and wide selection of boardgames which anyone can play!
Opening hours
Sunday – Thursday 11am – 8pm
Friday – Saturday 11am – 11pm
Civil rights walking tour with National Parks Service
Out of the three Park Ranger led walking tours we took whilst in Boston, the civil rights one was by far my favourite. Of course each one is rich in history as the city was home to many pivotal points in American history, but this one was not only poignant for me as a bi-racial person, but also because the inequality between people of colour and white people and the plight for fair treatment that you learn about in this tour is not dissimilar to how society in the United States still operates today. It was also led with so much passion that it was hard not to be completely swept up in the movements throughout America’s black civil rights history. This tour takes takes you to the following locations:
George Shaw memorial
Bottom of Beacon Hill
George Middleton’s house
Philips school
Abiel Smith school (the segregated black school for the area)
Lewis Hayden’s house
African Meeting House
George Shaw memorial – Your guide will encourage you to look beyond the purpose of the memorial and really study and analyse its racist significance.
Each destination includes a small talk about the location, including its significance whilst featuring the stories and facts about the leading figures of the fight for civil rights and the underground railroad.
The tour ends at the African Meeting House which is next to the Museum of African American History, should you want to further your experience and knowledge, the museum ticket includes a timed entry to the African Meeting House.
Opening hours
Daily, May 27 – October 26, 2019 1pm
Daily, July 4 – August 31, 2019 10am and 1pm.
Meeting point
George Shaw memorial
Ticket costs
Free
PFH Top Tip: Although the tour starts at the George Shaw memorial, be sure to stop at the National Parks information centre in Faneuil Hall, and watch the video (shown on repeat) downstairs. The video tells the story of Lewis Hayden’s life journey from slavery to one of the most significant leaders in the underground railroad movement.
Souvenir shopping
If you’re looking for souvenirs, the best place to go is down the sides of Quincy Market. There are a couple of stores selling all the Boston classics from lobster printed this and that to Bostonian baked beans sweets. There’s a couple of sports goods shops too selling all the gear your could need for their beloved New England Patriots and Red Sox, plus there’s a bunch of stalls dotted all around selling everything from knock-off Harvard apparel to the real deal.
I was pleasantly surprised by how rich in American history Boston was. I did not go expecting to come away with so much knowledge about such pivotal moments in the history of the United States, but I am so pleased I did. I truly hope that if you take a trip to Boston that this blog post encourages you to learn more about America’s fight for independence and civil rights.
You know that special feeling you get when you receive mail through the door that isn’t an electricity bill, a flyer for an elderly care home or a fast food menu that doesn’t even have a voucher attached?! No, I’m talking when it’s something just for you, from someone you care about, that you didn’t know was coming, you know? Well, TouchNote took that and combined it with the digital era to create an award-winning app that allows you to send personalised postcards, greetings card and more via your mobile, tablet or desktop to your loved ones all over the world. In an instant you can send a photo from your travels, of your kids or pets, any cherished moment in time, and have it arrive through the mailbox of your nearest and dearest a few days later. It’s what TouchNote like to call “keeping in TouchNote”.
Why I use TouchNote
I have been using TouchNote since 2014, way back when Michael and I had officially put both of our names down on a lease for our first place together and wanted to send personalised Christmas cards out to our family all around the world. Since then I’ve using TouchNote to send birthday messages, thank you notes, Christmas cards and travel postcards to and from all over the world.
To get the best idea of why I love using TouchNote and how much it means to me and my loved ones, watch the video below created in collaboration with TouchNote.
What I love most about TouchNote is how easy it is to use their app to make something so unique and personal at such a low cost. I have been sending my best friends postcards for almost a decade now and though finding the most ridiculous cards I could get my hands on was fun, it was always a pain to then purchase a stamp and locate a postbox. Since using TouchNote I can do it all from my phone at one all-inclusive cost for printing and postage.
I sent this card to my parents’ next door neighbours in 2016. They lived next to my childhood home for years and are dear friends of the family. Michael and I set off for our 16 week long round the world trip where we visited their daughter who is living and working out in Sydney, Australia. They gave us a bon voyage card along with Aussie Dollars to spend on our trip, so to say thank you, we put together a few photos of us out in Australia on the TouchNote app and sent them a postcard.
It’s not only sending them abroad that is cost-effective though. I can send postcards to my parents in England from anywhere in the world and only have to pay English postage because it will be sent from Guernsey. So not only is it cheaper but I also know it won’t take weeks to arrive! You can read more about where they print and post plus delivery time under “Delivery” further down.
On the same round the world trip I mentioned above, I was able to send my parents postcards from Malaysia, Singapore, Australia, New Zealand, Hawaii, Las Vegas, the Grand Canyon, Hollywood, Yosemite, San Francisco, Seattle, Vancouver, New York and Rio de Janeiro in just three TouchNote postcards using their grid layout, at a fraction of the cost that it would have had I sent them individually from each destination.
Another brilliant bonus about having the TouchNote app is that it is my address book, no matter where I go. The app allows you to save addresses in the TouchNote Address Book, even when you’re not sending a postcard. So whenever I need to send something abroad, whether it’s a TouchNote card or not, I always go on the app to check my address book.
Sometimes you just can’t find the perfect birthday card, so TouchNote comes in handy for sending one from the heart. The first card is a postcard I sent my (not so) baby cousin, Rachel, for her birthday and it’s a collection of photos of us together over the years. She lives in New Zealand and I’m in England so we don’t get to see each other often, so each photo is extra special.
“I love receiving TouchNote postcards from my daughter from her travels around the world. TouchNote cards are more than just a postcard, it’s visually sending a little piece of her home. I see what she is seeing as well as her, it makes them so much more personal and keeping in touch is more enjoyable. The postcards all live on our fridge and are a constant and happy reminder for all to see.”
My Mum
Cost
To pay for postcards, greetings cards and more you need credits. A postcard costs just one credit and a greetings card is two. The cost of credits vary depending on the country you are in and how many you are purchasing. There are three ways to purchase credits:
Credit pack
The best value for money for just purchasing credits is to buy a credit pack. For a long time this is what I would do around Christmas because I knew I would be sending multiple cards all at the same time.
Credit pack prices vary on your location but they all offer a discounted price for buying in bulk. For current pricing click here to view them via the app.
Credits expire one year from the purchase date, so please remember to use your credits within a year.
Per card
If you only want to purchase one card you don’t have to purchase a credit pack, you can create your card and then simply pay for it at the end.
Premium membership
There are four types of Premium memberships: Bronze, Silver, Gold and Platinum. Each one offers various perks that greatly benefit users who send postcards every month and love to get creative with TouchNote stickers, borders and more! The perks included are:
Free postcards every month
Money off extra cards
Money off other photo gifts
Access to 100+ Premium designs and illustrations
Use of photo filters
Use of stickers
Personalised stamps
Add the location to cards
Bonus free cards during the year
What’s great about the premium subscriptions is that if you don’t use your cards for that month, they will roll over onto the next! So you can even be smart and bank a few every month ready for Christmas when you know you’ll have more to send out!
You also have the option to pay monthly or one upfront cost. To securely pay for your credits, TouchNote accepts Visa, Mastercard, American Express and PayPal.
TouchNote prints and posts cards from the UK, USA, Netherlands and Australia. This means that the cost of international postage is cut down drastically. I am so grateful for this because I send out Christmas and birthday cards to Australia, New Zealand and Canada so I know not only am I sending a personal and creative card with TouchNote, but I’m also saving money on postage.
As the printing location depends on the destination of your card, the delivery times can vary, but here is an approximation of how long it should take:
UK – 1-3 working days
USA – 2-5 working days
Europe – 3-5 working days
Australia – 2-4 working days
Rest of the World – 5-10 working days
Also keep in mind that postal systems work differently around the world so the delivery time does also rely on that.
.
So what are you waiting for? Send your loved ones a personalised message through the good old fashioned post and make their day. Whether it’s for a birthday, good luck, congratulations or just a reminder of how much you care for them, TouchNote will help you say it better.
Disclaimer: This is a paid post in partnership with TouchNote UK. Please know that I have been using them since 2014 and I only recommend brands I personally love and use myself.
After my recent trip to NYC I decided to share the playlist I made for my time in the Big Apple. Here are all 26 songs from my personal mix tape from classic Ol’ Blue Eyes, Frank Sinatra, to the Beastie Boys, there’s even some classic Broadway hits and some soundtrack numbers from films set in New York in there! It’s the ultimate New York City themed playlist.
To save you the hassle of having to put together the perfect NYC playlist I have made the PFH New York City mix tape playlist public on Google Play here and on Spotify here.
If you don’t have access to either of these I’ve listed them down below:
Theme from New York, New York, Frank Sinatra
Welcome to New York , Taylor Swift
Arthur’s Theme (The Best That You Can Do), Christopher Cross
Empire State of Mind feat. Alicia Keys, Jay Z
No Sleep Till Brooklyn, Beastie Boys
New York, New York, Frank Sinatra
Manhattan, Ella Fitzgerald
Englishman in New York, Sting
Another Rainy Day in New York City, Chicago
It had to be you, Harry Connick Jr.
Broadway, Ella Fitzgerald
My Shot, Lin-Manuel Miranda
Defying Gravity (From “Wicked”, Original Broadway Cast), Kristen Chenoweth
Big Spender (from “Sweet Charity”), Bette Midler
Moon River (from “Breakfast at Tiffany’s”), Audrey Hepburn
New York State of Mind, Billy Joel
Rockaway Beach, Ramones
Brooklyn Baby, Lana Del Ray
Jenny from the Block, Jennifer Lopez
Brooklyn, Steely Dan
New York, Ed Sheeran
The Only Boy Living in New York, Simon & Garfunkel
Native New Yorker, Odyssey
New York City Cops, The Strokes
I love New York, Madonna
New York, Paloma Faith
Fairytale of New York feat. Kirsty MacColl, The Pogues
Here it is, the blog post that so many of you have been asking for! Thanks for that by the way, it makes me feel like I’m doing a good job of this travel blogging thing.
Here is everything we did in New York City over seven days, it’s pretty jam packed I will confess, there’s just so much to do there, and there’s still so much more that I want to do. NYC definitely deserves more than a city-break-long-weekender kind of trip, it needs so much more time than that! I could easily spend weeks exploring this city, but alas I only had one, so yes it’s a full on itinerary (except for Sunday where I took a personal day).
Despite there being a lot on our itinerary, not a lot of the things we did involve entrance fees, so aside from the cost of accommodation, eating, shopping and transportation, a trip to NYC doesn’t have to be as expensive as one might believe. It’s up to you how you want to spend your money, but there is definitely an opportunity to budget, just take a read and you’ll be able to figure out what you want to spend money on and where you don’t need to!
Day 1
Amtrak train from Boston to NYC
Check into YOTEL
Hudson Yards
The High Line
Dinner at Wild
Day 2
Brooklyn Bridge
DUMBO and Brooklyn Bridge park
Strand Book Store
Coney Island
Times Square
Day 3
Times Square
Soul Cycle
Day 4
Rockefeller Centre: Top of the Rock
Central Park
Loeb Boathouse rentals
Hard Rock Café
Cheesecake at Juniors
Day 5
Hudson Yards
The Vessel
Katz’s Delicatessen
PUBLIC hotel rooftop bar
Macy’s
Day 6
Flatiron building
Novotel Times Square bar
Souvenir shopping
Oculus
9/11 memorial
Monarch hotel rooftop bar
Novotel Times Square bar
Day 7
The Metropolitan Museum of Art
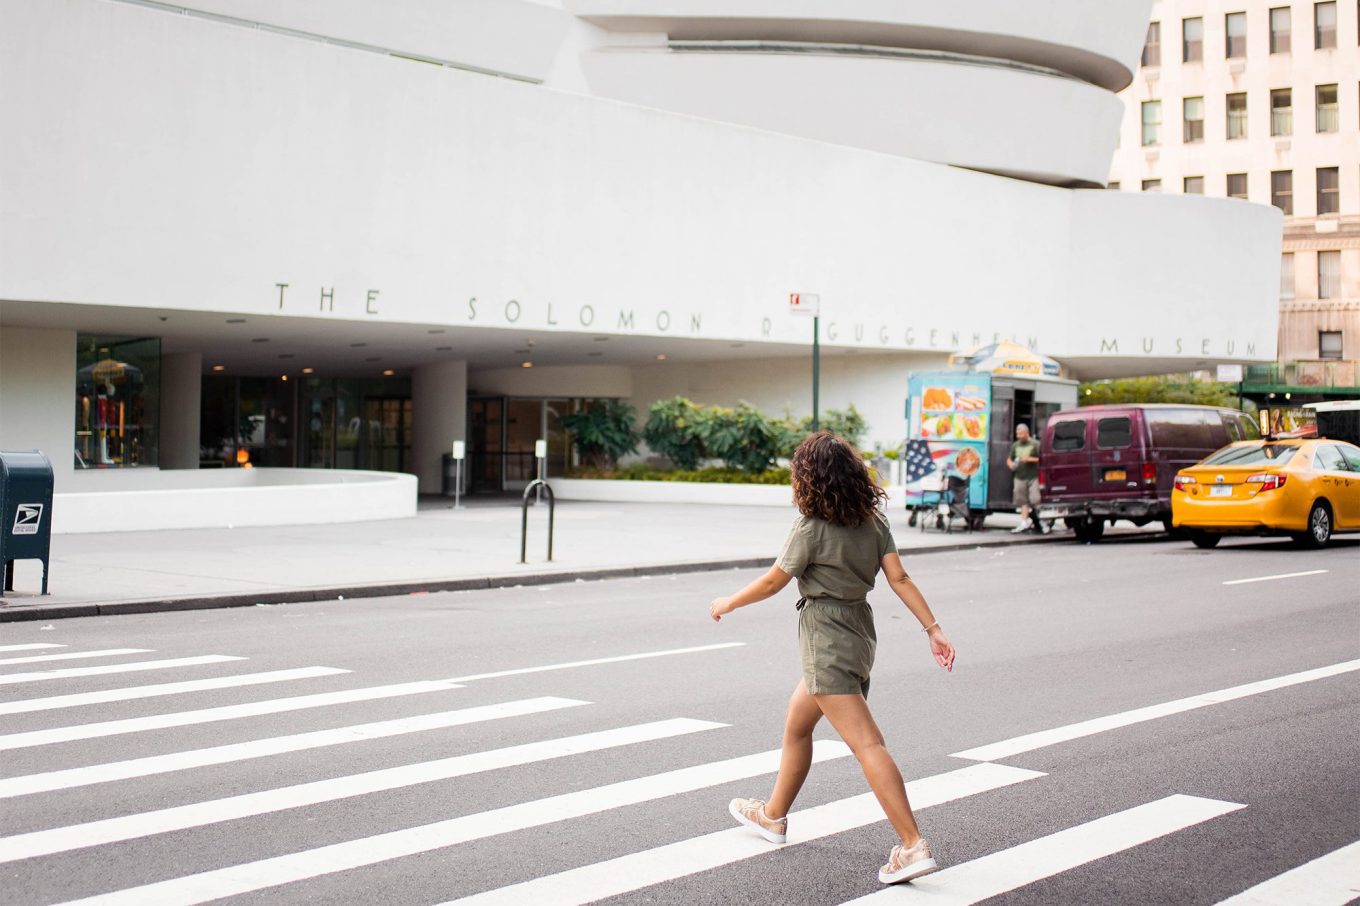
The Solomon R. Guggenheim Museum
Check out of YOTEL
Grand Central Terminal
American Museum of Natural History
Friends building
Pick up bags from hotel
Transfer to airport
Flight from JFK to LGW
YOTEL
I only have one negative thing to say about my trip to NYC and unfortunately it’s the very first thing in this itinerary, but once I’ve said it, we can all move on and you will know what to expect if you book with YOTEL…
Honestly I can’t say I would ever recommend YOTEL. I’ve stayed in a lot of budget hotels and private hostel rooms around the world, but something about YOTEL really takes the biscuit (Brit slang, it’s sucky). When choosing a hotel, we wanted to be in Manhattan so we were closer to the attractions we wanted to see and do, so we were prepared for sky-high prices. We made a decision between Moxy Times Square and YOTEL, choosing YOTEL because it was £100 cheaper and we figured that would pay for food for one day, which it did, but having stayed in Moxys before and now having stayed in YOTEL, I now would pay the extra £100!
New York City is known for small apartments, we all know that from movies, TV and Mindy Kaling’s first autobiography: Is Everyone Hanging Out Without Me? With the exception of Rachel and Kurt’s gigantic apartment in Glee, we all know you live in a shoebox in NYC, right? Well YOTEL is like staying in the shoe of a shoebox.
What bugs me the most is how it’s marketed. It is shown to be a contemporary hotel with a travel theme: clean, modern pod-rooms, a retractable bed and a robot, “Yobot”, who stores your luggage before or after check out. In reality, the lighting in the room is so poor that the risk of the business blocks opposite seeing you in your pants whilst you get changed seems like the better choice compared to tripping over under their purple lights with the blinds closed. The entire room – from the shower floor to the bed – is scuffed up and looks like it has seen better days, you get thrown off the WiFi every 10mins and the bed takes longer to go up and down than a taxi going from East to West in Midtown Manhattan during rush hour. Oh and this Yobot that stores your luggage? No, it’s a human, a cupboard and a charge of $2 per bag! Even in the most basic hotels I’ve stayed in, I’ve never had to pay for luggage storage. Plus they hounded Michael about using their transport service because according to them it was coming up cheaper than Uber but we actually got charged about $20 more than an Uber when we got to the airport, and it was not a pleasant ride.
I don’t usually use this space in such a negative way, but I don’t want to recommend a hotel that doesn’t deliver on the way it’s marketed. I’ve stayed in old banged up rooms around the world before, once even in NYC, but they never led you to believe they were anything more than old charm. I could deal with the room size, and we just left the bed extended for fear it was going to break down, we overlooked the scruffiness of it, but it irritates me that it had so much potential and was ultimately a let down.
Hudson Yards
Hudson Yards in a newly developed area, which was just a 12min walk from our hotel in Midtown Manhattan. A lot of money is being pumped into this area facing the Hudson River; there’s a huge highbrow shopping mall, the Vessel (which you can read about further down) and it’s where the High Line starts.
The High Line
The High Line is 1.45-mile-long elevated greenway repurposed from an old railroad track that runs along the west side of Manhattan. It is home to over 500 species of trees and plants, features multiple pieces of artwork from sculptures to murals and regularly hosts community and teen programs.
Click here to read about the history of The High Line from the 1800s all the way through to present day, it features some amazing photos of what the train tracks used to look like way back when.
There is no entrance fee for The High Line.
Wild
Though I didn’t starve myself like the itinerary would imply, I have only included a select few restaurants that we ate at to speak about. I chose to include Wild because it is a solely gluten free Italian cuisine restaurant, and better yet, they have a vegan cheese substitute for any of my dairy and gluten free/vegan readers.
Of course, if you’re not gluten/dairy free and don’t run the risk of bloating to the size of a Macy’s Thanksgiving Day Parade float, go grab a $1 slice of pizza from pretty much anywhere in NYC.
Brooklyn Bridge
The best time to visit Brooklyn Bridge is sunrise. It is an incredibly popular destination for tourists, runners and cyclists and having crossed it at both 6am and 9.30am, I can tell you that you do not want to be on it once the sun is up!
My suggestion is to take a taxi/Uber to the pedestrian entrance of the bridge just before the sun comes up, so by the time you are where you want to be – which ideally is by the arches – there will be enough daylight to take photos. Then you can continue walking it before the hoards arrive.
If you are coming from Manhattan, you need to be dropped off at City Hall Station, where you will cross the road to the island in the middle which has a pedestrian walkway leading you onto the bridge.
If you are coming from Brooklyn, you need to be dropped off on the corner of Washington and Prospect Street where the entrance to the bridge is underneath it, on the right hand side and in the middle. There’s a dark little entrance with a set of stairs heading up to the pedestrian walkway. I do have to say that despite walking both up and down these stairs at different times of the morning, I can see that on Google Maps street view, the entrance is barricaded off and as I don’t know why, I suggest you start at the Manhattan end.
Dumbo and Brooklyn Bridge park
When you have finished walking across Brooklyn Bridge from Manhattan, take the exit on the left that says “Dumbo”. Once you have come down from the bridge and reached the street level again, turn left out of the tiny dark exit/entrance from underneath the bridge, and walk out until you are at the crossing. The street crossing your path will be Washington Street, and if you look to your left you will see Manhattan Bridge poking out between the buildings. Take a left onto Washington and walk towards the bridge. When you reach the corner of Washington and Water Street, you will be looking up at the most iconic view of Manhattan Bridge!
Once you have taken those oh-so-necessary photos of the bridge, continue walking down the road (on the sidewalk so you don’t block anyone else’s shots) towards the waterfront. There is where you will find Brooklyn Bridge park which offers amazing views of both Brooklyn Bridge, Manhattan Bridge and Manhattan’s skyline.
Strand Book Store
Strand Book Store is a 90 year old independent book store located in the East Village, and boasts a collection of 2.5 million new, old and rare books. If you or someone you are travelling with is a book lover, this is the place to visit. With a rather large collection of pins, badges, stickers and patches, it’s also an ideal place for the designer amongst you to pick up a little souvenir.
Opening hours
Monday – Sunday
9.30am – 10.30pm
Coney Island
The first time I went to Coney Island was three years ago and I was drawn to it after watching “Brooklyn” (2015). Of course, anyone who has been to Coney Island in recent years knows that its charm isn’t quite the same, but if you’re looking for a loud afternoon of fun in a small theme park by the beach, Coney Island is just the ticket.
With a variety of attractions from crazy golf to rollercoasters, endless food vendors and the beach, everyone is sure to be entertained.
Coney Island musts:
Ride the Wonder Wheel, specifically a swinging car
Get a hot dog from Nathan’s
Let the Zoltar tell you your fortune
Visit the beach
PFH Top Tip: There are multiple parks in Coney Island, so before you buy a pass, make sure the rides you want are in that park. For example, the Wonder Wheel is in Deno’s park and not Luna Park.
Opening hours
The Wonder Wheel is open seven days a week from June until Labor Day from 12pm.
Weekends only during April, May, September and October from 12pm.
Closed November – April.
Closing times vary according to weather conditions.
Ticket costs
Tickets for the Wonder Wheel cost 10 credits per person which is $10, or you can purchase one of the following packs:
$40.00 gives you 50 Credits
$70.00 gives you 100 Credits
$100.00 gives you 150 Credits
Times Square
Located at the junction of Broadway and 7th Avenue, Times Square is one of the world’s most visited tourist attractions, drawing in approximately 330,000 EVERYDAY! This mesmerising display of advertisements and news headlines is lit up 24/7 365 days of the year with Earth Hour being the only exception!
PFH Top Tip: The TKTS booth – selling discounted Broadway theatre tickets – is located in the heart of Times Square under the staircase. Get there for when it opens to stand a chance of beating the massive queue that forms there daily!
Rockefeller Centre: Top of the Rock
As my last two trips to NYC featured a visit up the Empire State Building, this time we decided to go to the Top of the Rock at the Rockefeller Centre. Now I can’t say that you shouldn’t visit the Empire State Building once in your life, but the view from the Top of the Rock is far superior because it features the Empire State Building.
I have two strong recommendations for the time you want to visit and each depend on the type of experience you want to have. The first is to visit first thing in the morning when it’s most quiet. This way you can get all the photos you want without having to battle through a crowd. As there are three levels of viewing platforms, for the first half an hour, it’s like having the place to yourself, even if you go in the middle of summer. The second option is to do what we did up the Empire State Building during our last visit, which is to check what time the sun sets, then book your ticket for about 30-45mins before this. That way you have enough time to queue, see daylight (crisp photos), sunset (when the sky is on fire) and sundown (where the city lights come to life). Of course this last option will be much busier and unfortunately there is an extra $10 fee for any tickets that could cross over sunset, but it’s worth it if you can handle the crowds and don’t mind the extra cost.
Opening hours
Sunday – Saturday
8:00am – 12:30am
Last elevator up at 11:40pm
Ticket costs
$38 for adults
$32 for children aged 6-12yrs
$36 seniors (65+)
+$10 for sunset hours. Look for the sunset icon on the ticket times here.
Central Park
Central Park is the most famous urban park in New York City despite being only the fifth largest park in New York it is most definitely the most popular one, attracting somewhere between 25- 45 million (because no one on google has given the same number) people every year. There’s so much to see and do in the park, the most popular sights being: Strawberry Fields, Bethesda Terrace and Loeb Boathouse…
Opening hours
Daily from 6am – 1am
There is no entrance fee for Central Park.
Loeb Boathouse rentals
The rowboats out on the Central Park Lake have been rented out for over 150 years, and depending on how well you and your other half get on, is one of the most romantic things you can do in the city, again depending on how many arguments you have.
PFH Top Tip: Avoid renting a boat during the midday sun. There is no escape from it once you’re out on the water, and nothing to stop your butt from frying like an egg on the metal seats. Michael and I were taking it in turns to mop up our sweat with a towel it was so incredibly hot. Save yourself!
You cannot book in advance, they are rented out on a first come first served basis.
Opening hours
April – November (weather permitting)
Daily from 10am – sundown
Ticket costs
$15 per boat for a 1 hour rental +$20 deposit which is paid back to you when you return the boat. You must keep hold of your receipt and hand it over to the desk (behind where you paid) upon exiting to get the $20 deposit back. You’d be surprised how many people forget to do this.
Boats hold up to 4 passengers.
There is an extra charge for each additional 15mins the boat is out on the water: the website says $4 but the sign on the fence says $3 so do with that what you will.
Boat rentals are paid for in cash only, there is an ATM at the entrance of the boathouse restaurant.
Cheesecake at Juniors
How can you go to New York and not indulge in a slice of New York Cheesecake? Rated “Best Overall” by the Wall Street Journal, we popped into Junior’s on W 45th St to grab a slice of their plain NY cheesecake, and it did not disappoint. I only tried a couple of bites of Michael’s but I can tell you that (excluding my Brother’s) it was the best plain cheesecake I’ve ever had. It was rich but light and sweet but not sickly (then again I only had two bites).
PFH Top Tip: If you want to save time, buy your cheesecake to go next door out of their little cheesecake shop, but bring reusable cutlery as they only have plastic forks.
Opening hours
Sunday – Thursday 6:30 am – 12 am Friday – Saturday 6:30 am – 1 am
The Vessel
The rose gold beehive shaped structure has become the centre piece of Hudson Yards. Thomas Heatherwick designed this interactive artwork so that people could see new perspectives of NYC from different heights, angles and vantage points. There are 154 interconnecting flights of stairs with 80 landings so you never have to fight for a photo opportunity!
Opening hours
Monday – Saturday 10am – 9pm
Sunday 11am – 7pm
Ticket costs
Tickets are free if you are happy to reserve a certain time of day in advance online.
Same day tickets are free from their ticket booth onsite.
If you require an open ticket, there is a $10 charge per person.
Katz’s Delicatessen
If you haven’t watched “When Harry Met Sally” why are you even here? Go now and watch it, then come back to me and finish this blog post, I don’t want you to miss out.
If you have watched it, then you know that Katz’s Deli is the setting for Meg Ryan’s world famous “I’ll have what she’s having” scene. If you’re lucky you might even get to sit at the exact same table! On that day, the stars alined and my butt graced that same seat as Meg’s when we walked in! There’s a sign above it so you’ll know exactly where to go.
When you enter you will be given a pink ticket (DO NOT LOSE THIS TICKET), if you want a chance of sitting at the When Harry Met Sally table then don’t opt for the table service. Of course it means you might have to circle for a while but that table isn’t available otherwise. To order your food, go to the counter and pick something from the board above. Hand over your pink ticket for them to scribble your order on and put it somewhere safe. Drinks must be ordered at the far end of the counter, separately to the food. Once you’ve eaten, you pay. If you’re paying by card, go to the far end of the counter where the drinks are, and if you’re paying by cash, you pay at the desk at the front. You cannot leave without handing over your pink tickets that say you’ve paid.
Heads up, a sandwich will set you back about $25 BUT it will feed you for about 2 days.
Opening hours
Monday – Wednesday 8am – 10.45pm
Thursday 8am – 2.45am
Friday 8am – open all night
Saturday Open all day
Sunday Open until 10.45pm
PUBLIC hotel rooftop bar
Credit to finding this rooftop delight goes to Julie from @julieknailsnyc. After you’ve lined your stomach (and arteries) at Katz’s Deli, walk 6mins to PUBLIC hotel’s rooftop bar for some insane views of New York City from Brooklyn to Manhattan.
Entrance to the rooftop bar is on Chrystie St through the car park in onto the skinny black tent which feels like a sauna on a summer’s evening.
PFH Top Tip: Arrive close to opening time to avoid the reservation cover charge which basically asks for your kid’s college fund – ok I exaggerate, but seriously $300 for two people is A LOT! We spent close to $150 on two drinks for me and five for Michael and he was HAMMERED, so these couples who who can spend $300 booze should really be putting it towards the medical bill for when their stomach gets pumped… just saying.
Also, tables are given to reservations only, but if you arrive early you can sit at one until the booking arrives.
I do have to say that as amazing as the view was at PUBLIC the staff were less than satisfactory. The bartender was too busy on Snapchat to serve us (more than once), one waitress took off with our food before we finished it and another took me out, spilling my drink all down my leg and didn’t apologise. So just know that you’re going for the view, not for the service.
Opening hours
Monday – Wednesday 5pm – 2am
Thursday – Friday 5pm – 4am
Saturday 4pm – 4am
Sunday 4pm – 2am
Entry is aged 21 and over
Macy’s
Macy’s Herald Square is not only the largest Macy’s in America, but it is also the world’s largest department store. Covering an entire city block, the eleven (yes, eleven!) floors carry the most coveted styles for both you and your home.
PFH Fun Fact: It was the first building in the city to have modern-day escalators. They were wooden, and some of them are still in use today.
Opening hours
Daily from 10am – 10pm
Flatiron building
The Flatiron building is a triangular landmark that stands 285ft tall on 5th Ave in the Flatiron district (named so before the building was constructed). Shaped like a perfect right triangle, it measures only six feet across the narrow end.
Check out history.com‘s article on the Flatiron Building for a deeper history and some fun facts on the building.
Novotel Times Square bar
Instagram is a great place for finding travel inspiration, and it is where I found out about the Times Square Novotel’s outdoor terrace with awesome views of Times Square.
If you’re visiting in the morning, bring your reusable coffee cup and sip it as you watch everybody hustling to work and in the evenings grab a drink in the terrace bar and gaze across at the twinkly screens.
Souvenir shopping
There are souvenir shops scattered all over the city but the most you’ll find in one area is Times Square. Don’t be fooled into thinking they’re cheaper the further away from Times Square you are. Walking from the Novotel toward Times Square, we went into six souvenir shops and the prices kept dropping until we got to Grand Slam New York (opposite the TKTS booth in Times Square), where the prices were $10 cheaper than the first store we went to.
Iconic NYC souvenirs include:
An I love NY T-shirt – make it fashion
A snow globe of the city – like the one in Elf
PFH Top Tip: If you are a UK size 10 or US size 6 and under (and not too busty) grab a children’s T-shirt because their sizes run big and so much cheaper! Save that dollar!
Oculus
The oculus is a structure over the top of the Westfield shopping centre which sits on top of the World Trade Centre subway station, and is a popular photo spot due to its unique structure. Santiago Calatrava designed this steel and glass structure to represent “a bird flying from the hands of a child.”
9/11 memorial
Pay your respects to those whose lives were lost during the two attacks on the World Trade Centre on both February 26th 1993 and September 11th 2001. Two 1 acre water features stand in place of the Twin Towers and are the largest man-made waterfalls in the United States. Each fountain is surrounded by a bronze parapet, inscribed into it: the nearly 3,000 names of those lost in both attacks.
“Names are stencil-cut into the parapets, allowing visitors to create paper impressions or rubbings of individual names. At night, light shines up through the voids created by each letter of a name.” – 9/11 Memorial & Museum website.
Opening hours
The memorial is open daily from 7.30am – 9pm
The only exception is that is closes on the anniversary.
Monarch hotel rooftop bar
I take zero credit for this one as it was my friend, Johanna from This Wanderlust Heart, who booked our reservation at this bar.
Monarch hotel sits in the very heart of Manhattan; its penthouse bar looking directly up at the Empire State Building. The playlist is killer, as is the menu and the staff are exceptional. It’s also one of the very few bars in NYC that you can make a reservation at without having to sign away your first born or life savings for the minimum spend.
The Metropolitan Museum of Art & The Solomon R. Guggenheim Museum
As our sole purpose of visiting these two museums was to get product shots outside of the buildings, we went much earlier, but you can learn more by reading Round the world trip activities itinerary Part 2 which features both of them and the Cooper Hewitt Smithsonian Design Museum. That blog post features the opening hours and ticket costs for all three museums (published 2019).
Grand Central Terminal
If I’m honest, the first reason I ever wanted to visit Grand Central Terminal was because it’s where Justin Timberlake’s character in “Friends with Benefits” organises that very of-its-time flash mob scene to express his love for Mila Kunis’ character. The second reason is to gaze up at its celestial ceiling mural.
PFH Fun Fact: The original mural was covered and painted over in 1944 as the roof was leaking and the mural had gone mouldy. Unfortunately the mural that replaced it carries only a fraction of the detail the original one did.
American Museum of Natural History
On our last day, we had an afternoon to kill so we decided to spend it strolling through the wonderfully air-conditioned and highly educational American Natural History Museum. The museum has over 40 exhibition halls displaying a wide variety of their 32 million artefacts and specimens stored within the grounds. It’s impossible not to learn something fascinating there.
Whilst you’re in the gift shop, pick up one of 4ocean’s bracelets from the museum’s extensive collection. You can pull a pound of rubbish from the ocean and learn all about the planet we live on in just one day!
Opening hours
Open daily from 10am – 5.45pm
Closed on Thanksgiving and Christmas Day
Ticket costs
If you don’t want to queue then general admission is:
$23 per adult
$13 per child (aged 2-12yrs)
$18 for seniors and students
PFH Top Tip: Buy your ticket at the ticket desk in the museum and pay-what-you-wish for admission. You can pay absolutely anything you want, but make sure you request this at the desk or they will charge you their recommended ticket cost. Of course I don’t suggest you don’t pay anything, but if you have a tight budget or don’t intend to stay all day, it’s ideal.
Friends building
When it hasn’t been your day, your week, your month, or even your year: the Friend’s building will be there for you. The very last thing before grabbing a bite to eat (at Wild again which was only a few minutes walk from here) was to make a trip to see the building which was used for all the exterior shots for Joey, Chandler and Monica’s (and everyone else who lived there at one time or another) building.
It’s really nothing spectacular, but if you’re in the area and a fan of the show, it’s worth a visit.
There you have it, everything noteworthy that we did in the city that never sleeps, and as you can tell, neither did we. A trip to NYC can be whatever you make it, whether you’re interested in the nightlife, architecture, history, culture, fashion, food… you name it, this city has it all.
Having been to New York City before, we passed on a few of the most iconic attractions that we had already done such as the Empire State Building and the Statue of Liberty. If you do want to read more about my last trip to NYC where I did these attractions take a look at Round the world trip activities itinerary Part 2.
Just as Bananarama put it, it’s a cruel, cruel, cruel summer! Especially in the city where gridlocked exhaust pipes, steaming manholes, skyscraper outputs and outrageous levels of humidity wreak absolute havoc on your skin, not to mention your sanity! Are you dealing with the woes of a shiny face, clogged pores, tired eyes from sweaty sleepless nights and just constantly overheating? Don’t worry, together Anatomicals and I have got you. With just five products we can take you from hot mess to a breath of fresh air.
We’ll cool you again later, facial spritz
Sweating in places you’ve never before, not even after a good gym session? Feeling like the sun has a personal vendetta for your body temperature? This facial spritz is your quick fix to cool you off, helping you to think straight again.
“At home. At work. On the bus. At lunch. Even when you’re just idly walking along the street. Wherever you are and whatever you’re doing, we’ll cool you.” – Anatomicals.
Anatomical’s cooling spray is formulated with rose extract which reduces skin redness, peppermint which reduces daytime fatigue and my personal favourite, lavender which reduces stress and anxiety. Combined, they are perfect for soothing your face in the hot and sticky moments. Plus, they all have anti-inflammatory properties which is ideal for calming that unwelcome swell the heat brings.
Directions for use
Close your eyes and directly spritz onto your face. Leave on or remove excess with a cloth of reusable pad.
You can purchase We’ll cool you again later, facial spritz from Superdrug.
Grease isn’t the word. (Tell me more, tell me more). Mattifying face mask
This mattifying face mask eliminates toxins and tightens pores to leave your skin feeling fresh and clean. It also works to prevent surface moisture and shine whilst reducing any blockages.
It’s a great product for anyone who has combination or oily skin, but it’s perfect for helping to reduce your shine during the summer months. It’s ability to prevent surface shine means your makeup stands a better chance of staying put and not half way down your face like a sad clown – that is if you wear any.
Before I had a little pamper evening with this face mask I was constantly dabbing my lip and forehead to hide my shiny face, but after using it, that shine significantly reduced.
“Not only has it got groove, it’s got meaning to so many people with greasy skin.” – Anatomicals.
Directions for use
Cleanse and dry your face
Open the packaging at the bottom
Apply evenly over your face and neck with your fingers, avoiding the eyes and lips
Relax for 5-10mins or until it’s dry
Rinse off with warm water
Pat dry
For best results, use weekly
You can purchase Grease isn’t the word. (Tell me more, tell me more). Mattifying face mask from the Anatomicals website or in a set from ASOS.
And you can clear off muslin face cloth & 4 face masks
This set of face masks features all of Anatomicals best ones for fighting spots/zits/pimples and blemishes. The nasty city pollution will clog up your beautiful pores which can lead to those blemishes so the following four masks will help to prevent, protect and purify your skin after exposure to harmful emissions:
Urban grime’s had its time, anti-pollutant face mask
Farewell the scarlet pimplehell, deep cleansing mud mask
No breakouts. It’s Alcatraz for spots, purifying charcoal face mask
The hottie tottie is never spotty, anti-blemish face mask
“Formulated with cilantro and orange extract to help reduce the visible effects of pollution, it helps strengthen cells against environmental damage.” – Anatomicals, anti-pollutant face mask.
Directions for use
Cleanse and dry your face
Open the packaging at the bottom
Apply evenly over your face and neck with your fingers, avoiding the eyes and lips
Relax for 5-10mins or until it’s dry
Rinse off with warm water
Pat dry with the muslin cloth provided
You can purchase And you can clear off muslin face cloth & 4 face masks from ASOS.
Puffy the eye bag slayer, wake-up under eye patches
Let’s face it, there’s very little chance of getting a decent night’s sleep during those long sticky nights where you’re tossing and turning more than an Italian making a carbonara sauce (yeah I want that too now). So with those sleepless nights comes impending dark circles and more baggage than your best friend’s ex.
These under eye patches will reduce dark circles, eliminate puffiness, moisturise and they fight signs of under eye ageing.
These are probably my favourite Anatomicals product. No matter how little sleep I’ve had (whether it’s from a late night or early start) these always reduce any puffiness and dark circles under my eyes.
“A product to make you look less dead.” – Anatomicals.
Directions for use
Cleanse and dry your face
Open the individual package and remove the patches
Apply the patches under your eyes
Wear the patches for 30mins
Remove them and continue your morning routine
You can purchase Puffy the eye bag slayer, wake-up under eye patches from ASOS.
No old bags allowed, eye gel
If you want to try to beat those under eye bags, pop a little of this gel under your eyes before you apply your moisturiser in the evening. It’s also great for when you don’t have 30mins to treat your eyes to the patches. No judgement, get your sleep where you can!
Formulated to cool your skin, it will reduce any puffiness and soothe the most delicate area of skin on your face.
“Eyes are the windows to the soul. Don’t allow yours to look like they belong in a derelict building that’s just been vandalised again, by keeping this tightening gel handy.” – Anatomicals.
Directions for use
Apply a small about under the eye area.
You can purchase No old bags allowed, eye gel from ASOS.
When I first arrived in NYC in the middle of August I was dying in the heat. The humidity was so bad my hair was expanding faster than Monica Geller’s when she went to Barbados (Friends reference), my face was shinier than an Academy Award and my swamp ass was real! For a couple of days I preserved these products so that I could get photos of them around the city but once that was done I put them to good use straight away, and seriously they were a game changer.
I have been using Anatomicals products for years, long before I started working with them, and honestly can’t see a day where I would stop using them. To see more featuring Anatomicals, check out How to recover from jet lag with Anatomicals.
Lavender has blown up over the last few years and like pretty much everything that’s popular these days, it’s due to Instagram. As someone who uses Instagram for work I’m not mad at it, however, the behaviour displayed on the app and the examples being set can sometimes have a damaging effect. Unfortunately, the increasing desire to get that shot for the ‘gram in a lavender field has led to inconsiderate behaviour over in the fields of Provence.
It has come to light that in their desperation to get their own shot of themselves frolicking in rolling fields of lavender, people are flying to Provence in France and trespassing onto farmers’ fields, picking the lavender, stomping on the plants when they want to cross rows and there isn’t a gap and leaving rubbish. It’s easy to think a few sprigs of lavender won’t be missed but these fields are farmers’ livelihoods; it’s how they’re paying bills and providing for their families. To draw upon the DVD piracy campaign (are these even on DVDs anymore?), you wouldn’t steal a car, so why would you steal someone’s lavender stock? Whether you are using Instagram for work or pleasure, you are making an impression on someone, and therefore it is so important to lead by example.
So how can we solve this (whilst saving money)? Instead of entering someone’s field, visit the fields dotted around England where you can get a responsible, rewarding and legal experience. Sure, there are entrance fees or tour costs but you actually get to learn about the lavender plants and pick it guilt free.
The most important thing is to share with others about responsible tourism. Educate your followers, whether there’s 42k or 42 of them, about visiting a field that is supporting the industry as well as giving you the opportunity to get that all important Instagram-worthy photo.
I’m sharing Norfolk Lavender with you not only because you’ve asked to see more local content on here, but because it offers so much more than a lavender field. It really is a great day out for everyone. Entrance is free, there’s a café, gardens, a huge gift shop, a plant nursery, a farm shop and an animal garden and play park for children. Plus, in summer, when the lavender is in full bloom, they offer tours of both their lavender distillery and their new lavender field for a reasonable price. Read on for everything you need to know about visiting Norfolk Lavender.
Getting there
Norfolk Lavender is conveniently located in the countryside but close to the seaside in Heacham, West Norfolk. This means your day out doesn’t have to end there, Hunstanton (a popular and typical seaside town) is just 3 miles down the road. So if the intoxicating smell of lavender doesn’t do it, the sea air will guarantee you a great night’s sleep.
Parking at Norfolk Lavender is free.
Opening times
Monday – Sunday
9am – 5pm March – October
9am – 4.30pm November – February
Accessibility
All of the attractions at Norfolk Lavender are on one level so everything has full wheelchair accessibility plus there are two toilets for people with disabilities. I do just want to point out that the gift shop is split over two levels inside with stair-only access, however if you go back outside and around the building you can gain access to the second level without stairs where the ground naturally slopes. They also have a wheel chair available for guests to borrow but you must reserve it in advance.
Tour
In the peak months of lavender bloom Norfolk Lavender offer a tour in their newest field, Torrey’s Field. The tour lasts 45mins and includes a visit in the field with an opportunity to take photos and pick your own lavender, facts about plants, a history of Norfolk Lavender and a visit to their distillery.
The tour dates vary year to year depending on the crop so it can be anytime between June – August. Check the Norfolk Lavender website to be certain.
Tour times
11am, 12 noon, 1pm, and 2pm.
Ticket cost
£5 per person.
Tickets are purchased in the gift shop.
Tour cap off at 15 people max.
The Lavender Lounge tearooms
Though the presentation of the food leaves something to be desired, it is very good. They serve a good variety of snacks and meals from cakes and scones to sandwiches and hot meals.
I strongly recommend you try a slice of their lavender cake. Unlike most lavender flavoured or infused foods, the cake perfectly balances the lavender taste and goes down nicely with a coffee or a cuppa. They also serve up a great variety of generously filled sandwiches.
There are plenty of tables both inside and outside so you have a very good chance of getting a seat, but keep in mind that if you sit outside you will be surrounded by bees and wasps because they are attracted to the surrounding plants.
Breakfast 9am -11am
Light Bites 11am – 3.30pm
Lunch 12pm – 3pm
Gift shop
Norfolk Lavender was founded in 1932 and is now England’s best lavender farm. If me telling you isn’t enough then maybe you’ll trust the Queen of England. Norfolk Lavender has been growing lavender on HM The Queen’s Sandringham Estate since 1936 and currently holds a warrant of appointment from HRH The Prince of Wales, Prince Charles for all of their products.
Their gift shop has the largest variety of lavender products I have ever seen anywhere in the world, with everything from lavender infused food to beauty products, and trust me when I say they are some of the best lavender products you will ever use.
Aside from having every lavender product you could possibly imagine, the gift shop expands further down into the building to reveal kitchenware, children’s toys, gardening tools, food and so much more. It’s impossible for me not to buy something every time I visit.
All of their lavender products are available to buy through their online store but you can also find a list of stockist here.
Plant centre
As you exit the far side of the gift shop, there is a purple hut selling gardening items such as tools, seeds, bird feeders etc. Pass through this shop and you will enter the plant nursery where you will find the largest range of lavender products on sale in England, plus many other plant varieties.
Gardens
As you enter Norfolk Lavender from the car park, take the small entrance to the left of the gate for the opportunity to walk through their herb and lavender garden.
This small garden is not only a great place to see the different varieties of lavender but it is also another opportunity for photos. The field is best for shots within long rows of lavender, but the garden has lavender bushes that have grown higher so you can get photos that appear like you’re more nestled into the lavender.
For a further stroll into their grounds, from the plant nursery, turn right and cross over the bridge to gain access to their gardens. It’s a pleasant place for walking off your slice of lavender sponge cake or for children to play away from the plants.
Farm shop
Opposite the ground of Norfolk Lavender, on the side of the car park, is an award winning farm shop, Walsingham Farm Shop, selling fresh and local produce. I’ve picked up a bite to eat a few times from here when either The Lavender Lounge is full or has stopped serving food, and I’ve enjoyed everything I’ve bought from there. If you are planning on bringing anything back home from the farm shop, I suggest bringing a cool bag/box in the car as you are most likely visiting in summer.
Opening times
April – October
9am – 5.30pm Everyday
November – March
Monday 10am – 4pm
Tuesday – Saturday 9am – 5pm
Sunday 10am – 4pm
Animal garden and play park
I haven’t been here because I don’t have kids but I know people who have been with theirs and have enjoyed it. To get all the information you need to visit click here.
For the history of England’s lavender, click here to read a summary on Norfolk Lavender’s website.
.
As amazing as Norfolk Lavender is, I have to be honest the most spectacular lavender field that I have visited is Hitchin Lavender. It is located near Luton (about 1hr 30mins drive from central London) and is the biggest lavender field in England.
Their field is designated to visitors who want to cut their own lavender to fill a bag that is provided with your entrance ticket of just £6 per adult and £3 per child aged aged 5-14 yrs (under 5 yrs go free). However, there isn’t as much to do at Hitchin Lavender as there is at Norfolk Lavender and they don’t offer nearly as many products as Norfolk Lavender does, so I will say it depends on where you’re located, how far you’re willing to drive and what kind of experience you want to have.
A haku lei is a Hawaiian lei worn around the head, otherwise recognised as a flower crown. Usually they are worn on special occasions such as luaus, weddings, graduations and so on.
** updated **
Haku lei meaning
“Haku” refers to the technique in which the flower crown is made either by braiding or weaving flowers and foliage together, “Haku lei” means weaver of lei. When I first published this post I was under the impression the threading technique used in this blog post was also for a haku lei, as this was the technique used for the “haku lei” I was given as a gift from an independent florist on the island of Maui. I have since learnt that the threading technique used to make the flower crown I received and learnt in Maui is used to make lei worn on the neck (lei ‘ä’ï) and head which are called Lei Po’o not haku lei. So really this blog post is a tutorial on how to make a lei po’o.
This threading technique is far easier than weaving a hawaiian head lei, lei po’o, or flower crown so if you’re interest in learning keep reading on.
In 2020 I celebrated Postcards from Hawaii’s first birthday in Hawaii on the island of Maui, I also celebrated my birthday for which I had asked Michael just for one gift: a haku lei. Using a local florist on the island he chose a really simple crown made from white plumeria, red rose petals and a few sprigs of something green. It was the first time I had seen a haku lei or flower crown that wasn’t woven or made with wire and tape, as I mentioned above I have come to learn that this is because of a miscommunication and it was a lei po’o not a haku lei. This one was made in the same traditional way as a lei that is worn around the neck (see image below) but it was finished on each end with a ribbon so it was adjustable to the wearer.
During my time spent in Hawaii I have taken classes on how to make lei ‘ä’ï, lei worn on the neck and ti leaf lei, braided lei made with ti leaves. The technique for making the lei po’o in this tutorial is what I learnt in Maui.
Flower crowns are a popular accessory for weddings, christenings, baby showers, wedding showers, birthdays and more. If you are interested in learning how to make really quick and simple yet stunning flower crown. This threading technique is cheaper, easier and less time consuming should you need to make more than one before your special occasion.
In this blog post I have featured two different types of lei po’o so that you can decide which aesthetic you want. One is more elaborate; a tropical statement piece made with flowers I had hand selected from independent florists Crown House Flowers and The Rose Garden in Norfolk, England. The other is much smaller, more practical, and cost effective lei made with flowers from the supermarket.
As I mentioned this technique is a lot quicker and very simple, but it does include the use of a needle so please make sure that any children who wish to make this are accompanied by an adult.
Choosing your flowers and foliage
The four main points that you want to keep in mind when selecting your flowers are:
1. Weight
You don’t want the flowers to be too heavy. I learnt this after using large chrysanthemums in my larger head lei, they will weigh down the crown and with little to support it, it will slip down your face. This doesn’t mean you can’t go for big flowers, just make sure you don’t select too many heavy ones.
2. Structure
As you are pushing a needle through them, you want your flowers to be quite firm. You will notice how fragile the rose petals are once they are pierced with the needle, they are ok because they will be sandwiched quite tightly, but you want your main flowers to stand strong. Example of flowers with structure are small chrysanthemums, germini, gerbera or scabiosa. Also keep in mind how big the base of the head is, for example: carnations. Although they have a beautiful flower, they have large heads which are hard to cover, leaving you with a big green gap. Look for flatter bases such as germini or small chrysanthemums. Speaking of structure, the same applies for the leaves. Try to pick strong leaves or ones that have a thick stem so they don’t fall apart when you put a needle through them.
3. Be thrifty
Take advantage of what you have around you. I’m not at all suggesting you decapitate your neighbour’s rose bush, but be more aware of the leaves on trees and bushes. Picking a selection of leaves from your garden or the park will save you money. They don’t even have to be particularly interesting ones either, they can be pulled off the stems of the supermarket flowers if need be! Of course, if you are going for a big, bold tropical look, I strongly recommend going to a florist because they are your best chance of finding philodendron or umbrella fern.
4. Quantity
Don’t get too carried away! It’s so easy to do, especially if you are buying them in a florist, and it will surprise you how little you need. For the smaller of the two head lei that I made, I only bought three bunches of flowers and made the rest up with petals from two different coloured roses and leaves from my garden, these three bunches could easily have made two Hawaiian flower crowns.
5. Cost
For the larger haku lei I wanted bigger flowers and tropical leaves that would make a statement. I bought a selection of flowers that featured zantedeschia, dahlias, zinnia and more from two florists and together that cost £30. I am aware that this is costly and really only viable for a special occasion, but they did make a wonderful statement haku lei that reminded me most of the ones in Hawaii. I didn’t use all of the flowers so I put the remaining together in a vase to make the most of the money spent.
For the smaller and cheaper haku lei, I used flowers from my local Morrisons supermarket. I bought two bouquets of small chrysanthemums in pink and orange and one bouquet of white germini, to accompany these I used the remaining rose petals I bought in the florist and a selection of leaves from the garden. The bouquets were £3.50 each or two for £5, so collectively I spent £8.50. I know, much more reasonable, that’s why I’ve made two versions for you!
What you need to make a flower crown
Scissors (for cutting the ribbon and thread)
Secateurs (for cutting the flowers and leaves)
Tape measure (for measuring the thread)
6 or 9 inch upholstery needle (to pierce and sew the flowers)
2 metres of extra strong thread (to hold the lei together)
1 metre of ribbon (to tie the open ends of the lei together)
A selection of flowers and leaves
Step-by-step tutorial for how to make a Hawaiian lei po’o (flower crown)
Whether you have bought your flowers from a florist or the supermarket, make sure that you sit them in water until you are ready so they remain fresh for as long as possible.
1. Start by beheading your flowers with care using the secateurs. You want to cut as close to the bottom of the head of the flower as possible, removing all of the stem. Don’t cut all of them, start with a few and cut as you go, this way if you don’t use them all, you can put the remaining flowers in a vase.
2. If you are using rose petals, gently pluck the petals off the head.
3. Using the tape measure, measure out and cut 2 metres of the thread.
4. Thread it through the needle so that the thread is doubled (the needle is in the middle of the thread).
5. Tie the ends together with a couple of knots.
6. Begin to thread the flowers on in the order you want, being careful with the point of the needle as you do. As you push the first flowers down the thread towards the knots, leave about 10cm of the thread so the flowers don’t fall off and that you have enough thread to tie the ribbon to.
7. Thread on your flowers and leaves in whatever order you fancy. It is up to you if you want to create a pattern or not, but if there are certain flowers that you want to use at the front, be aware of how far you have worked down the thread. Also every head size is unique so keep holding it up to yours to gauge how much further you have to go.
8. The reason I recommend using a longer needle is because lei are made with one (unfortunately I couldn’t find any at a reasonable cost) because they make the process quicker. With a longer needle, you can thread on multiple flowers and then push a larger section down the thread.
9. Once you have your desired length in flowers, cut the thread at the eye of the needle.
12. Make sure the ribbon and thread is securely tied to each other before cutting the excess thread.
13. All you have left to do is carefully lift your Hawaiian flower crown, lei po’o, to your head and tie the ribbons together at the back of your head. A bow with a double knot will secure it.
If you are making your haku lei for an occasion it is best to make it on the day so that the flowers are their freshest selves. If you want to make the most out of, sprinkle it with water and store it in the fridge. Depending on the flowers you chose it can last a couple more days.
.
Now you know exactly how to make your very own Hawaiian head lei inspired flower crown you can make them for all sorts of occasions: weddings, baby showers, birthday parties and more.
If you do make one please share them using #postcardsfromhawaiiblog and I will share them on my Instagram stories.