Last month Michael and I went to Ireland to celebrate my Godson’s naming day in Dublin with his father’s family. It being the first time either of us had been to Ireland we turned it into a roadtrip tour around both Northern and The Republic of Ireland. Starting in Dublin we went on to Belfast, Giant’s Causeway, Connemara, Galway, Cliffs of Moher, Blarney Castle finishing in Cobh before heading back to Dublin for the Ferry back to Britain.
In total we were away for 11 days. Ireland is the first to get hit with any tail ends of storms coming across the Atlantic Ocean so the weather wasn’t peachy the whole time, but considering Autumn had started to really show its face, the majority of our days were dry albeit cold. The average temperature during our trip was 12˚C with one fluke day of 20˚C and a couple of miserably cold ones at 8˚C but overall it only rained for five of the ten days which I think was pretty good going for Autumn.
Having travelled in our little VW Polo, there wasn’t much space for luggage and for the safety concern of keeping our back seats clear of any visible belongings, we had less room than I would usually on a trip this length. For this reason you may notice some repeat offender outfits and a black roll neck jumper that has made so many appearances that it’s a wonder how it survived so many bathroom sink washes. I can say though, with hand on heart that you can get away with fewer garments on a trip like this, it really just comes down to how bulky your winter woolies are as to what you can fit in your suitcase.
Usually I travel with one large suitcase, one carry on case and a handbag but for this trip I only had my big case and a backpack with my hiking boots stuffed into a little crevasse of the boot.
Right then, let’s start with the key garments I relied on:
Waterproofs
Coat, trousers and shoes are all necessary and easily packed down if you get the right gear. I swear by my Mountain Warehouse waterproofs, the pakka over-trousers take up very little space and are so ideal in adverse conditions and my waterproof jacket folds down surprisingly well.
I couldn’t be happier with my Hi-Tec hiking boots, they’re cute and functional. Waterproof with a good tread and supportive sole they are the best shoes I own in terms of practicality.
Running tights/sports leggings
We planned a lot of walking and outdoor activities in Ireland so quick dry leggings are perfect for walks and hikes with unpredictable showers. I mostly wear USA Pro because their cropped legs are the perfect full length for my short leggies.
Lace up pile lined boots
I bought my lace up boots from H&M last December partly because they were on trend but also because I loved the idea of warm feet! For £25 my mind is blown by how comfortable they are! Not just that, but they are warm and the thick tread means I wear them for long walks with no risk of slipping. All they needed was a coating with a waterproof spray and they were good to go.
These boots are a great alternative to hiking boots when you need comfort for long days on your feet but want something with an element of style that can be worn with jeans or dresses. The ones I bought last year aren’t available anymore but they have brought out a similar pair here.
For extra insulation I pop in my sheepskin insoles, I transfer these into all of my shoes across winter because they keep the chill out beautifully.
WOC or clutch
A wallet on a chain is perfect for evenings when you are heading out to dinner or a pub/bar. They’re not cumbersome but they will still hold the basics. I’m not going to suggest you buy YSL unless you want to, but I will say make sure you can get at least your cards, cash, phone and lippy in there. I can get all of those in both my Mulberry Bayswater Clutch (which has been discontinued unfortunately) and my YSL Envelope Chain Wallet and yet they are both entirely different shapes, their size is deceiving and yet they do the trick.
.
I didn’t really have many garments that I shouldn’t have brought full stop, it was more that I had overcompensated and brought too many options of that garment and in one case not enough:
Blue Jeans
I had a good selection of dresses and skirts, my dungarees and my black jeans already, I didn’t need the extra pair, I never wore them.
Scarves
A girl needs options right? I had too many though. I brought two with me and bought an additional one out there plus I bought two Avoca blankets which I used as scarves. Yeah, five was too many.
I still heavily recommend a blanket scarf though because you can use it as a blanket to keep you warm in the car on your road trip.
Socks
I had WAY too many socks, which was linked tightly to me wearing mostly tights but also because I panicked after Canada when I was stuck with only one pair of hiking socks. I ended up packing 7 pairs of socks and it was at least 3 too many.
Tights
It’s definitely tights weather now, I’m a fan of 60-70 denier because I put holes in tights like it’s an olympic sport plus I like to keep my leggies warm. To be honest I could’ve done with an extra pair to the two I already had. Only because it was difficult to rotate the two I had whilst waiting for them to dry.
.
If you’re a frequent reader did you notice how heels weren’t in this part?! That’s because I actually wore them, can you believe it? It is because I had an event to wear them to and if it wasn’t for that I wouldn’t have bothered with them, but yay for not moaning about them this time, right?
.
If you do make a trip over to Ireland I suggest making room for some additional garments because Dunnes Stores (by recommendation from my cousin) is amazing! It’s a crazy cheap department store with good quality products and the best part is that you won’t find those items/designs back home. In total I came home with:
The other thing you should be making room for is a stunning woven piece from Avoca. Their blankets are the epitome of winter evenings spent snuggled up on the sofa with a cup of hot choccy. Check out my Ireland Instagram Highlight to see more from my visit and if I can’t convince you then maybe Blake Lively can after her recent visit to Ireland – “You have to go to Ireland just to go to Avoca, it’s just heaven”.
A trip to Northern Ireland would not be complete without a visit to the magnificent Giant’s Causeway. For centuries this 2016 British Travel Awards Winner* has attracted tourists from all over the world.
There are two explanations for how Giant’s Causeway was formed: scientific fact and the legend.
Science explains that approximately sixty million years ago, molten basalt erupted from the ground forcing its way through a layer of chalk. The basalt formed 40,000 columns as it cooled, the hexagonal shapes developing as the stone fractured.
The legend however claims that the Irish giant, Fin McCool built the causeway as a crossing to confront his Scottish rival, Benandonner. After building his path to Scotland Finn hastily retreats when he learns that Benandonner is far bigger than he is. Followed by Benandonner, Finn runs home where his wife disguises him as a baby. Seeing the size of the “baby”, Benandonner fears for how big the child’s father is and runs back to Scotland, the causeway crumbling under his feet due to his immense size.
*Best UK Heritage Attraction.
Getting there
Driving
The Giant’s Causeway is located on Causeway Road just 1hr 15mins from the centre of Belfast. As you get closer to the coast the scenery is beautiful and you’ll feel like you’re in the rom com film “Leap Year” as you cruise though the rolling hills past quaint little churches and fields dotted with fluffy sheep. Check out the map below to see Belfast in correlation to the visitor centre and stones.
Parking
Parking is included in the ticket cost (see more below) but spaces are limited. We didn’t have a problem getting parked up but I have heard from others that during peak periods – such as summer or public holidays – the traffic queues up for miles and you could be stuck without access to the car park.
Time
We went on a Monday morning outside of any school holidays and arrived at 9am. It was quiet for about one hour and then people started flooding in and before long it was difficult to get photos without a swarm of ant like people in the background.
Visitor Centre > Giant’s Causeway
There are two options for getting from the visitor centre to the stones: walk or bus.
A footpath will take you straight down to the stones and back up again, has opportunities to stop and get photos of the beautiful coastline and will take 20mins maximum to walk each way (depending on how often you stop for photos).
The bus leaves every 10mins from the back of the visitor centre (where the audio guides are given out) and both drops off at the stones and picks up for the return journey. Tickets are £1 per person per direction and are bought on the bus, National Trust members go free.
If you are fully able to make the trip by foot do so because it won’t take long, if you have problems on your feet I suggest taking the bus because the path becomes slippery in the rain and though it’s not a long walk, it is a fairly steep ascent back to the visitor centre.
Tickets
Tickets include onsite parking, audio guides and access to the visitor centre which has a café, gift shop and an interactive section with more information on the formation of the stones and coastline.
Save money by purchasing tickets online for:
Adult: £10
Children 5-17 years old: £5
Family: £25 (includes two adults and three children under 17 years old).
Tickets bought on the day at the visitor centre are:
Adult: £11.50
Children 5-17 years old: £5.75
Family: £28.75 (includes two adults and three children under 17 years old).
National Trust members go free.
Opening times
Giant’s Causeway is open from dawn til dusk throughout the year.
The visitor centre is open as follows:
January – February: 9am – 5pm.
March – May: 9am – 6pm.
June – September: 9am – 7pm.
October: 9am – 6pm.
November – December: 9am – 5pm.
Closed: 24th, 25th and 26th December.
Last admission is one hour before closing time.
Safety
Due to strong winds, big swells and the fact that the attraction is at the water’s edge, safety is a big concern here. If you choose to walk on the stones you do so at your own risk. There are however National Trust officials dotted around to prevent you from going too close to the edge and will blow a whistle to alert your attention if you do. They are equipped with first aid kits and there are flotation devices dotted around should anyone fall in.
What to wear
My advise is based on visiting in September when the weather had made its turn into Autumn with an average of 8˚C. I can’t say what to wear in the warmer months having not been there then, but I do know that the wind is quick changing and can blow right through you so be mindful of that.
Hat/thermal headband/earmuffs
The wind can blow past your ears at an uncomfortable speed so wear something on your head if you have sensitive ears or want to keep your head warm.
Scarf
Keeps your neck warm and will provide a wind barrier for your face.
Gloves
Difficult for taking photos but great for the walk there and back.
Bottoms
I strongly suggest trousers because they will preserve your modesty if you are planning on clambering over the stones. I wore my running tights/gym leggings because they are quick drying which is handy as the rain is unpredictable.
Top half
This will give you a good idea of how cold the wind was, I wore a sports bra, vest, jumper, gilet and a super light down jacket under my raincoat. This was enough to keep me warm with my hat and scarf but it didn’t stop my nose from going pink nor my eyes and nose from running.
Waterproof coat or at least a wind breaker
The forecast didn’t call for rain all day and yet heavy raindrops made an appearance on and off every half an hour to forty minutes.
Sensible shoes
I wore my hiking boots and even they were slipping. A lot of the stones are unstable and those closer to the sea develop a lovely slimy surface which makes navigating your way across somewhat treacherous. Make sure you wear comfortable shoes with a good tread.
Thick socks
Keep your tootsies warm.
What to bring
Water
Always stay hydrated!
Tissues
If you have a sensitive nose to colder weather, like myself, I advise taking plenty of tissues because the cold wind is going to make it drip!
Lip balm
If you’re prone to chapped lips in cold weather.
Camera
How could you not!
Tripod
If you want to put your photography skills to good use.
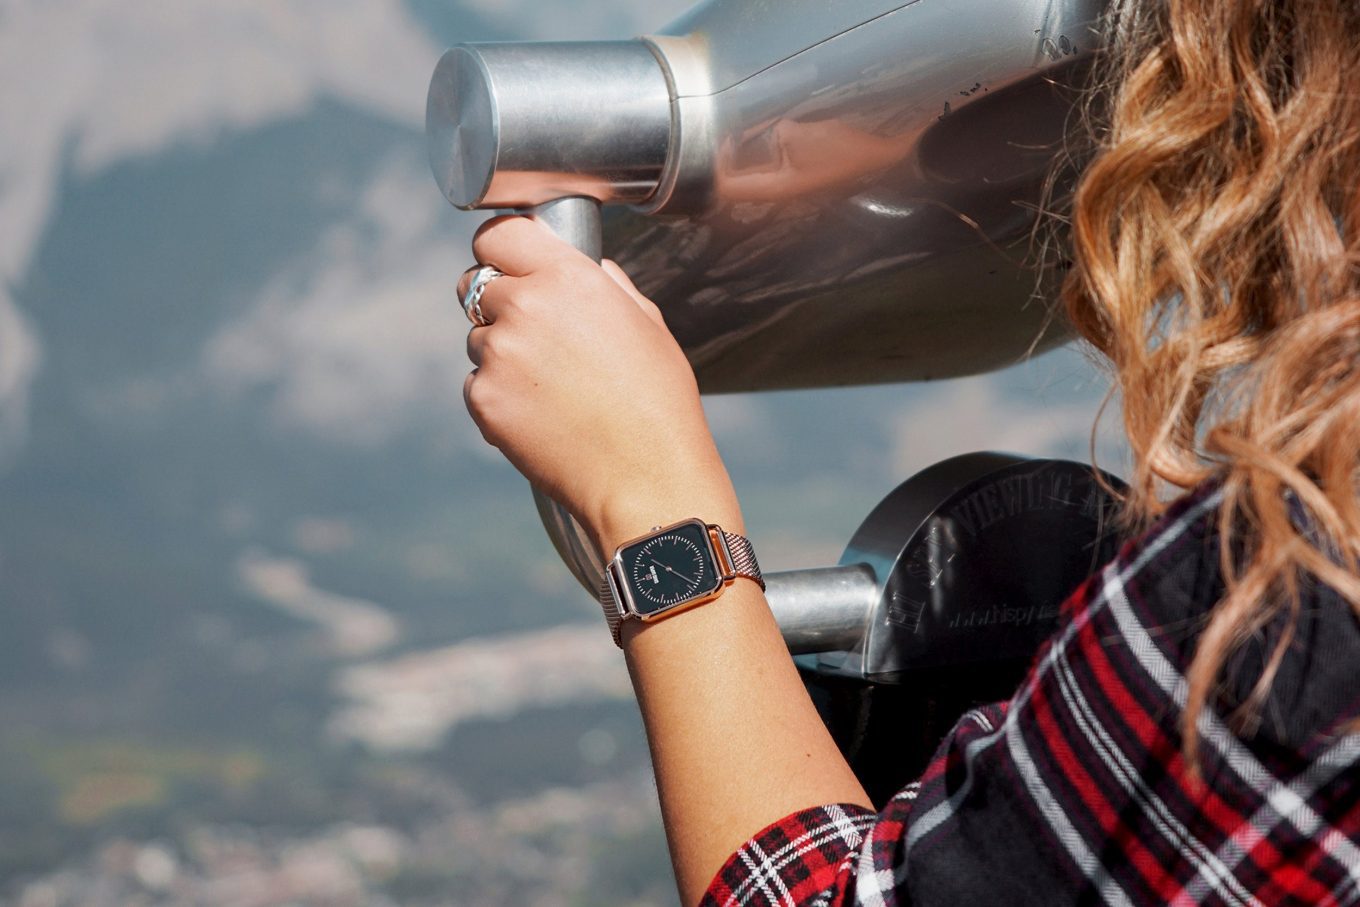
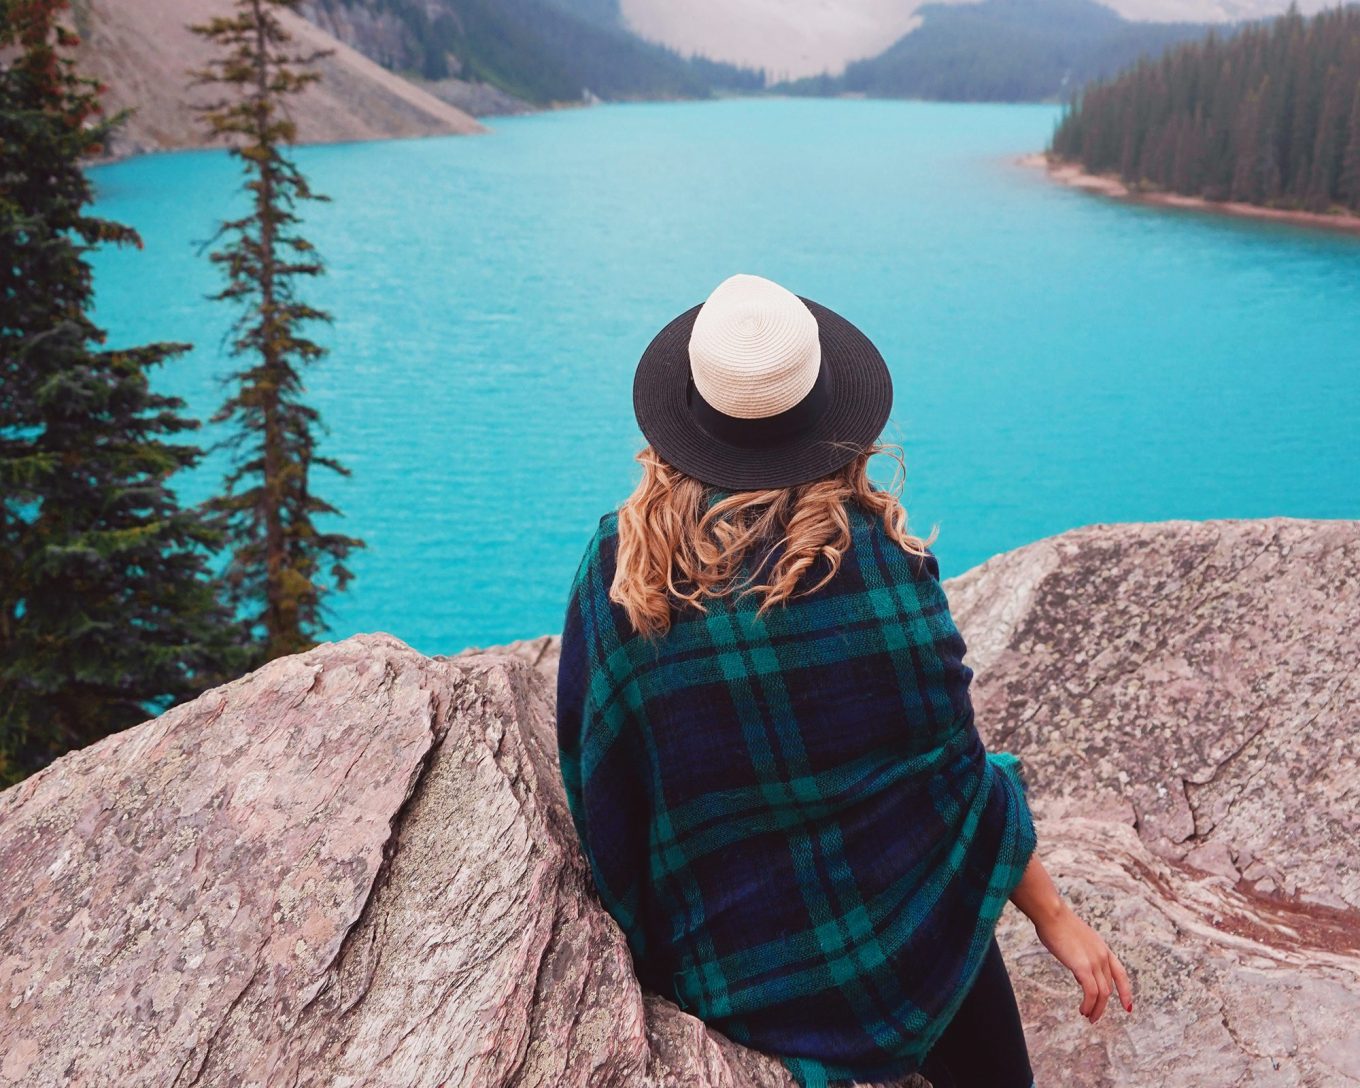
This post is not a usual one for Postcards from Hawaii but I wanted the opportunity to combine an itinerary with my photoshoot for David David in the Canadian Rockies. We shot in four locations: Lake Minnewanka, Banff Gondola, Sulphur Mountain and Moraine Lake. Read on to find out more about what we did at these locations, ticket costs and how long each excursion takes.
Lake Minnewanka
We began our day with a boat tour on Lake Minnewanka. The air was cool and crisp (as you can see from my goosebumps) and the water was a brighter shade of blue than the sky, in turn complimenting the playful stripes of blue and white on the Time Square candy striped wrist strap.
Lake Minnewanka is a 13 mile long glacial lake that is a whopping 466ft deep. Boat rentals are available here but the best way to learn about the “Lake of the water spirits” is to take the guided boat tour where you will be educated on the rich history and legends surrounding the lake. The tour costs $56 CAD per adult, $28 per child aged 6-15 and is free for children aged 5 and under. It is approximately one hour long.
Banff Gondola & Sulphur Mountain
Just as it does in the mountains, the weather changed in an instant as the midday sun graced the summit warming the air and bouncing light off the luxurious rose gold strap of Time Square mesh strap so that it shimmers in a way that you just can’t keep your eyes off it.
Accessed by the Banff Gondola, the views from Sulphur mountain are mind-blowing. From the top you’ll be able to see Bow Valley and six mountain ranges. For the best view that doesn’t require too much effort in terms of walking, take the boardwalk up to Sanson’s Peak where you can learn all about Canada’s first national park and the man who walked up to the top once a week for 30 years to check the weather, stopping at the incredible age of 84!
Tickets for the gondola return journey cost $58 CAD per adult, $29 per child aged 6-15 and is free for children aged 5 and under.
The gondola ride itself will take just under 10 minutes. It’s enclosed but the windows do open if you are brave enough to stick your camera out.
Moraine Lake
We finished the shoot with a final trip to Moraine Lake which was the only day we experienced glorious sunshine which brought the mind-blowing colour of the lake to a whole new level of appreciation for natural beauty. It was here that we got an incredible collection of focused product shots and photos that showcase the jaw dropping scenery in a way that makes you feel as though you’re seeing it with me.
In my personal opinion, Moraine Lake is in the top three lakes of Banff/Jasper along with Lake Louise and Peyto. Its colour is so intense that it’s hard to take in that what you are seeing really exists, and when the sun comes out well, it really is something else.
“Glacier-fed, its brilliant blue-green colour is a result of light refracting off the rock flour (fine particles of rock) in the glacier run-off which flows into the lake. At an elevation of 1,885 metres (6,183 feet), the lake does not begin to melt until June. Water levels, and its vibrant colour, peak in late June”. – www.banfflakelouise.com
Getting to Moraine Lake will be your biggest challenge of the day. Our time in the Rockies began in the summer holidays and ended within term time so towards the end of our trip the lakes were drastically quieter and parking was significantly easier. It is recommend that you arrive to the car park before 7am or after 7pm and this advice should be taken very seriously. The car parks to the main lakes are very small and fill up well before 7am, past 7am the road to the car park closes and you are turned away either to take the shuttle service or continue your journey elsewhere.
PFH Top Tip: If you aren’t feeling a crazy early morning, aim to be at road leading up to the car park for about 6.45am – I’m not making any promises that the road will be open, but even at the busiest time we were in by then – the road should be open but chances are the car park will be full. The first time we went we were in the car park at 7am with no spaces and a lot of car circling, defeated we headed back down to find the road had been closed to cars trying to enter. Quick thinking led us to turning around to head back to the car park. If no one could get in but people were leaving we would eventually get a space! That’s exactly what happened, we got to the top, waited no more than five minutes and got a space. This worked for us at least six times at various lakes.
As I mentioned the lakes were much quieter once schools had gone back so we were able to get into Lake Moraine in the afternoon where we hopped on a canoe, went for a walk and stayed long enough to see the sun disappear behind the mountains.
The canoes are heavily dependent on the weather and will close without notice if the wind picks up. They are run by the hotel, Moraine Lake Lodge, so if you are concerned about whether they are open you’re best bet is to go to reception to ask. From my personal experience where it took three tries before the canoes were open, reception is the only place you will get a straight answer. Canoes can be rented for $110.25 CAD per hour.
The two watches featured in this post are from a collaboration with David Daper, a Swiss watch company who live for travel and strive to create “a worldwide community sharing a common lifestyle outside of the mainstream”. Both watches are from their Time Square collection and are water resistant to 30m. To shop either of my watches head here.
As always, there are things I brought that I did and didn’t need (which have been removed from my packing list above) so let me highlight those items for you and explain why they were necessary and why they were dead weight. Additionally, due to the drastic change in temperature I ended up buying a few items I couldn’t have lived without during the last week which I will also take you through. You might be thinking, “why does she seem so surprised by the change of climate in the mountains, of course it’s going to be cold”, well I was working off the assumption that it would be warm because 1. I was heading there in August and 2. EVERYONE on instagram who had been there the week before were rocking T-shirts, little dresses and even swimsuits! So I was shocked when the forecast I had been looking at took a sudden turn literally as September approached. For this reason, I’ll mainly be focusing on the warmer garments that saved me.
Let’s start with what definitely worked:
Hat
I am super into hats at the moment, they conceal a bad hair day and are a great prop for photos but mine came in incredibly helpful this trip for keeping my head warm as the temperature plummeted. I ended up buying another hat and a thermal headband on this trip to add variety to my looks, which I speak about further down, but the one I brought really was a saving grace in the cold.
Knitted Jumper
Michael’s Nanny knitted me a jumper over the summer and I had brought it with me for the sole purpose of taking a photo in it by one of the beautiful lakes we were staying near. I figured I wouldn’t need it because it would be too warm, I sure as hell didn’t need it in Ontario where it was reaching 30°c, but I ended up wearing it so much that I had to buy a second jumper to give this one a chance to breathe. It did take up a substantial amount of room but I would have been so cold without it.
Jumper: knitted lovingly by Michael’s Nanny.
Hiking socks
I only brought one pair of hiking socks with me because I wear them to keep my feet warm on the plane. Even though I planned to do a lot of hiking, I was working off the assumption that it would be warm and was intending to wear my sports socks which I had in abundance. I ended up needing to wear my solo pair of hiking socks every damn day, which meant washing them every day which was a chore and a miracle they’re still in one piece! Mine was from a pack of three from Mountain Warehouse.
Waterproof jacket
For travelling I bring my lightweight waterproof jacket from Mountain Warehouse because it is so thin that it compacts nicely into my suitcase or backpack. Bonus, it’s so cheap at only £20 and comes in some great colours. FYI their colour chart is WAY off on this product so trust the colour of the coat not of the square you select. You can adjust the cuffs and the hood to fit your body plus the zip pockets are big enough to fit an iPhone 8 Plus with room for more! If that isn’t a massive selling point I don’t know what is!
After our last road trip in America where we moved around a lot I decided to buy a folding cool bag, much like the ones kids have as their lunch box. I wasn’t keen on driving with unrefrigerated milk for a few hours so I got the cool bag to keep items such as milk, butter and cheese in it during road trips. We also used it daily to keep our lunch fresh. I ordered a Sistema one from Amazon for just £4.49 but I know that most supermarkets will have a similar product down their home aisle.
Blanket scarf
Cheap flights, such as West Jet, don’t provide blankets so I bring my Zara blanket scarf to use as one to keep warm. This ended up being used every day in Banff to keep the cold out, plus it looks great in photos! Their website isn’t very useful for knowing the size of the scarves but I’ve linked one here which is similar to mine and I must say their scarves are very reasonably priced.
Scarf: Zara, Hat: H&M.
Dune Loupe sandals
They are their best selling sandals for a reason and that reason is mostly because they look deceivingly like the highly coveted Hermès Oran sandals but for a fraction of the cost. What really is amazing though is how insanely comfortable and versatile they are. I purchased the tan ones and I am yet to find an outfit that they don’t go with*. The Loupe sandals chic up everything I’ve worn and they don’t rub. I know summer is over so you might be thinking it’s not worth getting them but Hermès just brought out a new set of colours in theirs for fall/winter so I guarantee they’ll be around for next spring/summer.
Sandals: Dune, Dress: F&F, Hat: H&M.
*Please take into consideration that these were worn during the warm part of our trip in the West not in the cold national parks. They obviously did not go well with a coat, scarf and blue toes!
.
Moving on, here’s what I really didn’t need:
Heels
DEAR LORD why do I bother?! I’m not a heels wearing gal unless absolutely necessary and nine times out of ten it’s not, yet every time I bring them because I convince myself that I need to be prepared. Well I don’t and I won’t be bringing a pair on my next trip because I am wasting space and weight. If you have brought one type of shoes on the last 2-3 trips away and have never worn them, it’s time to stop packing them!
Denim jackets
I brought two and bought a third! NO ONE NEEDS THREE DENIM JACKETS ON ONE TRIP! I wore the newest one a fair amount because I could get a jumper under it but I didn’t even touch the other two! It was too hot in Toronto, Ottawa and Montreal and too cold in the West, no Goldilocks, nothing was just right about this one!
Hat: H&M, Fringed jacket: Forever 21.
Swimsuits
I packed three swimsuits because after seeing photos of girls in their swimsuits by the lake (and the good weather forecast) I thought I would be dipping my toes in too but alas the weather took a hard turn into the-last-thing-I-want-to-do-is-take-my-clothes-off degrees Celsius so I only wore one in my friends’ hot tub and didn’t wear the others. Of course no one can account for the weather changing like that but think twice about how many you need if you’re not going to a beach destination.
.
Now the most helpful part! This will really benefit you (should you be doing a trip similar to this) because knowing these items in advance will save you money by packing them rather than buying them on the go.
Gloves
Honestly I bought a pair of gloves in a department store in Calgary called Simons* because they were a cute cable knit and had a fleecy lining. I have really sensitive skin on my hands which blister during the summer and wrinkle during the winter (hot I know) so I wanted them for the colder months at home. I was not expecting to be wearing them on my trip but boy was I grateful to have them. I ended up wearing them six days out of eight.
*Which is incredible by the way! So good that I had to go back before heading to the airport because I was desperate to pick up more items. They have the softest garments for incredibly good prices.
Felt hat
I have wanted a felt hat for a while now but I have a small head and find it a struggle to find a hat that my head doesn’t get lost in, so when I saw this hat in a Banana Republic outlet I had to have it, and thank goodness I did because it did such a great job of keeping my head warm! As it was an outlet I can’t find the exact one but this one is similar.
Hat: Banana Republic, Scarf: Simons.
Thermals
I didn’t buy thermals whilst in Canada because I already had a good set at home and didn’t want to spend money on more, but considering how cold and windy it was I strongly suggest bringing them for a trip like this.
Knitted headband
I bought mine from North Face in the mountains because I needed to keep my ears warm but wasn’t interested in wearing a hat all the time. I do suggest getting one of these if you want something to keep warm but want to save on space, they are much smaller than a hat and if you look for a fleece lined one they are sure to keep your ears warm. I can’t find the one I bought but Trespass has a really similar one on offer for £7.99.
Headband: North Face, Scarf: Simons, Waterproof jacket: Mountain Warehouse.
Roll neck jumper
A desperate purchase made in Banff a few days in. I only had two jumpers with me, one was too thin to keep the cold out and the other I mentioned above was knitted by Michael’s Nanny which I needed a replacement for because I was starting to stank it up by that point and was nervous about washing it. If there’s a chance the weather could be colder, pack at least two jumpers.
Gilet (otherwise know as a body warmer or puffer vest)
I bought a quilted gilet from J Crew in the Niagara outlets because it had a really sweet ruffle detail along the collar and pockets and I knew it would come in so handy at home for keeping out the cold as the seasons changed. Yet again this turned out to be an amazing unexpected purchase because it helped to insulate my thin rain jacket on the days where the wind was unbearable.
You may have noticed (or will do now) that I am basically wearing the same clothes throughout my time in the mountains, and that comes down to the fact that my warmest clothes were two jumpers, two pairs of jeans, three scarves (I couldn’t resist them in Simons) and one pair of thermal socks. I was so surprised how for seven days the weather was averaging out at 7˚C and yet on the last day it came out at a very warm 20˚C, warm enough to warrant a summer dress for the afternoon! From this trip I have learnt that the weather can really turn within three weeks and that just because you have seen people wearing summer clothing and the forecast appeared good it definitely doesn’t mean it will stay that way. Always be prepared with a couple of basic warmer items if you’re heading somewhere that experiences frequent shifts in temperature and you’ll be good.
If you would like to edit your own packing list like the one above check out My ultimate interactive packing list where you will find a downloadable PDF and help on how to use it.
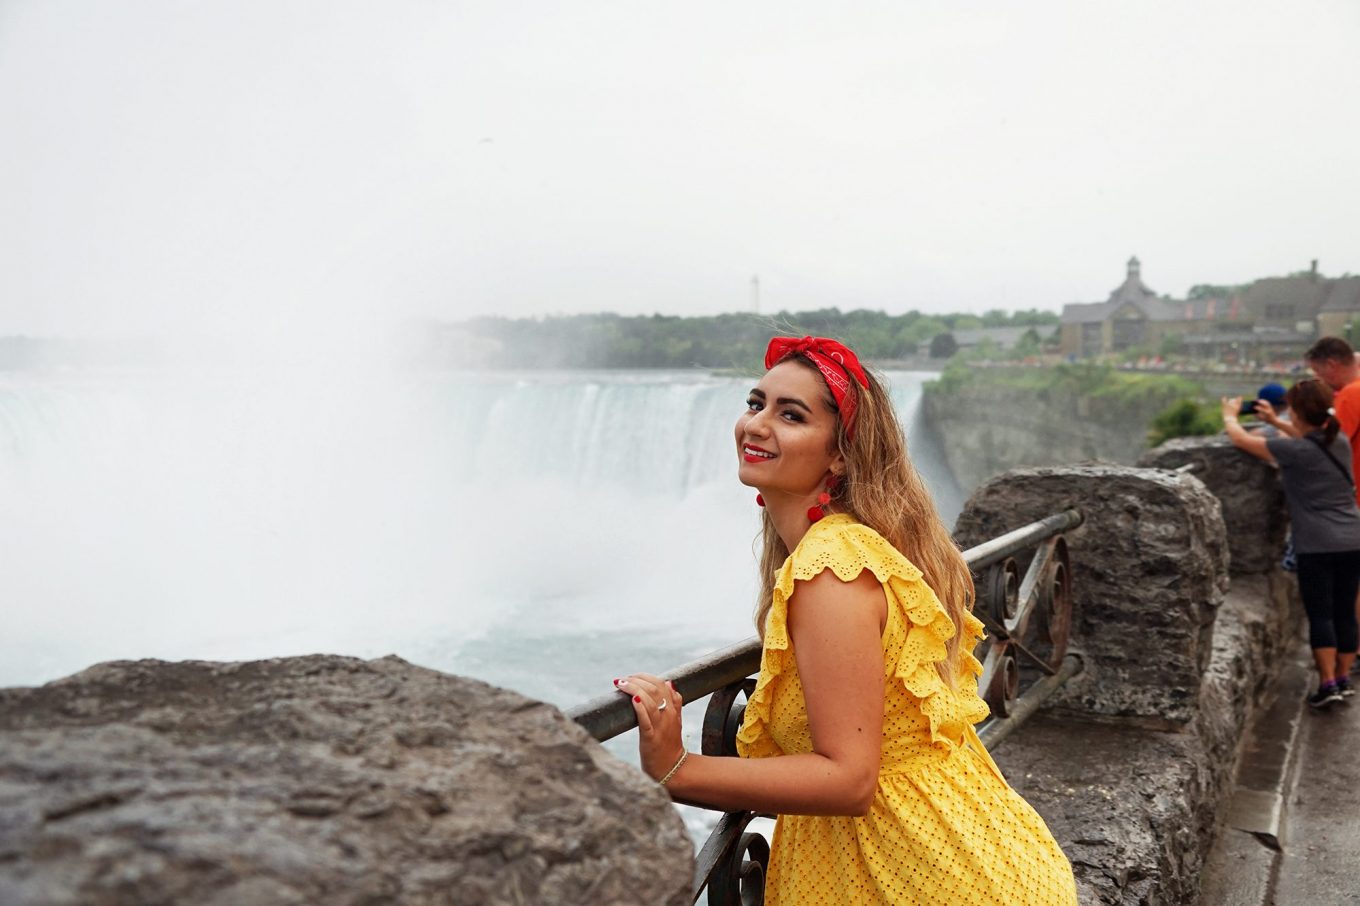
Niagara Falls is the world famous set of three waterfalls – the Horseshoe, the American and Bridal Veil – that link the international border between New York, USA and Ontario, Canada. Collectively the falls have the highest flow rate in North America, hurtling approximately six million cubic feet of water down the 165ft drop every minute. To give you a better idea of how powerful the falls are consider this: the brink of the falls has moved seven miles from its original position and in the twentieth century they had to be intervened with water diversion engineering to slow down the erosion from three metres per year to 30 centimetres every ten years!
Before we go any further I want to let you know this itinerary is for the Canadian side of the falls, which in my opinion is far superior to the American side because you get a much better view of both the American Falls and Niagara Falls. The American side does have a viewing platform that sticks out but it’s just not the same. To understand what I mean, I have inserted a screenshot of the area, everything above the bridge is the United States of America and everything below is Canada.
Day 1
Our starting point was Newmarket, Ontario which is about an hour outside of Toronto. We left at 9.30am and it took our friends approximately 2hrs to drive us there, but should you be going from downtown Toronto it will only take about 1hr 30mins.
Upon arrival into Niagara at about 11.30am we were able to get early check in on our friends room (they have a baby so it was optimal to get them their own space to feed and change etc.) where we left our bags and headed out for the day. All good hotels will hold your bags so you don’t have to leave them in the car should you want to arrive to Niagara earlier than your check in time.
The first thing we did was go out for lunch, the closest restaurant to us was iHop. I’m going to warn you right now, Niagara is EXPENSIVE, the mark up on food is ridiculous, for example snacks from Starbucks are x3 the cost you’d pay in Toronto. We had three breakfasts between the four of us and it totalled to just over $100 and on top of that the service was very slow (it wasn’t busy either). I do strongly suggest iHop however if you don’t have a “fallsview” hotel room and want to dine looking down on the falls because it is set on top of a tower looking out at the waterfall.
Hotel
After lunch we were able to check into our hotel room at Marriott On The Falls. We booked a “Superior Fallsview Room” at $430 CAD after tax (£250 GBP) for one night. I can honestly say out of all the hotels I’ve ever stayed this one had the best view by far. We were 29 floors up and looked out and down on both the American Falls and the whole horseshoe of Niagara Falls. Now obviously it isn’t cheap but compared to a night in Plaza Athénée in Paris where you’ll easily be spending £1000 a night for an Eiffel Tower view, it’s better value for your money.
Full disclosure on this photo looking outside the window: we moved the bedding onto the floor, the beds aren’t up against the window but you can still see the falls from where they are placed in the room.
After a quick freshen up we headed over to Hornblower cruises. We had previously tried to buy our tickets online but inexplicably the ticket cost kept doubling during checkout so we opted to buy them on the day. Considering we were there in the middle of August, which is undoubtedly their busiest time, the queue was surprisingly quick both for tickets and for entrance. Tickets for the “Voyage to the Falls Boat Tour” are $29.32 CAD (after tax) per person which covers your 15 minute tour up to the horseshoe and a poncho to keep the majority of you dry. There’s no doubt about it, you’re going to get wet so here’s what I suggest wearing for Summer and Winter:
Summer:
Shorts: Even at 4ft 11” my poncho didn’t touch the floor so more than likely your legs are going to get wet. Wearing shorts means the fabric will stay protected under your poncho and your skin will dry quicker than wet trousers.
T-shirt: Same as trousers really, your arms will dry quicker if they’re bare. I actually wore my rain jacket and I was roasting under my poncho, so I strongly advise you to not bother.
Flip flops or slides: On a hot day, wellies will be uncomfortable so I suggest going in a pair of rubber sandals which will dry off quickly.
If you’re worried about your hair, the poncho hood has a drawstring which will tighten it round your head to keep your hair dry.
Winter:
Waterproof over-trousers: These will protect your trousers from getting wet and being uncomfortably cold as they dry slower than paint.
Raincoat: It will keep you warm and protect your arms from the cold spray.
Wellies: Keep your feet warm and dry. If you have a long pair you probably won’t need waterproof over-trousers.
PFH Top Tip: If you collect ticket stubs get them from the ticket desk because it’s the only way that you will get a proper ticket. I went to the machine because the queue was shorter and I just got a paper receipt.
After the cruise tour we went to take photos with the falls. The best place is along the promenade either behind the Niagara Parks building, set back from the falls, or about 200m in front of the falls. The closer you get, the more the spray will obstruct the falls and won’t make for a good photo.
Dinner
If you have a view of Niagara Falls from your hotel room I strongly suggest ordering food up to your room and just taking in the beauty of the falls and the light display that they put on. Opt for take-out rather than room service because it will be much cheaper, plus they will still take it right up to your hotel room door. We used Uber Eats (not an ad) because all of our card details were already in the Uber app so it was super easy to order food, we got a ridiculously large pizza from Papa John’s so that we could eat it all the way through the fireworks and as a snack the next day.
Fireworks
The Niagara Falls fireworks schedule changes throughout the year but from June 18th to September 3rd the show is on every night at 10pm. Click here to check their full schedule. I had a feeling this one would be small given how often they put on the show, but it really didn’t disappoint. The show went on for at least 15mins and was loaded with all the good ones, accompanied by a light show projected on the falls.
The fireworks are set off from Queen Victoria Park and have many optimal viewpoints but if you have the opportunity to stay in a fallsview room I suggest staying in your hotel and enjoying the show from the comfort of your own room. We had an incredible view from our hotel room, it was the perfect end to the day.
Day 2
Breakfast
To save money on the breakfast buffet at the hotel we grabbed breakfast from the Starbucks which is in the lobby of the Marriott. As I mentioned it’s not cheap, but it’s cheaper.
Journey behind the falls
This is by far one of my favourite things that I have ever done! On the tour your senses are overwhelmed by the roar and ferocious velocity of the falls. You get to stand directly behind the falls via two passageways but the best part is when you get to go out on a platform beside the falls. It’s like being in a water fight, you’re going to get soaked from all angles and there’s not a whole lot you can do about it.
It was a cold and wet day on our second day so I was already prepared with waterproof trousers, wellies and my raincoat and even with the complimentary poncho I was a drowned rat at the end! I was soggy right down to my underwear because the velocity of the spray is so strong that water gets blown EVERYWHERE. My advice is to just go with it, it doesn’t really matter what you wear for this because you’re going to get wet no matter what, but trust me it’s worth it!
Tickets cost $22.54 CAD (after tax) per person and include your souvenir poncho which is fully biodegradable, yay!
PFH Top Tip: Don’t bother with putting on makeup until after you’ve done this tour. Mine went all down my face!
Gift shop
There is a massive gift shop in the Niagara Parks building, where you enter for Journey Behind The Falls. You’ll find pretty much any Canadian souvenir you can think of here.
We stopped at Denny’s for lunch where although the price was still high it was far more reasonable than the iHop we went to the day before, I’m guessing that’s based on location. Another tip for trying to keep the food cost down, try to go to a restaurant set a few blocks back from the falls.
Niagara outlets
Before heading home we spent the afternoon at Outlet Collection at Niagara. There are 116 stores so give yourself at least a couple of hours for shopping.
From the Niagara outlets we drove home and arrived in time for a late dinner.
Niagara Falls was everything I wanted it to be and more, the sheer power and beauty of this natural wander is incredible and I encourage it to be on your bucket list to experience it yourself.
Before reading this blog post, please note that it was published summer 2018. Since then I have made big changes to my health and beauty routine and have massively reduced my single use and plastic usage. Please understand that I no long use travel minis or plastic toothbrushes. To learn more about responsible toiletries read, Sustainable swaps for travellers.
.
To be perfectly honest I didn’t pay much attention to packing a decent selection of beauty products during my early days of travel. I was all about saving as much room for shopping as possible so I would leave a lot of products at home, or I would get wrapped up in buying travel minis because let’s be real, they’re so cute, but I now know that in a lot of cases it’s better to go with the devil you know.
I’m absolutely certain there will be so much more to learn, but for now here are a few of the things I have learnt from my travels throughout the years. I’m making the mistakes so you don’t have to!
Skin
Facial routine
Don’t forfeit your normal skin routine to save space and definitely don’t try to save space by bringing different branded travel minis to your usual products just because they’re smaller. I have so many unfinished products at home that I end up giving away because I’ve bought travel minis that have irritated my skin. Your skin is precious so look after it and don’t settle for second best, either look for travel sized versions of your usual routine or decant them into travel bottles.
Makeup remover
Keeping on the topic of bad travel minis, I have bought and disliked a vast variety of makeup removal products on the basis of trying to save space. My previous daily makeup removal product came in a large bottle and rather than pouring some of it into a smaller bottle, I opted for wipes because I knew as I used them that I would have less to bring home. My face and wipes don’t get on though and they cause so much irritation around my eyes.
Whilst in The States this summer I found the ultimate solution for makeup removal! Black Magic makeup remover cloths are the absolute best way to remove makeup, at least they are for me. Their special knitted structure and fabric means that they only require water to gently break down your makeup. No extra removal product is needed so you can move straight onto your cleansing routine. Not only this, they save the environment from daily wipes being thrown away, they are reusable – just thrown them in the washing machine – and they are so light!
Honestly I swear by them so much I bought a bunch home for family and friends! I bought mine from Sephora but I am aware of them being sold in most shops selling makeup.
Protection
Get a good facial suncream rather than using a general body one. The skin on our face is more sensitive than the rest of our bodies and it might clog your pores. Most suncream brands have a special facial cream and as a bonus they tend to be anti ageing, anti-blemish or suited for makeup application.
I have sensitive skin that dries out easily if it’s not frequently moisturised. Travel minis and the ones you get in hotels just aren’t big enough to accommodate my multiple applications so I travel with a big bottle of body lotion.
PFH Top Tip: Don’t let the minis go to waste though, keep hold of the lotions if you have the room and use them as hand cream because they’re the perfect size to keep in your bag or car.
Eye gel patches
If you have an early start to your day, pop on a pair of eye gel patches for about half an hour before applying your makeup (or not if you don’t wear it) to give your eyes a chance to perk up should you be suffering from bags or puffy eyes.
Hands
Mani pedi
Get a gel manicure over painting your nails, I started getting gel manicures in October last year and it was the best decision I’ve made for my nails in terms of travel. Gel manicures last at least two weeks without chipping (provided you aren’t rough with your hands) plus it makes your nails stronger. Painting them means you have to bring the nail varnish with you for touch ups because you know it will chip within days plus a base/top coat and nail varnish remover because you know it’s going to look a flakey mess within a few days. I make sure to remove the gel polish after each trip so that my nails get a break and see the sun.
Moisturiser
My hands dry out easily with a change of climate, whether it’s hot or cold, so provided it fits in there, I now keep a little moisturiser in my bag at all times. For a very long time I paid little attention to my hands because I figured the possibility of my hands ageing was decades away but boy does it creep up on you!
My current favourite is Molton Brown’s Delicious Rhubarb and Rose tube, it’s very moisturising but the smell is so fresh and strong that you can dab some around the neck as a pitstop perfume should you need a quick scent lift.
Teeth
Toothpaste
I used to think a mini travel sized toothpaste would be enough because when do you ever really monitor your toothpaste consumption, right? It didn’t take me long to realise that it wasn’t enough and I would end up needing to buy more toothpaste. It’s easier to travel with a big toothpaste and take it on multiple trips than spend more money on lots of mini ones that run out all the time. Plus it means you can buy your usual toothpaste that suits your dental needs.
Brushing
Keep a toothbrush and toothpaste with you when you’re on the go. If you are in a car, plane or train for a long time I strongly suggest brining these so you can freshen your mouth either before/after sleep or before you arrive at your destination (in this case, have an extra mini toothpaste that’s just for in transit brushing).
Hair
Anti-dandruff
I get a dry scalp and use head and shoulders to keep it at bay, but up until a couple of year ago I would neglect my scalp when I went away because I didn’t want to carry an extra shampoo bottle, especially when most hotels have complimentary shampoo. I’ve learnt that it’s not worth having a sore or itchy head and now I travel with the 90ml bottle because I’d rather have flake free hair than an extra few inches in my case.
Protection
Travel can take its toll on your hair for many reasons: water quality, sun, styling with heat, chlorine etc. For a long time I only travelled with hair spray and curl gel because I was naive about protection. I have learnt that my hair requires even more attention when I’m away than it does at home because of all the extra styling and heat it encounters, so now I travel with:
Protein spray which is for UV ray protection from Toni and Guy’s Label M. I can’t find a link to the 50ml travel size but it can be bought in store.
Ties and clips
I have found that for all the hairstyles I frequently do, these items are the only ones I need:
Four little claw grips for partitioning when styling or for holding back my hair when I’m washing my face.
Two bobby pins for holding back strays. If you do more extravagant hair styles then you’ll probably need more, but I have found after bringing heaps that I rarely use more than two.
Three hair ties, two packed and one always in my bag for emergency frizz scenarios.
Two fine elastics for tying the ends of plaits without a bulky finish.
Accessory-wise I usually brings lots of options but these are my basics every time.
Hair removal
Use razors which have replaceable heads because they create less waste than disposable razors and a couple of extra heads take up less space than a couple of razors. Take a new head per week away to prevent bacteria building up in them and razor burn.
Makeup
Concealer and foundation
If you’re spending time out in the sun your skin is likely to get darker and you may go past your regular concealer and foundation shade. It’s not ideal to keep spending money on multiple foundations as you get darker, especially as no tan is the same and you’re likely to vary in shades across your time away or during the summer. My solution for this is to go to a makeup or department store and go to the counter of either your current foundation brand or one that you want to try and ask them for a sample of the shade that they match you to. Most brands that have someone working on their counter will send you home with a sample because they appreciate that you need to try it with your usual products and with natural lighting rather than the harsh lights in store. The sample should last you until your tan fades so you’ve saved money on a full product and you have the opportunity to try a new product.
Also ask for samples of makeup you are currently using so if you are going on a quick trip you can bring smaller versions to save space. Moisturiser samples are amazing for weekends away because you can get 2-3 uses out of the pouches.
PFH Top Tip: Try to sample a foundation that has SPF to give your skin a protective barrier.
Waterproof makeup
Unless you’re going to an event where you’re likely to get a little teary-eyed, ditch the waterproof makeup. If it’s for vanity whilst you’re poolside or on the beach it’s not necessary, embrace your natural beauty. When I was in my late teens I took waterproof eyeliner and mascara on holiday with Michael because I was concerned about not having my daily cat-eye look whilst hanging out by the pool and snorkelling, I soon got over that when I got in the pool with my waterproof winged liner and felt my eyes burn like they’d been set on fire! The sting was so real I had to race to wash it off. Now I’ve learnt to embrace my face without makeup on many occasions and it has never felt better!
Brushes
Don’t bother with mini travel brush sets, you might think they’re worth it for the space saving but they will give you so much hassle in return. It’s highly unlikely that they will be good quality and they will just make your application a painful experience. I am still learning to build a good brush collection (thanks to my girl Katie who is my makeup Guru – you might have seen her work on my face on my Instastories at the beginning of my trip to Canada) but I know for sure that it’s better to travel with your everyday brushes.
Brush cleaner
If you’re planning on travelling with the bare minimum brush selection or if you’re away for more than a week I strongly suggest packing a mini brush cleaner set to prevent colour transfer and bacteria swarming whilst you’re away.
.
As I mentioned before I know I will learn so much more about which products I should be taking or leaving at home, better alternatives and hacks to save money but for now I hope these tips will help you to take better care of your body whilst away.
UPDATED: 8 of the best places to get photos with the Golden Gate Bridge.
In this updated blog post I am sharing not just 3 but now 8 of the best places to get photos of or with the Golden Gate Bridge. I will be sharing how to find all 8 photo spots, where to park, the best time of day to get to them and photography examples of each location. I created fresh content for all eight best Golden Gate Bridge locations but some of the original photos from this blog post remain because even though I cringe at the edits it’s always fun to see the evolution of content creation.
These Golden Gate Bridge picture spots will have you travelling around San Francisco to appreciate it from eight spectacular locations at both north and south of the bridge but before I share them, let’s learn some facts about the Golden Gate Bridge.
It might no longer be the tallest, or the longest but the Golden Gate Bridge is most definitely the most photographed bridge in the world. More than 10 million people come to visit Irving Morrow’s iconic structure each year and is it really any wonder why? With its 746ft tall towers, art deco style and unmistakable “International Orange” the Golden Gate Bridge is a triumph to be marvelled at.
Golden Gate Bridge was built over four years to connect San Francisco to Marin County which previously was reached by ferry boat. On May 28th 1937 the bridge was opened to traffic and as of January 2014, 2,025,883,491 vehicles have crossed the Golden Gate Bridge*.
What’s truly magic about the Golden Gate Bridge is her relationship to the ever changing fog that rolls across the bay, sometimes concealing her entirely and often allowing only the very tops of her towers to peak through. No matter what time of year you visit you’re in for a treat.
I’ve picked these eight place to get photos with the Golden Gate Bridge because each one of these Golden Gate Bridge picture spots offers a completely different perspective of the bridge and none of the environments are the same. Of these eight Golden Gate Bridge photo spots Baker Beach offers views from far away, getting the whole bridge in the frame, Battery Spencer takes you up a mountain to look down on the bridge and the city and Fort Point and Moore Rd give you the opportunity to view the Golden Gate Bridge from underneath whilst looking out across the bay. The Welcome Center offers an educational experience, the Overlook lets you see the bridge towers head on and crossing the bridge gets you up close and personal with this masterpiece of engineering.
Here’s 8 of the best places to get photos with the Golden Gate Bridge:
1. Golden Gate Bridge photo spot: Baker Beach
Baker Beach is a mile long public beach located Northwest of the city. It’s not safe for swimming due to large waves and rip currents but it’s popular for fishing and incredible views for pictures of the Golden Gate Bridge. It’s one of my favourite spots to take photos of and with the Golden Gate Bridge.
Baker Beach allows you to photograph the whole bridge from afar which can look pretty spectacular on both clear and foggy days.
You can easily do all 8 of these places to get photos with the Golden Gate Bridge over 2 days but if you’re going to do that, I suggest planning them all around Baker Beach as the best photo spot there is reliant on tide times.
Check the tide times for Baker Beach in advance here. For anyone who is unsure of tide times, you want to arrive as close to low tide as possible, and avoid getting there around high tide.
Parking at Baker Beach for photos of Golden Gate Bridge
There is a free beachfront car park/parking lot with an overflow at Baker Beach. Continue past the overflow and down to the beach front to get the closest spaces to the beach. Please don’t leave any belongings visible in your car, San Fran is notorious for car break-ins so lock it away or keep it on you. Be wary of visibly moving valuables to a safe space in your car as thieves may be watching.
How to get to Golden Gate Bridge photo spot on Baker Beach
If you’re facing the beach, the entrance to Baker Beach is in the right hand corner of the car park. Once you’re on the beach turn right and keep walking towards the Golden Gate Bridge until you reach the rocks that prevent you from going further, this will take about 15mins. As you’ve planned to be there around low tide, you will be able to walk around the left of the first set of rocks. Climb up the second set of rocks from the right hand side, you want to be standing along the third ridge on the far left. Please be careful and wear shoes with good grip and be sensible when climbing these rocks. They’re not very high, but you don’t want to slip.
To get to the Golden Gate Bridge photo spot where I was for these images, you want to walk between the rocks. Just be careful not to damage any of the marine life attached to the rocks on either side. Once you’re through to the other side it is here that you’ll be able to stand in the sand with an unobstructed view of the bridge. This is my personal favourite place to take photos with the Golden Gate Bridge on my list.
FYI the far end of the beach, near the rocks, is the nudist section so be respectful of the people’s choice to go au naturel as you make your way to the rocks.
2. Golden Gate Bridge photo spot: Fort Point
Fort Point was built between 1853 and 1861 with the means to protect and defend San Francisco Bay. It has survived the Gold Rush, earthquakes, Civil War and World War II and even escaped demolition in 1930 before the original plans to build the Golden Gate Bridge changed to build around the fort rather than in place of it. These days this ideal spot for taking photos of the Golden Gate Bridge is a museum which is only open Friday – Sunday 10:00am-5:00pm.
Parking at Fort Point for photos of Golden Gate Bridge
There are free parking spaces all along the waterfront leading up to Fort Point. For the best angles of Golden Gate Bridge aim to park in the second from last section of parking spaces. It’s not the end of the world if you can’t, it just saves you from having to walk there.
How to get to Golden Gate Bridge photo spot at Fort Point
To get the this amazing and super easy location to photograph the Golden Gate Bridge, all you have to do is step over the chain railing that’s in front of the parking bays to the edge of the promenade and you’ve got the perfect spot anywhere along there, depending on how much of the bridge you want in. The closer you get to Fort Point the less you will capture as you are underneath it, but if you want the whole bridge in, position yourself in front of the parking spaces I just mentioned.
Oh boy, these old edits are really quite something, aren’t they?
3. Golden Gate Bridge photo spot: Battery Spencer
Just like Fort Point, Battery Spencer was another area of defence for San Francisco bay and harbour. Though the buildings are in poor shape as they were scrapped for anything that could contribute to World War II, you can still walk around them and see where the 12” guns would have been manned.
Battery Spencer is the most breathtaking Golden Gate Bridge picture spot on this list. From up here you can gaze down at the bridge with the San Francisco city skyline as a backdrop.
Parking at Battery Spencer for photos of Golden Gate Bridge
Parking at Battery Spencer for views of the Golden Gate Bridge is free but limited. The best parking is right outside the park entrance but it’s hard to tell if there will be empty spaces at the top as you’re going up, so I suggest parking when you see a space then walk up to the park entrance from there.
How to get to Golden Gate Bridge photo spot at Battery Spencer
From the entrance of Battery Park walk up the path until it opens out at the edge of the cliff. There’s no one monitoring the area so it is possible to get photos on the other side of the rope, but of course this is at your own risk.
PFH Top Tip: It’s incredibly windy up there so make sure you don’t wear anything that can blow away and maybe tie your hair up if you don’t want it looking unruly in photos.
Best locations to photograph Tower Bridge
Read here
4. Golden Gate Bridge photo spot: Golden Gate Overlook
This top location for taking photos of or with the Golden Gate Bridge is called the “Golden Gate Overlook” which makes finding it without a guide like this list of best places to take photos with the Golden Gate Bridge pretty difficult. It took us quite a while to find the place between the trees so I could share it with you but once we did, it didn’t disappoint.
Before making my third trip to San Francisco so that I could update this list of best Golden Gate photo spots, my favourite place to take photos of the bridge was from Baker Beach but it is now tied with the Golden Gate Overlook.
What the Golden Gate Overlook has over the others on this list is that you can photograph the bridge from head on, lining up the towers behind one another to look straight through them.
When photographed with a lens that offers you a narrow field of view or shallow depth of field, the Golden Gate Overlook has the potential to elevate your content to a cinematic and so beautifully dramatic level. When I shared the difference between taking photos at the Golden Gate Overlook on our Sony FE 24-240mm f/3.5-6.3 OSS zoom lens at 25mm and 233mm on my Instagram Stories I had a lot of people in disbelief that it was the same place.
Not long before publishing this update I saw a viral Reel that claimed to show you an iPhone hack that delivers this shallow depth of field result on your phone but then uses photographs taken with a professional camera as the end result. They did put a disclaimer in the caption but it does concern me how misleading it is, so I wanted to be super transparent about our exact camera equipment and focal length for how we achieved these photographs of the Golden Gate Bridge. If you want cinematic results like this then you can’t expect to achieve the same quality with a phone camera.
We visited the Golden Gate Overlook for photos twice to take these photos and both times we went between 8-10am in July and we were the only people there. Don’t bank on it always being this quiet though so I do recommend going early on a weekday if you want a clear shot without the pressure of onlookers or other photographers and content creators.
Parking for photos at the Golden Gate Overlook
The closest parking lot to the Golden Gate Overlook is Langdon Court Parking and it’s right next to this Golden Gate Bridge photo spot.
Parking at Langdon Court Parking is free.
The address for parking at this Golden Gate picture spot here is Langdon Ct, San Francisco, CA 94129, United States.
How to get to Golden Gate Overlook photo spot
From Langdon Court parking lot, walk though the trees towards the bridge to the steps located in the middle of a concrete circle wall.
5. Golden Gate Bridge photo spot: Moore Road
Like Battery Spencer, number 3 on this list, Moore Road allows you to view the Golden Gate Bridge from the north end of the bridge. Moore Rd takes you to the other side of the bridge though and gives you the opportunity to view and photograph it from below rather than over the top.
Moore Rd is a much quieter spot than all the others so you don’t need to arrive early to this best place to take photos of the Golden Gate Bridge in order to avoid crowds.
There’s a little concrete platform that juts out at the water’s edge that creates an ideal spot to stand for photos of the Golden Gate Bridge.
How to get to Golden Gate Bridge photo spot on Moore Road and where to park
Moore Road is located in Sausalito at the north end of the Golden Gate Bridge. Take exit 442 and make a left onto Alexander Ave until it turns into Conzelman Rd. Keep left when Conzelman Rd forks and take it until it joins Moore Rd. Make a right onto Moore Rd and when you’re there you can park up onto the side of the road where it’s wide enough to let other cars pass you.
6. Golden Gate Bridge photo spot: Golden Gate Bridge Welcome Center
The Golden Gate Bridge Welcome Center is more than just a best photo location for the bridge. Here is where you’ll find an exhibition on the history of the bridge, a gift shop selling GGB themed memorabilia, the Round House which holds Equator Coffees coffee shop, true size replicas and artefacts from the bridge’s construction and it’s where you can start your walk across the bridge. See more below in 7 and 8 about crossing the Golden Gate Bridge.
Visit Equator Coffees in the Round House for the opportunity to sip coffee with a pretty incredible view of the Golden Gate Bridge. I really admire that someone made the decision to put a coffee roaster like Equator Coffees in the Round House. They could have just sold over priced drip coffee like so many popular tourist locations but someone made the right call to serve high quality coffee and it really does elevate the experience.
Pretty much everywhere around the Welcome Center offers great views of the Golden Gate Bridge.
The Golden Gate Bridge Welcome Center is open daily from 9am – 6pm except for Thanksgiving and Christmas Day.
Parking at Golden Gate Bridge Welcome Center for photos of Golden Gate Bridge
There is a parking lot at the Golden Gate Bridge Welcome Center but there are limited spaces. There are only 26 general, 6 bus and 3 accessible spaces available so try to arrive early if you’re visiting during peak times of the year.
Parking is charged at 25¢ per 15mins and there’s a 2 hour limit.
Heads up, Golden Gate Bridge parking lots are closed on weekends and holidays between 11am – 5pm. Keep up to date with the parking lot closures here.
Alternative parking that’s free for visiting the Welcome Center or to walk on the Golden Gate Bridge is Fort Point. Park in one of the bays on the waterfront and take the path up the slope to the Golden Gate Bridge Visitor Center. It’s a steep but short walk to the top and will save you from having to rush to get everything done in the 2 hour time limit for parking at the Welcome Center.
How to get to Golden Gate Bridge Welcome Center
The Golden Gate Bridge Welcome Center is located in Presidio of San Francisco on the US Highway 101. The address is, Golden Gate Bridge, Coastal Trail, San Francisco, CA 94129, United States.
Golden Gate Transit bus routes 101, 130 and 150 all go from downtown San Francisco or Union Square and stop at the Golden Gate Bridge Visitor Center. Check the GGT bus schedules here.
7. Golden Gate Bridge photo spot: On the Golden Gate Bridge – pedestrian or cyclist
Unless you’re scared of heights (guilty) the most exciting way to experience the Golden Gate Bridge is on the Golden Gate Bridge. Every other Golden Gate picture spot on this list allows you to view the bridge from further away so you can get more of this magnificent landmark into your Golden Gate Bridge photo.
Experiencing the Golden Gate Bridge up close allows you to truly appreciate what an incredible accomplishment of engineering it is, not to mention humbles you as you imagine how brave the people were/are who built and work on the bridge.
Walking or cycling on the Golden Gate Bridge also gives you a beautiful vantage point to take photos looking back at downtown San Francisco.
The walk across the Golden Gate Bridge one way is 1.7 miles long and will take approximately 30 minutes if you’re not stopping to take photos.
We used our 90mm Leica lens for photos of me with the Golden Gate Bridge and for photos of the city.
PFH Top Tip for visiting Golden Gate Bridge: even on a warm day in San Francisco it is still cold and windy up on the bridge. Don’t forget the Golden Gate Bridge is suspended 67m in the air so expect a strong wind and dress appropriately. Avoid anything that can blow away and bring a warm layer.
For an even more immersive experience of visiting the Golden Gate Bridge sign up for a FREE walking tour with San Francisco City Tours which sets off every Thursday and Sunday at 11am.
Parking for photos on the Golden Gate Bridge
The best place to park to walk on the Golden Gate Bridge is the parking lot at the Golden Gate Bridge Welcome Center. There are only 26 general, 6 bus and 3 accessible spaces so try to arrive early.
Parking at the Golden Gate Bridge Welcome Center is 25¢ per 15mins and there’s a 2 hour limit.
Golden Gate Bridge parking lots are closed on weekends and holidays between 11am – 5pm. Keep up to date with the parking lot closures here.
See alternative and free parking advice for walking across the Golden Gate Bridge under Parking at Golden Gate Bridge Welcome Center for photos of Golden Gate Bridge in the 6th best Golden Gate Bridge photo spot in this list.
How to get onto the Golden Gate Bridge for photos
From the Golden Gate Bridge Welcome Center (see number six on this list to see how to get here) walk towards the bridge and take the sidewalk/pavement behind the Round House (Equator Coffees) that runs parallel to the road. This sidewalk/pavement leads directly onto the Golden Gate Bridge.
Be mindful of cyclists – and other pedestrians – on the bridge when you take your photos with the Golden Gate Bridge. Even on a sunny afternoon we were able to wait for breaks in the crowd, try not to block people from getting past.
8. Golden Gate Bridge photo spot: On the Golden Gate Bridge – by vehicle
As I was only with my fiancé who was driving I could only get a photo of the Golden Gate Bridge rather than with it, as this blog post title suggests. I wanted to include this extra point though as taking a photo as a passenger of the Golden Gate Bridge has the potential to be a unique photo. Also when I originally published this blog post it was very much during a time when travel bloggers believed they had to be in every photo in order to succeed.
Set yourself up to photograph the Golden Gate Bridge in the wing mirror for some great road trip content or B-roll for a Reel/TikTok.
How to drive across the Golden Gate Bridge for photos
If you are travelling southbound into San Francisco then there is a toll to pay. To reduce traffic Golden Gate Bridge no longer accepts toll fees on the bridge. To pay your toll you can either use FasTrak, a license plate account, pay a toll invoice or do a one-time payment. Payment can be taken online, over the phone or in person in select locations.
More information about the cost and how to pay the Golden Gate Bridge toll fee can be found here.
If you are driving north across the Golden Gate Bridge from San Francisco then you don’t need to pay the toll to cross.
There you have it, 8 of the best places to get photos with the Golden Gate Bridge.
If photos of or with iconic landmarks is something that thrills you then you may be interested in one of my other popular blog posts, Best locations to photograph Tower Bridge.
Being an Au Pair is a great way to live in and explore a new country whilst earning money, but being responsible for someone else’s child isn’t easy, especially in a foreign country with a possible language barrier depending on your linguistic skills. As an Au Pair you’ll have a lot on your plate: cooking, entertaining, disciplining, educating – to name a few. To give you one less thing to think about I’ve compiled a list of items every good Au Pair should carry around on a daily basis to cover all bases.
When I was living and working in Paris I looked after three ages on different days of the week; Lucas ages 12, Solenn aged 8 and Louis aged 4. As I was in Paris with my boyfriend I didn’t live in with my assigned families and I had weekends off, but my afternoons into the evenings and Wednesdays (no school on Wednesdays in France) were spent with the kids. My experience with them definitely made me far more responsible as a young adult, I learnt so much from them, one of them being how to pack the perfect Au Pair day kit!
First aid
You won’t need a big kit, literally all you need on the go are some plasters and antiseptic wipes. If anything more serious happens than a bump and scratch you should be looking to contact their parents and doctors so these two items will get you by.
PFH Top Tip: Check with the parents to know if the child has a latex allergy.
Emergency numbers
Whether it’s on your phone or written down, make sure you have all of the emergency numbers needed for the children i.e. parent’s, doctor’s, school etc.
Tissues
There will be tears for sure so be ready to mop!
Wet wipes
It never ceases to amaze me how grubby kids can get, germs are good for their immune system but if they’re about to eat and the option to wash their hands isn’t available, a gentle wet wipe will do the trick. The likelihood is that you’ll get through a fair amount of these so you’ll probably want to just keep a big pack on you.
Suncream
Obviously this depends on the time of year you have the children. Mine would spend a lot of their time outside and Spring can really heat up, for this reason suncream is good to keep close because it will be easier to slather it on them than to try to get them indoors – trust me! Make sure it’s a child friendly factor and brand that the parents trust and use.
Snacks
Try to stick to healthier options such as fruit but keep in mind what the child is usually given. French children notoriously have sweet snacks after school such as a biscuit or pastry. Make sure you stick to their routine when feeding them, even with snacks, you don’t want to fill them up before their evening meal but equally you don’t want them to go hungry. Of course, make sure that anything you feed the child has been approved by the parent.
PFH Top Tip: From my experiences, you’ll want to have a snack for them to hand if you plan on eating yourself, because they will always want what you have!
Drink
Water, juice, milk or syrup mix, whatever it is that the child is used to having make sure you always have it to hand for them to drink, no matter the weather. Children exert a lot of energy and it’s important to keep them hydrated. This goes for you too as you will undoubtedly need a drink in-between running around after them.
Music
Have some children’s songs on your phone such as nursery rhymes or Disney sound tracks. Not only do they love a good sing-a-long but you also have the opportunity to teach them english with something they already recognise. Frozen had not long come out when I was working in Paris so I would spend the walk home from school four days a week singing “Let It Go” back and fourth between French and English.
Books
Reading, colouring, activity, whichever one will keep “your” child occupied when they can’t have a run around. I used to bring an English activity book to keep Solenn occupied whilst waiting for her dance class to start.
PFH Top Tip: If you choose to carry a reading book with you try to get one that is part of a series so that they have the chance to get familiar with characters. It will help you encourage them to read if they become attached to the characters in the book because they will want to know more about them.
Crayons
Crayons don’t need to be sharpened like pencils and they won’t mark clothes like felt tip pens, plus they are small and easy to pack.
.
Don’t worry about spending your own money on these things, no parent expects you to pay for these items. My “families” always reimbursed me for the books and as for the snacks, they would be from their after school snack cupboard.
I’m thinking of doing a series of posts on being an Au Pair, focusing on how to keep them entertained, educational tips for helping them improve their English etc. Let me know if this is something you would be interested in here.
I first came across This is Ground in 2015 when Michael – for anyone who doesn’t know he is both my partner in life and travel – begged for a Mod Tablet 2 for his birthday. I filmed him opening it because the pure joy on his face was just short of those videos of kids freaking out over their Christmas presents. I posted it on Instagram and it was reposted by TIG and thus the relationship began. From that point on his Mod came everywhere with us and his photos from around the world were reposted. About a year later they approached him to do some animations of their products and I swear he just about burst with excitement. Fast forward to now and he has a good relationship with the brand and a collection of products about as unhealthy as my handbags.
Mod 3, Mod mini, Stash 2
Since launching in 2013, the L.A. based company has become a global phenomenon and has revolutionised the world of luxury leather organisers bringing the need for Filofax diaries into the 21st century (she says whilst acknowledging her still lovingly used Filofax next to her!). They now sell 30+ products that cover technology, toiletries, handbags and jewellery.
Though they are designed in L.A. the final products are produced in Italy and are made with high quality vegetable-tanned Italian leathers. Despite my Fashion background I was pretty unaware of the processes for colouring leather, it wasn’t until my visit to TIG and further research that made me aware of the damaging effects and health risks that come with chemically tanned/coloured leather. The vegetable-tanning process has no health risks and is the most ethical way to produce coloured leather, which I find very admiral that not only does TIG want the best for their customers, but they also have their health in mind. This process also means that the leather is individual, more durable and it ages well. Also because it’s such a specialised technique it can only be carried out by experts which means each cut is crafted with the upmost care and attention, which in turn means you are purchasing some of the very best leather when you buy a This is Ground product.
This Is Ground Headquarters, Los Angeles
During our recent trip to L.A. we stopped by to take a look at their showroom and studio which is located at 2449 Hunter Street B, Los Angeles, CA 90021, USA and open to the public by appointment only. You will be able to see and handle all of their current products and purchase whichever one takes your fancy (provided it’s in stock).
Inspired by this visit and our usage of their products I decided to share with you both mine and Michael’s five favourite TIG products, why they are loved, what we use them for and why we recommend them to any creative individual looking for luxury leather goods to keep you organised.
Cord Taco
Cord Taco
Cord Taco with Mod 3 in cognac
Price
£22.44 for a pack of 5.
Usage
To store small cables, wires and headphones, preventing them for getting knotted and tangled up.
There is an option to sign up for an email notification for when the Toffee and Mixed colour sets come back in stock.
Features
This crazy simple design of a single circle of leather with a popper closure has rocked the world of cable storage. Don’t be discouraged by how wired headphones are being phased out, the taco is still useful for your USB wires and as virtually every piece of technology is charged by those, a pack of 5 will come in very handy.
On a daily basis I will opt to carry my apple headphones because they’re compact. I used to wrap them in a loop and keep them in one of my multiple pouches in my bag, but they would always get knotted and wrapped around everything else in there. Since being given my taco I haven’t wasted any time trying to untangle them!
Mod Tablet 4
The photos of Michael’s Mod in use are of the Mod Tablet 3. He received it a few years ago so they are no longer produced by TIG but fret not, they have been replaced by the Mod Tablet 4 which I’ll be giving specifics on so I’m not enticing you with a product you can’t actually purchase anymore.
Mod 3 in cognac
Price
£297.46
Usage
A tablet case with additional storage for your everyday items for when you’re on the go.
The Mod Tablet 4 has the most storage space and organised sections out of all the products Michael and I collectively own and you’ll be able to see from our images just how much you can get in there. It’s main use is to carry a tablet when you’re on the go but Michael’s tablet was too big for it so he used it to carry everything he uses on a daily basis. As you can see from his images, it’s beloved and has been taken all around the world with us. I must admit I actually admire how he fills it with so much colour and character no matter where we go.
A few things have changed between the Mod 3 and 4, mainly the way in which the tablet now slides in from the side rather than the top, and a few smaller differences such as the placement of slots, size and the zip pocket, but in general the same variety of storage options exist.
There are three card slots which you can fit at least two in each, two larger slots suitable for a phone, passport or notebook, one large pocket designed to fit a tablet, a second large pocket for documents or a notebook, six loops in variable sizes (two of which have a popper for easier release an alternate storage), a zipper pocket which provides extra security for lose change and an external slot that could be used to store your phone for quicker access, a notebook or travel tickets.
“My Mod goes everywhere with me! It’s my mobile office while I’m on my travels. What I love about it most is how flexible the space inside it is, I’m constantly rearranging it, changing inserts and switching up what I carry inside it to suit my trip. I also use it as a space to collect things while I’m travelling, I love watching it get filled up with travel ephemera.” – Michael Lester, This is Ground addict.
With the idea that each person is individual, TIG has produced 15 different inserts ranging in size, colour and functionality so that you can accessorise your Mod to cater to your own specific and creative needs.
If you’re sentimental to the core the Memento insert is the one for you, if you have creative fingers the Sketch insert will be right up your alley and if you’re an old soul then you will probably appreciate the Hemingway insert – it’s a real niche. Of course these aren’t all of them and there are so many ways to adapt them to your needs.
Inserts range from £5.41 – £69.54. Click here to see more.
During my visit to This is Ground’s HQ I was gifted the Mod Mini prototype to experiment with and use along my travels. The Mod Mini is their latest release and has proved to be a very popular product. As I don’t have a tablet I adapted mine to be a travel document wallet and I have to say it’s pretty perfect for carrying all the essentials: passport, boarding pass (if there isn’t an option for paperless), bank and loyalty cards and tickets, you can even slip in your phone where I have my passport, plus there’s room for a notebook, small headphones, sweets, pens and other bits and bobs.
Mod mini in toffee
Price
£227.92
Usage
A mini tablet case with additional storage for a few everyday items.
As my Mod Mini is a prototype there are a few differences between it and the final product which has only recently been released. The difference between them is that the final product has a zip pocket running parallel to the tablet slot and it only had one loop fastening with a popper, whereas mine has 3 loops rather than a zip pocket. It goes without saying that the zip pocket is far more useful than the extra loops as the insert that it comes with already has five loops.
I’ve used my loops to hold pens, a mini lipstick to brighten up my face after long travels and ginger sweets for Michael when his ears pop during flights. It’s actually quite surprising what the loops can hold. Keep in mind that as they’re leather they will stretch so don’t be discouraged if something doesn’t slot in straight away.
Given it’s title, it’s pretty clear that the Mod Mini is to hold an iPad mini or any similar sized tablets, but as I mentioned I don’t have a tablet and have adapted mine to hold travel documents and a few go to items whilst I’m travelling but it could easily be used the same way as Michael uses his Mod Tablet 4 in terms of how directed towards a creative on the go; pencils, pens, notebooks galore etc.
Inserts
Just like the Mod Tablet 3, the Mod Mini can be modified with their smaller inserts such as the Pencil 2 insert or the Express insert. As I have customised as a travel wallet/document holder, the Express insert would be perfect as the zip pocket would be ideal for holding currency.
Stash 2
Price
Stash 2 large with Google Pixel 2
£135.44
Usage
Mobile phone holder and wallet.
Size
Regular: W 3.375” x H 6.375
Large: W 3.75 x H 6.75
The Stash 2 comes in Regular and Large. Most current phones are released in two sizes for example Apple’s iPhone 8 has a bigger size called the plus and Google’s Pixel 2 has a bigger size called XL. So TIG has accounted for these and has two sizes to provide a good fit for alternative screen widths. What’s also quite admiral is that unlike the phone itself you don’t have to pay more for the larger case, both sizes have the same price tag.
Heads up everyone, stock is limited on these as they have just been released, but they do offer the option (under the one you want) to receive an email when it gets re-stocked.
It’s designed to be held like a book which at first I didn’t hugely appreciate until I borrowed Michael’s phone and I realised how this design actually alleviates hand cramps whilst you’re scrolling. You know what I’m talking about, that burn that comes from trying to stretch your fingers more than humanly capable – even with the accessibility feature on apple I need two hands! My point is, this is super creative seeing as phones only seem to be getting bigger and our hands aren’t.
To prevent your phone from slipping out of the Stash, there are magnets concealed within the product and you receive a couple of magnets with your purchase to insert between your phone and case.
PFH Top Tip: You will need a phone case to be able to use the magnets, I suggest not purchasing a clear one so that you can keep the magnets concealed.
There are four card holder slots which will easily fit at least 2 cards each, so you will able to carry a fair few of your most used cards, and there’s a larger slot which is great for holding bank notes, receipts and a pen.
This product wouldn’t work for me as I have a selfie ring on the back of my phone for filming stories for my PFH Ohana (that’s you lovely people) but Michael is obsessed with his and literally takes it everywhere when we’re on the go.
As gender boundaries are blurring and society becomes more progressive with how we identify between masculine and feminine, men are being encouraged to carry around (incredibly) helpful accessories to organise and protect their belongings. The Stash is definitely the answer to smartphone wristlet pouches which are marketed towards women. Of course this is not to say it’s just for men, it’s to highlight the beauty of minimal and functional design.
It’s designed to lay out flat or to hang from a hook to save surface space. This is honestly so handy when you have multiple wash bags and cosmetic cases. I like to keep surface space clear for my Flat Lay makeup bag so it’s so handy that the Ritual Wash Kit hangs up and out of the way.
Leather loops hold items in place both in transit and when it’s hanging up, and the elastic pouch can be used to either prevent items from slipping or to hold smaller products. How much you can fit in really depends on the size of the products you use, but it holds a decent amount and will definitely will see you through a weekend trip.
The lower section has a concealed full-size flat pocket that can be accessed by velcro from both sides. Personally I like to keep my face masks and gel eye patches in here because they’re flat products, but it can also be used to hold smaller products that are likely to fall out of the elasticated pouch in the top section.
Insert
The Ritual Wash Kit doesn’t have the option to purchase inserts but it does come with one. There is a small zip-up fabric pouch that attaches the same way as other inserts, with poppers. This is a great feature because it means you can detach it and slip it into your bag if you want to carry around any items for touch ups throughout your day. Since using it I carry a nail file, lip balm, lipstick, hand cream and tissues in there. The really great thing about this pouch is that it’s water-resistant as is the lining of the kit, so you don’t need to worry if it gets splashed near the sink.
.
I won’t pretend like the price of their items isn’t on the higher end, but it’s easily justifiable when you consider that these items are hand crafted and made from premium quality leather. Each product has gone through a very lengthy design process to make sure that needs are met and every feature is practical. If you purchase an item from This is Ground, you won’t be disappointed by their quality or function.
Just an FYI This is Ground has a sale* on now if you’re looking for items with a lower price tag.
There’s a lot of controversy surrounding apps, it can be argued that they make us lazy, that there’s nothing like turning the page of a physical book, that we’re becoming ill-equipped to navigate with a real map that doesn’t have a moving blue dot and I can’t imagine the postcard industry is all that healthy at the moment.
For the most part I agree, I mean have you tried to track your whereabouts with an actual map recently? I feel like Joey Tribbiani when he stepped into his pop up London map in The One with Ross’ Wedding.
What we are to be grateful for though is how all of the below “fits” into your phone or tablet, and that if it wasn’t for the advancement in technology, to be able to have all of these things to hand would mean travelling with at least six books. Not to mention the extra bulk of an iPod or walkman – if your childhood goes back as far as mine and if it does can you remember hauling around our extra CDs?! Honestly it’s a miracle we didn’t all put our backs out earlier! My point is, that’s a lot of stuff that has been reduced to one piece of technology.
So let me take you through the apps I’m using for planning, transport, accommodation, communication and entertainment that help me to plan a trip a lot quicker than ever before.
Planning
Google sheets
Sheets is my ultimate app when it comes to planning trips. I know it seems excessive to most people but I plan out all of my trips by making an itinerary spreadsheet. I’ll pop in all the dates I’m away and fill in each activity and hotel with all the details I might need to know at a later date. The spreadsheet doesn’t mean everything is fixed to that day, it’s there so that I can access opening times, ticket costs etc., without worrying about an internet connection. I’m a visual person so it helps me to have it all laid out and if I need to move things around I can see straight away what will and won’t work.
Google Trips
If you have a google account this app is a breeze, it adds all of your trip details that you receive via email (for example, flights and hotel bookings) and makes an itinerary for you, one that you can personalise for your trip. It’s basically google’s answer for my spreadsheets except you can’t add your own notes to specific days or reservations, so there’s room for improvement. To find out more watch the video here.
Google Translate
Most of us probably know from getting a helping hand on our French/German/Spanish homework that Google Translate doesn’t provide the smoothest of translations, but one thing’s for sure, it will help you out if you get in a pickle. Great for vocabulary and making rough translations, you’ll be able to get by in most well-travelled-to countries.
The app has come such a long way since it started. You’re no longer restricted to just typing, you can now translate via a photo of the text, handwriting onto the screen and speaking into it. It’s also capable of translating a live bilingual conversation and can even live translate an image of text by just holding your camera up to it.
Banking
Honestly, travel cards and online banks are a saving grace! I couldn’t recommend Starling and Monzo enough. Access to their app is secure, their customer service is prompt and reliant, they are Mastercard so for the most part you don’t get charged to use it abroad, you get an instant notification (if you are online) when you spend money that shows you what you’ve spent in Pound Sterling, transferring money over is so easy and there are options to make multiple virtual piggy banks for whatever your heart desires. To learn more about the benefits of travel cards take a look at my post 8 ways to manage your travel money.
Lonely Planet
I don’t plan to stop using my LP travel guides anytime soon, they are so helpful. If you aren’t planning on travelling around the country/city/state etc you’re going to and don’t need an abundance of information, or are even just looking to save money by not purchasing the book, you can access heaps of information on their app for over 200 destinations. If you want to know what the must see places are where you’re going then I strongly recommend using Lonely Planet.
Transport
Skyscanner
It’s amazing for comparing flight costs across the board. You can view flights for specific days or even a whole month depending on how flexible you are, plus if you’re really looking to save money you can search for flights to “everywhere” to see what comes out cheapest. Skyscanner compares a huge range of airlines, you can set alerts for when the price drops on flights you have your eye on and there is an option to book multiple legs of your trip which is a seriously great feature that can cut out the need for travel agencies, saving you time and money. They also compare rental car hires and hotels!
Airline
Once you’ve booked your flights, download their app (if they have one). The app gives you easy access to your booking should you need to amend it, it’s a far quicker process for checking into your flight, you can view your itinerary easily and most importantly you can save trees by having your boarding pass on your phone. Some airlines such as WOW Air even use their apps to give you access to their inflight entertainment.
Google Maps
Save money by not paying for the sat nav system in your rental car or network data if you get lost by downloading areas for offline use. Once you know where you’re going, download the areas you need by searching for it on the map, selecting “offline maps” on the app’s menu, press “custom map” then all you need to do is adjust the amount of area you want to have offline access to and press “download”. Make sure you have a good Wi-Fi connection before doing this because it may drain your data. The other brilliant thing about Maps is that you can save and tag places so they’re easier to locate on your map. This does need to be done online but once you have saved them you will be able to see them offline.
Uber
Uber is great for cities and around touristy areas, you can use your card unlike many taxis and you don’t have to worry about stepping into the street to hail one. Plus you get an upfront cost that you can trust rather than getting ripped off in a haggle war.
Public transport maps
Of course, the cheapest option is to use public transport. Maps for train and bus routes are available in app form and most are able to plan your route for you, tell you how long it will take and show the cost. For example, RATP is the app for the Paris Metro and bus lines.
Accommodation
Hotels.com
I LOVE using hotels.com because not only do they have a great loyalty programme that gives you bigger and better discounts the more you book with them but they also offer a rewards system whereby if you collect ten nights you get one free. The room value will be the average amount of your ten bookings and can be added to a longer booking or used for just one night.
Lastminute.com
I’ve got some great discounted last minute trips here, if you’re not restricted to going away at a certain time or don’t have your heart set on a certain destination then lastminute.com can relieve you from a lot of travel planning stress with the flight and hotel packages they offer for crazy prices. The last time I used them was to book our 6 night trip to the Amalfi Coast in February. We stayed in an absolutely stunning hotel and got an incredible off season deal for it.
Communication
World Time Buddy
Even at my best I’m pretty pants at working out what time it will be in different time zones so to make it easier on myself I use World Time Buddy. The greatest thing about this app is that you can see time zones lined up for each hour of the day rather than just the current time like our usual world clocks do on our phones. This is so helpful for scheduling calls, posting on Instagram and knowing if you’re going to either get a response straight away from someone or annoyingly wake them up. With over 20,000 locations you can personalise the ones you want to see.
Messaging
Whatsapp, Facebook Messenger etc. to stay in contact with friends and family without it resulting in a huge phone bill.
Video calling
Skype, Facetime etc. so you can see your friends and family plus you can show them around the wonderful places you go. Sometimes we take for granted how far technology has come in terms of communication, I seriously wish these apps were available back when my Dad was flying with British Airways, you can’t imagine what a difference that would have made.
Entertainment
Been
I recently downloaded Been as a virtual accompaniment to my actual map with pins so that I can track where I’ve been in the world. This app will total up how many countries you’ve been and what percentage of the world you’ve seen. It will make even the most seasoned traveller feel humble to what the world has to offer.
Music
iTunes, Google Play, Spotify etc. Whatever you listen to whilst away will remind you of that trip for years to come so put together and download a good choice of playlists to soundtrack your trip.
Video streaming
Netflix, Amazon Prime, Now TV, More 4 etc. Though it’s not wise to spend a lot of time staring at your screen on couch potato mode, this is a great way to pass time if you’re on public transport (where there isn’t a view out of the window), stuck in the airport when your flight has been delayed or trying to get through a hotel gym work out session. Offline downloads are available on most streaming apps so to save yourself data I suggest you take a moment to download a few episodes or films in advance whilst you have decent Wi-Fi.
Books
Who doesn’t love the feeling of being stuck in a good book? If you don’t have a problem reading from a small screen and want to save on packing space, try downloading some ebooks from Amazon Prime, Google Play Books, iBooks etc.
Camera
If your camera has it’s own Wi-Fi and the ability to share photos via that NFC you’ll need the app to make that happen. Some apps such as the GoPro one have the ability to control your camera from your phone so you can see what you’re taking a photo of, this is especially handy for selfies.
Instagram
Obviously Instagram is very important considering what I do but if you’re not a travel blogger it’s still a great app to have throughout your travels because:
1. You can share you travels and experiences.
2. You can take inspiration from other people’s travels.
3. You can build a community with likeminded travellers.
.
Of course these aren’t all the travel apps in the world – you’ve probably thought of a few that I haven’t mentioned whilst you’ve been reading – but these are my most used and the ones that have made my journey to booking trips so much smoother than it was in the past and I hope they can do the same for you.
I’d love to hear about your favourite apps that you use on your travels, spread the love and let me know here.