Tag: Homemade

  • Homemade & low-waste travel snacks

    Homemade & low-waste travel snacks

    Learn how to make snacks using store cupboard items and vegetable scraps to save waste and make something tasty that you can take on your travels for when you feel peckish. In this blog post I’m going to show you how you can turn potato skin peelings into potato crisps/chips without deep frying them, how to roast chickpeas to turn them into flavoursome crunchy bites and how to turn bulk-buy (save that plastic) corn kernels into popcorn! Yum!

    All of these snacks can be stored in a tiffin or a reusable freezer/zip-lock bag to keep them fresh when you’re travelling or out and about.

    Whether you’re travelling or not, these following three recipes will help you to reduce your plastic consumption and save you from throwing out food by composting it when you could eat it!

    Before I share these really simple recipes I’ll answer a few questions you may have about them:

    Are these small homemade snacks suitable for children?

    These recipes for roast chickpeas, popcorn and potato skin crisps/chips are suitable for children who are over the age of 5 years old. As guided by the NHS website small snacks such as popcorn are a choking hazard for children under the age of 5. Also be mindful of how you season these homemade snacks as young children should not eat sugar to prevent tooth decay or salt to prevent kidney failure.

    Above the age of 5 and with reduced sugar and salt these snack recipes are suitable for children.

    Why are these plastic-free snacks better for the environment?

    These homemade snack recipes are plastic-free as it’s possible to buy potatoes, chickpeas and corn kernels without any packaging and if you’re not used to buying dry chickpeas you can buy them in an aluminium can which can be infinitely recycled. 

    Reducing your single-use plastic consumption can help keep plastic out of our oceans and landfills saving wildlife from accidentally ingesting it and it can work towards a reduction in the need for single-use plastic production which will reduce the need for fossil fuels and production of poisonous greenhouse gasses. 

    Sure, making homemade snacks won’t save the planet right away but every little positive change we make will always help towards it. Don’t give up the good fight and remember the most sustainable thing you can do right now is to use up what you have first.

    Can I take these homemade snacks on a plane?

    Yes you absolutely can take homemade snacks on a plane. Check your destination for specific rules on what food products can be brought in just in case you don’t end up eating them in transit.

    I travelled to Europe with my roast chickpeas and popcorn in reusable freezer bags.


    Homemade potato skin crisps/chips recipe

    How much will this recipe make?

    At least two large potatoes will serve two people.

    How long will these potato skin crisps/chips keep?

    These potato skin snacks are best eaten warm and out of the oven but if you leave them to cool down completely before storing them they will last one day.

    How long will it take to make potato skin crisps/chips?

    It takes an hour to prepare and cook these potato skin snacks.

    What you need to make potato skin crisps/chips

    Baking tray/sheet

    Tablespoon

    Teaspoon

    Sharp knife or vegetable peeler

    Homemade potato skin crisps/chips ingredients 

    2 large potatoes

    2 tbsp oil

    Salt & pepper

    1 tsp paprika (optional)

    1 tsp garlic powder (optional)

    How to make homemade potato skin crisps/chips


    1. Pre-heat the oven at 200°C/392°F (fan assisted).


    2. Peel the potatoes cutting a little deeper than you usually would – this will prevent the crisps/chips from burning as it makes them thicker.


    3. Add peelings to a baking tray/sheet.


    4. Drizzle the oil over the skins.


    5. Season with salt, pepper and any seasoning of your choice. I like to use paprika and garlic but you can use anything. This time I used Everything-but-the-bagel seasoning from Trader Joe’s which works well too!


    6. Pop the tray/sheet into the oven on the middle shelf and cook for 40-45 minutes, check after 35mins to be sure they’re not burning – if you peeled them thick then they’ll take slightly longer.


    7. Allow to cool for a moment and serve or cool completely and store for later or the next day.


    Homemade roasted chickpeas recipe

    How much will this recipe make?

    One tin of chickpeas will make 4 servings.

    How long will these roasted chickpeas keep?

    These roasted chickpeas will last about 5 days in a fridge or 2 days stored dry.

    How long will it take to make roast chickpeas?

    It takes 40mins to prepare and cook these roast chickpeas (if you use canned chickpeas).

    What you need to make roasted chickpeas

    Baking tray/sheet

    Tablespoon

    Teaspoon

    Homemade roasted chickpeas ingredients 

    1 tin of chickpeas

    1 tbsp oil

    Salt & pepper

    1 tsp paprika (optional)

    1 tsp garlic powder (optional)

    How to make homemade roasted chickpeas


    1. Pre-heat the oven at 200°C/392°F (fan assisted).


    2. Drain the chickpeas and put them on the baking tray/sheet – save the chickpea water from the can as you can use it as a vegan egg alternative for baking, 3 tbsp of chickpea water (aquafaba) is 1 egg.


    3. Drizzle the oil over the chickpeas.


    4. Season with salt, pepper and any seasoning of your choice. I like to use paprika and garlic but you can use anything.


    5. Pop the tray/sheet into the oven on the middle shelf and cook for 30 minutes.


    6. Allow to cool for a moment and serve or cool completely and store for later.


    Homemade popcorn recipe

    How much will this recipe make?

    ⅓ cup of corn kernels will make one large bowl of popcorn.

    How long will homemade popcorn keep?

    You can store homemade popcorn in an airtight container or reusable freezer bag for up to one week.

    How long will it take to make homemade popcorn?

    It will take around 15 or less to make popcorn.

    What you need to make popcorn

    Large saucepan with lid

    Tablespoon

    Homemade popcorn ingredients 

    40g (⅓ cup) corn kernels 

    3 tbsp oil

    1 tbsp salt or cinnamon or sugar (optional)

    How to make homemade popcorn


    1. Heat the oil in a saucepan on a medium heat.


    2. Add 4 kernels to the heated oil and cover the pan, when those kernels pop add the rest of them and cover but lift the saucepan off the heat for 30 seconds.


    3. Place the saucepan back on the heat, with the lid left slight off centre for the steam to escape, until the corn pops. Once the corn starts popping shake the saucepan to even distribute the un-popped corn across the bottom of it.


    4. Once the popping slows down, tip the popcorn into a large bowl and season with your choice of flavour.


    5. Allow the popcorn to cool down completely before storing in a tiffin or reusable freezer bag.


    .

    Bon appétit! I hope you enjoy these quick and easy snacks that you can make from home to save waste.

    Do more on and for the planet, Gabriella

    Pin this post


  • Wimbledon viewing party snacks

    Wimbledon viewing party snacks

    Wimbledon is back on our tellies! I don’t know about you but the sound of subdued applause, grunts of exertion and low-tone commentary on a point system that has no reason or rhyme is the nostalgic sound of summers gone by.

    As a travel blogger who has been grounded by the pandemic for 15 months (at the time of publishing) I’ve had to think outside of the Royal box (laugh at my tennis joke!) so here I am, serving up (laugh again) ideas for your Wimbledon-at-home experience this and every summer that Wimbledon is on, or any tennis championship for that matter.

    Whoever you’re watching the tennis with this year, these drink and snack ideas will help level up your experience whilst watching Wimbledon at home.

    To be as inclusive as possible all of my suggestions below are suitable for vegetarians and can also be made vegan, and to make things easy for you I’ve also put a shopping list together at the end of this post.

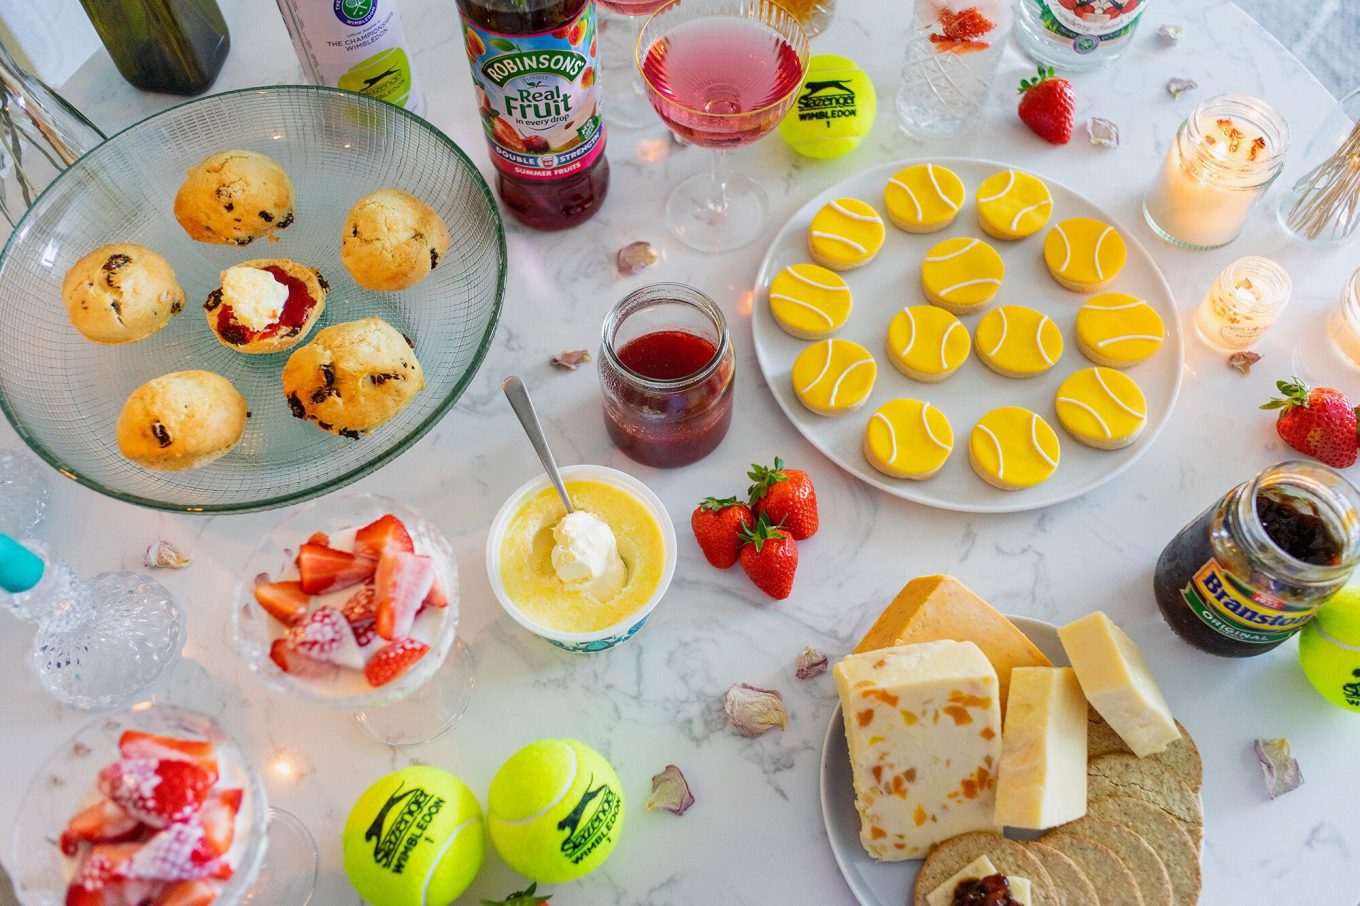
    Here are the drinks and snacks you need to serve up the perfect spread for a Wimbledon viewing party.

    Wimbledon viewing party drinks

    Pimm’s No1 Fruit Cup

    Drinking Pimm’s in the summer is synonymous with watching Wimbledon. 

    Pimm’s is a spiced and fruity gin-based spirit served as a long drink with lemonade or ginger ale.

    Learn more about the origin of Pimm’s No1 here.

    How to make the perfect pitcher of Pimm’s

    Recipe Here

    What you need to make a simple glass of Pimm’s 


    • 50ml Pimm’s No1


    • 150ml lemonade


    • 1 sliced strawberry


    • 3 slices of cucumber (1 for garnishing)


    • 1 sprig of fresh mint


    • Ice


    If you want to make the perfect pitcher of Pimm’s then take a look at my popular summer recipe blog post.

    Gin & tonic

    The G&T is the most classic English cocktail of all time. Celebrate the Wimbledon Championships  being back on our TV sets with official gin of Wimbledon: Sipsmith. Serve an ace (see what I did there) and make your gin and tonics with Sipsmith’s Strawberry Smash gin, their special edition Wimbledon themed gin.

    Sipsmith’s Strawberry Smash gin has been distilled with Hugh Lowe’s (the official strawberry supplier for Wimbledon) 2020 strawberry harvest. 

    Serve Sipsmith’s Strawberry Smash with tonic and strawberry slices or take a look here at Sipsmith’s suggested cocktail recipes.

    Robinsons squash

    Robinsons is the official soft drink of Wimbledon and is perfect for those who won’t be drinking alcohol. 

    Robinsons make concentrated squashes and cordials ready for you to dilute with water into a refreshing drink to quench your thirst whilst watching the tennis. Robinsons has turned almost every fruit into one of their squashes so there’s one to please everyone (who likes fruit).

    PFH Fun Fact: Robinsons squash was created at The Championships, Wimbledon in 1935. Their first flavour was Lemon Barley Water for the players to keep them hydrated during their matches.

    Get double strength to reduce the amount of plastic you purchase as you only need half the amount and recycle your bottle responsibly if you don’t plan on upcycling it.

    Wimbledon viewing party snacks

    Pimm’s Drizzle Loaf Cake

    Recipe here

    Strawberries and cream

    Strawberries and cream were first combined during the reign of Henry VIII in the 1500s, since then it has been a firm British favourite during the summer.

    The tradition of serving strawberries and cream at the Wimbledon tennis championships originated in 1877 but no one really knows why. Popular beliefs are that strawberries were in season during the tournament and that eating strawberries was very popular during the Victorian Period. Consider them the Victorian equivalent of a grande Starbucks cup that appears all across your social media feeds (please try to use reusable cups).

    PFH Fun Fact: the strawberries sold at Wimbledon are picked on the Hugh Lowe farm at 4am on the day that they are to be served.

    A serving of strawberries and cream at Wimbledon includes at least 10 strawberries. Serve them with oat cream for a vegan alternative.

    Scones served with clotted cream and homemade strawberry jam

    Few sweet treats are as quintessentially British as a scone served with clotted cream and jam. As it’s a Wimbledon themed spread you’re putting together I suggest serving strawberry jam, or to make things really special why not try your hand at making fresh strawberry jam with my homemade jam recipe blog post. I made a jar of strawberry jam for this blog post in under one hour and it tastes better than any strawberry jam I’ve ever had. To speed up your jam making process, blend your strawberries in a smoothie maker or food processor before adding them to the sugar.

    As for your clotted cream, it can’t be anything other than Rodda’s, made in Cornwall. In saying that I am aware that if you’re reading this in North America and want to put this tennis themed spread together you won’t be able to get your hands on the best cream in the world. For you I suggest whipping up some double cream.

    English fruit scone recipe

    Recipe Here

    Learn to make freshly baked scones with my recipe blog post here. To make vegan scones simply swap out the egg for 3tbsp of chickpea water, the butter for margarine and the milk for any milk alternative.

    Tennis ball sugar cookies

    My sugar cookies take less than an hour to make and once cool you can decorate them in under half an hour. They only take 8-10 minutes to bake, require very little baking skills, are easy to decorate and really pull the theme together. Click here for the recipe.

    If you’re not vegan don’t worry, my sugar cookie recipe wasn’t originally vegan. Where I use egg replacement use 1 egg and you can use dairy butter instead of margarine.

    To make tennis ball sugar cookies, use a round cookie cutter and find a yellow fondant icing. Mix up some icing sugar into a thick consistency and pipe on the white curves or you can purchase pre packaged piping icing if you don’t have your own bag at home.

    English cheese and crackers

    For your savoury accompaniment to all of these sweet treats serve up some crackers and classic English cheeses such as cheddar, Wensleydale and Double Gloucester. Take a look in your local deli to support a small business.

    Easy Sugar cookie recipe

    Read here

    Compliment your cheese and crackers with a pickle. For a crowd pleaser go for Branston pickle – it’s a sweet pickle chutney and for a British classic serve Piccalilli – it’s a mustard pickle that was inspired by south asian pickle – or, if you feeling like something different why not give my Mauritian spiced vegetable pickle a go, I’ve linked the recipe here.

    Wimbledon viewing party shopping list


    • Strawberries (at least x2 punnets, one for making jam and one for serving with strawberries)


    • Cucumber


    • Lemon


    • Mint


    • Cheddar cheese


    • Double Gloucester cheese


    • Wensleydale cheese


    • Clotted cream


    • Cream or oat cream


    • Milk or milk alternative


    • Margarine


    • Pickle


    • Tin of chickpeas (for the water as egg replacement or buy eggs)


    • Crackers


    • Caster sugar


    • Plain flour


    • Self raising flour


    • Baking powder


    • Fondant icing


    • Icing sugar


    • Caster sugar


    • Vanilla extract


    • Currants


    • Robinsons Squash


    • Lemonade


    • Indian tonic


    • Pimm’s No1 Cup


    • Sipsmith Strawberry Smash gin


    Don’t understand the rules of tennis and want to grasp it quickly? Take a listen to the Calm app’s sleep story “But seriously, The Rules of Tennis” read by the legend himself John McEnroe.

    Game, set, match and snack!

    Do more on & for the planet, 

    Gabriella 

    Pin this post.


  • How to make handmade loofah soap

    How to make handmade loofah soap

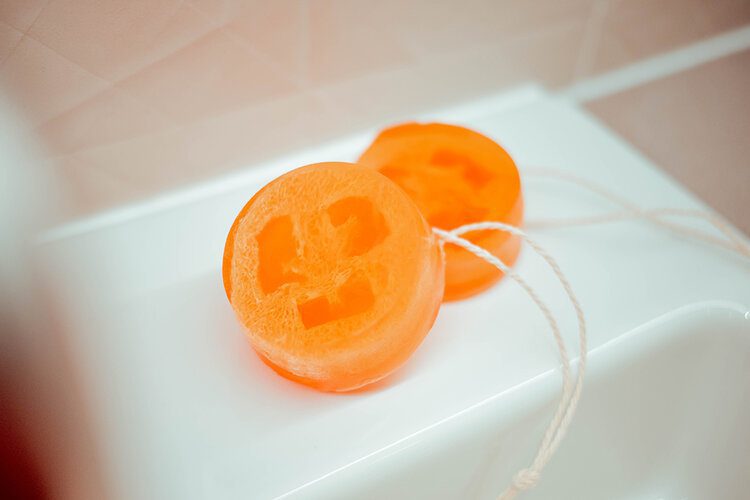
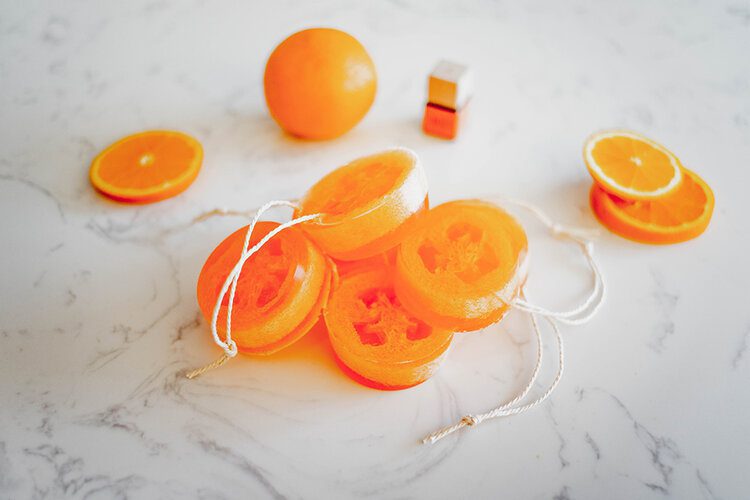
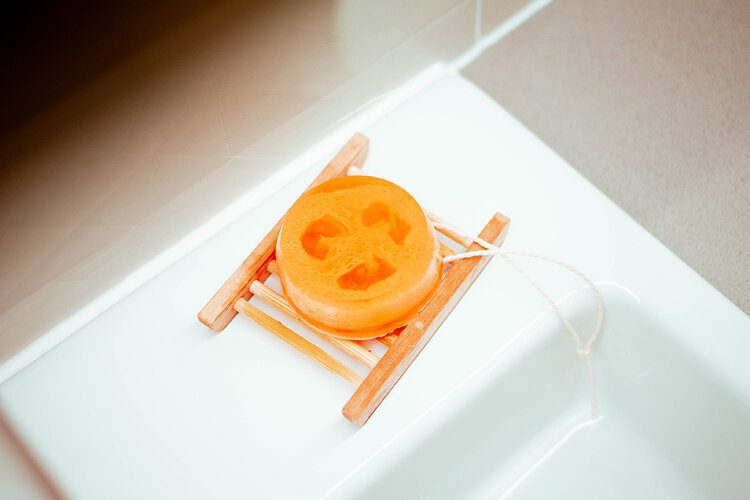
    Learn how to make handmade soap with a naturally exfoliating loofah inside with this easy step-by-step tutorial in collaboration with Earth Conscious shop, Coconut & Cotton. Soap making is not only a fun activity to do (for yourself or with kids) but it’s also a great way to reduce plastic in your bathroom

    Sidebar: wash out and reuse the tub that the soap base comes in to store your homemade soap.

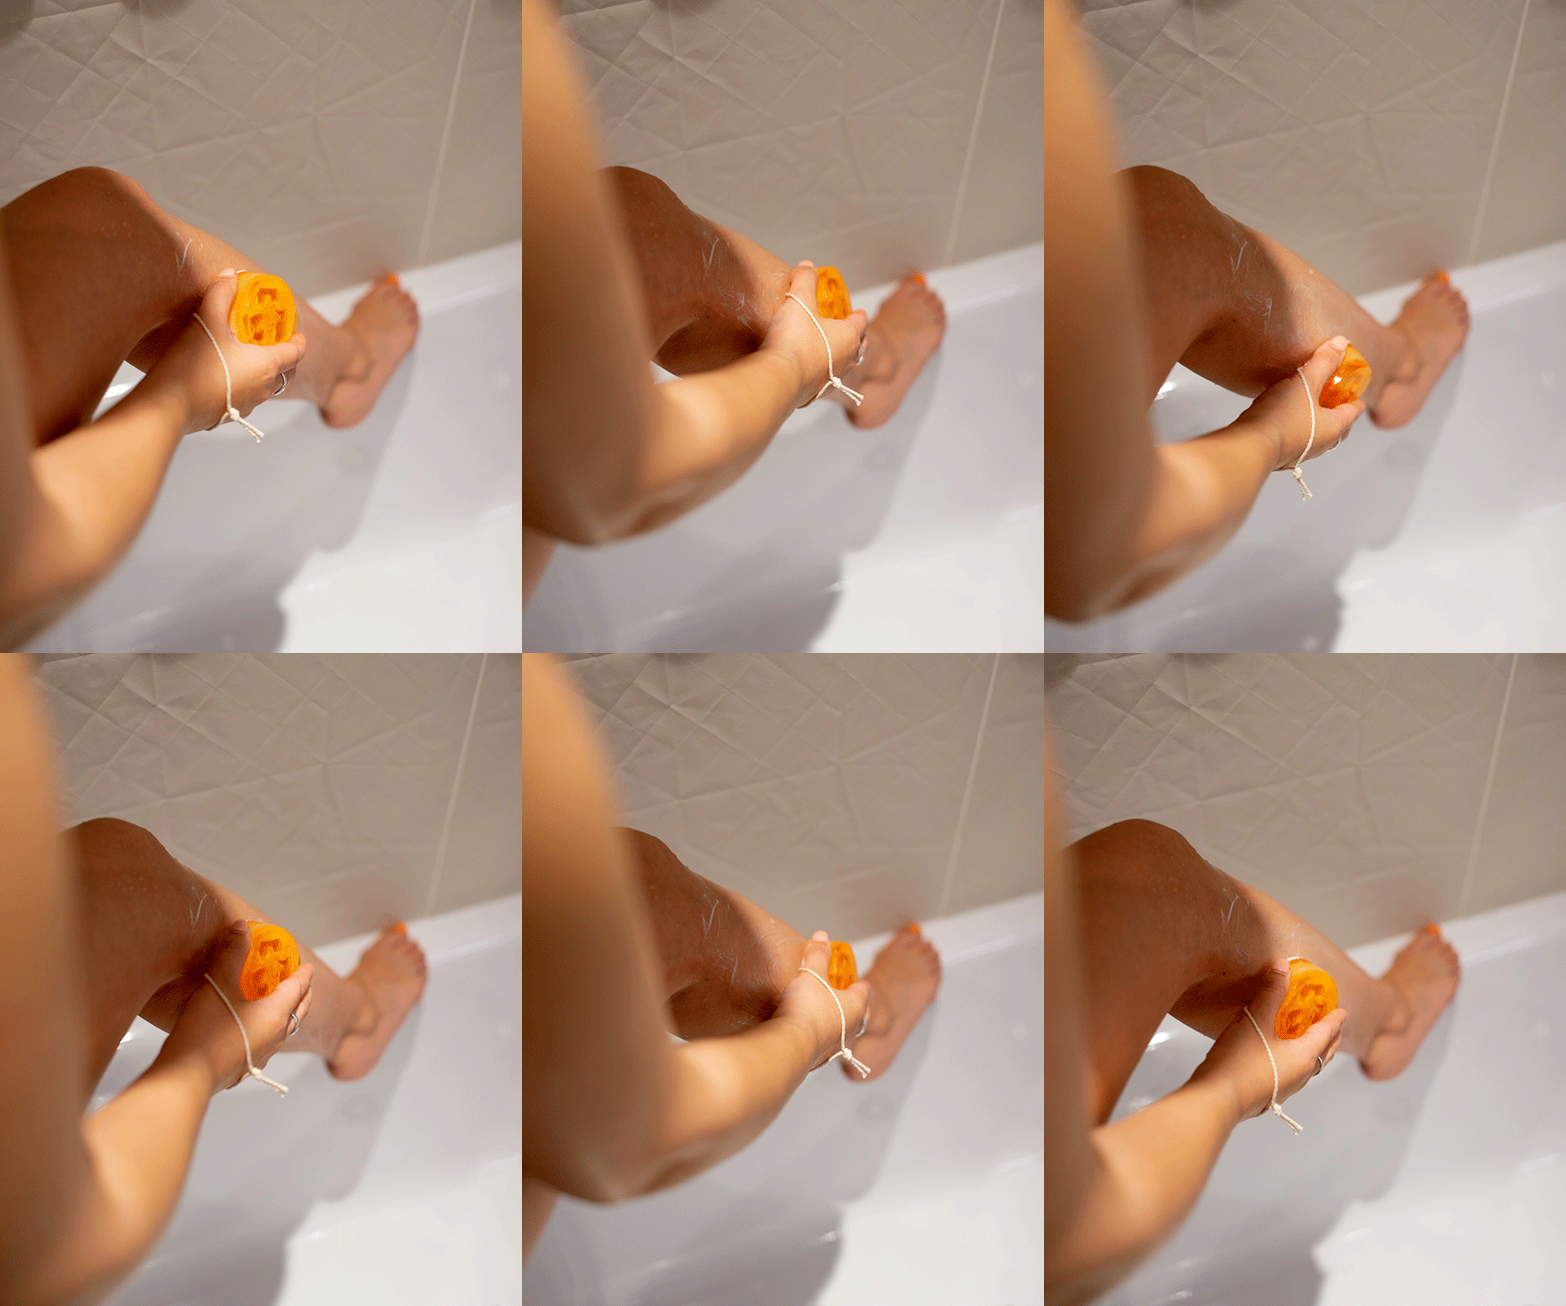
    Take your handmade loofah soap on your travels in an aluminium soap tin from Coconut & Cotton (it fits, I tried it) to prevent needing to use any plastic packaged soap or shower gel. These homemade soaps also make for great gifts and/or party favours.

    This how to make soap tutorial is brought to you by Coconut & Cotton who provided many of the items needed to make these round loofah soap bars. 

    Coconut & Cotton is a female-owned plastic-free and planet-conscious shop selling an amazing range of affordably low-waste household products to help you live a more sustainable lifestyle. Coconut & Cotton is located in Shaftesbury, south west England and most of their products are available to shop online at www.coconutandcotton.co.uk. All orders are sent using reusable and plastic-free packaging and they often pop in a fun free sample.

    Scroll past what you need to make handmade soap and the instructions for answers to some questions you may have.

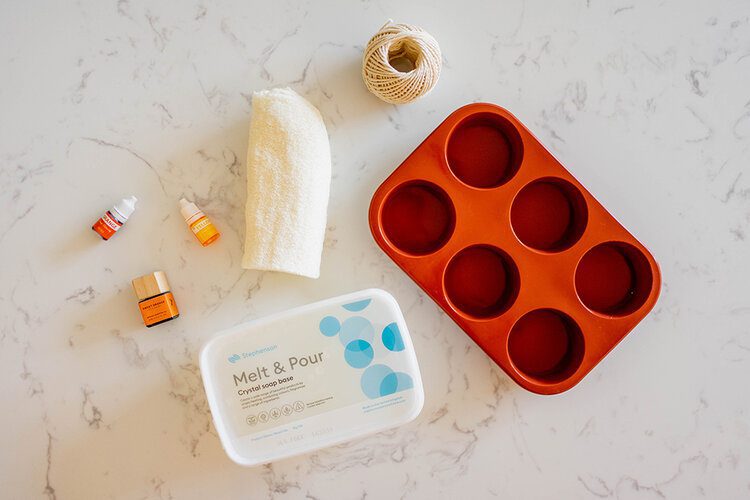
    Ingredients for making loofah soap

    Equipment needed for making loofah soap


    • 6 cavity round silicone mould 7cm or 2 3/4” wide and 3cm or 1.18” deep


    • Bread knife


    • Sharp knife


    • Chopping board


    • Ruler or tape measure


    • Scissors 


    • Microwave and microwaveable container or two saucepans and the stove top


    • Dessert spoon


    Step-by-step instructions for making handmade loofah soap

    1. Re-hydrate your loofah from Coconut & Cotton in the bathtub with the shower head or you can just pop it on the floor whilst you shower to hydrate it.

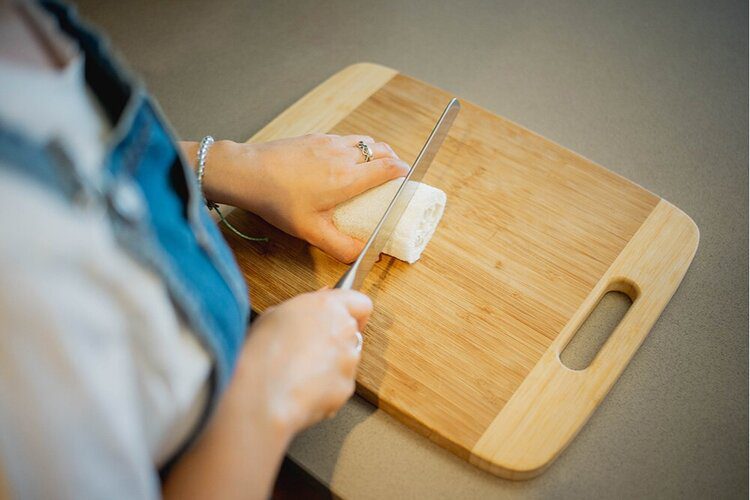
    2. Slice your vegan loofah with a serrated knife (a bread knife will do) into x6 slices about 1.5cm or 1/2” thick.

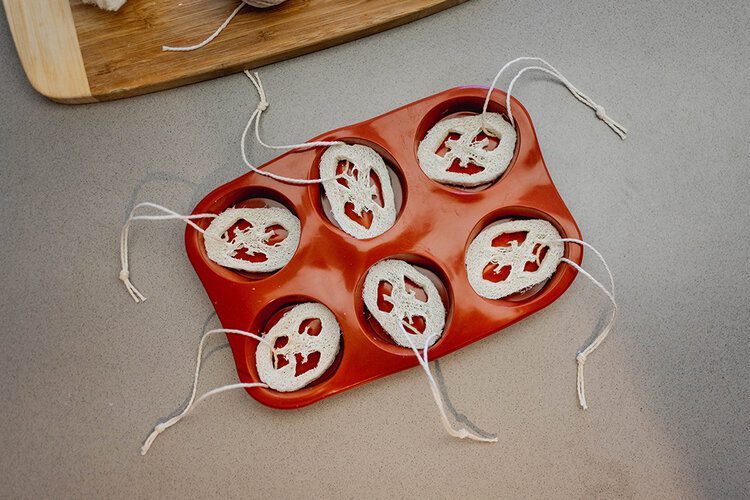
    3. Cut x6 pieces of 41cm or 16” long recycled cotton string from Coconut & Cotton. Pair one loofah with one piece of string and thread the string through one of the holes in the centre of the loofah slice and tie a knot to secure a loop handle. This string loop that you’ve created means you can hang your soap in the shower when you’re not using it and you can loop it around your fingers to stop you from dropping your soap when it gets slippery.

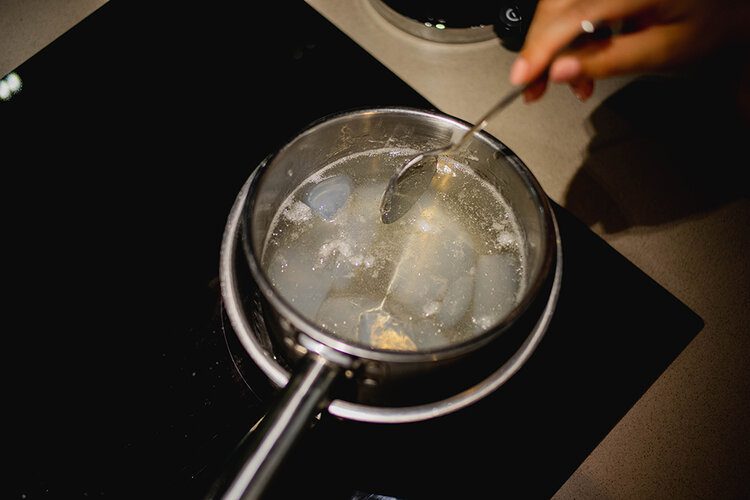
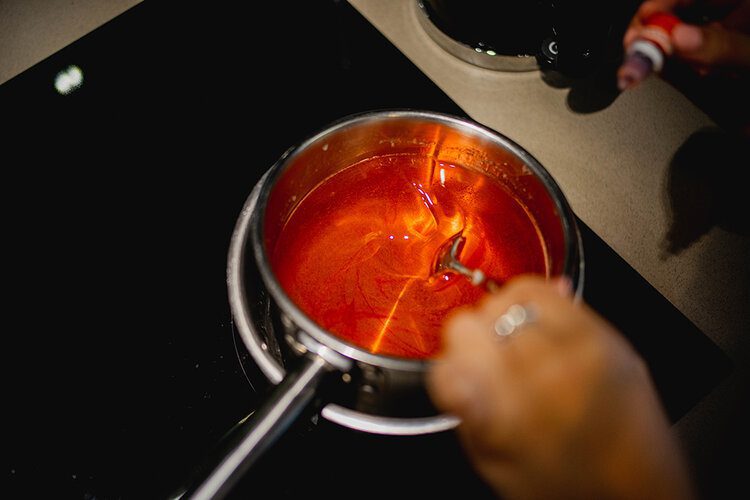
    4. Next you’ll need to melt your soap base, to do this first remove your soap base from its package and cut it into smaller pieces. You can either place it into a microwaveable container and melt it for a couple of 30 second bursts in the microwave or you can create a double boiler with two saucepans and melt it on the stove top. If you’re using the double boiler method then it will take about 15-20 minutes on a medium heat to melt the soap base into a liquid. You may need to top up the water in your double boiler a couple of times.

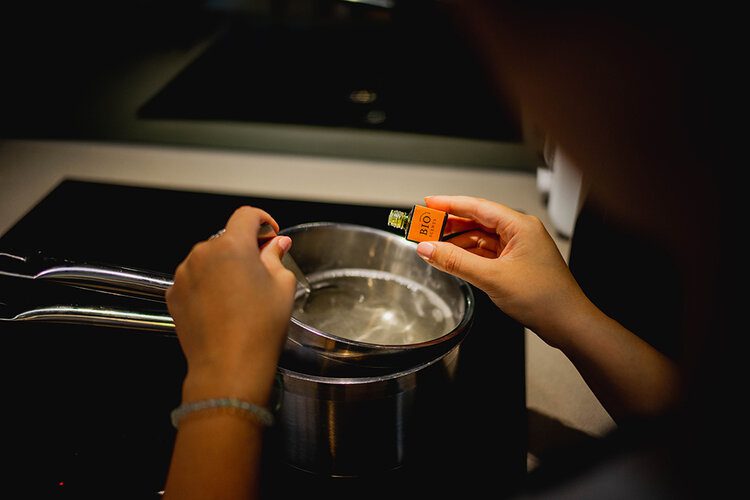
    5. Once liquified, frequently stir the soap with a dessert spoon to prevent a skin from forming. Add your choice of essential oil(s) from Coconut & Cotton, you need about 3-4 drops of each oil per soap you’re making.

    6. Then add 6-8 drops of your choice of soap colourant if you’re adding it. Stir the soap base to combine the colouring and essential oils and stop a skin from forming.

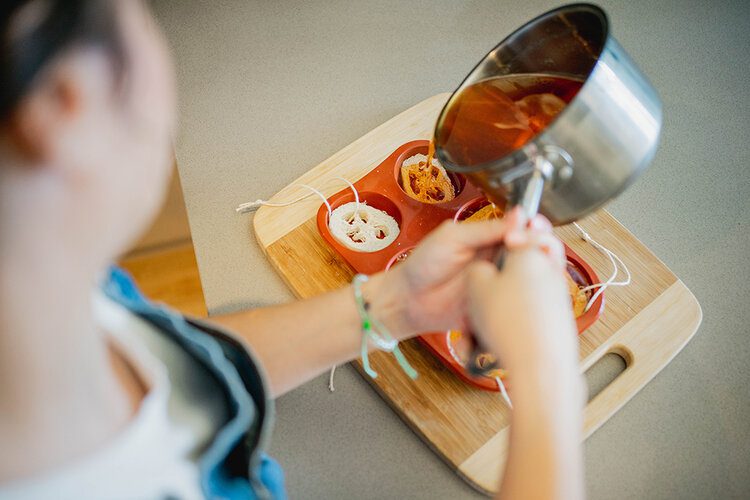
    7 .Carefully remove your soap mixture from the heat and gently pour into each of your 6 moulds.

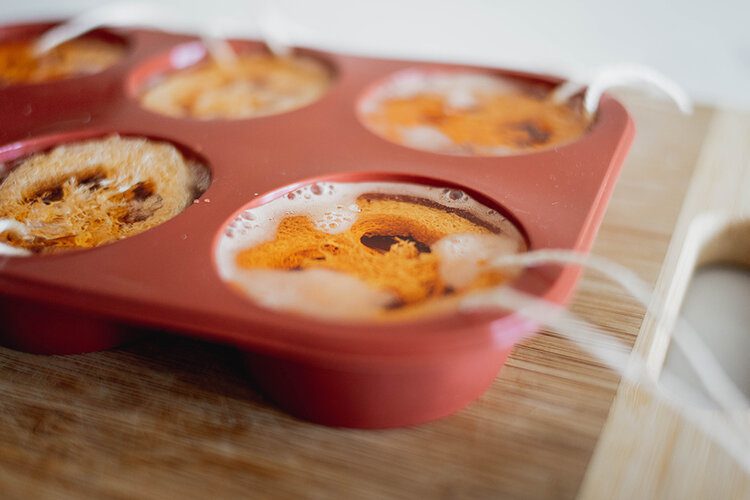
    8. The loofah slices may float to the surface but you can encourage them to sink by placing 3 regular knives over the top of them. Lay each knife over 2 moulds each.

    9. Leave your soaps to cool and set for an hour and a half. Once cool, you can pop them out and they’re ready to use.

    If you have any leftover soap mixture you can pour it into other moulds.

    What is a loofah/luffa?

    Loofah (or luffa) is the fruit of a tropical vine plant related to the cucumber family. The fruit, that looks much like a courgette, is left out to dry for 6+ months after which the husk can be re-hydrated to form a coarse sponge that will naturally exfoliate skin by brushing away dead skin cells and it stimulates blood circulation.

    Once you are ready to discard your used loofah you can simply compost it.

    You can either buy a slice of loofah for £1.60 or a whole loofah for £7.50 from Coconut & Cotton which you can cut up yourself.

    Do I need to use a loofah to make this soap?

    No you don’t need to insert a loofah into your soap to use this soap making tutorial. You can leave out the loofah or alternatively you can use poppy seeds as another natural exfoliant.

    Is soap making difficult?

    Making homemade soap with a melt and pour soap base is not difficult. It only takes about half an hour to make and pour and then an hour and a half to set. I recommend using a melt and pour soap base because soap making with lye or sodium hydroxide can be dangerous if you don’t know what you’re doing. 

    Is homemade soap vegan?

    The Stephenson melt and pour crystal soap base that I use is 100% vegetable based so yes it is vegan. It is also paraben free, biodegradable and isn’t tested on animals.

    Which essential oils are best to use in handmade loofah soap? 

    You can use any combination of essential oils you like. Coconut & Cotton has a collection of 17 essential oils by Bio Scents, a Portuguese company who bottle 100% organic essential oils in reduced plastic packaging. Choosing your essential oil really depends on the effect you want the scent of your soap to have whilst you use it, for example:

    Lavender essential oil in soap

    Bio Scents lavender essential oil will soothe, de-stress and encourage a relaxed state of mind. Lavender scented soap is ideal to use before bedtime. 

    Citrus essential oil in soap 

    Any citrus essential oil such as Bio Scents lemon essential oil or the Bio Scents sweet orange essential oil from Coconut & Cotton is known for being uplifting and specifically orange essential oil can support clean skin.

    Eucalyptus essential oil in soap

    Eucalyptus essential oil is known for being stimulating and rejuvenating so it’s ideal for using in the shower first thing in the morning. It’s also ideal for when you have a cold or the flu because it helps to clear congested sinuses. 

    Do I need to use soap colouring in my handmade soap? 

    You don’t need to use soap colouring, the only thing adding soap colouring does is change the colour of the soap from translucent to whichever colour you choose. It ultimately makes the soap fun to look at so if you want to save money you don’t need to add soap colouring.

    If you do choose to add soap colouring you can match it to the colour of your essential oil: purple with lavender, orange with orange etc.@coconut.and.cotton for amusing content of the owner, Lucy, as she shares new products and eco-conscious tips.

    How long does handmade soap take to cool?

    The soap will take about an hour to set at room temperature but to be certain it has before popping it out of the mould, leave it to cool for at least an hour and a half.

    .

    If making your own soap isn’t quite your thing and for some reason you’ve made it this far in this blog post then I recommend buying some heavenly scented bars of French Marseille soap – they’re my favorite bars of soap when I’m not making them myself!

    Follow @coconut.and.cotton for amusing content of the owner, Lucy, as she shares new products and eco-conscious tips.

    For more with Coconut & Cotton check out Eco-conscious period packing list, How to have an Earth-conscious spa day at home with Coconut & Cotton and Sustainable stocking fillers for travellers with Coconut & Cotton.

    Do more on & for the planet, Gabriella

    Pin this post


  • Vegan fresh pasta recipe

    Vegan fresh pasta recipe

    Learn how to make simple homemade pasta from two ingredients with this simple recipe. If you’re  intentionally eating a more plant based diet then there’s no need to be scared off by the word “vegan”, this recipe doesn’t substitute anything it’s just an eggless fresh pasta recipe.

    This pasta recipe will help you to make pappardelle pasta which is like spaghetti with a whole lotta junk in its trunk – it’s about 2-3 times wider than tagliatelle. You don’t have to make pappardelle though, you can make any shape you fancy with this pasta dough.

    Yes my homemade pappardelle pasta is on the floor, it was the only spot with natural daylight when I made it.

    This fresh pasta recipe is super easy and quick to whip up and is really handy if you’ve run out of pre-made pasta, looking for a pretty simple way to impress your dinner guest, want something fun to cook with kids or are feeling extra come dinnertime. It’s also a neat way to honour a beautiful country whilst we can’t travel to Italy just yet.

    I have chosen to serve up my fresh pappardelle pasta with pesto sauce, mixed baby tomatoes, pine nuts, parmesan and basil but you can serve your homemade pasta with any sauce of choice.

    Ok so anyone who isn’t just here for the recipe and hasn’t already skipped down (no judgement here) I’ve answered a couple of questions you may have about this vegan fresh pasta recipe and then I share the ingredients, equipment and method.

    How much will this vegan fresh pasta recipe make?

    1 ½ cups of plain flour will make enough pasta to serve two people.

    Important tips for making homemade vegan fresh pasta

    The most important part is to make sure you have enough flour underneath and on top of your rolled out dough so that when you cut out your chosen shapes it doesn’t stick to itself.

    Does it have to be pappardelle pasta?

    Nope I’m just lazy and pappardelle shaped pasta requires very little effort.

    What you will need to make homemade vegan fresh pasta

    Ingredients for homemade vegan fresh pasta


    • 204g / 1 ½ cups of plain flour plus extra for dusting


    • 330ml / 1 ⅓ cups of cold water (approximately)


    • Teaspoon of salt


    Equipment for homemade vegan fresh pasta


    • Cup measurements


    • Dessert spoon


    • Fork


    • Rolling pin


    • Sharp knife


    • Saucepan


    • Wooden spoon


    • Colander


    Method for making homemade vegan fresh pasta

    1. Measure out the flour onto a clean surface, alternatively you can use a mixing bowl.

    2. Using a dessert spoon make a well in the middle of the flour, you can use the GIF below as a reference. Making a well in the flour makes it easier to gradually mix in the water so your dough doesn’t become lumpy.

    3. Add the water approximately one tbsp at a time and use the fork to mix the flour in. You want to gradually take flour in from the edge of the well you made and whisk it into the flour to combine it. As the dough becomes less sticky add a little more water and continue to mix the flour in. To make things easier, you can mix the dough in stages.

    Note that you might not need all of the water, use as much as you need to form a dough with all of your flour.

    4. Once you have mixed all of your flour into a dough, dust your surface with extra flour and knead your dough for about 4-5 minutes or until it becomes smooth and elastic. This helps the pasta to keep its structure once you shape it whichever way you please.

    5. Dust your surface again with flour and your rolling pin and roll out one half of the dough to a thickness of 3mm/0.2”. Be sure to dust flour onto your surface every time you move and flip your dough to make sure it doesn’t stick. If it’s easier you can work your dough in two halves.

    How to shape pappardelle pasta

    Before we continue, you don’t have to make pappardelle pasta, you can make whatever shape you like. I’m just lazy and pappardelle is easy.

    6. Bring a saucepan of salted water to the boil as you continue with steps 7-10.

    7. Sprinkle and smooth out a layer of flour onto the rolled out dough. You don’t want to smother it with flour but it needs enough so that neither side is sticky.

    8. Take one edge of your dough and lightly roll it in and continue to roll the whole dough so it resembles a Swiss roll. Be careful to roll lightly so the dough will unravel easily after you’ve cut it.

    9. With a sharp knife slice your rolled up dough (gently if you choose not to use a chopping board as to not damage your surface). To make pappardelle pasta cut your slices 2-3cm/3⁄4–1inch wide.

    10. Lightly flour your hands and gently unroll your pappardelle pasta.

    11. Place your pappardelle pasta into the boiling water, stir and cook for 2 minutes. Make sure you don’t overcook your pasta as it will become gloopy, lose its shape and be unpleasant to eat.


    12. Drain your pasta, add a little butter and stir in your sauce of choice, I used vegan green pesto. Add any extra you like such as pine nuts and tomatoes, add a sprinkling of parmesan and garnish with fresh basil.

    Buon appetito!

    Do more on & for the planet, Gabriella

    Pin this post


  • Homemade raspberry jam recipe

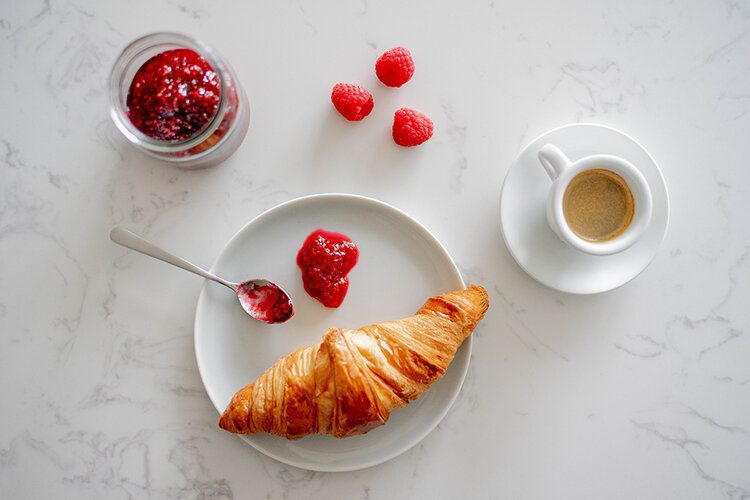
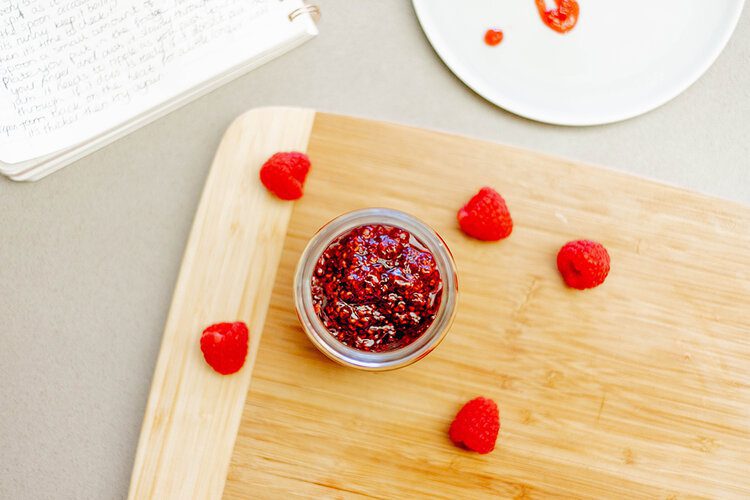
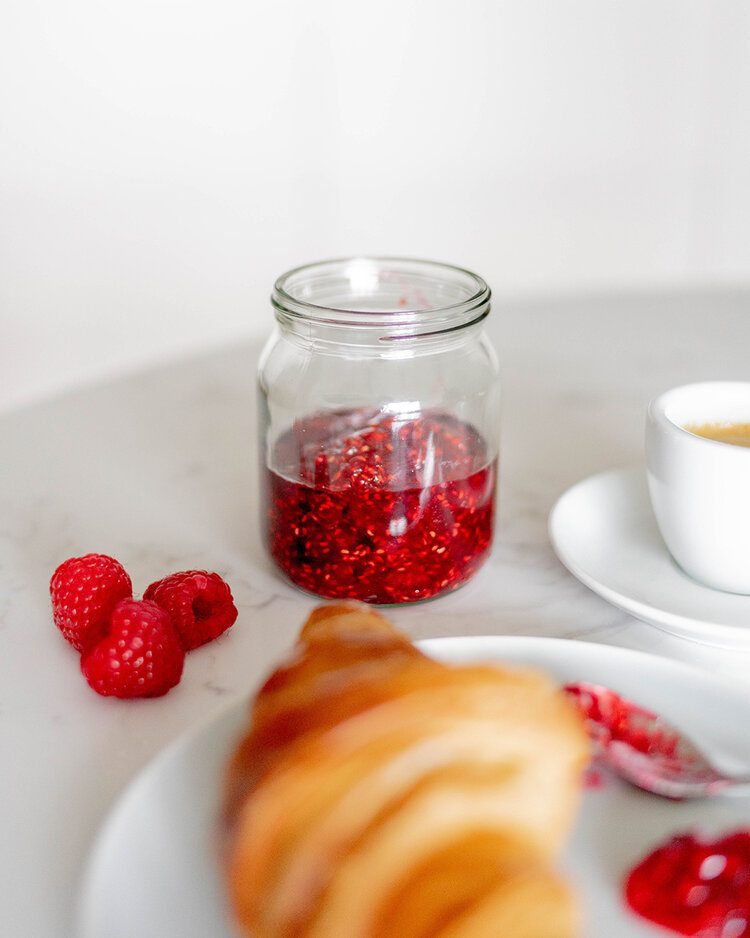
    Homemade raspberry jam recipe

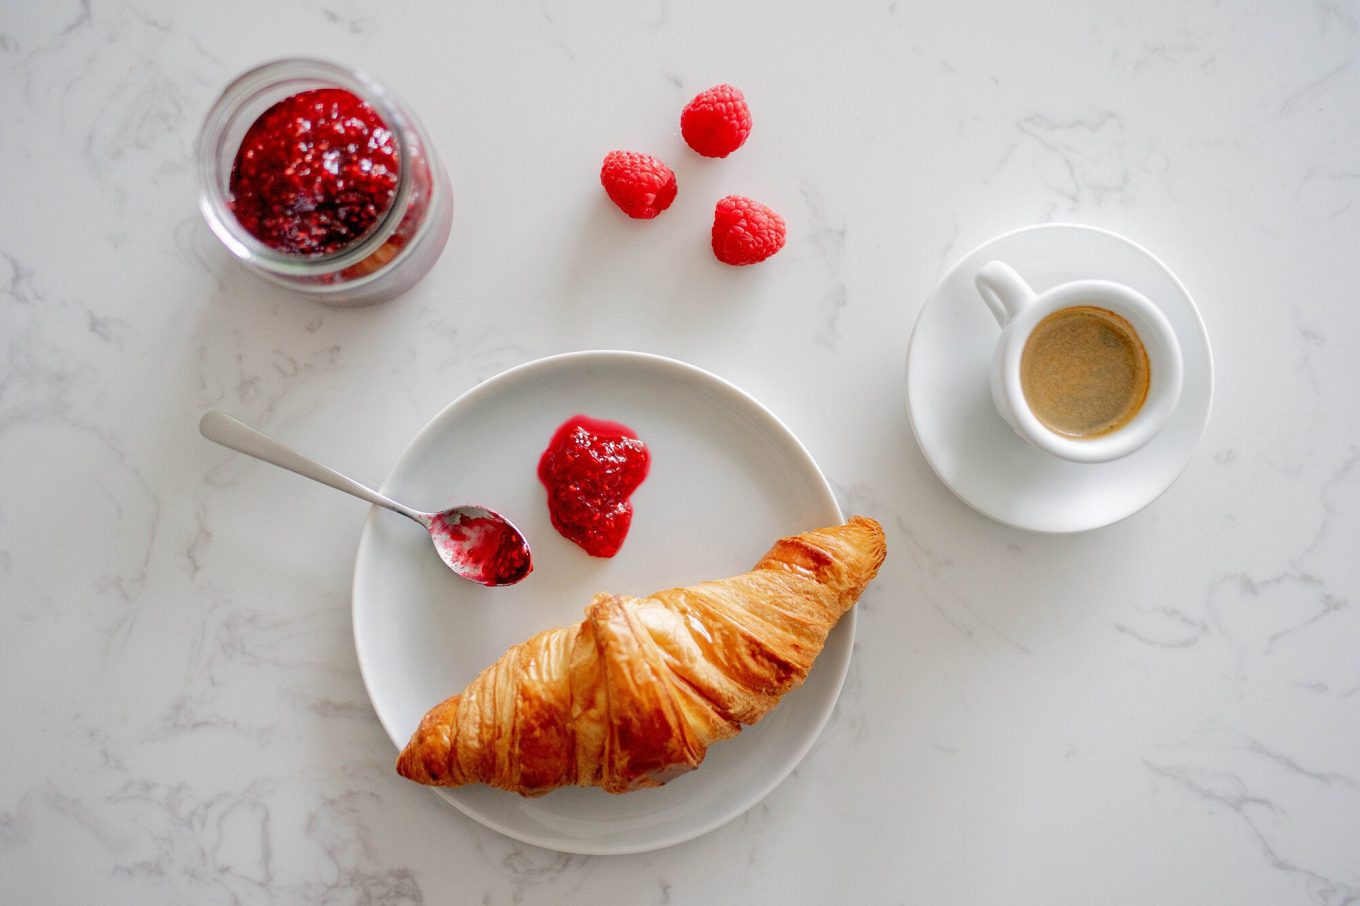
    As you are aware, this homemade jam recipe blog post has been published in the midst of a worldwide pandemic. I haven’t left England in over a year and I don’t have any trips booked for the foreseeable future. Giving you fresh travel content is tricky, but I want to keep giving you blog posts that can at least keep you occupied whilst you also wait for your borders to open, so here I am publishing my Mum’s jam recipe. 

    Her homemade jam is stashed in just about every corner of her kitchen so we can all trust that she makes a good jam. You didn’t come here to read an essay about why you’re getting a homemade jam recipe though as the chances are you’re here because you just want a jam recipe, right? If that’s the case scroll down for the recipe. Everything that comes between now and the recipe is me answering some frequently asked jam related questions, so if you find yourself thinking “how long will this jam last Gaby?” check back here and I won’t judge you for skipping these paragraphs before the recipe – we all do it!

    Notes on making homemade jam

    Homemade jam is really easy to make, plus it’s a really cute gift if you’re trying to give more eco-conscious presents – it uses minimal ingredients, it preserves the fruit for much longer and it gives a greater purpose to your upcycled jars.

    PFH Top Tip: Wear an apron or something dark coloured that you’re not precious about as the jam will spit.

    Can I take jam on a plane?

    Making jam out of fresh fruit is also a really neat and easy way to preserve fruit to bring it home from your travels in your suitcase, should you be staying in accommodation with a kitchen. 

    Border restrictions prevent you from being able to enter a country with fresh fruit but the sugar in jam preserves the fruit and eliminate the risk of pests and diseases that can spread with fresh fruit.

    Of course, the jam is a liquid so you will have to pack it into your checked luggage to be able to bring it back. Make sure it’s protected within your luggage so it doesn’t break when your suitcase gets tossed around behind the scenes.

    Jars are super easy to get hold of in homeware stores so should you go coconuts for some juicy mangoes on your tropical travels, you can make them into jam and bring them home to enjoy! I actually made a raspberry and mango jam with this recipe (if you add another fruit then increase the amount of sugar to match the weight of all the fruit) and it was delicious!

    How do I sterilise up-cycled jars?

    It’s super simple to sterilise old jars to give them a second life such as holding your homemade jam. Place the jar into a container filled with warm soapy water and leave for a few hours to remove the labels and the sticky residue. Then either wash out the jar or put it in the dishwasher to clean the inside.

    To sterilise it before using it for food storage (leftovers, jam etc.), pour some boiling water into it  and let it sit for a few minutes. Wear oven gloves/mitts or use a tea towel to touch it to pour out the water so you don’t burn your hands. Dry it and it’s ready to use.

    You may also be interested in my Mauritian achard légumes recipe, a vegetable pickle you can store in your sterilised jars!

    How much jam will this recipe make?

    This is a small batch jam recipe and will make one jar of jam. A 150g punnet of raspberries (which is a standard measurement in British supermarkets) will make one 350g jar of jam.

    Although I give quantities of the ingredients below the rule of thumb for jam making is to have equal sugar to fruit. The quantities in my jam recipe are based on the punnet of raspberries I bought, so just check the weight of the punnet you buy and adjust your sugar to equal it. 

    Take into consideration this is based on weight not volume.

    How long will homemade jam keep?

    If you store homemade jam in a cool and dry space that is out of direct sunlight it will last for 12 months. 

    Once opened, your jar of jam should be consumed within a couple of months. 

    Store opened jars of jam in the fridge.

    Use a clean spoon/knife (as opposed to one with butter on it) to prevent it from getting contaminated.

    How will I know my jam is the right consistency?

    I explain the process for checking your jam is the right consistency in step 9 of the recipe below but if you’re just looking for this answer then the test goes as follows:

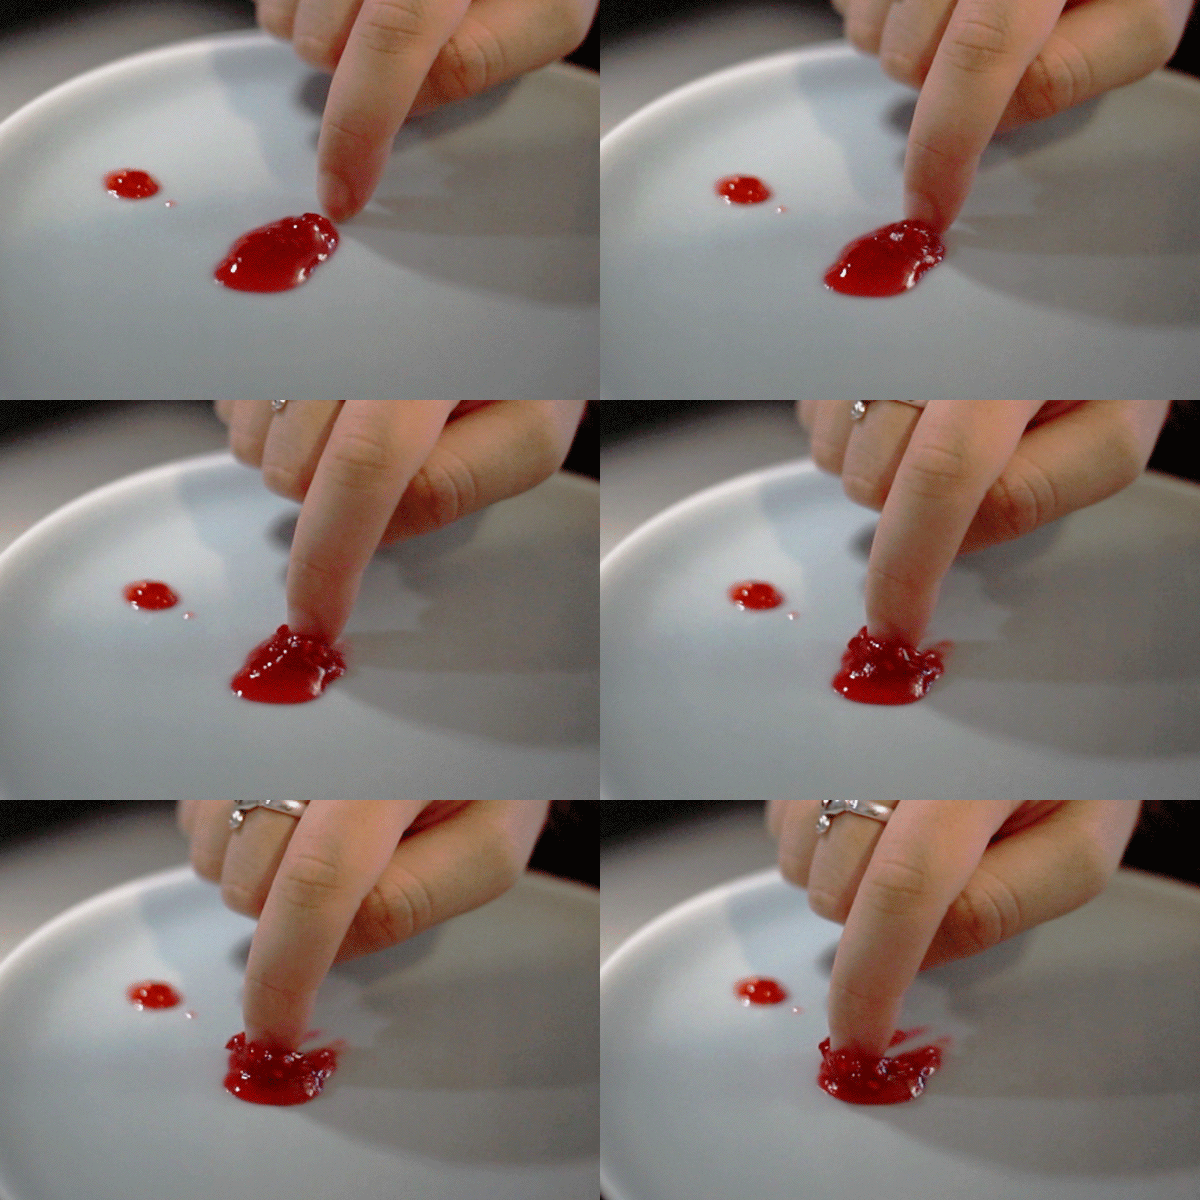
    To test if your jam is ready to pour into your jar push your finger through the centre of the jam. If the jam ripples in resistance to your finger nail and your finger leaves a clear path through the jam then your jam is at the right consistency.

    If you’re still unclear then take a look at step 9 for a GIF that perfectly illustrates what I mean.

    What you need to make jam

    Wooden spoon

    Medium saucepan

    Small saucepan

    Scales/measurement cups

    Tbsp measure

    Small plate

    Jam jar with lid

    Homemade raspberry jam ingredients 

    150g / 1 ⅓ cups / 5.3 oz of fresh raspberries

    150g / ¾ cups / 5.3 oz of Billington’s golden caster sugar

    1 tbsp lemon juice

    Raspberry jam recipe

    1. Put a small plate in the fridge. This is for checking if your jam is the right consistency before pouring into your jar to set.

    2. Pour some boiled water into your jar to sterilise it. Set it aside until you’re ready to pour the jam in.

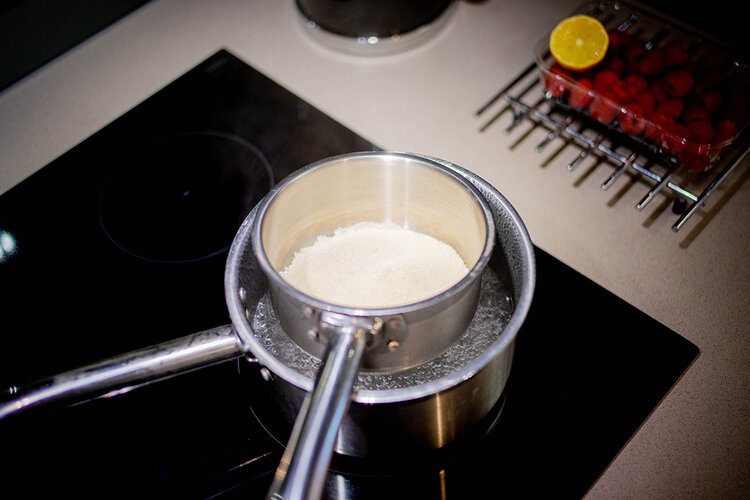
    3. Set up a double boiler by placing the smaller saucepan into the larger saucepan and bringing enough water to the boil in the large saucepan that it heats the small one but doesn’t touch the bottom. Once the water is boiling, turn it down to a simmer.

    4. Add your sugar to the small saucepan and leave it to gently warm the sugar, this will encourage the fruit to melt rather than burn when you add it. Stir the sugar every few minutes to make sure it’s heating evenly.

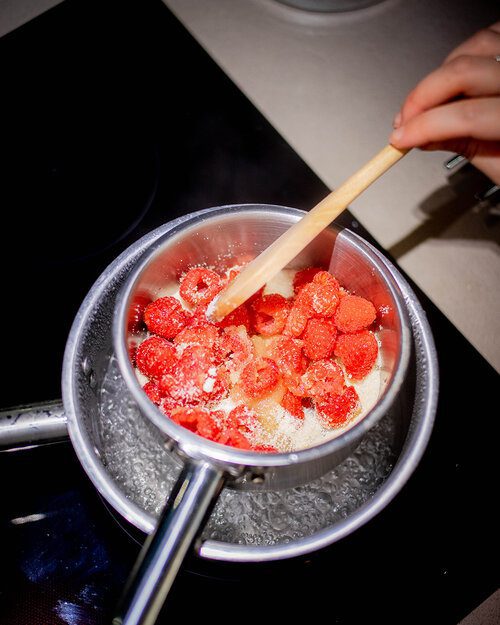
    5. Once the sugar is warm to the touch (it should only take about 8 minutes) add your raspberries (or fruit of choice) and lemon juice.

    6. Gently stir to encourage the fruit and sugar to melt together.

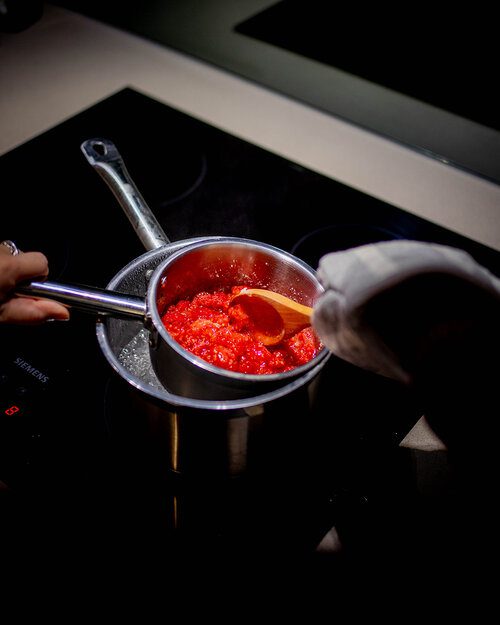
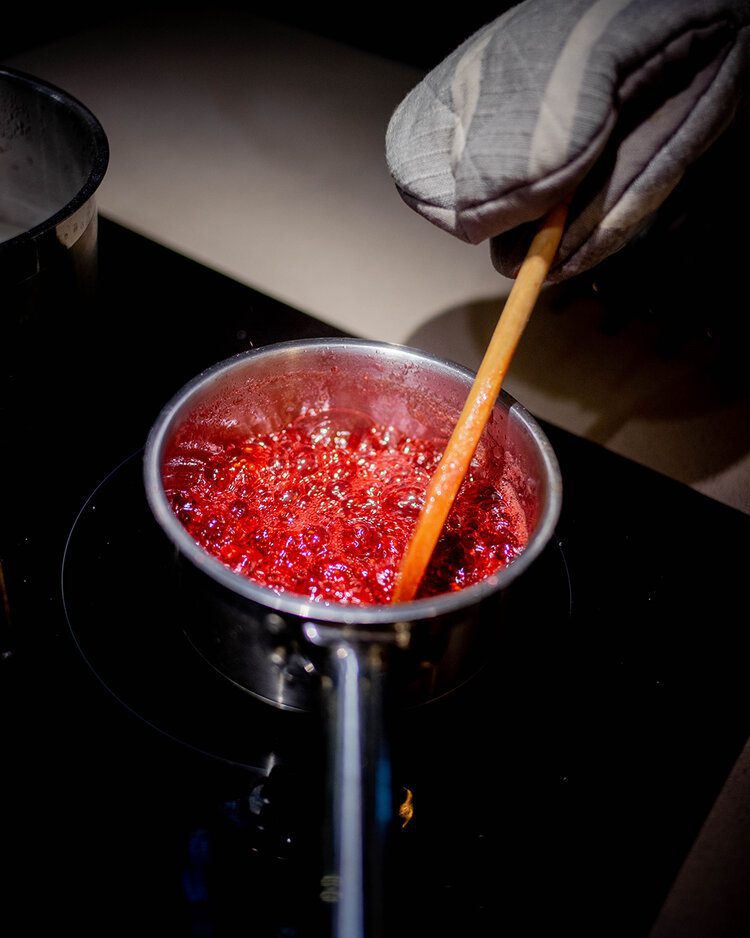
    7. Once the fruit and sugar has combined, remove the small saucepan from the large one and place it directly onto the hob (giving the bottom a quick wipe dry before) and increase the heat until you have brought the mixture to a boil, stirring it consistently every 5 seconds. WARNING, the jam mixture will spit as it boils so wear oven gloves/mitts to protect you hands.

    8. After 10 or so minutes boiling, the consistency should go from runny to sticky. If it is still runny then continue to boil and stir it. You want to keep an eye out for when it starts to stick to the sides of the saucepan.

    9. Once you see the jam starting to stick, take your small plate from the fridge and use the spoon to drop a small amount of jam onto it. To test if your jam is ready to set, push your finger through the centre of the jam, just like I’m demonstrating in the GIF below. If the jam ripples in resistance to your fingernail and your finger leaves a clear path through the jam then your jam is at the right consistency. If it doesn’t ripple and looks as though your finger was never there then continue to boil and stir the jam until it appears thick enough to try this test again.

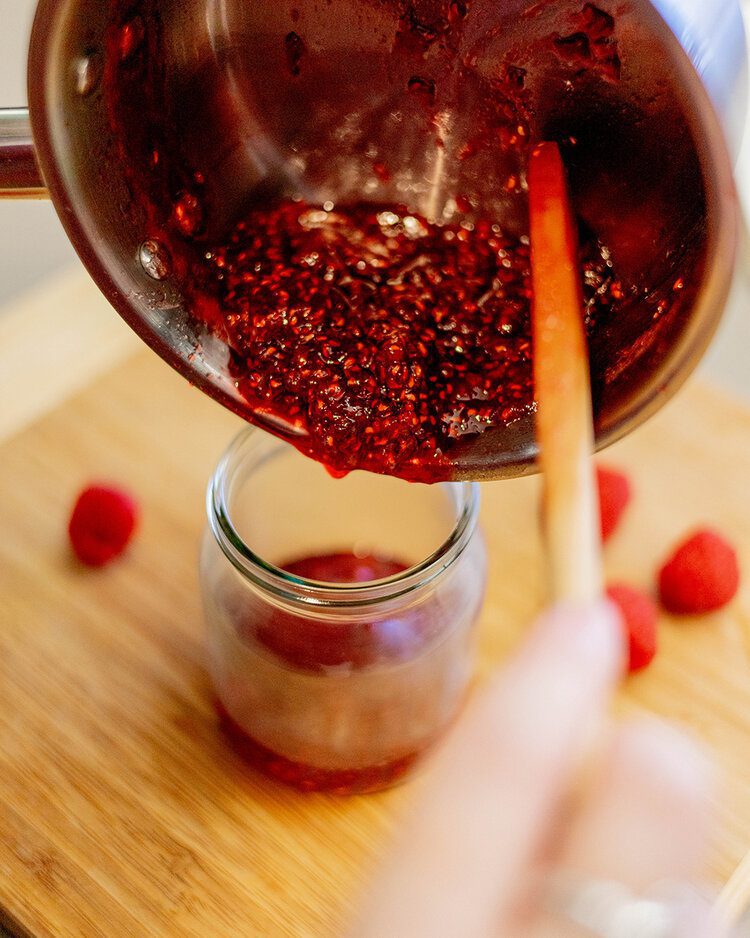
    10. Once your jam is the right consistency on the plate, take the saucepan off the heat. Pour the water out of the jar, dry it and pour the jam in. Place the lid on whilst the jar is still warm so that it forms a seal (as it cools you’ll hear a pop as the lid expands to form a seal).

    11. Leave it out to cool completely so that it sets. You can keep your unopened jam in a cool and dry place for up to a year. Once opened, store it in the fridge where it will last for a couple of months.

    Bon appétit!

    You may also be interest in my vegan sugar cookies recipe.

    Do more on and for the planet, Gabriella

    Pin this post


  • How to crochet a chunky beanie hat (free pattern)

    How to crochet a chunky beanie hat (free pattern)

    New to crochet? Want to learn how to make something you can take on your travels around the world to keep you warm? Something you made with your very own hands and are very proud of?

    GOOD! That’s why I made this beginners step by step crochet tutorial for my chunky beanie hat. Well, that and a lot of you requested it.

    I learnt to crochet Summer 2020. With no travel in sight, I needed something to occupy my mind and I always love trying something new. Yes, the summer of 2020 was the summer of crafts, I learnt to crochet, tie-dyed half of my clothes, made my own candles, made a bunch of hair scrunchies from Michael’s old jeans and I taught you how to make the best banana bread ever (so I’ve heard).

    Since I started, crochet has taken a special place in my heart. As someone who has dabbled in knitting, personally I think crochet is easier and far more enjoyable. It’s easier to correct mistakes, to transport when you’re travelling and it’s really quick! So let’s get started.

    To make this as easy as possible to follow if you’re a beginner, I have added some extra guidance in italics under most steps of the pattern. In these additional steps I go a little slower and give you a step-by-step guide for completing a double crochet (US) stitch which is the main stitch for this chunky beanie crochet hat. If you’re a crochet whizz or simply understand how to follow a shorthand pattern, then go ahead and breeze past those extra words of encouragement.

    Sizing for this chunky beanie crochet hat

    This free crochet pattern for a chunky beanie hat will fit a small-medium adult head. If you want to make it bigger then simply add a couple of extra rows. For reference, 32 rows fits me and 34 rows fits Michael.

    What you need to crochet my chunky beanie hat

    5.5mm hook.

    100g Chunky yarn/wool (between double knit and super chunky), minimum 135m/147 yards. I used Amelia Cake by Canan for no other reason than all the yarn/wool shops are closed during lockdown and it’s all I could get my hands on in Wilko. I highly recommend finding a yarn/wool that is made from recycled or natural materials.

    Darning needle (if you don’t know what this is, it’s a chunky needle with a large eye for the wool/yarn).

    Scissors.

    Pom pom (you can either buy or make one).


    This is the set I have, it’s great because it comes with stitch markers.

    Chunky beanie hat crochet pattern

    This pattern uses US terms (because that’s what I learnt to crochet in) but here’s a quick translation to UK crochet stitches:

    Double Crochet (US) is a Treble Crochet (UK)

    Abbreviations

    ch = chain

    dc blo = double crochet in the back loop only

    st – stitch 

    sl st = slip stitch

    yo = yarn over

    Make a slip knot and ch 39.

    1st row: 1 dc in 3rd ch from the hook (the first 2 ch on the hook acts as your turning ch which lifts you up to work on the next row). When you reach the end you should have 37 stitches.

    I’ve placed a stitch marker in the 3rd ch from the hook to help you identify it.

    How to do a Double Crochet (US) or Treble Crochet (UK) crochet stitch in the back loop only:

    With one loop already on the hook, bring the yarn over the hook so it looks like you have two loops on the hook.

    Insert your hook vertically down through the stitch (through the little “V”) and push it out the back, so your needle goes under the back loop of the little “V”.

    Yarn over and bring it it back up through the stitch (“V”). Now you will have 3 loops on your hook.

    Yarn over and bring the hook through the first two loops on your hook. You should now have two loops on your hook. 

    Yarn over again and bring the hook through the final two loops on your hook. You should now have one loop on your hook.

    Congratulations you have completed your first double crochet in the back loop only (dc blo) stitch!

    2nd row: ch 2, turn your work, work 1 dc blo in each of the 37 stitches.

    Remember how you skipped the first two stitches on your first row and I said it’s your turning chain to raise you up to the next row, that’s what this “ch 2” is every time you reach the end of a row to begin a new one. When you have chained two, you work into the first stitch in the row you previously worked. You should have 37 stitches when you finish your 2nd row.

    To turn your work is to flip it around so you can begin working back across the row you just made.

    Continue to do a double crochet stitch in the back loop only that I explained above across all 37 stitches before moving on to the next row.

    How to turn your work.

    How inserting into the back loop looks in a row that isn’t the starting chain.

    3rd row: repeat instructions for 2nd row. Now continue to repeat this row until you have 29 more rows (32 row altogether).

    You’ve got this!

    You will now have a rectangular piece that looks like a luxury bedspread for a Barbie doll, right? Great! 

    Fold the rectangle in half taking the two short edges together. Now you’re going to stitch them together using your crochet hook.

    Join the two edges by working 1 sl st in each st.

    Insert your hook through each stitch you made on your last row and through to the other side of the other edge, yo and pull it through both edges and continue to pull it through the loop already on your hook. Continue to do this across all 37 stitches.

    Fasten off leaving a tail of 15”/40cm

    To fasten off, ch 1 and cut your yarn leaving 15”/40cm (for this pattern) then use the hook to pull the loop on the hook up until the end of the yarn/wool comes out. Pull on the tail of yarn/wool gently to form a knot that will prevent your crochet piece from unravelling.

    You should now have a crochet tube, got that? Perfect!

    You’re nearly there!

    Thread the end of the tail of yarn/wool through the darning needle and from the joining seam you just made, begin to weave it in and out of the open edge of the hat, you want to keep the thread close to the top edge. 

    As you weave in and out, gently pull on the thread so you draw the top of the hat closed as you go along.


    You may also be interested in my how to make a drawstring laundry bag DIY tutorial.

    Once you reach where you started, pull the yarn/wool gently so that the top of the hat closes and leaves no hole. Remove the needle and tie the yarn/wool to the tail of yarn/wool from your original chain.


    Turn the hat inside out so that the seam you created is on the inside.

    If you want to add a pom pom then thread the longest end of your yarn/wool onto the darning needle, thread the yarn/wool up through the top of the hat, just off to the side of the centre. Take your pom pom and thread the yarn/wool through it, then thread the needle back into the inside of the hat, this time insert the needle just off to the other side of the centre.

    Putting space on either side of the top of the hat when you attach the pom pom makes it more secure and less wobbly on the top.

    Pull the yarn/wool tight and secure the pom pom by lopping the yarn/wool tail to a stitch on the inside of the hat then weave in the two ends.

    If you don’t want to add a pom pom then weave in your ends.

    How to weave in your crochet ends

    Thread the end of the yarn/wool onto the darning needle and simply weave the needle under stitches within your work piece. You preferably want to do this on the inside of anything you make so that it’s not visible on the other side. In this case, you will do it on the inside of the hat. 

    You can go down one row and come back on yourself in the next, or you can simply go straight down one row. You don’t need to do anything fancy but the more you weave, the more secure the end will be.

    Once you’re happy with how much you’ve weaved in, simply cut the yarn/wool close to piece.

    Fold up the bottom edge of the beanie hat and now it’s ready to wear!

    Congratulations on successfully crocheting my chunky beanie crochet hat! I’m proud of you!

    If you have any questions or need help then please feel free to email me here or send me a DM on Instagram.

    You may also be interested in my How to make a haku lei Hawaiian flower crown guide with YouTube tutorial.

    Do more on & for the planet, Gabriella

    Pin this post


  • How to make a haku lei *lei po’o* (flower crown)

    How to make a haku lei *lei po’o* (flower crown)

    A haku lei is a Hawaiian lei worn around the head, otherwise recognised as a flower crown. Usually they are worn on special occasions such as luaus, weddings, graduations and so on.

    ** updated **

    Haku lei meaning

    “Haku” refers to the technique in which the flower crown is made either by braiding or weaving flowers and foliage together, “Haku lei” means weaver of lei. When I first published this post I was under the impression the threading technique used in this blog post was also for a haku lei, as this was the technique used for the “haku lei” I was given as a gift from an independent florist on the island of Maui. I have since learnt that the threading technique used to make the flower crown I received and learnt in Maui is used to make lei worn on the neck (lei ‘ä’ï) and head which are called Lei Po’o not haku lei. So really this blog post is a tutorial on how to make a lei po’o.
    This threading technique is far easier than weaving a hawaiian head lei, lei po’o, or flower crown so if you’re interest in learning keep reading on.

    In 2020 I celebrated Postcards from Hawaii’s first birthday in Hawaii on the island of Maui, I also celebrated my birthday for which I had asked Michael just for one gift: a haku lei. Using a local florist on the island he chose a really simple crown made from white plumeria, red rose petals and a few sprigs of something green. It was the first time I had seen a haku lei or flower crown that wasn’t woven or made with wire and tape, as I mentioned above I have come to learn that this is because of a miscommunication and it was a lei po’o not a haku lei. This one was made in the same traditional way as a lei that is worn around the neck (see image below) but it was finished on each end with a ribbon so it was adjustable to the wearer.

    During my time spent in Hawaii I have taken classes on how to make lei ‘ä’ï, lei worn on the neck and ti leaf lei, braided lei made with ti leaves. The technique for making the lei po’o in this tutorial is what I learnt in Maui.

    Flower crowns are a popular accessory for weddings, christenings, baby showers, wedding showers, birthdays and more. If you are interested in learning how to make really quick and simple yet stunning flower crown. This threading technique is cheaper, easier and less time consuming should you need to make more than one before your special occasion.

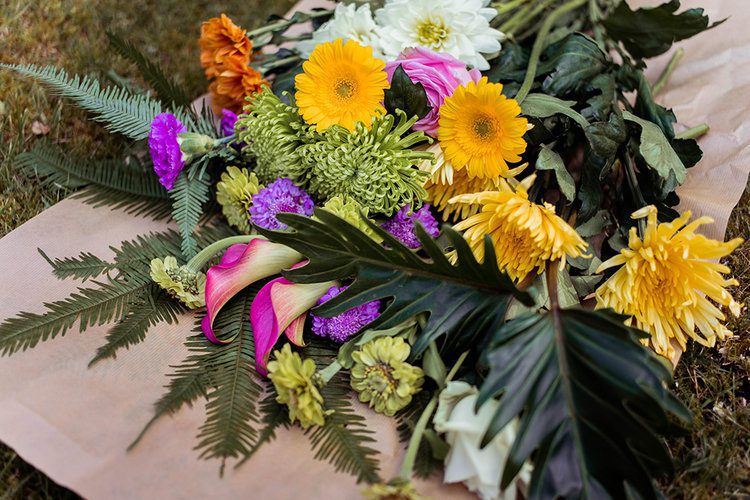
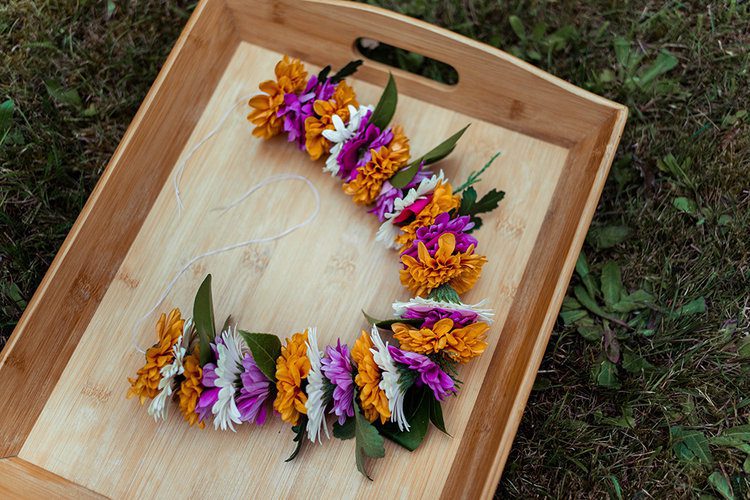
    In this blog post I have featured two different types of lei po’o so that you can decide which aesthetic you want. One is more elaborate; a tropical statement piece made with flowers I had hand selected from independent florists Crown House Flowers and The Rose Garden in Norfolk, England. The other is much smaller, more practical, and cost effective lei made with flowers from the supermarket.
    As I mentioned this technique is a lot quicker and very simple, but it does include the use of a needle so please make sure that any children who wish to make this are accompanied by an adult.
    Choosing your flowers and foliage

    The four main points that you want to keep in mind when selecting your flowers are:

    1. Weight

    You don’t want the flowers to be too heavy. I learnt this after using large chrysanthemums in my larger head lei, they will weigh down the crown and with little to support it, it will slip down your face. This doesn’t mean you can’t go for big flowers, just make sure you don’t select too many heavy ones.

    2. Structure

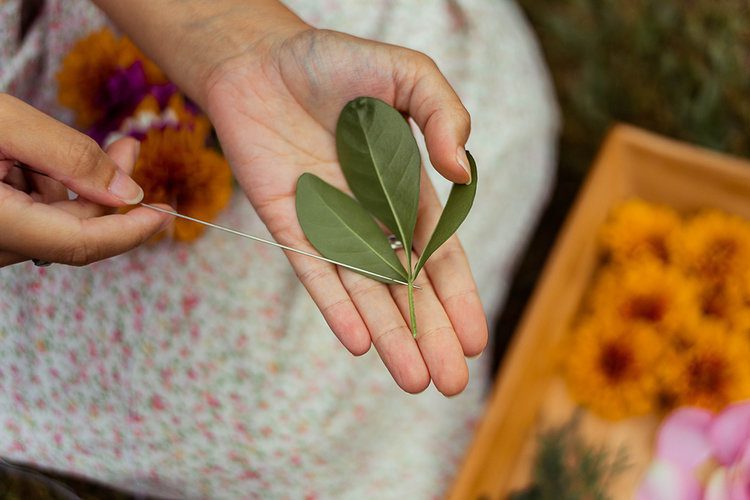
    As you are pushing a needle through them, you want your flowers to be quite firm. You will notice how fragile the rose petals are once they are pierced with the needle, they are ok because they will be sandwiched quite tightly, but you want your main flowers to stand strong. Example of flowers with structure are small chrysanthemums, germini, gerbera or scabiosa. Also keep in mind how big the base of the head is, for example: carnations. Although they have a beautiful flower, they have large heads which are hard to cover, leaving you with a big green gap. Look for flatter bases such as germini or small chrysanthemums. Speaking of structure, the same applies for the leaves. Try to pick strong leaves or ones that have a thick stem so they don’t fall apart when you put a needle through them.

    3. Be thrifty

    Take advantage of what you have around you. I’m not at all suggesting you decapitate your neighbour’s rose bush, but be more aware of the leaves on trees and bushes. Picking a selection of leaves from your garden or the park will save you money. They don’t even have to be particularly interesting ones either, they can be pulled off the stems of the supermarket flowers if need be! Of course, if you are going for a big, bold tropical look, I strongly recommend going to a florist because they are your best chance of finding philodendron or umbrella fern.

    4. Quantity 

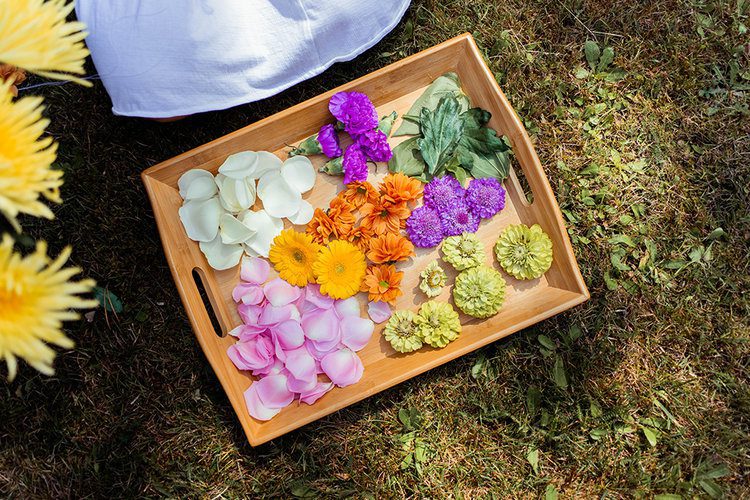
    Don’t get too carried away! It’s so easy to do, especially if you are buying them in a florist, and it will surprise you how little you need. For the smaller of the two head lei that I made, I only bought three bunches of flowers and made the rest up with petals from two different coloured roses and leaves from my garden, these three bunches could easily have made two Hawaiian flower crowns.

    5. Cost

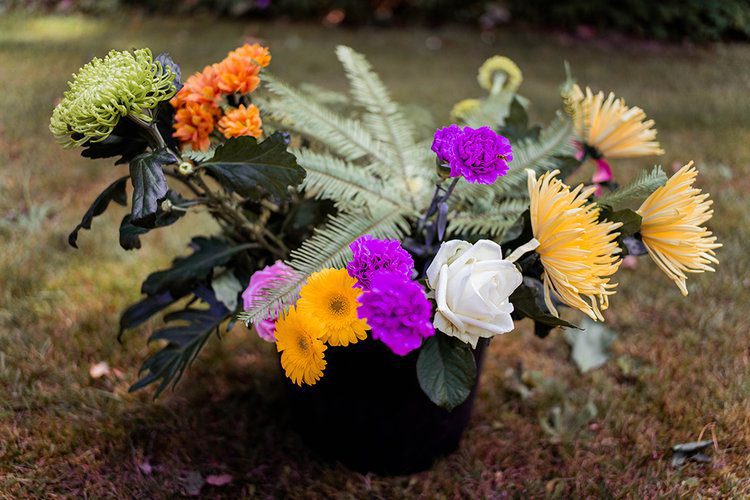
    For the larger haku lei I wanted bigger flowers and tropical leaves that would make a statement. I bought a selection of flowers that featured zantedeschia, dahlias, zinnia and more from two florists and together that cost £30. I am aware that this is costly and really only viable for a special occasion, but they did make a wonderful statement haku lei that reminded me most of the ones in Hawaii. I didn’t use all of the flowers so I put the remaining together in a vase to make the most of the money spent.

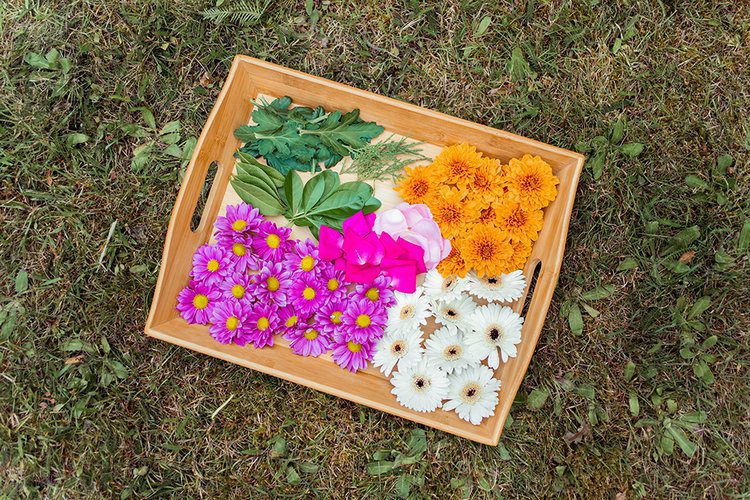
    For the smaller and cheaper haku lei, I used flowers from my local Morrisons supermarket. I bought two bouquets of small chrysanthemums in pink and orange and one bouquet of white germini, to accompany these I used the remaining rose petals I bought in the florist and a selection of leaves from the garden. The bouquets were £3.50 each or two for £5, so collectively I spent £8.50. I know, much more reasonable, that’s why I’ve made two versions for you!

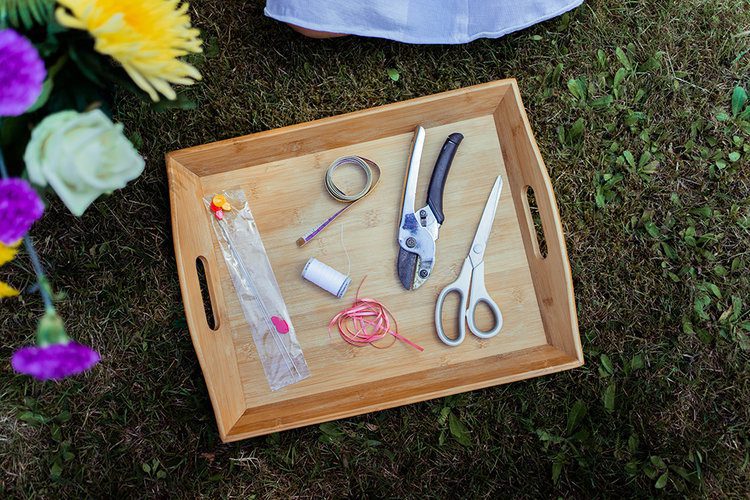
    What you need to make a flower crown


    • Scissors (for cutting the ribbon and thread)


    • Secateurs (for cutting the flowers and leaves)


    • Tape measure (for measuring the thread)


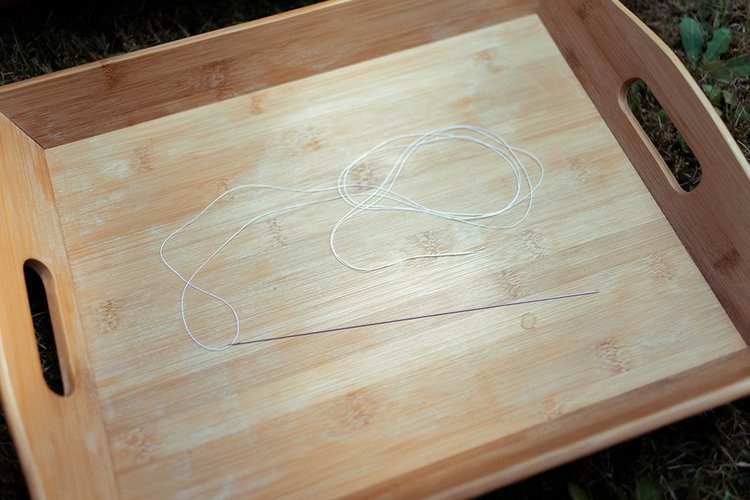
    • 6 or 9 inch upholstery needle (to pierce and sew the flowers)


    • 2 metres of extra strong thread (to hold the lei together)


    • 1 metre of ribbon (to tie the open ends of the lei together)


    • A selection of flowers and leaves


    Step-by-step tutorial for how to make a Hawaiian lei po’o (flower crown)

    Whether you have bought your flowers from a florist or the supermarket, make sure that you sit them in water until you are ready so they remain fresh for as long as possible.

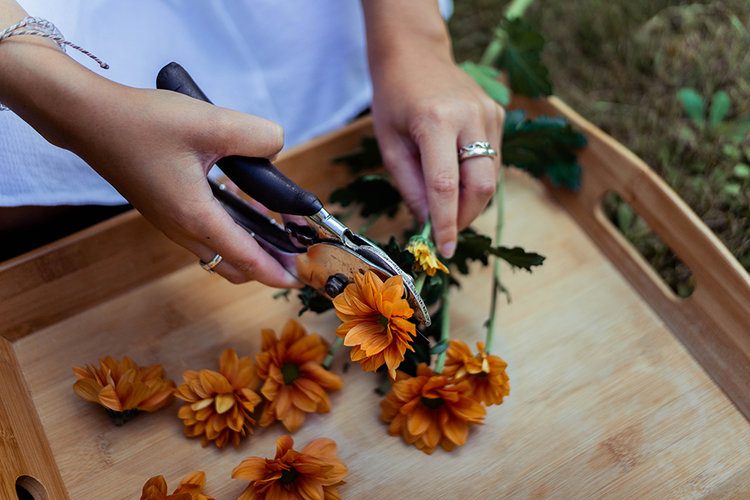
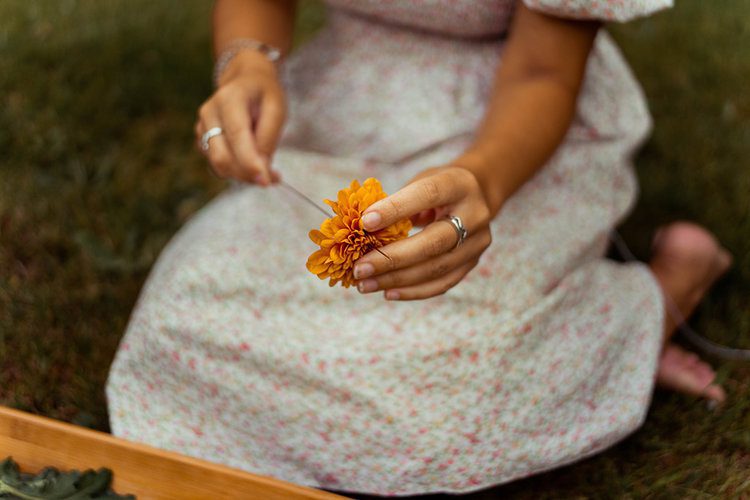
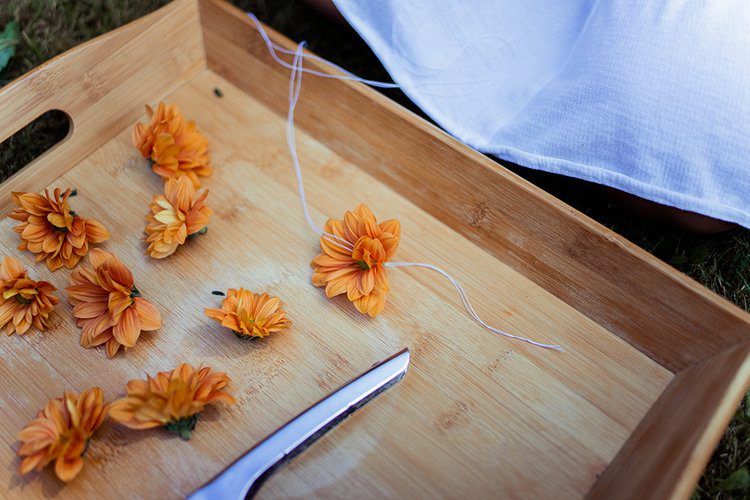
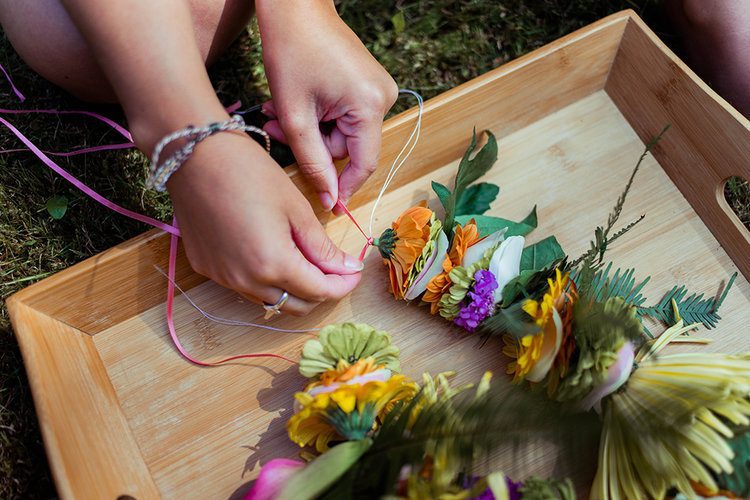
    1. Start by beheading your flowers with care using the secateurs. You want to cut as close to the bottom of the head of the flower as possible, removing all of the stem. Don’t cut all of them, start with a few and cut as you go, this way if you don’t use them all, you can put the remaining flowers in a vase.

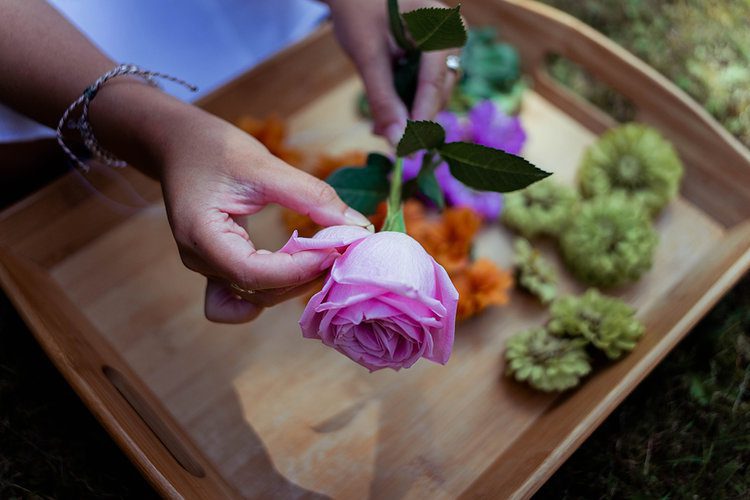
    2. If you are using rose petals, gently pluck the petals off the head.

    3. Using the tape measure, measure out and cut 2 metres of the thread.

    4. Thread it through the needle so that the thread is doubled (the needle is in the middle of the thread).

    5. Tie the ends together with a couple of knots.

    6. Begin to thread the flowers on in the order you want, being careful with the point of the needle as you do. As you push the first flowers down the thread towards the knots, leave about 10cm of the thread so the flowers don’t fall off and that you have enough thread to tie the ribbon to.


    7. Thread on your flowers and leaves in whatever order you fancy. It is up to you if you want to create a pattern or not, but if there are certain flowers that you want to use at the front, be aware of how far you have worked down the thread. Also every head size is unique so keep holding it up to yours to gauge how much further you have to go.

    8. The reason I recommend using a longer needle is because lei are made with one (unfortunately I couldn’t find any at a reasonable cost) because they make the process quicker. With a longer needle, you can thread on multiple flowers and then push a larger section down the thread.

    9. Once you have your desired length in flowers, cut the thread at the eye of the needle.

    12. Make sure the ribbon and thread is securely tied to each other before cutting the excess thread.

    13. All you have left to do is carefully lift your Hawaiian flower crown, lei po’o, to your head and tie the ribbons together at the back of your head. A bow with a double knot will secure it.


    If you are making your haku lei for an occasion it is best to make it on the day so that the flowers are their freshest selves. If you want to make the most out of, sprinkle it with water and store it in the fridge. Depending on the flowers you chose it can last a couple more days.

    .

    Now you know exactly how to make your very own Hawaiian head lei inspired flower crown you can make them for all sorts of occasions: weddings, baby showers, birthday parties and more.

    If you do make one please share them using #postcardsfromhawaiiblog and I will share them on my Instagram stories.

    Do more on & for the planet, Gabriella

    Pin this post