Category: Uncategorized

  • Where to buy Christmas decorations in Vancouver, Canada

    Where to buy Christmas decorations in Vancouver, Canada

    Whether you’re new to Vancouver or want to change up your holiday decor this list of 11 stores is your answer to where to buy Christmas decorations in Vancouver, Canada. Let me help you decorate your Vancouver home for the holidays.

    Christmas 2022 is the first year of my 30 on earth where I’ve been in the same home for more than one Christmases in a row (excluding my parent’s house). I’ve moved a lot! So you can bet this lover of all things Christmas scoured the city for months looking for the best Christmas decorations in Vancouver in order to make her home feel the most festive any of hers have ever felt. It’s probably this reason (or the fact that I can be found in festive attire for the months of November and December) that I’ve become somewhat of a go-to Christmas advisor amongst my peers and after being asked multiple times where to buy Christmas decorations in Vancouver, I decided to put this blog post together for you.

    In this blog post, where to buy Christmas decorations in Vancouver, Canada, I will be breaking down 11 of the best stores in Vancouver for buying Christmas decorations and what each one is good for. I’m covering all kinds of holiday decorations from indoor to outdoor, bathroom to bedroom, big to small, classic to colour scheme, budget to luxury and I’m also helping you find winter décor if Christmas decorations aren’t really your “aesthetic” for the holidays. 

    Let me share with you my ultimate list of where to buy Christmas decorations in Vancouver, Canada:

    Home Depot

    Home Depot is the largest home improvement and hardware store in North America.

    Best for: Christmas Trees

    Home Depot is the place to go for Christmas trees in Vancouver, both real and reusable. They have a huge selection of all shapes, sizes, foliage and lighting. That being said they aren’t cheap so either wait for the Black Friday or New Year’s sales or if you’re really on a budget for Christmas trees take a look at IKEA.

    Home Depot reusable (artificial) Christmas trees range from 18 inches all the way to 12 foot. There are slim ones for small spaces, bushy ones for those who want to make a statement, there’s flocked or plain, pre-lit with multiple settings, there’s potted, pre-decorated and even some with mixed foliage. 

    We got our 7.5ft Christmas Tree from Home Depot. It has mixed foliage which helps it look more full and it has 8 different light settings including the option to choose multicoloured or warm white. Though I don’t particularly like multicoloured Christmas lights, I do like that I have the option should I change my theme in the future.

    Home Depot does sell other Christmas decorations but they are one of the more expensive stores on this list of where to buy Christmas decorations in Vancouver, Canada, so I don’t want to encourage shopping from them here when you could save money elsewhere. 

    Top Tip: If you’re shopping in Canada make sure you’re on the Canadian Home Depot website because often it will take you to the US one where the stock is different and the prices will appear cheaper.

    Home Depot is also amazing for outdoor Christmas decorations. They’ve got everything from little, pre-lit candy canes for your lawn to giant inflatable Santas and snowmen.


    20 BEST THINGS TO DO IN VANCOUVER DURING THE CHRISTMAS HOLIDAYS

    Read Here

    The Christmas Store at Potters Garden Centre

    The Christmas Store at Potters Garden Centre is the largest Christmas shop in all of Western Canada.

    Postcards from Hawaii Travel Lifestyle blog 20 best things to do in Vancouver during the Christmas holidays Canada

    Best for: Baubles and Christmas Tree decorations

    Since 2004 Potters has been transforming 28,000 square foot of the garden centre into a winter wonderland. Shop from every colour of Christmas baubles your happy-holidays heart desires from classic red and green to rainbow. 

    If you want to decorate your Christmas tree with a theme the Christmas Store at Potters is perfect for that. Potters has everything you can think of including food, sports, careers and animals. You could have a Firefighters tree, a ballerina tree, a tree full of birds or even an entire Coca Cola themed tree. Let your imagination run wild!

    Postcards from Hawaii Travel Lifestyle blog 20 best things to do in Vancouver during the Christmas holidays Canada

    The Christmas Store at Potters doesn’t just have Christmas tree decorations, they also have wreaths, garlands, figurines, trees (real and reusable), lights, kitchen accessories and more. I picked up these Santa Claus salt and pepper shakers from Potters and I’m obsessed with them.

    Subscribe to Potters’ newsletter and get a 20% off voucher on priced items ending with 99¢.

    Michaels

    Michaels is chain of craft stores across North America.

    Best for: Christmas crafting

    Whatever your crafting hobby is, Michaels has it. So this Christmas whether you’re baking Christmas cookies, knitting homemade gifts or making your own Christmas cards Michaels in Vancouver has the supplies you need.

    Despite being a craft store Michaels also has décor for every holiday that North America takes it upon themselves to celebrate. For Christmas that includes wreaths, garlands, ornaments, candles, Christmas trees and so much more.

    What I love most about the Christmas decorations in Michaels is that you can buy plain ones and personalise them yourself such as a Christmas wreath or garlands. It’s so much cheaper to do it that way, especially if you personalise them with homemade dried oranges or items from the dollar store. That’s what I did with our Christmas wreath for our front door. Every reusable wreath I saw was at least $40 so I bought a plain one from Michael’s and added the bow myself.


    If you’re working with a particular Holiday mood or vibe Michaels is particularly good as they have different capsule collections of Christmas decorations. For example they have their Holiday Romance Décor collection whose colour scheme is blush pink, cream, mint green, gold and silver with textures of velvet, fur, glitter and beading – it’s a very luxurious and soft theme. On the other hand they have their North Pole Journey collection which is made up of bold primary colours, hot pink and lime green – its focus is on holiday characters and messages to Santa Claus. There’s also collections in-between that focus more on the classic Christmas aesthetic or a cosy winter. Whatever your theme, you’ll find inspiration in Michaels.

    Michaels has regular offers such as one item for 20% or 40% off and for Black Friday they have up to 60% off. There’s almost always a buy-one-get-one-free offer on all Ashland décor, which covers most of their holiday décor.

    Canadian Tire

    There’s no easy way to explain what Canadian Tire is. It’s a Canadian store that sells hardware, automotive stuff, sports, leisure and housewares goods. You could fix up your car, get a new smoothie maker, furnish your patio, kit yourself for almost any sport, find all your storage solutions and get your Christmas decorations all in one visit.

    Best for: Outdoor Christmas lights

    Whether you’re the kind of person who wants the Christmas lights on their house to be seen from space (did you get my Deck the Halls reference?) or prefer to keep it simple with a few strings of icicle lights strung from the guttering, Canadian Tire is the best place to go in Vancouver for buying outdoor Christmas Lights. 

    The inflatable characters at Canadian Tire range all the way from the classic Santa Claus to Santa riding a motorcycle. They also have The Grinch, Snoopy, Olaf and even the Minions.

    Home Depot is also amazing for outdoor Christmas lights and inflatable lawn décor.

    FREE THINGS TO DO IN VANCOUVER AT CHRISTMAS

    Read Here

    Dollarama

    Dollarama is Canada’s chain dollar store.

    Best for: budget Christmas décor and indoor Christmas lights

    Dollarama isn’t just incredibly useful for those on a tight budget in Vancouver at Christmas but it’s also where you can find crazy good holiday décor gems like disco ball baubles and mini Christmas trees, festive scented candles and ribbons.

    Dollarama is the best for indoor Christmas lights. Whether they’re for your tree, wrapping around a garland, popping inside a decorative bottle or creating a magical lit up snowy village display, Dolllarama has different colours, lengths, settings and shapes plus they sell battery or mains operated.

    If you’re the crafty kind and on a budget Dollarama is perfect for you. Not only do they sell craft supplies for sewing, knitting, crochet, painting etc. They also sell items that allow you to use your imagination for example, my hanging icicles and snowflakes strung up in my living room (den) are packs of Christmas tree decorations from dollarama. I removed their strings attached for hanging them and instead used a fine thread to sew them onto a ribbon which I attached to the ceiling like bunting or a garland to make it look like snowflakes were falling. I already had the ribbon and I purchased the icicles and snowflakes for $1.75 for a pack of 8 and 10.


    Dollarama is also one of the best stores to buy candles. Not all stores have the same stock so candle shopping at Dollarama is a commitment but if you’re open to it you can find the most amazing candles. I bought a couple of snowy pinecone candles from Dollarama for $4 whilst an almost identical one was being sold in Anthropologie for $24.

    Dollarama isn’t just good for decorations this year, you can also get holiday themed kitchenware such as a gingerbread shaped silicone cake mould or you can get festive costume accessories like a jingle bell head band or Santa hat hair clips. It’s truly worth a browse down the Dollarama holiday aisles. 

    Finally I want to note how amazing Christmas candy is in Dollarama. They have both branded and non-branded candies. They’re the ideal place to pick up cheap candy canes and festive shaped chocolates for advent calendars, stocking fillers or candy dishes.

    The key to shopping Christmas decorations in Dollarama is to start early and go to different stores because they don’t all have the same thing.


    The Cross Decor & Design

    The Cross is a home décor store selling luxury furnishings and finishings to create a dreamy home of relaxation.

    Best for: Luxury Christmas décor

    If you’re looking for inspiration for how to turn your home into a luxuriously cosy winter wonderland for Christmas then take a stroll through The Cross in Yaletown, Vancouver. The Cross is what home décor dreams are made of if money was no object.

    That’s not to say it’s impossible to afford anything in The Cross, a couple of pretty wine glasses, a boujee tea towel or a delicate Christmas bauble might be within budget but if you wish to avoid heart palpitations avoid the candles at all costs (pssst they’re cheaper in Indigo).

    5 DELICIOUS WAYS TO USE UP THANKSGIVING AND CHRISTMAS LEFTOVERS

    Read Here

    Salvation Army Thrift Store

    The Salvation Army Thrift Store is a thrift store across Canada that raises money for the Salvation Army, an international Christian organisation that provides social services including shelter, rehabilitation and basic necessities.

    Best for: Christmas entertaining

    Much like Dollarama if you are on a tight budget for Christmas in Vancouver the Salvation Army Thrift Store should be your go-to. If you’re not particularly fussy about a theme or willing to browse for a while before you commit to the purchase, the Sally Army Thrift Store has second hand decorations at very reasonable prices and though you might not find something on the first visit you never know what has been donated for your next trip.

    What the Salvation Army Thrift Store is particularly good for during the Holidays is buying in any kitchenware that you may need to get you through the holidays. Whether you’re looking for pretty candy dishes to add to your décor, entertaining friends throughout the season or hosting Christmas dinner and you’re in need of extra plates, an oven dish for the turkey or serving bowls then this is place to go. You’ll find unique items, save money and be donating to charity to help others in need. 

    Before I moved to Canada I donated and passed down almost all of my kitchenware so I had to buy it all again when we arrived. When it came to doing that I got most of it from Salvation Army Thrift Store. We saved so much money and got some really unique pieces that we used all the time.

    One last thing! Take a rummage through the book shelves for some second-hand Christmas novels and records for the chance of scoring a classic holiday album on vinyl. They’re not only functional but they also make for really charming Christmas decorations.

    The Salvation Army Thrift Store is also a top place of mine to find Christmas gifts that will again save money and help out others in need.

    HomeSense

    HomeSense is a chain of discount home furnishing stores in Canada. It’s very similar to HomeGoods in the US and TK Maxx in the UK, Australia and parts of Europe.

    Best for: finishing touches

    HomeSense is the perfect place to go in Vancouver for any festive finishing touches to complete you holiday décor around the house. From Christmas soap dispensers and hand towels to throw pillows and snuggly blankets HomeSense has all the little bits to make the whole home feel like a cosy home for the holidays. 

    If you want anything Christmas or winter themed for your kitchen, bathroom or bedroom HomeSense is the place to go. Plus what’s super amazing is the low, discounted prices!

    PFH Top Tip: If you have just moved to Vancouver and people back home want to get you vouchers to help you furnish your home ask for HomeSense vouchers because they’ll cover HomeSense, Marshalls and Winners. We did this for our engagement party and have been getting all sorts for our home with the vouchers. Aside from Christmas decorations I also love HomeSense for adorable candles and photo frames.

    As HomeSense is a discount store you can’t guarantee that each store will have the same stock so you may want to shop in a few different ones before committing to a purchase. I have found the one on Robson St and the Winners in Park Royal to be the best for choice in Vancouver.

    La Maison Simons

    Simons is a Canadian department store with a focus on fashion and accessories.

    Best for: winter décor

    Simons is one of my favourite stores in Canada and there’s one in Park Royal in North Vancouver. Aside from it being one of maybe three high street stores that actually keep up with current trends they also have super affordable and gorgeous homeware items. Most of our bathroom accessories and table settings have come from Simons.

    What I love most about the holiday décor in Simons is that it isn’t focused on Christmas but more on winter which is ideal for anyone who doesn’t celebrate Christmas or for those who want festive winter decor without it screaming it’s Christmas!

    I’m talking plaid/chequered table cloths, reindeer napkin rings, mugs with skiers and snowboarders on, tea towels printed with wooden cabins, throw pillows embroidered with penguins and Fair Isle bedding.

    HANDMADE CHRISTMAS GIFT GUIDE

    Read Here

    Bulk Barn

    Bulk Barn is a Canadian dry bulk produce store that’s ideal for saving money and the planet from unnecessary packaging.

    Best for: Christmas baking and Christmas candy

    If you’re like me and love to decorate your home with themed candy dishes for the holidays and festive baked goods then Bulk Barn in Vancouver is the place to be. Whether you’re filling decorative bowls with festive candy or putting your yule logs or delicious Christmas fruit cake out on display, Bulk Barn has all the ingredients you need. 

    If you’re baking Christmas cookies Bulk Barn has all the icing, sprinkles, chocolate chips and food colouring you need – including all the store cupboard ingredients. If you’re filling candy dishes then they have candy cane Hershey’s kisses, Reese’s Peanut Butter Cups in the shape of Holiday bells, there’s red and green M&Ms and snowmen marshmallows. If you’re baking a Christmas cake or mince pies Bulk Barn has the dried fruit and peel and if this all sounds too much and you don’t like being in the kitchen then you can keep it simple but exciting with one of their many holiday flavoured hot chocolate powders which include candy cane and s’mores.

    Old Navy

    Old Navy is a clothing store that caters for the whole family.

    Best for: Christmas pyjamas

    Okay so I know Christmas PJs aren’t technically a Christmas decoration but if you’re here reading this blog post I feel there’s a good chance you share my love for festive holiday jammies. Old Navy have some of the best I’ve seen and they frequently do crazy price drops like $5 for PJ bottoms. They’re also amazing for getting matching PJ sets for the whole family right from the youngest to the eldest.

    Old Navy also has Christmas socks and festive sweaters that are worth checking out.

    I hope you found this list of stores where you can buy Christmas decorations in Vancouver, Canada, useful! If you use this list to buy any of your holiday decorations then let me know what you got in the comments below, I’d love to hear it!

    If you have any recommendations for stores in Vancouver to buy Christmas decorations I’d love for you to drop them in the comments to help others deck their halls this Christmas. Thank you!

    Happy Holidays, Gabriella 

    Pin this post

    Postcards from Hawaii Travel Lifestyle Blog Where to buy Christmas decorations in Vancouver, Canada Best Christmas Décor stores


  • Our Canadian engagement party

    Our Canadian engagement party

    In this blog post I’m sharing all the details from my first engagement party hosted in Vancouver, Canada for my friends based in North America. I will be sharing how I created my Something Old, Something Borrowed theme to combine our love of vintage and environmentalism. I’m sharing the details of our engagement party on Postcards from Hawaii for the same reason I share travel content, to inspire you to do more on & for the planet.

    Every decision made for our engagement party combined vintage glamour whilst being mindful of preventing waste all the way from the vintage dress code to the second-hand plates the food was served on.

    Please read on for the story of our engagement party and the planning of the little details that made our vintage inspired engagement party quite the soirée. 

    Postcards from Hawaii Canadian engagement party Vancouver roof terrace Gabriella Wisdom Michael William Lester wedding classic vintage

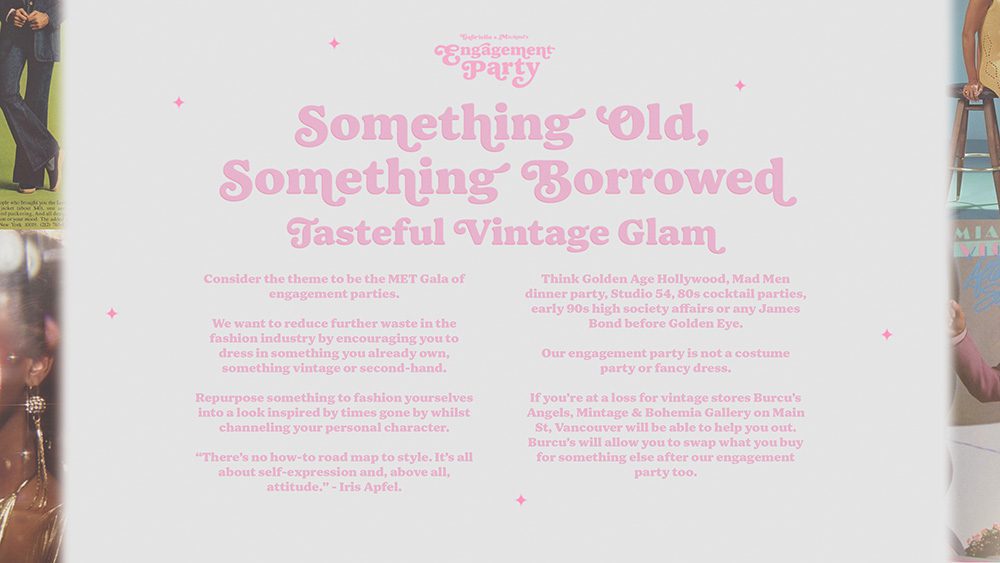
    Something Old, Something Borrowed (Theme from Gabriella & Michael’s Engagement Party)

    Tasteful Vintage Glam

    If the fact that I co-planned the vision of mine and my fiancé, Michael’s, engagement hasn’t already given you a good idea, I have a very specific creative vision for life’s most celebratory moments. 

    “Why are you so fanciful? Why do you make everything seem so special?” – Robert Redford.

    “Because it is.” – Natalie Wood.

    This Property Is Condemned, 1966

    Natalie Wood’s character, Alva Starr, has it absolutely correct, it is.

    Postcards from Hawaii Canadian engagement party Vancouver roof terrace Gabriella Wisdom Michael William Lester wedding classic vintage

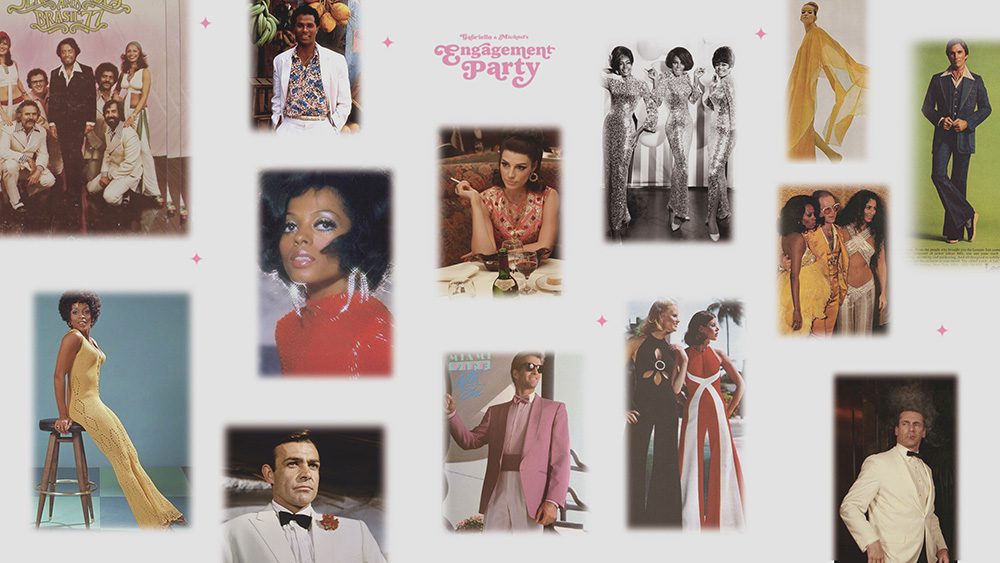
    Our theme of Something Old, Something Borrowed; Tasteful Vintage Glam was inspired by our current love for vintage clothing circa 1950s-70s that elevates our individual style but also repurposes something pre-loved over buying new. 

    I played upon the western-wedding bridal tradition of “Something Old, Something New, Something Borrowed, Something Blue”, dropping the Something New and Something Blue using it as a means to encourage guests to dress in something they already – or someone else previously – owned.

    It was a theme we carried through not just in the dress code but across the entire aesthetic of our engagement party.

    Postcards from Hawaii Canadian engagement party Vancouver roof terrace Gabriella Wisdom Michael William Lester wedding classic vintage

    Connecting the vintage dress code to the full concept of the party I was inspired to draw upon elements of times gone by. We had multiple playlists that spanned across four different decades, we served a selection of our favourite traditional cocktails, Michael made a home movie inspired by silent motion pictures and our photo booth printed strips of images were in back and white.

    Finally, our Tasteful Vintage Glam theme was also intended to match the mood, vibe if you will, of our actual engagement back in January 2022. My favourite movie of all time is High Society (1956), the MGM musical adapted from the Broadway play and 1940 film of the same name: The Philadelphia Story. 

    Our engagement was themed around High Society as it was my earliest memory of cinema, was the key influence to my attraction to the fanciful and inspired my uncompromising and resolute decision that I would only say yes to an engagement ring from Cartier. To this day I still don’t know how a very little Gaby found out the breathtaking (truly, I’ve seen all 10.5 carats in person) engagement ring Grace Kelly’s character, Tracy Lord, was from the highly esteemed French jeweller, Cartier. Or that I didn’t make the connection that it was her real engagement ring given to her by the Prince of one of the wealthiest countries in the world and is still one of the most expensive engagement rings in the world (how Gaby?!?!). But she did and with a decision that she too deserved nothing less it inspired our engagement from the ring all the way to how we dressed for the occasion. 

    Dress Code

    Our theme of Something Old, Something Borrowed; Tasteful Vintage Glam was inspired by our current love for vintage clothing circa 1950s-70s that elevates our individual style but also repurposes something pre-loved over buying new.

    The dress code was created to encourage our guests to wear something they already owned, vintage or thrifted. In knowing that Vancouver is not known for fashion, or to be frank style altogether, we were invested in curating an event that gave everyone an opportunity to express themselves through their clothing and be their most theatrical selves. 

    The guideline that prohibited costumes were to draw inspiration from eras of style throughout the 50s to the 70s. 

    “Think Golden Age Hollywood, a Mad Men dinner party, Studio 54, 80s cocktail parties, early 90s high society affairs or any James Bond before Golden Eye.”

    Postcards from Hawaii Canadian engagement party Vancouver roof terrace Gabriella Wisdom Michael William Lester wedding classic vintage
    Postcards from Hawaii Canadian engagement party Vancouver roof terrace Gabriella Wisdom Michael William Lester wedding classic vintage


    Not only did this reduce waste within the fashion industry preventing the desire to buy a whole new look but it also gave them the perfect ice-breaker and topic for an engaging (pun intended) conversation.

    A sequinned ballgown bought for my black-tie 30th birthday dinner that got cancelled because of Covid and never got worn, a number of thrifted handbags/purses, a Karl Lagerfeld belt handed down from Mother to daughter, a thrifted silk scarf worn as a bandana, a vintage handmade waistcoat, a matching ensemble that was their birthday party that was also cancelled due to Covid and colourful men’s suits and patterned shirts pulled from their closets came together in a spectacular fashion.

    As I looked across my treasured guests and the effort each and every one of them put in to dressing up for us, proudly sharing which era inspired them, the film and TV characters they channelled and what from their outfit was second-hand, I was immensely proud and humbled by their mutual respect and love for Michael and I. 

    Gabriella’s outfit

    Whilst road tripping the west coast from Vancouver to Los Angeles and back we spent time in San Francisco updating my most read blog post, 8 of the best places to get photos with the Golden Gate Bridge. Whilst there we also spent an afternoon vintage and thrift shopping along Haight St and it was here that I found the store, Relic Vintage, where I would purchase my three future engagement party outfits.

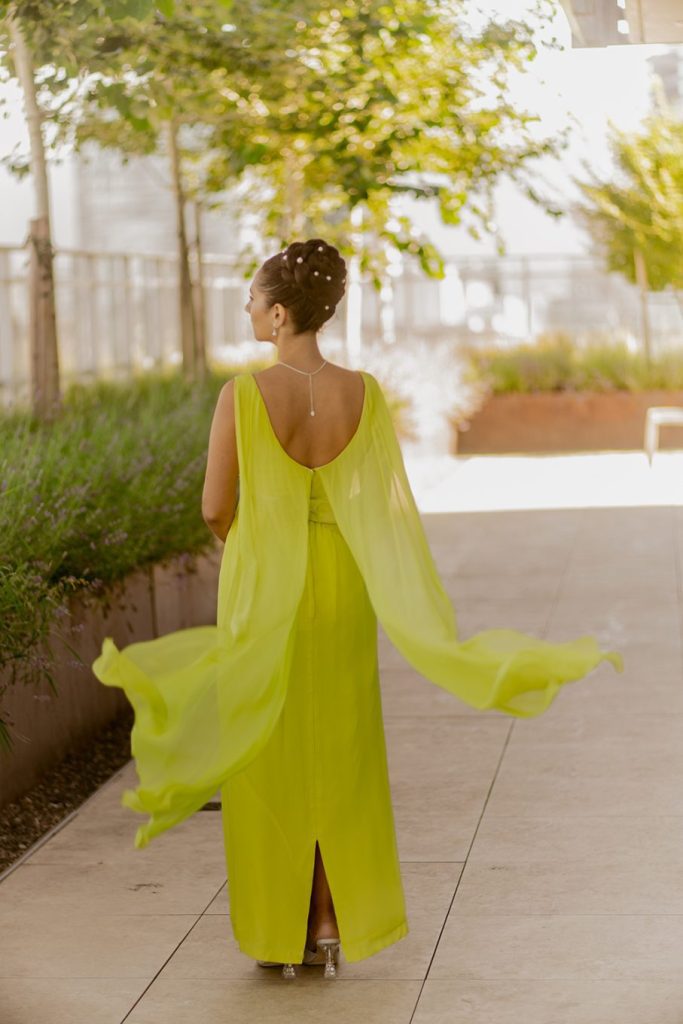
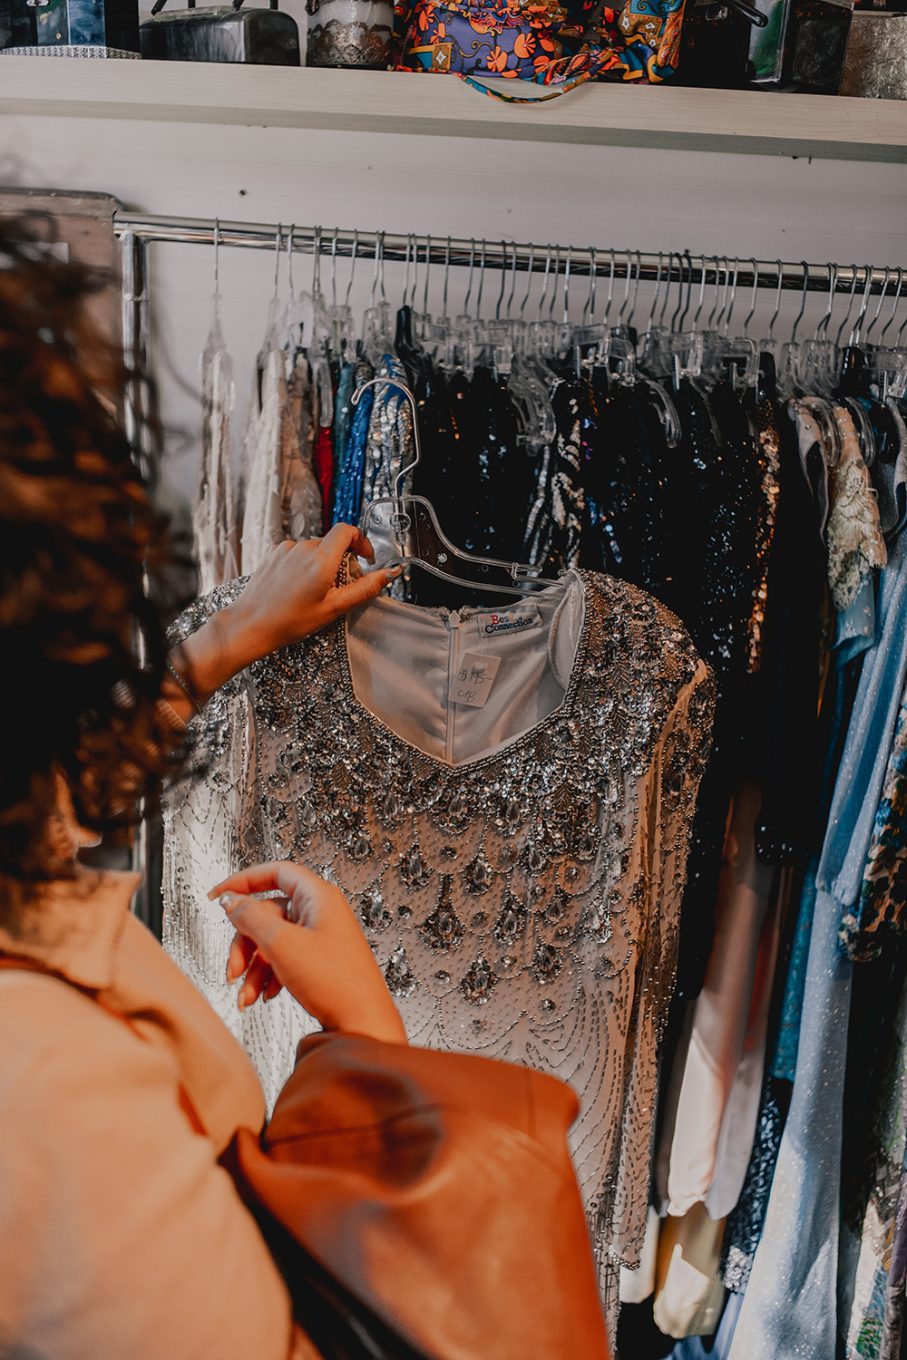
    One by one I slipped into 1960s evening gowns that fit as though they were made just for me. My wildest Gina-Lollobrigida-in-Come-September-and-Grace-Kelly-in-just-about-every-film-she-made dreams came true. Intricately beaded embellishments and deliciously draped chiffon that billowed in precession as I floated across the store melted my core and set my heart on fire.

    Postcards from Hawaii Canadian engagement party Vancouver roof terrace Gabriella Wisdom Michael William Lester wedding classic vintage

    Incapable of making a decision between two I bought both with the intention to do a casual outfit change in the middle of our party. Little did I know how grateful I would be for this decision. Various little dramas has caused a delay in Michael and I getting dressed in time and right at the moment guests were arriving Michael was too hasty in zipping up my first and most spectacular dress of the evening and yanked the zipper pull right of the teeth leaving me in a dress that wasn’t going to do up.

    Whilst Michael ran out to get the zip replaced and after a narrowly avoided meltdown, I reversed the order of my outfits and put on my other dress. 

    The two pairs of shoes that I wore with each dress were an engagement gift from Dune London. The two styles were Diane in Silver and Mitsie in Metallic and were both chosen for their vintage-inspired style.

    Postcards from Hawaii Canadian engagement party Vancouver roof terrace Gabriella Wisdom Michael William Lester wedding classic vintage
    Postcards from Hawaii Canadian engagement party Vancouver roof terrace Gabriella Wisdom Michael William Lester wedding classic vintage


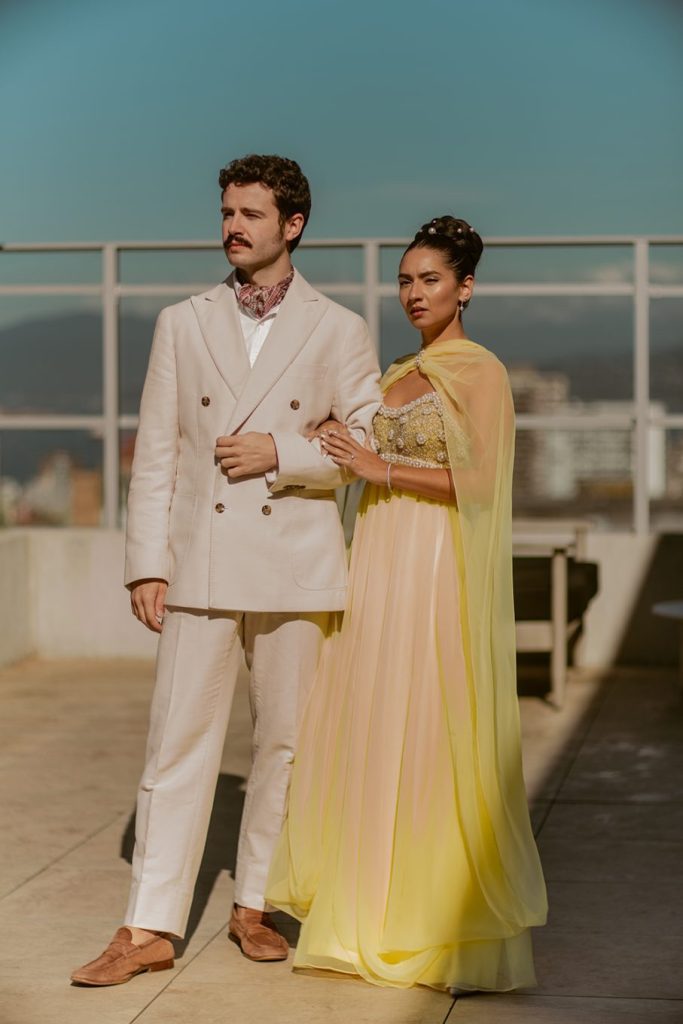
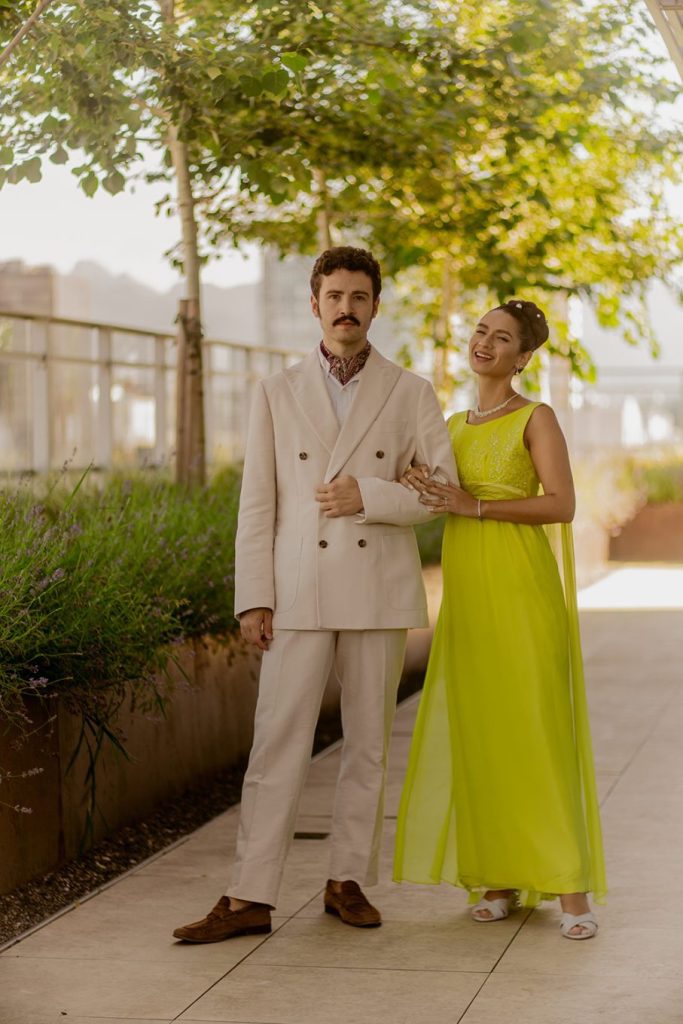
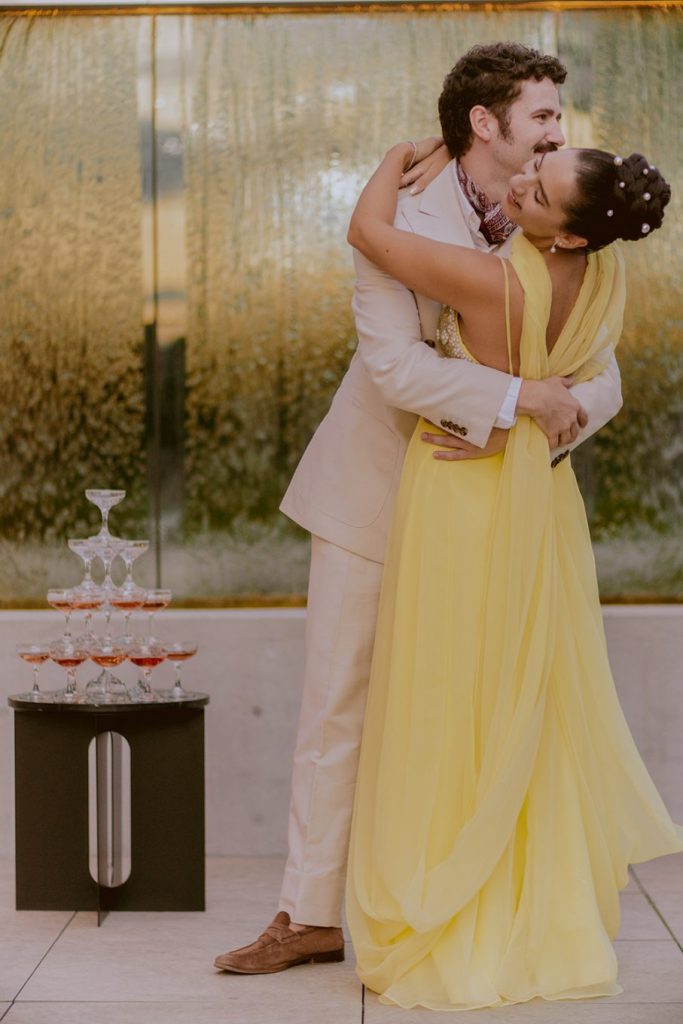
    My hairstyle was inspired by an image of Princess Grace Kelly of Monaco’s large braided updo from the 60s. I adorned it with pearl hair pins to match the pearl beading on my yellow gown and the Mikimoto pearl earrings that were my Mum’s. I created my up do with three sets of braided extensions from previous hairstyles that I had kept in tact over the past few months to be able to use for this.

    For my manicure I went for a nude nail with a lemon yellow ombré French tip, to match my dress, and had a layer of yellow chrome applied to the top. My manicure was done at my favourite salon in the city, Ella Bonita Beauty Lounge.

    I have never felt so glamorous as wearing those two outfits and I am deeply proud that they were second-hand and will one day be a part of someone else’s precious memories.

    Michael’s outfit

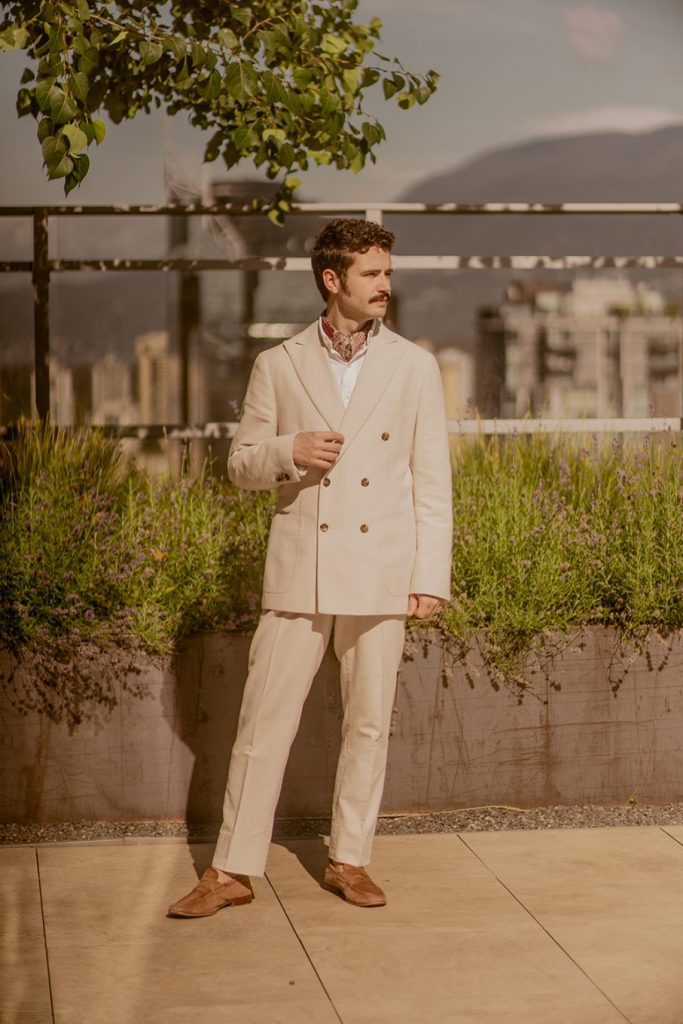
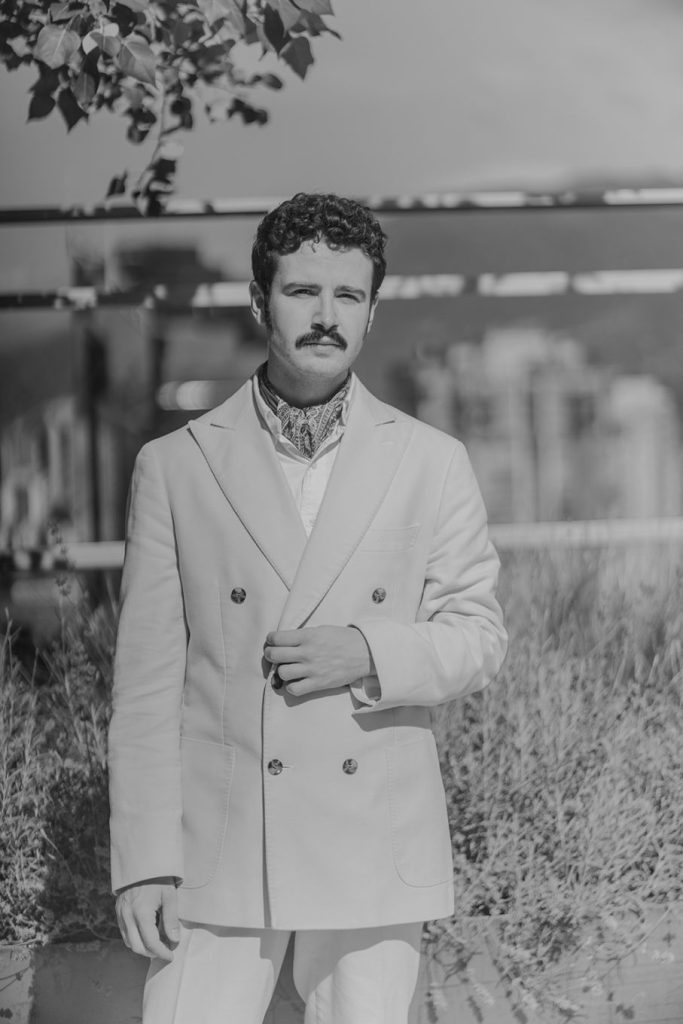
    For Michael’s outfit we channelled 1960s Cary Grant in the form of a double-breasted suit styled with a silk scarf we fashioned into an Ascot. 

    We had been to all of our favourite thrift stores all across the city before heading over to Burcu’s Angels on Main St here in Vancouver. We had left Burcu’s to last as she has recently been increasing her prices as she moves towards her retirement but she always delivers and this time was no different. When she spotted us pulling beige and cream double-breasted jackets she came out from the back of the store with the most gorgeous, pristine, cream double-breasted in Italian velvet cotton. Love hearts appeared in our eyes as we ran our fingers over the buttery soft texture and just as she expected it fit almost perfectly, we just had the waistband taken in at Money’s. 

    Postcards from Hawaii Canadian engagement party Vancouver roof terrace Gabriella Wisdom Michael William Lester wedding classic vintage

    His Ascot was a Liberty of London silk scarf that we thrifted for just $5. Clearly they did not know what they had as a new Liberty silk scarf will set you back $120 minimum.

    His Ralph Lauren shirt was pulled from within his wardrobe as were his brown, suede loafers which were a previous gift from Dune London. His O’Malley Sun Oliver People’s sunglasses were a 30th birthday gift from me.

    Michael looked so dapper and sophisticated. This to date is my most favourite outfit I have ever seen Michael wear and my heart swoons whenever I see the photos of him.

    Postcards from Hawaii Canadian engagement party Vancouver roof terrace Gabriella Wisdom Michael William Lester wedding classic vintage

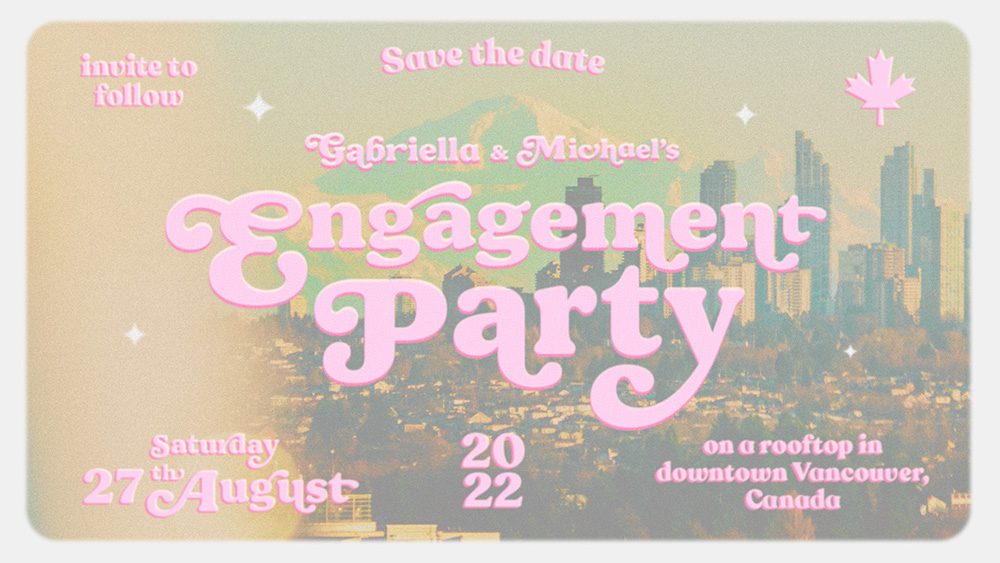
    Invite design

    As the invite design was all Michael I’m passing you over to him for a moment to explain his creative process:

    “Although I usually go down the illustration route for things like this, the magical setting of a Vancouver roof terrace lent itself to a photography-based approach. I had a few photos I’d taken of the incredible view from our building and played around with a hazy pink edit, complete with fuzzy chromatic aberration (light-fringing that is reminiscent of old cameras) and a healthy serving of grain.

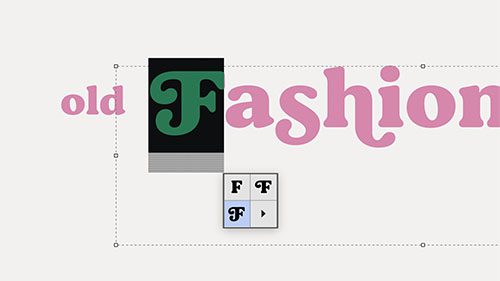
    Bogue is a font designed by melvastype, it was the perfect primary font for our event with its playful vintage-inspired serifs. Each character comes with a bunch of stylistic alternates so you can dial up the personality of individual letters to create truly bespoke finishes.”

    Postcards from Hawaii Canadian engagement party Vancouver roof terrace Gabriella Wisdom Michael William Lester save the date design wedding stationery classic vintage
    Postcards from Hawaii Canadian engagement party Vancouver roof terrace Gabriella Wisdom Michael William Lester save the date design wedding stationery classic vintage


    The save the date set the tone for the final invitation and the rest of the printed matter which took a slightly more elegant approach. We omitted the photography for anything that would be printed as we couldn’t control the printing quality of certain pieces and sticking to solid colours meant it would look great even if the print quality wasn’t good.

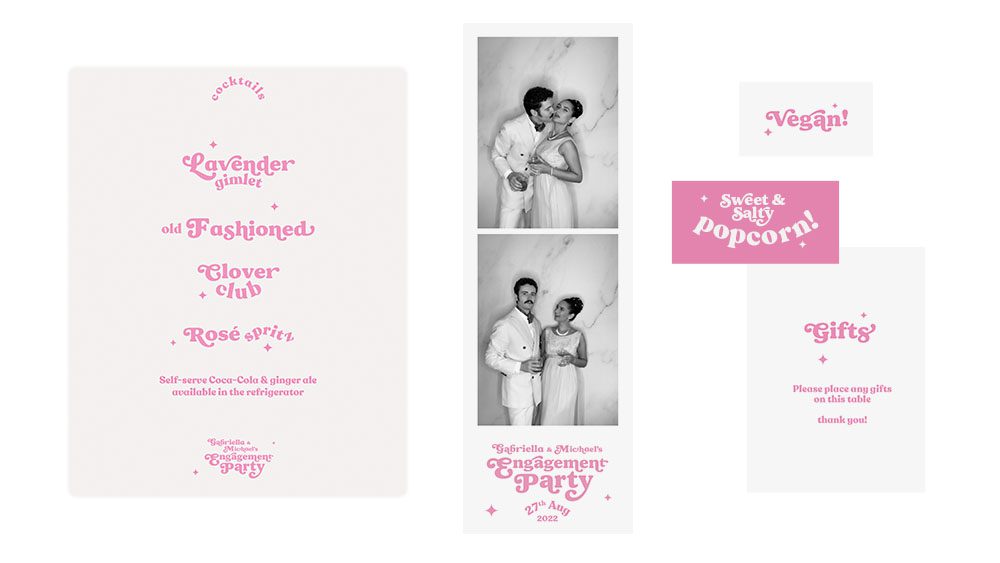
    For continuity we used the same font across all of the signage at our party, on the open-air photo booth, on the photos themselves and on the opening title to our home movie.

    The signage included:

    • One for the door so guests knew they were in the right place
    • To label the hand sanitiser and differentiate the vegan snacks
    • The cocktail menu
    • A label for the gift table
    • Stickers on the popcorn
    Postcards from Hawaii Canadian engagement party Vancouver roof terrace Gabriella Wisdom Michael William Lester save the date design wedding stationery classic vintage

    Location

    When we decided we were going to host our engagement party in the summer we decided that our first choice for venue would have to change as it has no outdoor space for people to get fresh air. 

    Back in May, as we struggled to find someone that had both indoor and outdoor space we hosted our first BBQ of the year on our balcony. When the sun was no longer shining upon us we moved up to the rooftop patio of our building where its gloriously warm rays were not obstructed. It was up there that my friends suggested I enquire about renting the Sky Lounge attached. 

    Our rooftop offers 270 degree views of all of Vancouver from downtown all the way to the North Shore mountains and out to sea. It held the promise of a glowy sunset, that just about delivered beneath a layer of cloud, and as a gentle breeze passed over us now and then it brought with it the scent of fresh lavender off the bushes planted when I booked the space for our party.

    After finding out we could – and for a fraction of the cost of our first choice – we booked it and kept our fingers crossed for good weather throughout the rest of spring and summer. Luckily for us we narrowly avoided the forecasted rain and it was a beautifully bright and warm day.

    Postcards from Hawaii Canadian engagement party Vancouver roof terrace Gabriella Wisdom Michael William Lester wedding classic vintage

    Entertainment

    Playlist

    We created three Spotify playlists for our vintage inspired engagement party that spanned four decades from the 1950s to the 80s. All three of these playlists fill me with so much joy and nostalgia over our engagement party. I’ve linked them all below so you can listen to them depending on the vibe you are after.

    The first was complied of 50s and 60s instrumental jazz, French MOD, Bossa Nova and a couple of iconic theme songs from select James Bond movies. We curated this playlist to set an elegant and sophisticated tone that created a mood but still allowed conversation to flow over the top. These songs complimented our home movie beautifully.

    After we nervously poured our champagne tower and delivered our toast that neither of us can recall what the other said, we popped on our brief transitional playlist. It comprised of just nine songs from the 70s which would delicately carry us from the smooth jazz that supported introductions and long awaited catch-ups and towards the part of the evening where we’ve all enjoyed a number of cocktails, feel well-acquainted and ready to party.

    After the sun went down, guests adjourned from the patio to indoors and we reached the end of our short transitional playlist, we moved to our third and final playlist of the evening. This playlist was comprised of some of our most favourite hits and ballads from the 70s and 80s, complied with the intention to get people to enjoy a little boogie.

    Home movies

    The Sky Lounge we hired for our Canadian engagement party has a TV and we knew we wanted to put something on there but I was adamant that a slideshow of photos wasn’t going to cut it for me.

    We had settled on the idea of playing High Society without sound until we went out for dinner in Las Vegas earlier in the summer. The restaurant we were in had a montage of black and white movies projected onto the wall and I thought it would be amazing if we did the same thing but with our own videos from our travels.

    We put the film on a loop so it would play throughout the evening as our playlist set the mood. It ended up being a huge hit and we truly didn’t know what to do with ourselves with all the compliments. We believe in capturing and memorialising the purity of all of life’s moments, especially the ones in-between the ones people are usually seeking out. Our film is primarily made up on moments before and in-between our photo shoots.

    I’ve embedded it within the introduction of this blog post to reflect the experience our guests had entering our party. You can also watch it below.

    Luckily for me my fiancé is a creative genius with a big flex right now for making cinematic magic with the little in-between moments of life caught on film.

    He compiled 15 minutes of video that we had shot of each other or via a tripod, created a custom-made filter that gave the effect of an old black and white film reel projection and he added a title in the matching font to the invites and signage of our engagement party.

    Photo Booth

    Our main source of entertainment outside of my tipsy theatrics and the look on everyone’s face as they found out Michael broke my dress moments before the party started, was our photo booth. 

    I LOVE a photo booth and we know I don’t need to explain why.

    With very little luck in booking one, my close friend here recommended DAZI CREATIVE and luckily they were available. Jeremy was amazing throughout the whole process of us giving the specifics of what we wanted the images to look like. 

    I wanted to do vertical strips like the original 1970s photo booth that can be found in Selfridges in London (find out exactly where here). We chose to only do two images rather than four with the guidance of Jeremy that you can capture more detail within two larger images than four smaller ones. 

    We chose black and white to keep within our vintage glam theme which was very well received by our guests. Black and white also helped to make everyone using the photo booth look more cohesive in their outfits from varying eras, whilst not losing any of the character of their ensembles.

    We originally wanted a white backdrop but one wasn’t available so we chose marble to match the walls in the Sky Lounge and it actually worked very well.

    We had some complications at the start with a late set up but aside from that, they were absolutely amazing. We made the most precious memories with it which you can see scattered throughout this blog post. The photo booth was the best decision we made for the party.

    Drinks and Nibbles

    Cocktail bar

    We chose to hire a bar over making our guests serve themselves. The one thing that we wanted for both parties here in Canada and in England was cocktails. We loved looking across our guests and seeing them with beautiful cocktails in hand as they laughed and mingled in the sunshine. 

    I found The Bar Guys online and was drawn towards their glassware. 

    It was very important to me that we used glasses, not only because they look elegant but because they are reusable. It wasn’t until the very end of the party that we were given a few single use cups to drink what was leftover when the bartenders had finished. 

    Postcards from Hawaii Canadian engagement party Vancouver roof terrace Gabriella Wisdom Michael William Lester wedding classic vintage menu design

    We chose four cocktails based off of our favourites and what we knew our guests would enjoy. 

    1. Lavender Gimlet – I love a Gimlet and for this one we chose lavender to match the lavender planted on the rooftop patio, plus it’s my favourite! It was made with Empress 1908 Gin which is a local BC gin.
    2. Clover Club – Unfortunately The Bar Guys couldn’t get their hands on raspberry syrup so we ended up with a variation of the Clover Club featuring blackcurrant. The Clover Club is again one of my favourite cocktails and on the sweeter side to a gimlet.

    Both of those drinks are served in coupes which was really important to me as I love coupes and they are a glass that defined the era we were trying to emulate.

    1. Old Fashioned – It’s Michael’s favourite cocktail and one of the most classic ones out there. 
    2. Rosé Spritz – this gave our guests the option of a wine based cocktail rather than spirits. I knew many of my guests love a spritz in the summer so we chose this for them.

    We also stocked the refrigerator with sodas for anyone who wasn’t drinking.

    Towards the end of the evening – once I had received my original party dress from the alterations and made my outfit change – we gave our toast. Purely for a nod to vintage glamour we had a champagne tower for our toast. Just as I’ve mentioned the best decision we made was getting the photo booth, well the champagne tower was the worst. It was assembled far too early leaving us to serve warm drinks to our guests for the toast. Plus it was ridiculously expensive for the quality. Please learn from me here if you want a champagne tower, it will cost you significantly less to buy the glasses and bubbles and make it yourself. 

    The staff were charming and efficient and no empty glass was left unattended for long which is an often overlooked but crucial detail to how a party looks on the evening. The bar service, for the most part, took a lot of the responsibility of the night off our hands and helped contribute to our engagement party looking and feeling glamorous and elegant.

    Postcards from Hawaii Canadian engagement party Vancouver roof terrace Gabriella Wisdom Michael William Lester wedding classic vintage the bar guys
    Photo credit: Chelsea Brown

    Dessert table

    As we were serving alcohol we knew we couldn’t leave our guests without sustenance but we really struggled to think of what we could serve that would hold up sitting out for 5+ hours. We had been to various events over the summer and even hosted a few where the cheese on charcuterie boards was sweating, sandwiches had gone dry or things had gone warm/cold. 

    Whilst watching Desi Perkins’ Instagram Stories of her baby shower, I saw her friends had created a gorgeous dessert table. Cakes, donuts, pretzels and more were displayed across varying levels and so that’s what we decided to do. It also helped us keep the cost down after hiring a photo booth and bar.

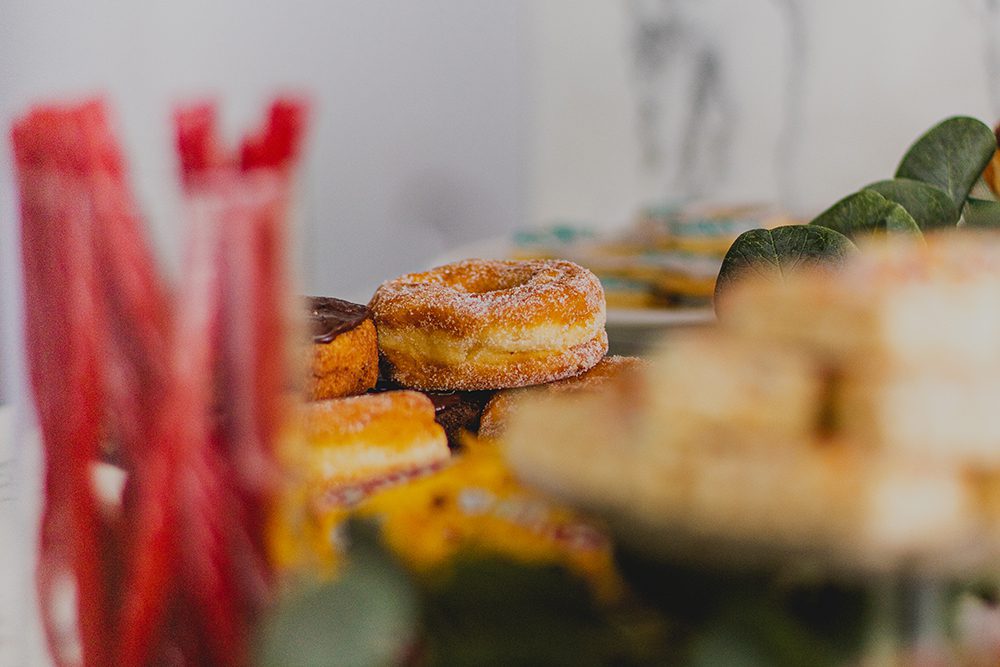
    The two main stars of our snack table were the 48 doughnuts we ordered in from local shop, and Seth Rogan’s favourite, Lee’s Donuts on Granville Island and homemade shortbread cookies/biscuits in the shape of engagement rings. Shoutout to our friend who stayed up until 2am helping us ice them the night before.

    Postcards from Hawaii Canadian engagement party Vancouver roof terrace Gabriella Wisdom Michael William Lester wedding classic vintage food dessert table

    We purchased giant bags of popcorn which we served in mini boxes (an idea from another friend) which we personalised with sticky labels that matched our invites.

    Other snacks included Hersey’s Kisses, Red Vines, Coffee Crisps, maple leaf cookies, rice crispy treats and cheese straws.

    The food was displayed all on second hand plates, cake stands and vases that I had bought across the year since moving here for just a few dollars each. They mostly came from Salvation Army thrift stores and local thrift store, Wildlife. Beneath the plates was one of my table runners and an artificial Eucalyptus garland which I got from the craft store Michael’s for free when I purchased another piece of autumn decor.

    We ordered 48 doughnuts because it was the only way we could skip the giant Saturday morning queue on the day. For this reason we were left with a lot of doughnuts. After eating a few over the following days as we recovered from the party we were left with about a dozen. Instead of wasting them I chopped them up and made a bread and butter pudding with them. Delicious! I froze what we couldn’t eat.

    On Days Like These

    The Golden Era of Hollywood cinema didn’t come without its drama and neither did our engagement party. It wouldn’t sit well with me to not share some of the moments where our celebrations experienced some hiccups – some more sizeable than others. I’ve always been transparent on my Instagram and blog about things not being as perfect as the social media realm would have you believe and this blog post will follow suit.

    We’ve already spoken about how Michael ripped the zipper off my dress as our guests were arriving, well that was a big one. 

    We also had issues over a miscommunication within the company we hired our photo booth that meant they arrived late and were setting up after my guests started arriving. Just an FYI, they’ve since been graceful enough to compensate for this.

    The playlist was connected to Michael’s phone and he had ran off with it to the alternations shop so we didn’t have our carefully curated playlist playing for about 45mins. 

    The laptop got accidentally pulled out of the wall that meant we didn’t have the home movie playing as our guests entered like we wanted.

    Not all of our guests could make it to celebrate with us.

    The bartenders left our champagne tower in the sun all afternoon then served our guests warm, flat drinks for our toast.

    We forgot to turn on the fire pits and string up the fairy lights we bought for the occasion.

    Then there was the extremely frustrating situation of residents in our building breaking the one toilet available to all of our guests – not ideal!

    Postcards from Hawaii Canadian engagement party Vancouver roof terrace Gabriella Wisdom Michael William Lester wedding classic vintage
    Photo credit: Chelsea Brown

    The point is, things went wrong. Are they sticking with me because my moon sign is in Virgo and I am a very particular person when it comes to executing my creative vision? Yes. The reason I’m sharing these though is because it’s important that you know not everything was as perfect as it appears and it isn’t realistic to expect it to be. 

    After our party, friends who married this year shared with me how things had gone wrong at their weddings and it made me feel so much lighter. I had been caught up in that time old comparison game and to hear that I wasn’t alone in my feelings of “it wasn’t meant to be like that” was reassuring. So I hope that being transparent about the things that didn’t go to plan can help you if you ever feel the same.

    Ultimately we had a wonderful time being surrounded by friends, who, even though they didn’t all know each other, were all there for one magical reason. To support Michael and I and celebrate our unconventionally beautiful love and respect for one another at an engagement party seven months after I said “hmmm, okay!”.

    Do more on & for the planet, Gabriella 

  • PFH 5 favourites: May 2022

    PFH 5 favourites: May 2022

    May of 2022 is the first month I’ve been home in Vancouver and nowhere else. My travels finally slowed down once my friends stopped having weddings and I got a chance to explore my city, so my PFH 5 favourites are focused on both ways you can save money at home and a couple of things I have found within my city that excite me. 

    Read on to find out two ways that I’m saving money on food, my favourite vintage and second hand stores in Vancouver, how thinking outside of the box got me some really pretty and inexpensive photo frames for our home and how I’ve been finding new music to listen to in my office.

    Here’s my PFH 5 favourites for May:

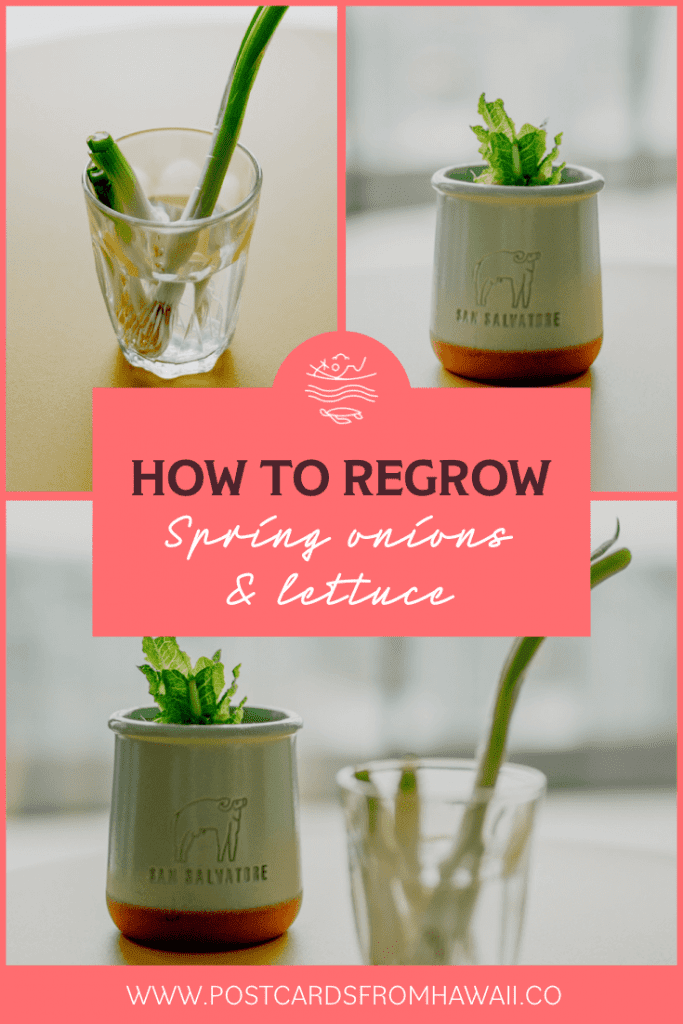
    1. Regrowing salad vegetables from food scraps

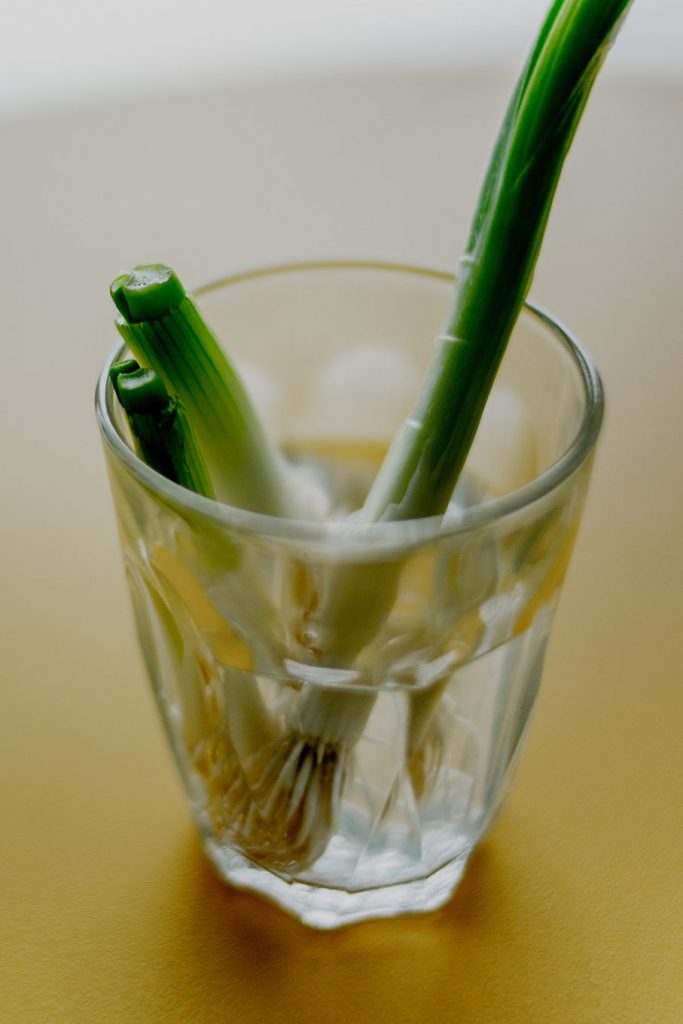
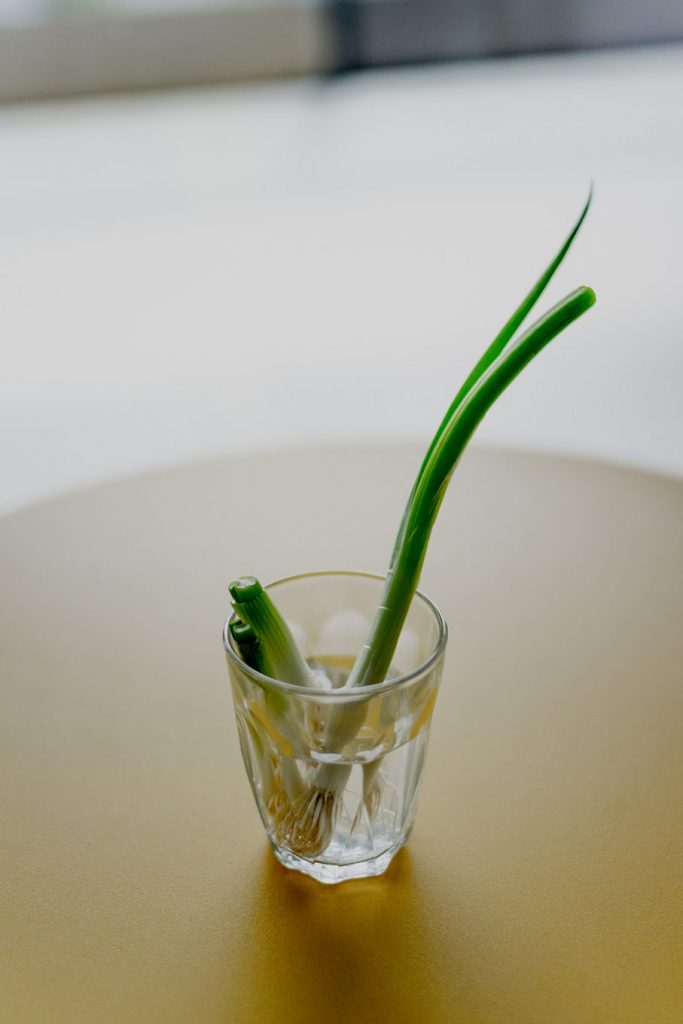
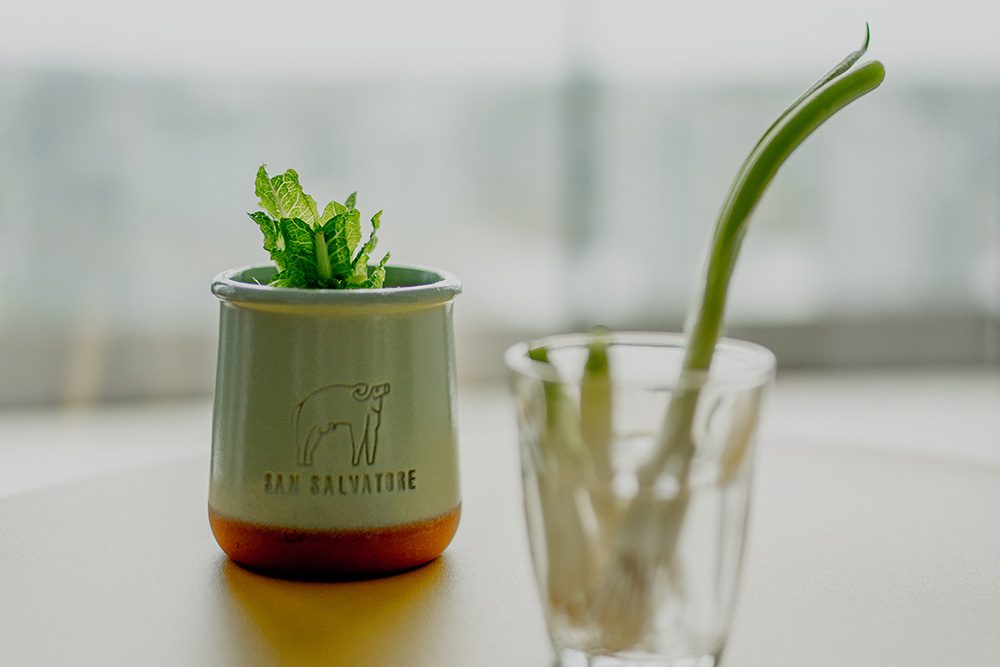
    I feel like I might actually be the last person on earth who has realised how easy it is to regrow food scraps but just in case I’m not I want to share my most favourite thing I’ve been doing this month. I have been regrowing spring onions/salad onions (possibly even scallions – why is North America and England so different??) and romaine lettuce from the ends of the ones I’ve just eaten in water. Water! 

    This blows my mind!

    I had a vague idea that you could regrow spring onions from the bulbs in a glass of water but I had no idea they would grow so quickly and that you could do it twice! Within a week I have a brand new onion and if you leave them for two they will really flourish. Now I only have to buy fresh ones every other week.

    postcards from hawaii travel lifestyle blog May 5 favourites how to grow green onions Mintage caramel macchiato iced coffee recipe second hand photo frames

    How to regrow a spring onion or salad onion or scallion or whatever

    1. When you’re ready to eat your spring onion/salad onion, chop the onion about 2 inches from the end of the bulb
    2. Place the bulb into a small glass
    3. Fill the glass with ½” of cold tap water 
    4. Place your glass somewhere it will get plenty of natural sunlight 
    5. Within two days the green stem of the onion will start to regrow as well as the roots
    6. Change the water every 2 days
    7. When your spring onion is big enough to harvest (between 1-2 weeks) repeat the process

    You can regrow your green onions this way up to three more times.

    postcards from hawaii travel lifestyle blog May 5 favourites how to grow green onions Mintage caramel macchiato iced coffee recipe second hand photo frames

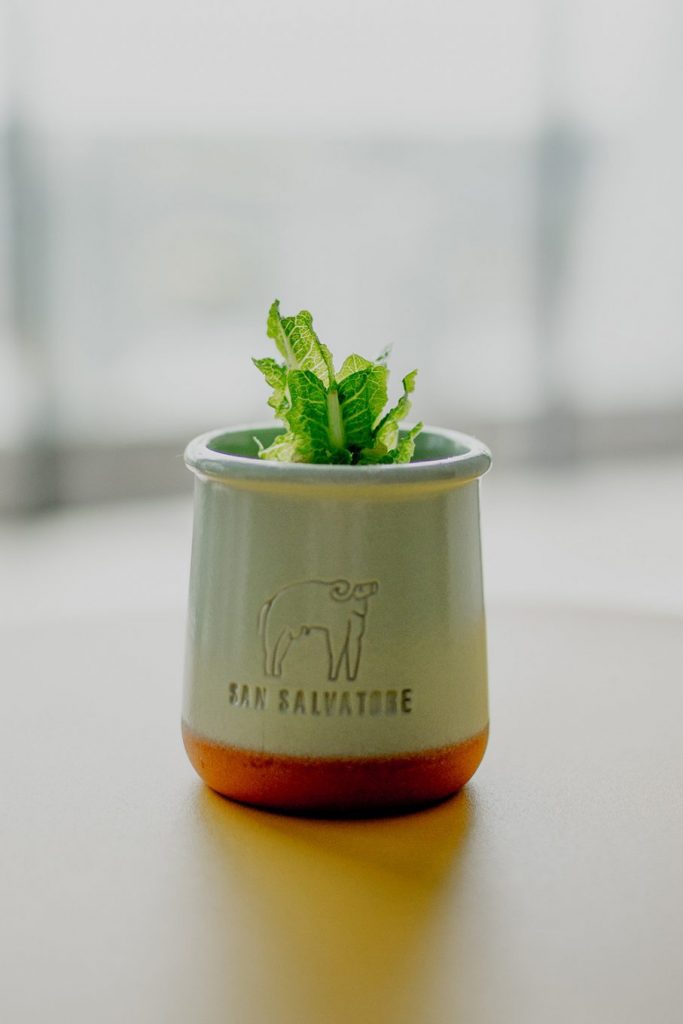
    After my big spring onion success I tried the end of my Romaine lettuce with the same method and I was thrilled to see regrowth within a week! This one will take a lot longer than the spring onions but how exciting is it to save waste and money?

    postcards from hawaii travel lifestyle blog May 5 favourites how to grow green onions Mintage caramel macchiato iced coffee recipe second hand photo frames


    This post from spud.ca has a useful list on other fruits and vegetables you can grow in water.

    Stay tuned for a blog post on more ways to use up your food scraps in your kitchen. 

    You might also be interested in my homemade & low-waste snack recipes that show you how to make crisps/chips from potato skins.

    postcards from hawaii travel lifestyle blog May 5 favourites how to grow green onions Mintage caramel macchiato iced coffee recipe second hand photo frames

    2. Vintage shopping on Main St in Vancouver

    If you asked me what I missed about London it would take me most of my two year working holiday visa in Canada to tell you it all but one thing in particular is Brick Lane. Honestly it’s the Jewish bagel shop Beigel Bake that hurts the most about missing Brick Lane but second to that it’s for the second-hand, pre-loved and vintage shopping. 

    I’m super pleased to report that I found Main St which is basically Vancouver’s answer to Brick Lane. Lined up on and dotted around Main St are various second-hand stores ranging from bogus to genuine, bleak to extraordinary and affordable to you-might-need-a-bank-loan.

    Beware of the second-hand stores passing themselves off as vintage who are marking up the cost of Zara clothing that is only 1-3 seasons old – I mean honestly that’s like glueing a My Little Pony on the hood of a VW Polo and trying to sell it as a Ferrari.

    postcards from hawaii travel lifestyle blog May 5 favourites how to grow green onions Mintage caramel macchiato iced coffee recipe second hand photo frames


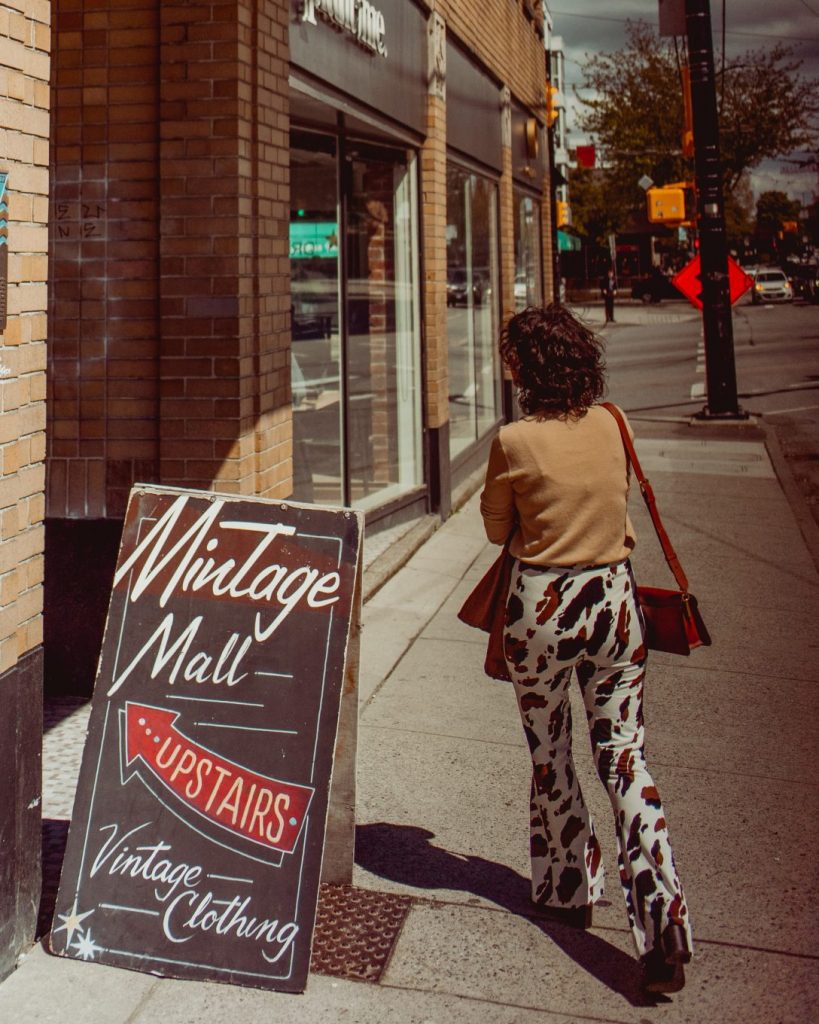
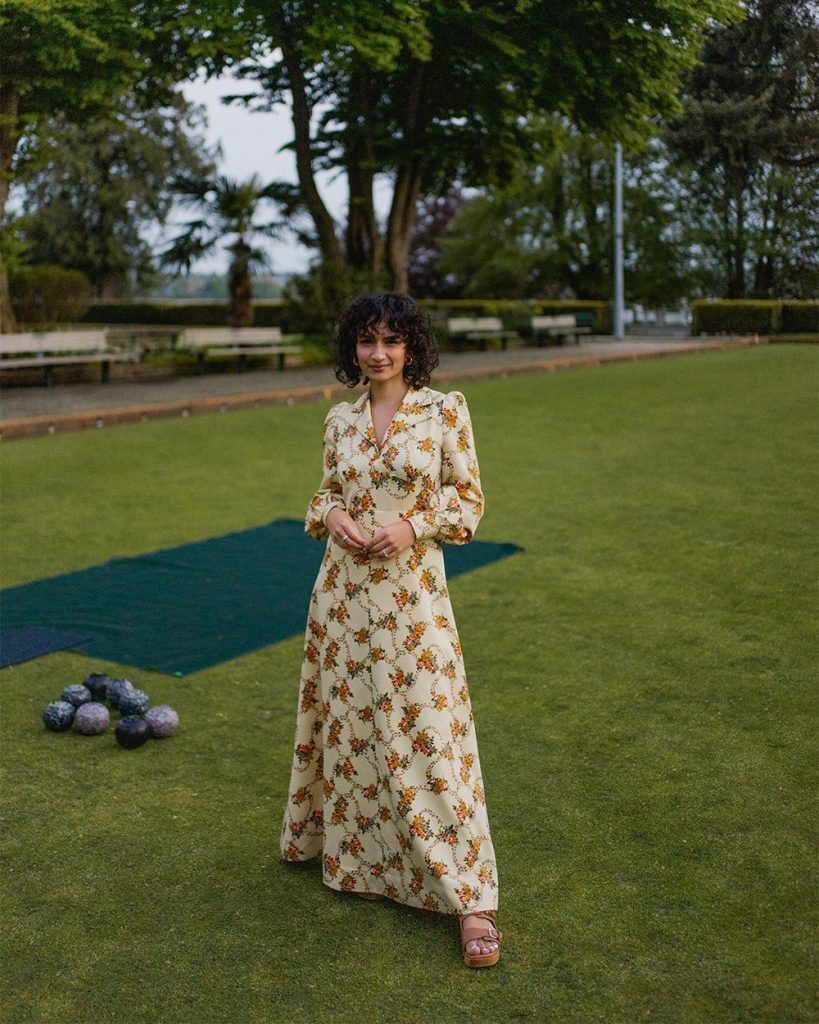
    Mintage Mall on E Broadway however is the real deal. Spread across at least 8 sections* is everything from clothing to accessories and it’s categorised by garment then colour. It’s rather reminiscent of The Brick Lane Vintage Market except it’s all one store and I noticed the prices are much more affordable. The pre-loved 70s maxi dress of dreams I’m wearing here was just $42 CAD from Mintage and both my fiancé and I picked up a tan leather 70s jacket each for $150-175. Whereas I’ve paid no less than £50 for just a blouse in the vintage shops on brick lane.

    postcards from hawaii travel lifestyle blog May 5 favourites how to grow green onions Mintage caramel macchiato iced coffee recipe second hand photo frames

    I also am high-key obsessed with Burcu’s Angels whose store is like a treasure chest beyond your wildest fantasies. I have been collecting various wedding outfits from her store since we got engaged and each piece is utterly unique and exquisite. She often works with Vancouver’s highly successful film industry and has helped source costumes for various period pieces. Another wonderful thing about Burcu’s Angels (apart from the fact that they always encourage you to play dress up) is that they offer exchanges after you’ve worn the items so that someone else can love them too and you get to wear something else. It’s the most fabulous closed-loop store in Vancouver!


    Another firm favourite of mine is Woo Vintage who has strong connections with Vancouver’s movie industry and has helped out with the wardrobe for many productions including the Netflix series The Chilling Adventures of Sabrina the Teenage Witch. I picked up the most glorious 1970s black velvet, hooded opera cape from Woo Vintage that I have absolutely no occasion for but the way it drapes when worn feels positively celestial.

    *Mintage is located on the second floor accessible only by stairs.

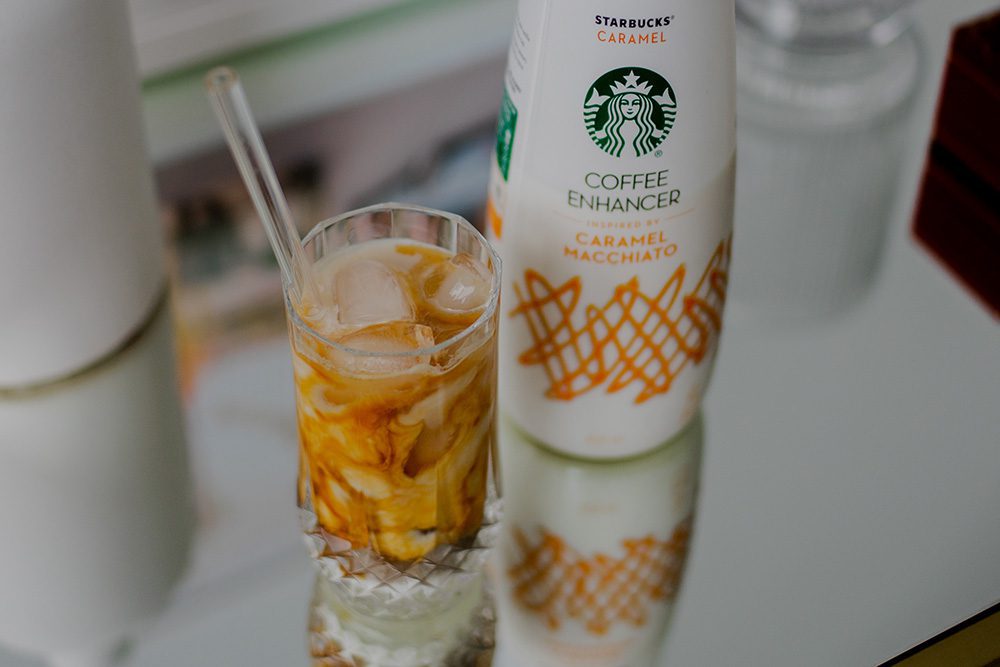
    3. PFH caramel macchiato iced coffee recipe

    It’s iced coffee season and just like every other basic b*tch on this planet I am very happy about that. What doesn’t make me happy is the $6.32 CAD price tag that comes with my tall decaf iced caramel macchiato with soy milk at Starbucks – yeah I know it’s a mouthful.

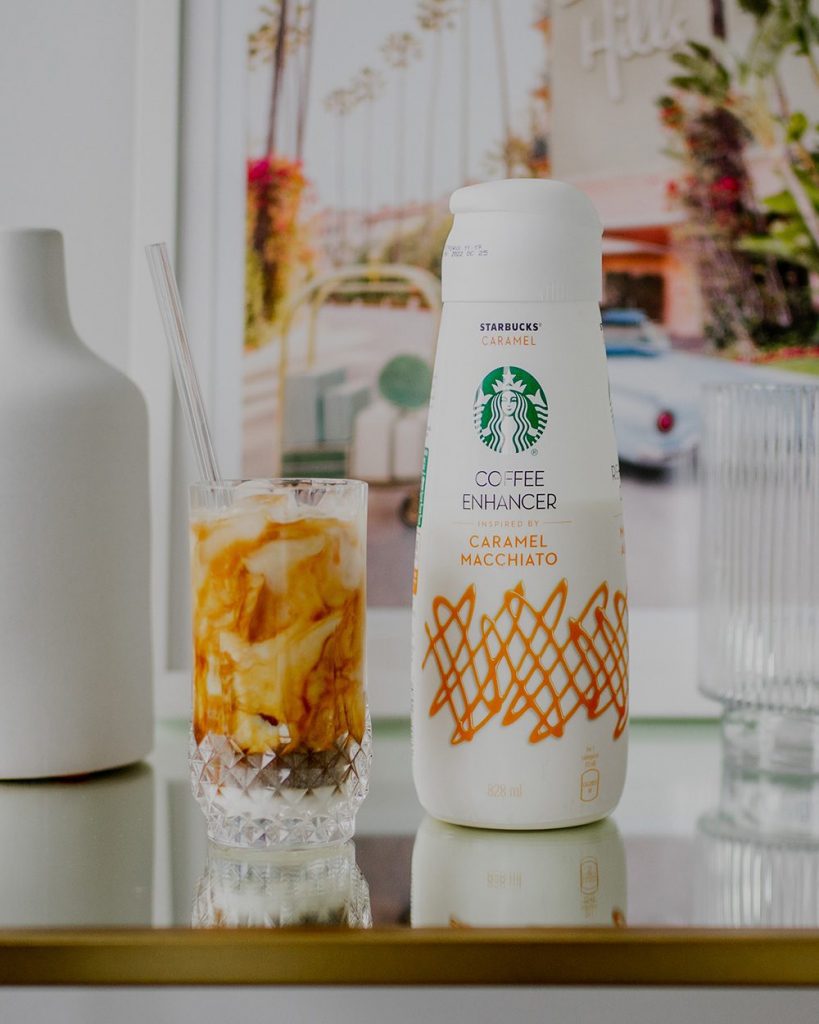
    So imagine my delight when I found a bottle of Starbucks caramel macchiato coffee enhancer/creamer that costs only $6.70 from Walmart.

    Thanks to my fiancé’s coffee machine I am able to make an espresso at home to mix in with a few extra ingredients and I’ve got myself a super cheap but just as good Starbucks-style iced caramel macchiato. There’s a bunch of other fan-favourite flavours as well as caramel macchiato and a dairy-free version – which I found out after.

    So if you can get your hands on the Starbuck’s coffee enhancer/creamer here’s the recipe for the iced caramel macchiato that I’ve been making at home for an afternoon treat on sunny days:

    postcards from hawaii travel lifestyle blog May 5 favourites how to grow green onions Mintage caramel macchiato iced coffee recipe second hand photo frames

    Ingredients for an iced caramel macchiato

    • Ice
    • Double espresso 
    • 1tbsp Vanilla syrup
    • 1tbsp Starbucks coffee enhancer/creamer
    • Milk of your choice

    How to make an iced caramel macchiato

    1. Fill your glass, tumbler or travel mug with ice
    2. Pour a fresh double espresso over the ice
    3. Measure out and pour in the vanilla syrup and Starbucks coffee enhancer/creamer
    4. Top it up to the top with the milk of your choice

    Add a reusable straw and enjoy! My glass straw is from the small business Manchester Glassworks and you can read more about them here.

    Sorry Brits, I’m not aware of coffee creamers being a thing there.

    postcards from hawaii travel lifestyle blog May 5 favourites how to grow green onions Mintage caramel macchiato iced coffee recipe second hand photo frames

    4. How to save money on photo frames

    When I moved to Vancouver it never crossed my mind that finding photos frames would result in being such a thorn in my side. I swear just about every clothing store in England now has some sort of home section or at the very least a corner of nicknacks. Oliver Bonas has such a beautiful line of photo frames and heck I mean Zara and H&M have their own independent home stores! 

    When it came to furnishing our new home and the process of finally being able to frame our own photographs and the various prints we have collected from our travels, we found it to be not only more challenging but also pretty expensive. Unlike England, not many stores in Vancouver have interesting design-focused photo frames let alone affordable ones (don’t even get me started on my quest to source glassware) and any we could find were wildly expensive. 

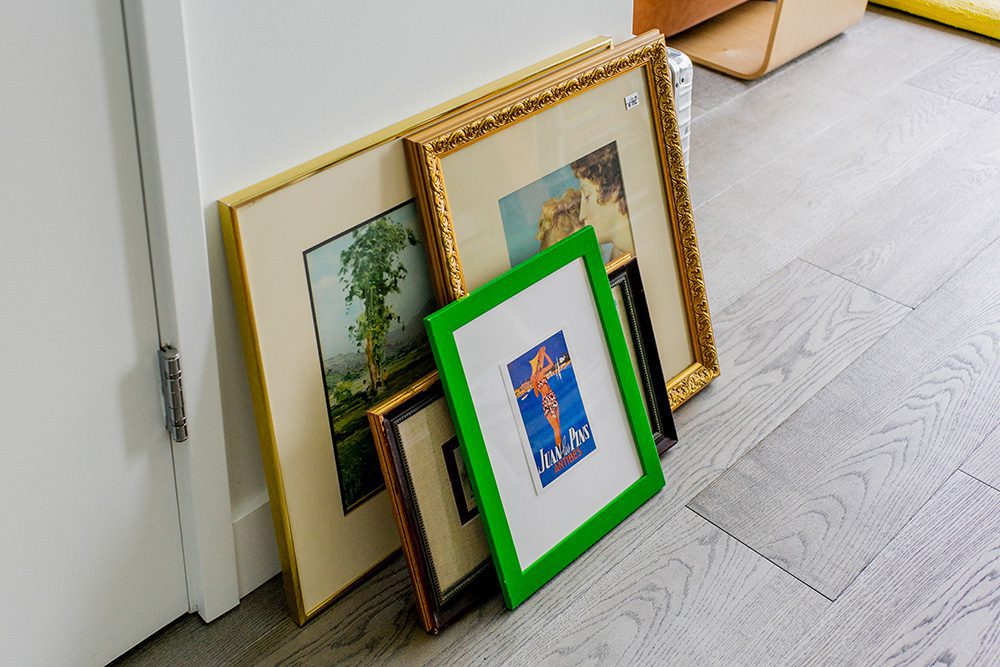
    At first we sought out frames from IKEA and Michaels (the craft store) but the cost was adding up and we were tired of getting the exact same, basic frames. We started thinking outside of the box and came up with three places to look out for photos frames with character that I believe will work across the world where these are an option to you:

    1. Thrift stores

    Or as we know them in the UK: charity shops. 

    Sure you’re not going to find a gem every time but if you make a habit of frequenting these stores to see if any photo frames have come in you might find something in keeping with your home decor. 

    Remember a fresh coat of paint can go a long way too if it’s not quite what you’re after.

    I hadn’t considered them before because honestly it hasn’t really crossed my mind that you could remove whatever was being housed within. Once that penny dropped it seemed like such an obvious choice as they are so reasonably priced for something with so much more character than you could get from IKEA.

    2. Dollarama and Dollar Tree

    postcards from hawaii travel lifestyle blog May 5 favourites how to grow green onions Mintage caramel macchiato iced coffee recipe second hand photo frames

    The UK version being: Poundland and 99p Store.

    I’ve found the stock changes from store to store and that nothing ever returns once it’s out of stock but I’ve managed to grab a few lovely photo frames on passing trips to get biodegradable bin bags, amongst all the other bits that are more affordable in Dollar saver stores.

    Their photo frames won’t be priced at £1/£1 but they will be far cheaper than homeware stores. 

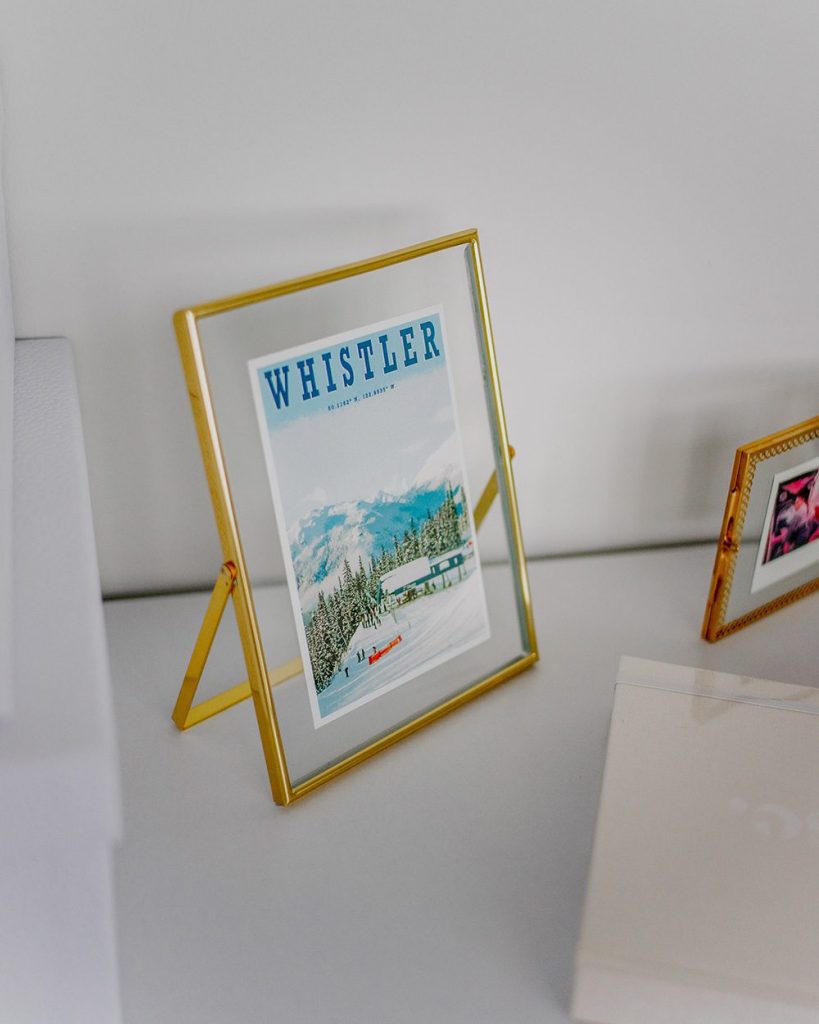
    The gold and glass portrait standing frame that currently frames a postcard of Whistler (where my fiancé and I got engaged) was just $4 whilst I’ve found an almost identical one from Oliver Bonas for £14.

    postcards from hawaii travel lifestyle blog May 5 favourites how to grow green onions Mintage caramel macchiato iced coffee recipe second hand photo frames

    3. Independent drug stores

    Independent drug stores, pharmacies and chemists tend to have a little more to them than just medication. I’m talking the kind that have a random selection of homely knickknacks next to the cough medicines and anti-fungal creams. Like they’re thinking, whilst you pick up your blood pressure pills perhaps you are also in need of a “Good Vibes Only” sign, a freshly-cut-grass scented candle and a photo frame?

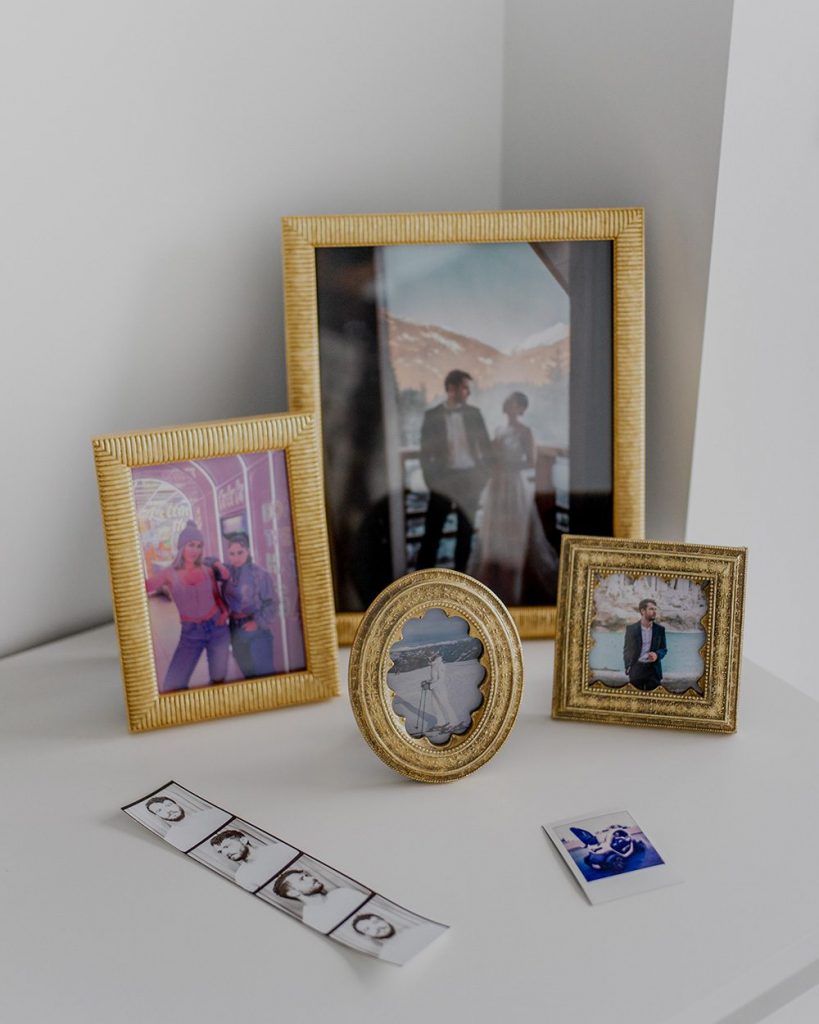
    Some of my favourite photo frames came from a drug store just like that! I was getting my covid test done at a drug store in the US to return to Canada and they had all sorts of homeware including a little section of silver and gold photo frames at very good prices.

    You never know what you can find by thinking outside of the box right? 

    I will be publishing more in depth blog posts on furnishing a home in Canada and ways to mindfully furnish a home with second hand and environmentally-conscious items soon. Keep an eye out in my Expat content for updates.

    5. Being open to new music

    postcards from hawaii travel lifestyle blog May 5 favourites how to grow green onions Mintage caramel macchiato iced coffee recipe second hand photo frames

    Something new I started doing in May was following the link to any song recommendations people are sharing via Spotify on Instagram Stories. Though I have a super eclectic taste in music – which I think also reflects within my style – I felt like I was reaching for the same playlists. As amazing as my playlists are I wanted to branch out. This has been working out for me so far and thanks to Spotify finding songs relevant to what you just listened to I’ve been able to find so much fresh music for the days I’m at my desk.

    Speaking of my playlists, if you are looking for something to soundtrack your summer vacation or road trip then take a look at my PFH playlists here. You can use the topics drop down to find all my playlists as well as all of my entertainment recommendations including books, podcasts, movies and more.

    Something else I’ve been doing is listening to artists who I love but have maybe only listened to a couple of their best known hits. Going back to their older albums has pulled out some songs that I didn’t know I was missing. 

    Oh yes she’s on a reused streak this month!

    What have you been loving recently? I’d love to hear it in the comments below!

    Do more on & for the planet, Gabriella

    Pin this post
    postcards from hawaii travel lifestyle blog May 5 favourites how to grow green onions Mintage caramel macchiato iced coffee recipe second hand photo frames
    postcards from hawaii travel lifestyle blog May 5 favourites how to grow green onions Mintage caramel macchiato iced coffee recipe second hand photo frames
    postcards from hawaii travel lifestyle blog May 5 favourites how to grow green onions Mintage caramel macchiato iced coffee recipe second hand photo frames


  • Simple vegan sugar cookies recipe

    Simple vegan sugar cookies recipe

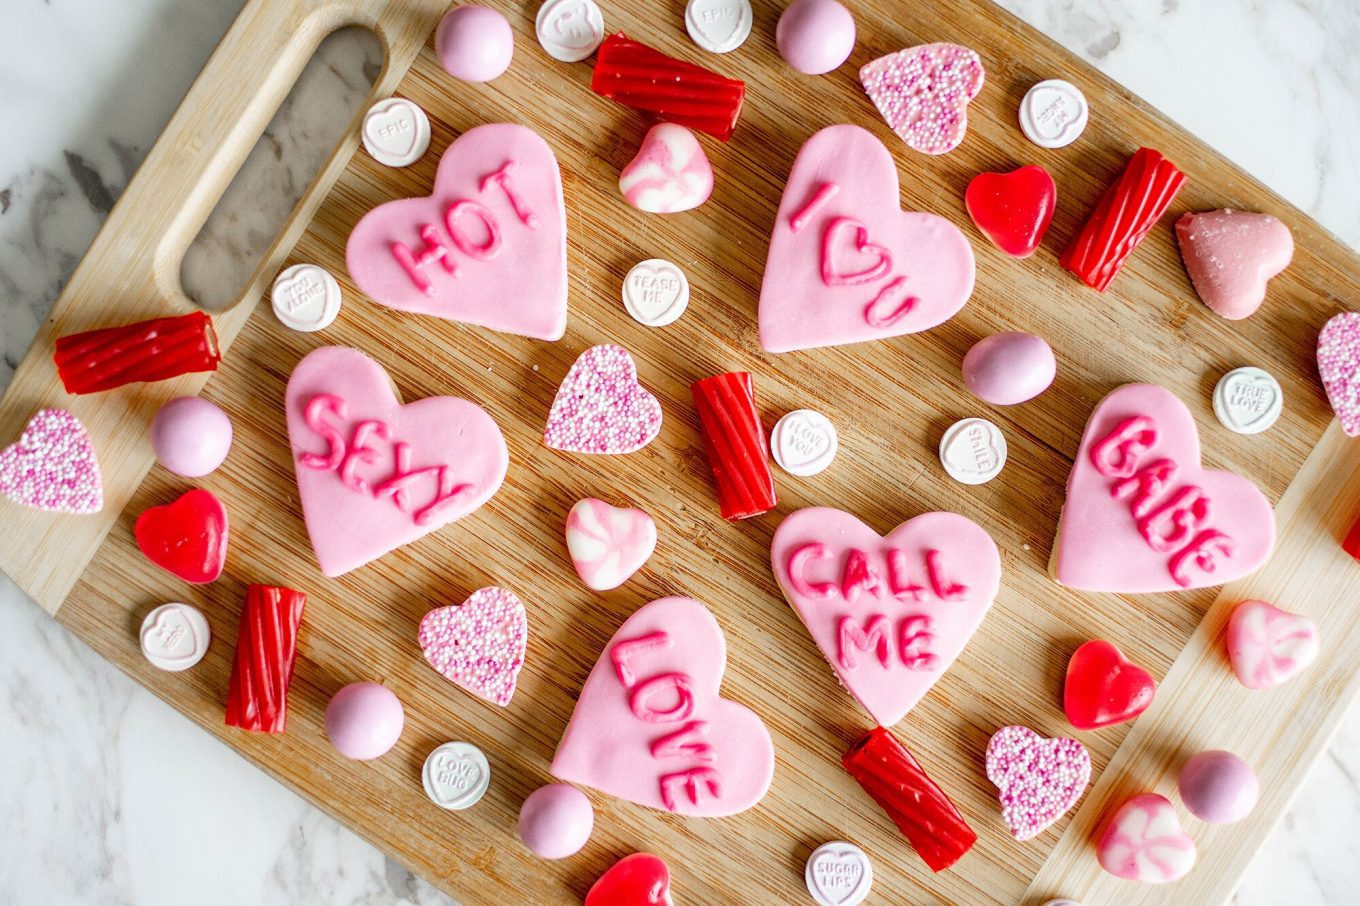
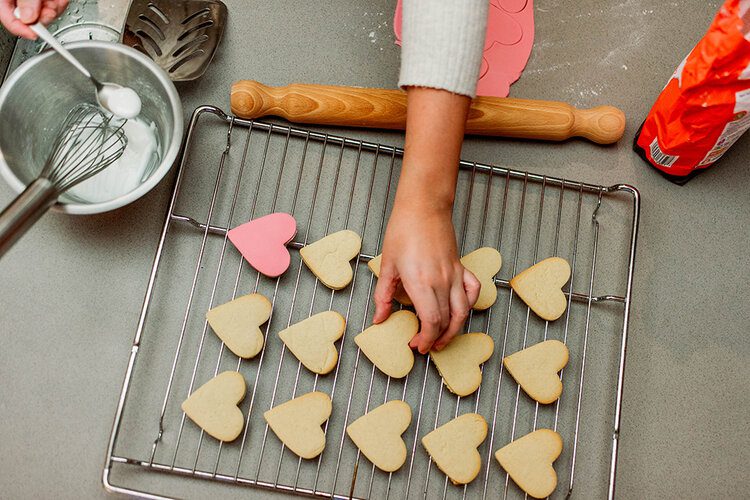
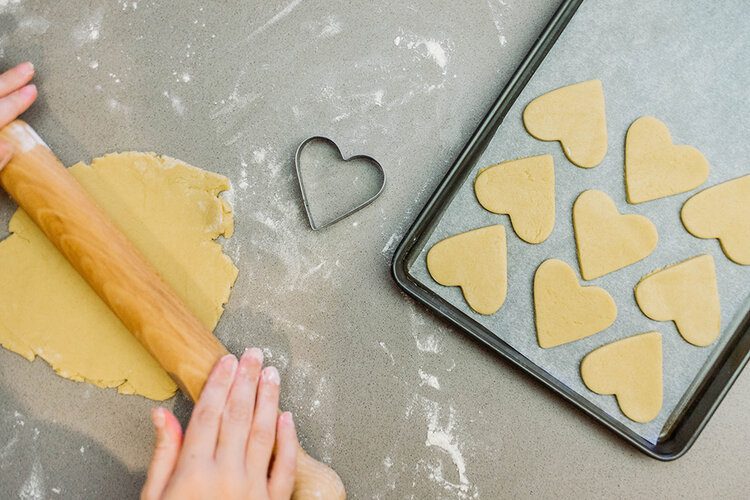
    This sugar cookie recipe is super simple, needs very few ingredients but makes delicious and really cute biscuits that can be enjoyed on any occasion. As you’ll see from the photos I love making them for Valentine’s Day but I also make them as Christmas cookies or whenever there’s a party – ahh remember what parties were? Those were the days.

    I’ll be honest with you, being a travel blogger in a time when international travel is illegal is getting to be somewhat tricky and makes me feel like some kind of dirty accomplice. Sharing fresh travel content not only during the UK’s 3rd lockdown but also having not left the country for over a year now isn’t easy but of course I want to provide you with useful content that can at least keep you occupied in your spare time whilst you’re not working from home and you can’t travel.

    So with that said, here’s my sugar cookie recipe for the cookies that I will most likely bring to your party when they’re legal again but until then, you can bake these little bickies (that’s Brit slang for biscuits which are cookies, yes I know you’re now practicing your English accent) yourself for your zoom party or whatever sad thing we’re all doing to feel alive on a weekend during the pandemic.

    What if I don’t want vegan sugar cookies?

    I’ve been reducing my dairy intake for the last 3 years but I’ve been baking these sugar cookies for so much longer. Originally I was baking them with an egg and butter before switching to margarine and vegan eggs.

    Sure, they’re richer with butter but they are delicious baked with dairy or vegan ingredients so I would urge you to try the vegan option for the future of the planet but either way, they will taste amazing!

    How to make gluten free sugar cookies

    Simply switch out the plain flour for gluten free plain flour and use double the amount of egg or vegan egg replacement if you want to make these easy sugar cookies gluten free. I will say that despite the vegan eggs and butter making no difference to the taste or texture, the gluten free flour does make the sugar cookies dryer. I always counteract this by using piping icing so you don’t notice it quite so much. They will look at lot more pale than if they weren’t gluten free so don’t bake them for longer than 10mins.

    How long sugar cookies will last

    Sugar cookies will last 2 weeks if stored in a dry, airtight container for 6 weeks in the freezer.

    If you have an event coming up such as Valentine’s Day or Christmas and you’re short on time, you can use this recipe to make them in advance and then freeze the sugar cookies. Just take them out of the freezer to defrost for at least 2 hours to be sure they’re ready to eat.

    How to decorate sugar cookies

    If I have a lot of time I will mix up icing sugar with water and food colouring and smooth the icing over each one, but it’s very time consuming and usually something I do for Christmas. If you choose to do this you will need to leave them to set overnight.

    If you want to add sprinkles then add them before you leave the icing sugar mixture to set.

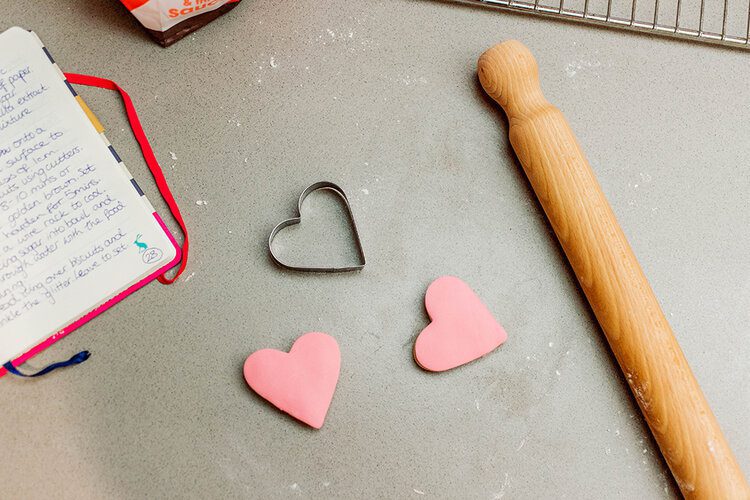
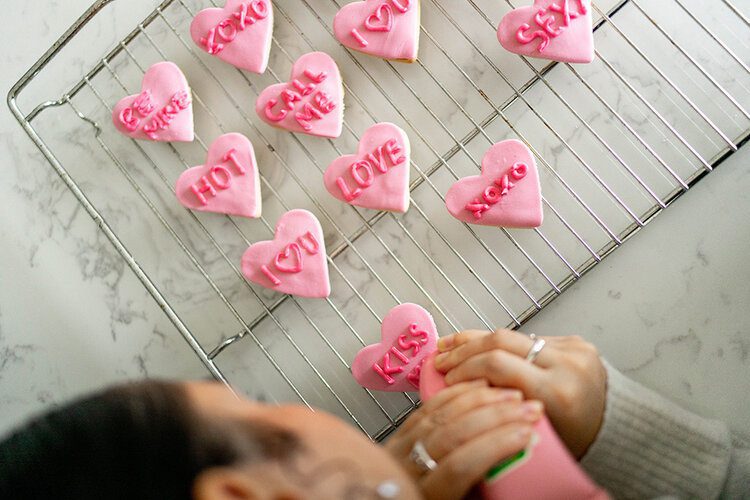
    When I’m short on time, I use the same cookie cutter to cut out fondant icing which I’ll stick on with a little icing I’ve made with water and icing sugar. 

    Add a little something extra by decorating them with piping icing. My tip for using piped icing is to go slower than you would think necessary to keep your pattern or writing consistent.

    This recipe will make approximately 36 sugar cookies.

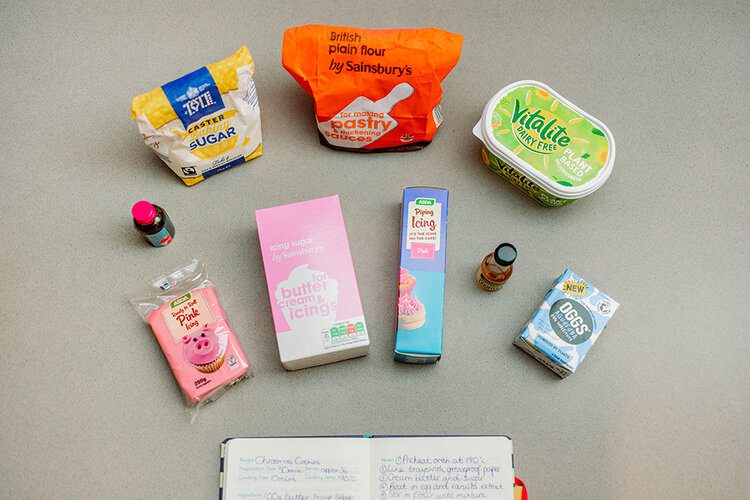
    Ingredients

    Sugar cookies

    275g / 2¼ cups plain flour

    100g / ½ cup caster sugar

    100g / ¼ cup and 3 tbsp vegan margarine or butter

    1 free range egg / 3 tbsp vegan egg replacement for baking, check the packaging for the brand you use (I used Oggs) 

    1 tsp vanilla extract

    Icing 

    Piping icing with:

    400g icing sugar mixed with 3-4 tbsp water with ½ tsp of food colouring

    Or 

    250g fondant icing

    Equipment 

    Mixing bowl

    Scales or measuring cups

    Measuring spoons

    Wooden spoon

    Rolling pin

    Cookie cutter in shapes of your choice

    Cooling wire/rack

    Method

    1. Preheat the oven to 190ºC Fan or 374ºF.

    2. Line your baking trays/sheets with greaseproof/parchment paper (if you have a reusable lining then use that).

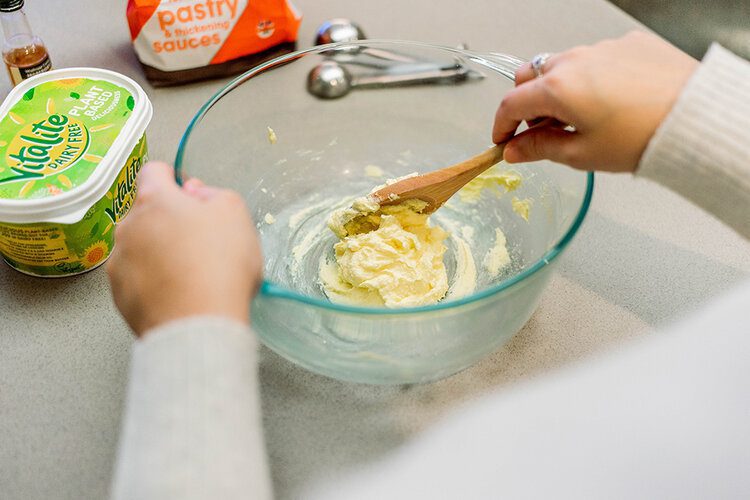
    3. Cream the butter and sugar together in the mixing bowl with a wooden spoon.

    4. Beat in the egg or vegan egg replacement and vanilla extract.

    5. Stir in the flour and bring it together until the mixture forms a dough (you will need to use you hands towards the end).

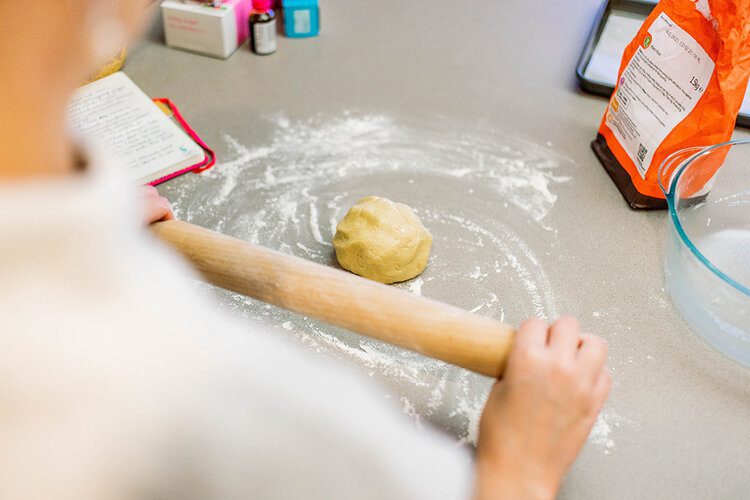
    6. Split the dough into two so you can manage it better and roll it out onto a lightly floured surface until it’s 1cm thick.

    7. Take your cookie cutter in the shape(s) of your choice and cut out your cookies/biscuits. Keep rolling out the excess dough until you have cut as many cookies as possible, you will get approximately 18 from each half of the dough. Place your cookies onto your pre-lined baking trays/sheets.

    You may also be interested in my American Buttermilk Pancakes recipe.

    8. Bake your cookies in the oven for 8 – 10mins, you want to catch them right before they start to brown on the edges, they should be baked but pale in colour. Start them at 8mins and if they’re about to turn golden then remove them, if they’re looking under-baked then leave them in a further 2mins but no longer.

    9. Place your baked sugar cookies on a cooling wire/rack and leave them until they’re cool to the touch. You want to decorate the sugar cookies when they have cooled down completely or the icing will melt.

    You may also be interested in my traditional British Christmas mince pies recipe.

    Bon appétit, Gabriella

    Pin this post


  • 10 accessories to transform a simple outfit

    10 accessories to transform a simple outfit

    As the significant damage to our planet that fast fashion causes is coming more into focus, I wanted to create a blog post that highlights the simple ways you can accessorise one dress to create different looks without needing to buy new outfits for a trip, instead using what you already have or can buy second hand. It’s a great way to reduce the amount of clothes you pack into your luggage, which also saves fuel consumption on your travels as the load is lighter and helps to prevent you needing to buy more than necessary, contributing to the effects of fast fashion consumption. 

    “My mother worshipped at the alter of accessories and I got the bug. She always said, if you have a good, little, simple black dress and you have different accessories, you can have 27 different outfits.” – Iris Apfel.

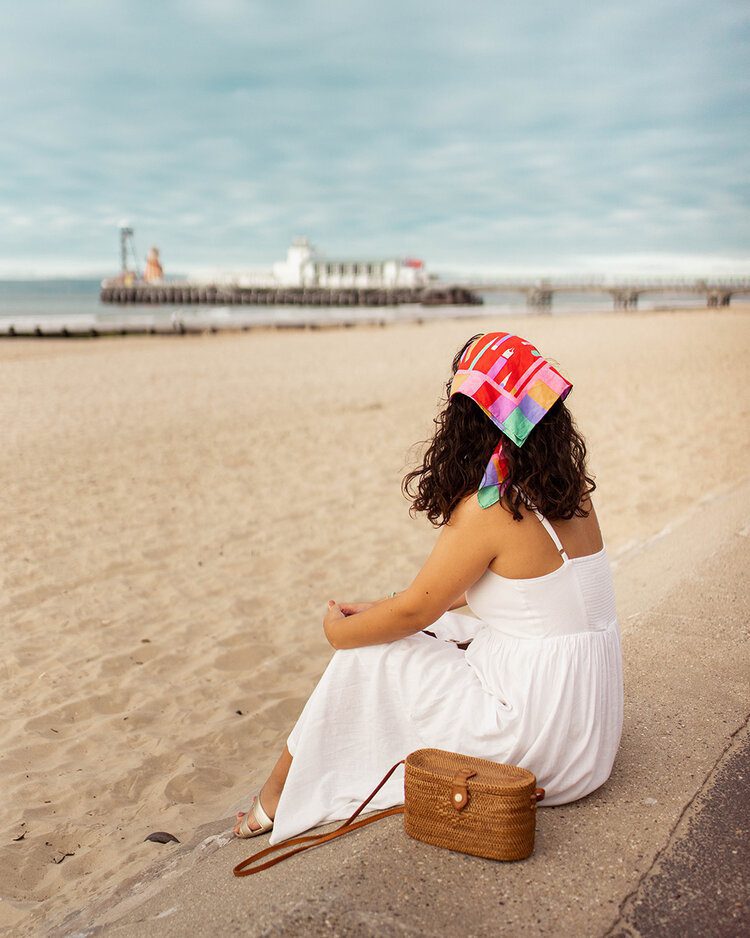
    I have decided to focus on one dress to show you the ways just one outfit can be changed up for different looks. I have taken this dress on almost every trip since I bought it in 2018 and no matter how many times I post a photo wearing it on Instagram I never get any comments about needing to wear something new. It’s ok to repeat outfits, in fact it’s amazing and something we should be doing a lot more.

    This dress was purchased from Urban Outfitters, which I no longer recommend due to their unethical practices, but as it’s a simple linen dress that has been on trend for the last few years, it is easier to buy one from more responsible brands, or better yet, you could make one yourself. You could also buy one second hand or borrow one from a friend.

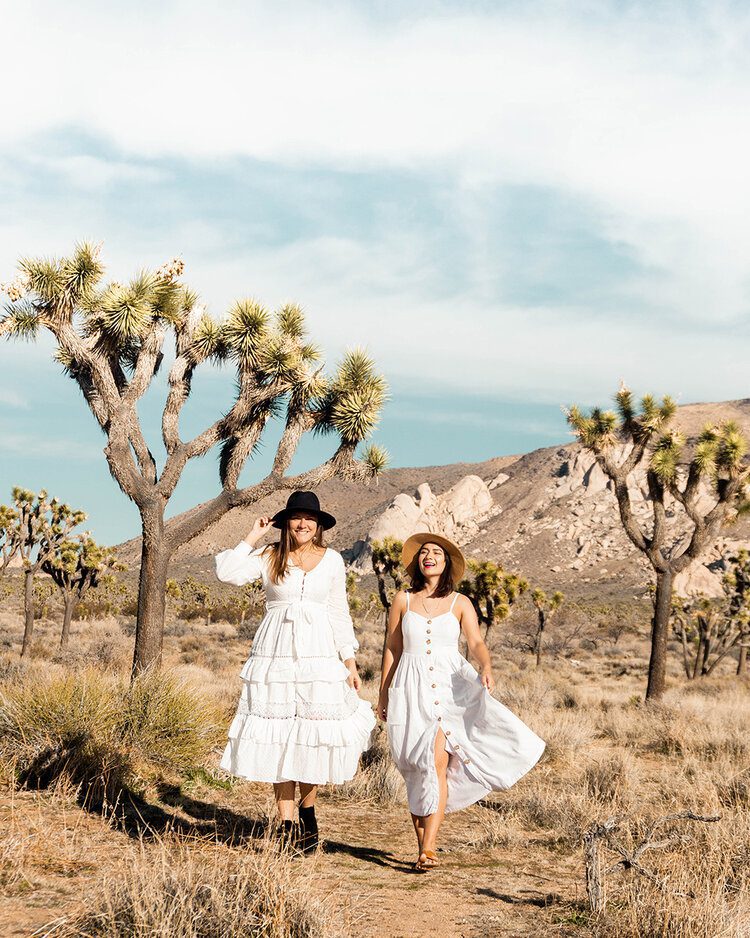
    PFH Top Tip: A white dress will get you far. It’s a classic that is easily accessorised and if you’re taking photos it suits most locations.

    These accessories will change up your outfit, help you to save pennies, make life easier and prevent you from overpacking multiple garments.

    Silk scarf 

    A silk scarf really is one of the best accessories womxn can travel with because it’s so versatile. I realise silk scarves are expensive but you can save pennies by buying one second hand, I bought a Liberty silk scarf for just £9.99 ($13 USD) in a charity shop. It doesn’t have to be silk either, there are many shops selling silk imitation scarves, just be mindful to avoid buying one from a fast fashion brand. I’ve done it in the past, but I don’t intend to anymore.

    Here are the ways you can wear a silk scarf to accessorise an outfit in different ways:

    Headband 

    Fold your square in half into a triangle and roll it up keeping its length, so that you have one long piece. Wrap in around your hairline, tying it either at the top of your head or at the nape of your neck, depending on the look you want. Either keep your hair down or if you have the length, you can tie it up.

    Bracelet 

    Tie your scarf around your wrist for a cute bracelet. This is especially cute if it catches in a breeze.

    Tie your hair up

    You can also use your scarf to tie up your hair. Wrap it around a messy bun or a pony tail for an effortlessly styled look.

    50s bandana style

    The second Girls From Ipanema (originally titled in Brazilian Portuguese Coisa Mais Linda) came to Netflix last year – it’s a Brazilian drama about independent women breaking free from oppressive gender roles to make a name for themselves in beautiful Rio de Janeiro – I started wearing my headscarves in the bandana style that the lead character, Maria Luiza, does. It also picked up as a popular style so it won’t look dated by any means. This style automatically makes your outfit chic, plus it helps to protect your head from the sun.

    Neckerchief 

    For an air of sophistication tie your scarf around your neck.

    Other ways you can use your scarf:


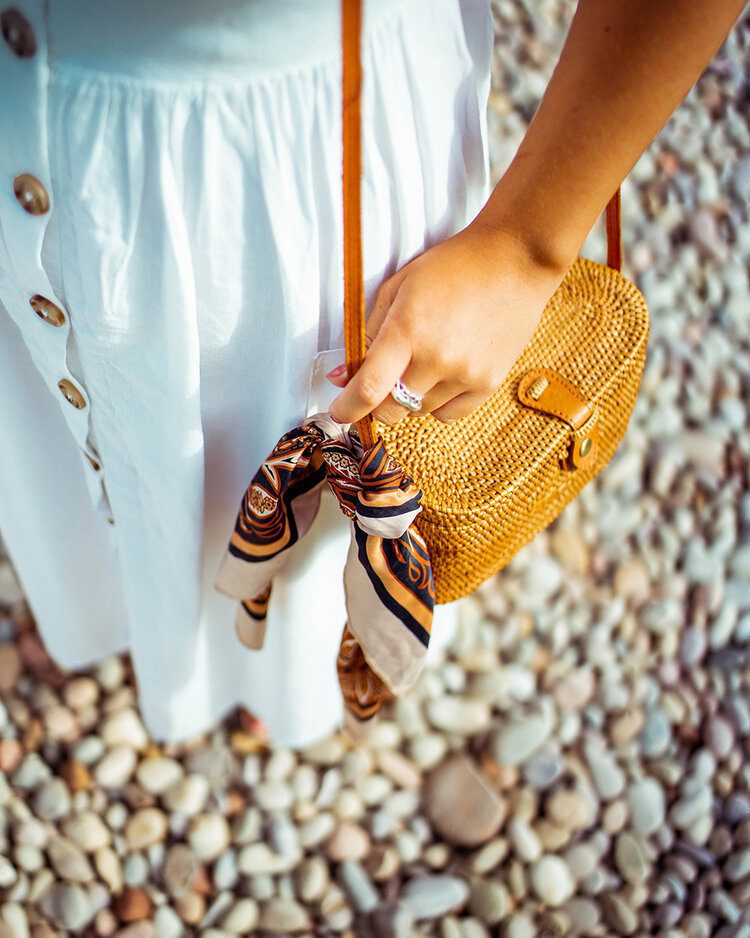
    • Tie it around a handbag for a different look.


    • Use it as a DIY face covering.


    • Tie it around your body to make a boob tube – yep this style has made a comeback.


    • If you have curly hair you can tie it around your curls before you go to bed so your curls don’t get damaged as you sleep.


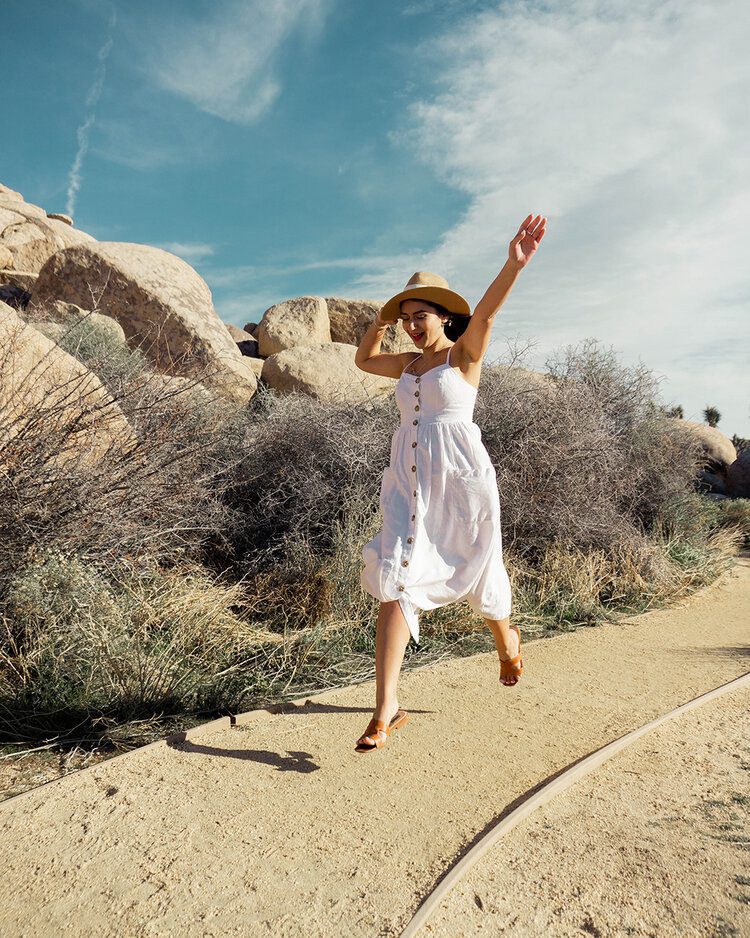
    Straw hat

    A straw hat is such a great prop let alone accessory. When taking photos, you can swing it, throw it, or you know, actually wear it. A hat always makes an outfit look well put together plus it will protect your hair from the sun and cover up any not-so-great hair days.

    A straw hat will get you far, it’s timeless and goes with so many outfits from floaty dresses to cut off denim shorts.

    If you need a transitional hat for changing seasons, I suggest a beret or a structured felt hat. A beret looks cute with a jumper/sweater in Autumn/Fall, a coat in winter and a dress in spring; I don’t recommend wearing one in summer as the wool gets hot and itchy.

    Statement jewellery

    Statement jewellery always pulls together an otherwise simple outfit. Whether it’s a big necklace layered with shells or beads or a knock out pair of earrings it’s going to give your simple outfit a fresh look. 

    Earrings and necklace from Lux Reve.

    A personal favourite of mine is to tie up my hair into a messy bun, wrap a scarf around my hairline in a headband style and pop in a pair of statement earrings.

    Cardigan

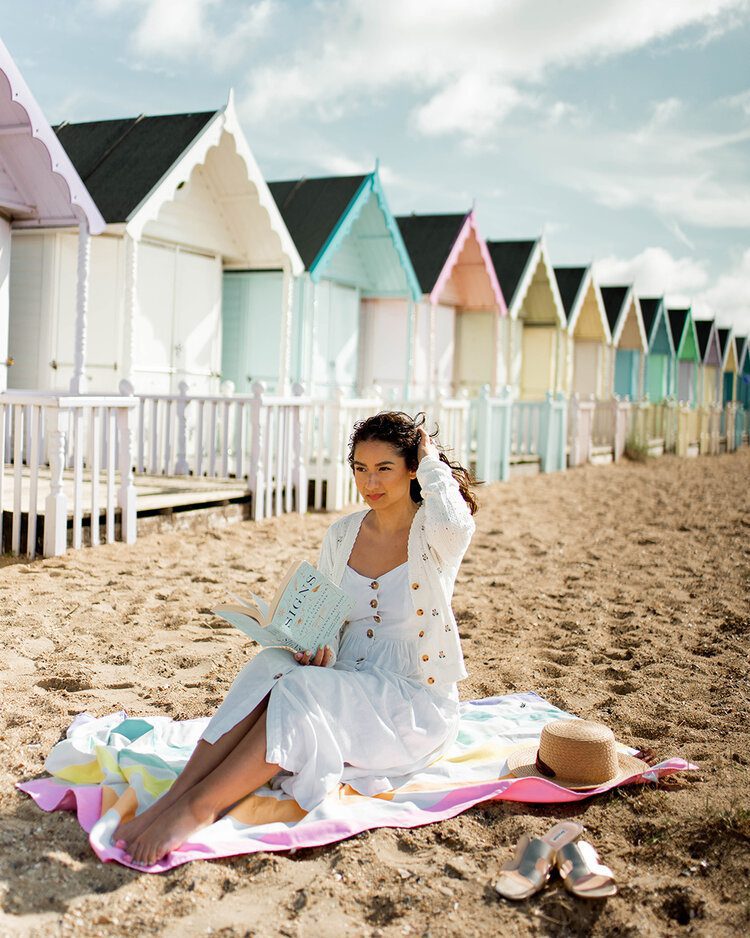
    A short knitted cardigan will compliment so many sundresses, keep you warm on a chilly day, cover your arms on a day you’re feeling a little self conscious of them and if it buttons up, it will transform your dress into a skirt. 

    You can also throw it over your shoulders and knot the sleeves over your chest for a quick chic look.

    This little white cardigan pictured here was my last purchase from Urban Outfitters before I became clued up to they’re misconduct with paying employees. I don’t want to encourage you to buy from them so my top tip would be to knit it yourself, or if you don’t think you’re able to knit one, go to a wool shop and ask if you can pay one of the sales assistants to knit one from the patterns they sell. They often sell garments they have knitted themselves, so take the opportunity to get something custom made and of high quality. If you’re really lucky, maybe there’s someone in your family, like a Grandma, who could possibly knit you one.

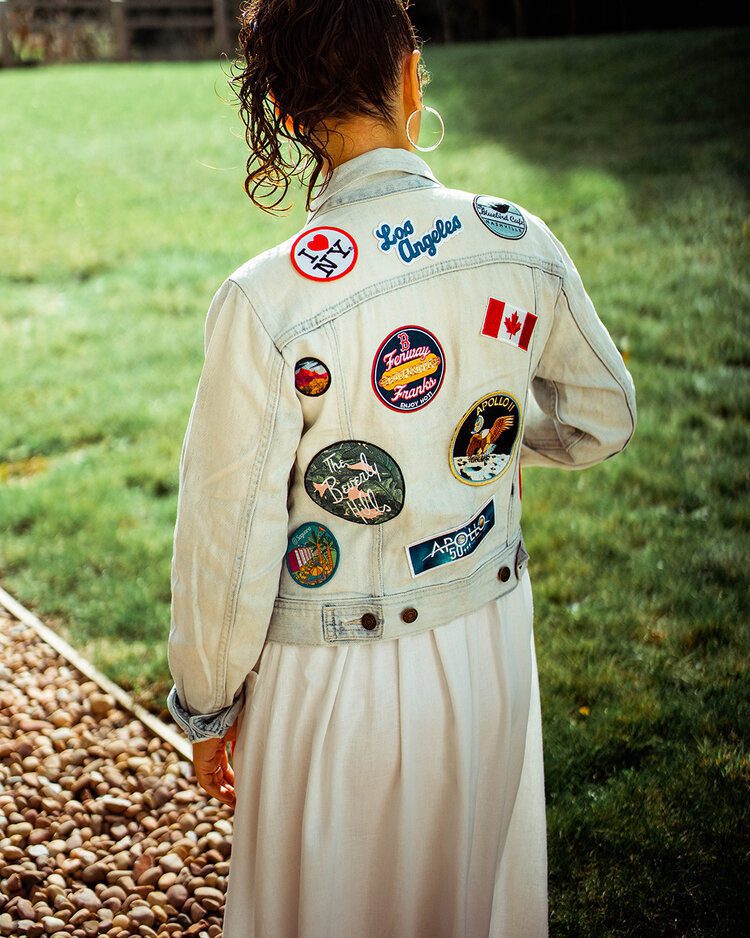
    Denim jacket

    Maybe it’s a cooler day or you want to dress down your look, just add a denim jacket and it will compliment almost any sundress. A denim jacket always comes in handy on warmer trips because it will take the chill off cooler evenings or shops with air con.

    PFH Top Tip: Customise your jacket with pins, patches or embroidery for a unique look.

    Shirt

    To make my dress look like a skirt, I layer a button up shirt over the top and tie it up at the front, around the waist. A simple addition like this gives you a new outfit with minimal packing. Plus you can team the top up with a pair of denim short on another day.

    Bags

    Aside from its purpose of carrying your belongings, it’s a great prop for photos and the style of bag changes the look of your outfit. 

    A basket bag has been a classic for years and goes with so many outfits, an ethically made or personalised tote bag makes for a bold statement, a designer handbag levels up your outfit, a colourful bag makes the outfit playful and a backpack makes it casual.

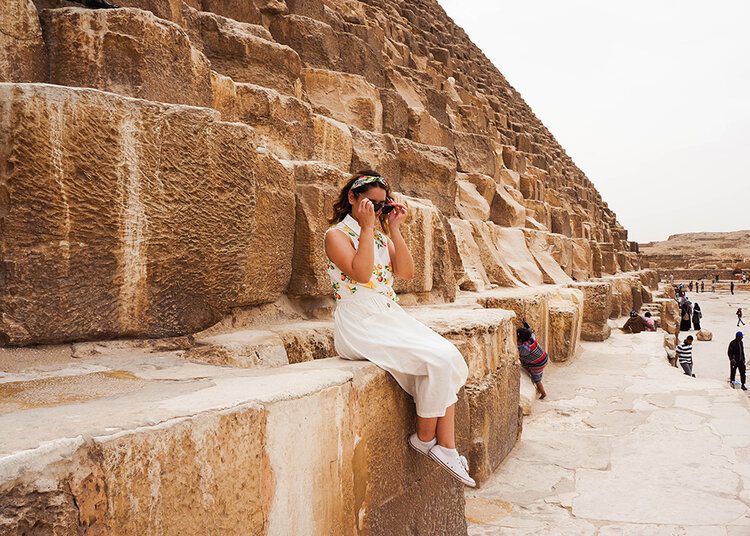
    Sunglasses 

    As well has protecting your eyes from the sun, sunglasses are such a great prop for photos: wear them on your face, on your head, tuck them into your neckline or hold them in your hand. 

    Sunnies will change a look quickly and dramatically depending on their style. Want something edgy? Go for a round, black pair. Wear a gimmicky shaped pair (but not something that you won’t wear often or will throw away) like hearts if you want something fun and quirky or a pair that’s a bright colour. Oversized has been chic for goodness knows how long, likewise, tortoiseshell is a classic. Sun damage to your vision is important to avoid, so invest in a pair that’s going to protect your eyes. You don’t need to spend big bucks on a designer label but please make sure they have UV protection lenses.

    The bonus to packing multiple sunglasses is that they are much smaller and lighter than packing multiple garments.

    Shoes

    Shoes are the most important accessory for changing up a look. Elevate it with a pair of heels and bring it down to earth with trainers/sneakers. My go to shoes, unless I’m going somewhere cold, is a pair of plain sandals in either tan or gold. They smoothly take me from a day on the beach to dinner and cocktails in the evening and they go with almost everything! My absolute favourites are Dune’s Loupe sandals – I believe in investing in a good pair of shoes is more important than buying endless cheap shoes from the likes of Primark/H&M/New Look because they will last longer and won’t cause long term damage to your feet. I mean, don’t get me wrong, it took me a long time to figure that out, despite my Mum telling me for years, but I get it now, so hopefully you listen to me when I tell you.

    If there’s one thing I’ve learnt about packing shoes it’s that it is important to pack shoes that go with multiple outfits and outfits that go with most, if not all, of the shoes you pack. It sounds simple but it’s so easy to pack outfits that only go with one pair of shoes and it creates deadweight in your suitcase and limits your options. By keeping things interchangeable it prevents you from overpacking and keeps your outfit options versatile.

    .

    You may have noticed that in some of my photos I have more than one of these accessories, that’s the beauty of these, you can mix and match so that your one dress can feel like so many different looks.

    Styling outfits before packing always helps me to cut down on how many clothes I think I need to pack for a trip.

    Let’s see if we can make a difference together by nipping fast fashion habits in the bud!

    Gabriella 

    Pin this post


  • Great British desserts every traveller must try

    Great British desserts every traveller must try

    If there’s one thing British cuisine does well it’s dessert, or as we call it, pudding! With so many classics it was hard to get it down to a digestible number so here’s 11 of the greatest British desserts that I think travellers to the UK need to try, (at least one anyway!)

    All of these desserts can be ordered in pubs across Great Britain (they might not have all of them but it would be peculiar if they didn’t have at least one) and if you want to save money you can also buy them in pretty much any large supermarket across the nation. I’ve also linked out to recipes if you fancy making them yourself at home whilst the pandemic is preventing international travel.

    Traditionally, all the puddings/desserts below are made with wheat and dairy, but with so many more alternatives available these days, it’s easy to make or find gluten free, dairy free or vegan versions of these Great British delights.

    I started working on this blog post in March right before the UK went into lockdown so I didn’t manage to get photos for all of the following sweet treats, so Michael very kindly provided some illustrations so you can get an idea of what they look like. Aww ain’t he cute!

    1. Sticky Toffee pudding

    What is it?

    Sticky toffee pudding, often known as STP, is a dark, moist sponge that is coated to the point that it’s virtually swimming in a rich toffee sauce. Sometimes the sponge is light and fluffy and others make it dense but it’s always extra sweet and sticky.

    Origin story

    The origin of sticky toffee pudding is still highly debated between three possibilities:


    1. STP was first made by Francis Coulson at Sharrow Bay in the Lake District in Cumbria, England in the 70s. Coulson’s recipe is so sought after that all the staff at Sharrow Bay have had to sign a non-disclosure agreement. The recipe itself is kept in a vault within the hotel.


    2. STP was first made in Aberdeenshire in Scotland.


    3. Francis Coulson received the recipe from Mrs Martin of The Old Rectory in Claughton, Lancashire in England.


    Whatever the origin is, it came from a desire to create something warm and comforting for dark and cold winter nights.

    Served with

    Served hot with either custard, cream or vanilla ice cream.

    Recipe

    Get Mary Berry’s classic recipe here.

    2. Spotted Dick

    What is it?

    It’s a polkadot patterned male genital usually served with custard but sometimes cream… UGH could you imagine? Nope, despite the comical name, spotted dick is a steamed suet pudding packed full of currants or raisins. The pudding itself isn’t very sweet but it gets its sweet taste from the dried fruit and custard that it should always be accompanied by.

    Origin story

    Spotted dick originated in the Victorian Era, a period known for its pudding inventions. Its first published mention was in 1850 by chef Alexis Soyer in The Modern Housewife, or, Ménagère. 

    So why spotted dick? “Spotted” comes from the dried fruit scattered throughout the pudding and “dick” is a dialectal name for a plain pudding shorted from “puddick”. Alternative names for spotted dick are Spotted Dog or Railway Cake; “dog” was also another name for a plain pudding abbreviated from “puddog”.

    Served with

    Served hot with warm custard.

    Recipe

    Get James Martin’s spotted dick and custard recipe here.

    For Nadiya Hussain’s Irish soda bread spotted dick recipe, click here.

    3. Bread and Butter pudding

    What is it?

    Bread and butter pudding is made from layered slices of buttered, stale bread that have been sprinkled with currants and cooked in nutmeg seasoned egg and cream mixture. It should be golden and crunchy on top and soft and moist on the bottom. It’s incredibly fragrant for a fairly simple pudding and is ideal for using up stale bread that’s on its way out. Bread and butter pudding is made with stale bread in the same way that banana bread is made with over-ripened bananas.

    Origin story

    The earliest publication of a bread and butter recipe was in Eliza Smith’s The Compleat Housewife in 1728 (take the fact that most of these desserts come from some kind of how-to-be-a-good-housewife guide, with a pinch of salt, Lord knows I am). 

    Before it became bread and butter pudding though, it was known as “whitepot”. Whitepot used bone marrow in place of butter, yeah…. I’m glad it changed too.

    The much loved dessert comes from the necessity to use up stale bread so that it doesn’t go to waste. 

    Served with

    Served hot with either custard, cream or ice cream.

    Recipe

    For Delia Smith’s classic bread and butter pudding recipe, click here. 

    For Jamie Oliver’s bread and butter panettone pudding tart recipe, click here. I made this a couple of Christmases ago and it’s an amazing use for panettone bread, if you’re someone that always gets given one over the festive period. 

    4. Summer pudding

    What is it?

    Summer pudding, otherwise known as summer fruits pudding, is a chilled bread pudding that has been soaked in the fruit juices of seasonal summer berries and has a centre packed full of all of those juicy berries. The berries used may include any of the following:


    • Raspberries


    • Strawberries


    • Blackcurrants


    • Whitecurrants


    • Redcurrants


    • Blackberries


    • Tayberries


    • Loganberries


    • Cherries 


    • Blueberries


    • Gooseberries


    Origin story

    Another Victorian pudding made from stale bread, yes, but this one is entirely different from bread and butter pudding as it swaps out a rich dairy mixture for being soaked in fresh summer berries. Oh, and it’s served chilled.

    A similar recipe to summer pudding dates back to 1904 but was served hot. The most similar recipe came much earlier in the late 1800’s but it was called “Hydropathic pudding”, served to ladies in spas as it was seen to be a healthier option to stodgier suet puddings.

    Served with

    Serve chilled with thick pouring cream.

    Recipe

    The very best summer fruit pudding recipe has to come from Delia Smith, click here for her recipe.

    5. Crumble 

    What is it?

    Crumble is to the Brits what pie is to North Americans; it can be made with multiple fruit fillings and is often enjoyed after a large family meal.

    It’s a base of stewed fruit topped with mixture resembling breadcrumbs made from flour, butter and sugar which is baked to go golden and crunchy.

    Origin story

    Crumbles came about during World War II when food was rationed and the breadcrumb-like topping was a far more economical way to create a dessert over making a pie during a time when ingredients were limited. To further reduce the use of flour, oat and often breadcrumbs could be used to top this dessert.

    The most popular crumble fillings are apple and rhubarb.

    Served with

    Served hot with custard, cream or ice cream.

    Recipe

    Click here for Jamie Oliver’s rhubarb crumble.

    Lorem ipsum dolor sit amet, consectetur adipiscing elit. Ut elit tellus, luctus nec ullamcorper mattis, pulvinar dapibus leo.

    6. Jam Roly-Poly

    What is it?

    A jam roly-poly is not dissimilar to a Swiss roll in that it’s spread with strawberry jam and rolled up before being steamed or baked.

    Origin story

    The jam roly-poly is another Victorian era suet pudding creation, honestly how the women survived in corsets is beyond me. It was originally rolled up and steamed within an old shirt sleeve which got it the appetising nicknames: shirt-sleeve pudding and dead man’s arm… yum!

    It’s a simple delight that’s a popular choice with kids and is a staple dessert on school dinner menus across the nation. 

    Served with

    Serve hot with warm custard.

    Recipe

    Click here for The Hairy Biker’s jam roly-poly pudding recipe.

    7. Trifle

    What is it?

    I’m sure many Brits would agree that Christmas wouldn’t be Christmas without a trifle.

    Trifle is the traditional English dessert that Rachel Green was trying to make for Thanksgiving when she got mixed up with shepherds pie in Friends, “The One Where Ross Got High”.

    It’s made up of layers of sponge soaked in booze, fruit, jam/jelly and English custard that is topped off with whipped cream and sprinkled with either chocolate shavings or almond flakes. 

    Just like a crumble, the fruit can be your own choice. Strawberry is a firm favourite but it’s equally delicious when made with seasonal fruits.

    Origin story

    The trifle is one of the oldest desserts in British history and was first published in 1585 in Thomas Dawson’s cookbook, The Good Huswifes Jewell. It evolved from a fruit foole which is a dessert made from fruit mixed into a sweetened cream.

    The Scottish version is a tipsy laird and in the US there’s a trifle variant called a tipsy cake… yeah, a boozy one for sure, but you can swap out the sherry (etc.) for fruit juice so it’s more appropriate for the kiddies to eat.

    Served with

    As trifle is made with layers of custard and cream, it doesn’t need to be served with anything.

    Recipe

    For a traditional trifle recipe made with jam, click here for Mary Berry’s recipe.

    For Jamie Oliver’s trifle recipe made with jelly, click here. 

    8. Eton Mess

    What is it?

    Eton mess is a delightfully simple dessert made from meringue, cream and summer berries.

    Origin story

    Eton mess is a dessert that originates from Eton College, the poshest all boys school in the United Kingdom; it’s where Princes William and Harry went to school.

    Eton mess is know to have first been made in 1893. Originally Eton mess was made from either strawberries or bananas mixed with either ice cream or cream and was available from their tuck shop in the 1930s. It was years later that the meringue was added. Its name comes from its place of origin and the fact that it wasn’t well presented.

    Legend goes that a dessert of strawberries, cream and meringue was accidentally dropped on the floor during the annual Eton vs Harrow cricket match in the late 19th century, instead of letting it go to waste, they scooped it up and served it anyway. It is now served every year at the cricket match, however you can get it from most pubs in summer or it’s easy peasy to make at home, especially if you use pre-made meringues.

    Served with

    As Eton mess is made with cream, it doesn’t need to be served with anything else.

    Recipe

    Click here for an Eton mess recipe that teaches you how to make meringues from scratch.

    9. Knickerbocker Glory

    What is it?

    A knickerbocker glory is a British ice cream sundae.

    Origin story

    The knickerbocker glory is known to have been around since 1920s but its true origin story seems to be lost in a multitude of claims from being named after the popular Dutch surname to Lyon producing a series of desserts named after outer-garments.

    Served with

    As knickerbocker glories are packed full of cream and ice cream, it doesn’t need to be served with anything else.

    Recipe

    Click here for Mary Berry’s knickerbocker glory recipe.

    10. Banoffee Pie

    What is it?

    Banoffee pie is an incredibly indulgent pie filled with toffee, sliced bananas and cream.

    Origin story

    The banoffee pie is the most recent dessert creation on this list. It was first created in East Sussex by British restaurateur Nigel Mackenzie in 1972 when he and his chef Ian Dowding were making a Blum’s Coffee Toffee Pie but decided to adapt it to include fruit. It instantly took off and became a permanent dessert on the menu at The Hungry Monk. The recipe became accessible to all when Nestlé printed it on the side of their cans of Carnation condensed milk. 

    Served with

    As banoffee pie is topped with lashings of cream, it doesn’t need to be served with anything but it can be served with ice cream.

    Recipe

    Click here for Mary Berry’s classic banoffee pie recipe. 

    11. Treacle Tart

    What is it?

    Treacle tart is a shortcrust pastry base filled with a thick golden syrup mixture and is probably the sweetest one on here.

    Origin story

    The recipe for treacle tart first appeared in one of Mary Jewry’s cookbooks in 1879 but it was made with a much thicker black treacle and isn’t a representation of the treacle tart Brits know and love today. The modern treacle tart came about in the 1880s with the invention of golden syrup.

    It was a popular dessert with less fortunate families as it could simply be made with bread and treacle which were much cheaper ingredients than fresh fruits.

    PFH Fun Fact: “treacle tart” is cockney slang for “sweetheart”.

    Served with

    Served hot or cold with whipped or clotted cream or ice cream.

    Recipe

    Click here for James Martin’s treacle tart recipe. 

    .

    I hope you have sweet tooth!

    Gabriella

    Pin this post



  • What’s in my travel bag (updated)

    What’s in my travel bag (updated)

    It’s been nearly two years since I published What’s in my travel bag and a lot has changed, so I thought to kick off 2020’s blog posts I would do an updated edit of everything I pack in my carry-on bag.

    Bag

    In my time blogging so far I have put a much stronger focus on sustainability and practicality so though there may be similar items, for the most part they have swapped to eco-friendly versions or been replaced by something more useful than say, stylish. The biggest swap I have made to my travel bag/carry on is the actual bag itself. When I first started blogging I was travelling with my Louis Vuitton Neverfull MM. Though I love this bag very much and often use it as home when I’m nipping out to a coffee shop with my laptop, I no longer use it as my travel bag. Though I still believe Louis Vuitton is “the epitome of luxury luggage” (quoting myself from my previous travel bag blog post) I’ve learnt that with the amount of travel I do, it’s just not as practical as I had hoped. So to replace my Neverfull I spent a long time seeking out the perfect travel bag, which I found in Away.

    Here are the reasons why I prefer my Away Everywhere Bag to my Louis Vuitton Neverfull:


    • The straps are wider and stronger, plus there are two ways to carry it: crossbody and in your hand. 


    • There are 13 compartmentalised pockets including a space for your shoes, phone, laptop and umbrella.


    • It’s cheaper.


    • There is a band across the back of the bag which is designed to slip over the retractable handle of a suitcase. It sits best on an Away case but I haven’t had a problem sitting it on any of mine or Michael’s other cases which cover Delsey, Lojel, Rimowa and Samsonite.


    • It seals with a zip which means nothing spills out when it goes through the X-ray machine at security, and it’s harder for someone to dip their hand in it.


    • It’s Nylon and durable so I’m far less precious with it. I even use it as a footrest when it’s under the seat in front of me.


    My exact one is a Nylon limited edition Everywhere Bag so you won’t be able to buy it from Away but they have other options both in Nylon and Leather here.

    Purse

    When I’m travelling I have the following in my purse:


    • A little bit of cash in the currency that’s both mine and of wherever I’m going.


    • My Starling and Monzo cards – to find out why, read 8 ways to manage your travel money.


    • My Priority Pass card for access to airport lounges.


    • Michael’s Heathrow Rewards card (which he never uses so I have to carry it because, well, I do).


    • Bank cards.


    • My driver’s license.


    • Loyalty cards which I can use in duty free such as Boots or Accessorize.


    • My Organ Donor card, because you never know.


    Passport

    I used to travel with my Aspinal of London Travel Wallet which I bought a long time ago when I had an office job and dreamed of exploring the world on my own time. It was more than just a travel wallet to me, it was the promise of a different life. Since using my Everywhere Bag I have stopped using it for two reasons: 1. My bag has a pocket on the side (where you slide the bag onto a suitcase) that has three compartmentalised pockets perfect for money or my purse, my passport and documents such as my boarding pass. As the pocket is on the outside but closest to me when I wheel my case around it has the most perfect access for whenever I need my boarding pass/passport and it’s so easy to slip them back in to keep them safe.

    Keys

    The Away Everywhere Bag has a clip for keys which is super handy, especially to avoid Michael going through all of his luggage in the car park to find our car keys. Oh yeah, I can’t tell you how many times we’ve had to open his suitcase in the car park to find them.

    Sunglasses

    They’re useful in the car if we’re driving to the airport on a sunny day and on the other side on the way to our accommodation. If you’re driving at any point on the day you travel or arrive I can’t stress how important it is for yours and others’ safety to have sunglasses to hand so you can see the road without squinting.

    Socks

    When I’m flying I travel with a pair of thick socks in my bag to put on my feet inflight to keep them warm, especially when I sleep because I don’t like sleeping with my shoes on. You’ll notice a lot of the things I carry in my travel bag are focused on giving me the best sleep I can get on a flight because it is the most important thing to me when flying. It passes the time and makes me feel less crappy when I disembark. 

    If you travel in sandals I recommend taking a pair of socks to cover your feet inflight, because bare feet on a flight is not cool.

    Shopping bag

    I carry a compact reusable shopping bag as a habit.

    Book

    When I published my first “What’s in my travel bag” I didn’t list a book because I struggle to get into books as I read so much online via blogs, articles etc. Towards the end of 2019 I decided to take reading physical books more seriously and take one with me to encourage me to get away from a screen now and then.

    I absolutely love “How to Save the World for Free” by Natalie Fee. It’s filled with tips for living a more sustainable life with all the good reasons why.

    I also have “Burning Girl” by Claire Messud on the go that I bought from Strand Bookstore in NYC.

    Umbrella

    If I’m travelling somewhere where there’s a high chance of rainfall I pack my umbrella into the concealed pocket in the base of my Everywhere Bag. I have a lightweight one so it doesn’t add too much weight. It’s just so handy if it starts raining in the carpark whilst I’m waiting for the shuttle bus.

    Electronics

    Laptop and charger

    As laptops, tablets, mobile phones, chargers etc. have lithium ion batteries, they cannot be placed into checked luggage as they could short circuit and cause a fire so you must pack them into your carry-on.

    I used to keep my laptop in my carry-on case because it was too heavy to carry in my Neverfull on my shoulder along with everything else but now thanks to my Everywhere Bag I have a purpose-made laptop pocket to efficiently and safely store my laptop in whilst my charger just goes in the main central pocket of my bag. This has made airport security an absolute breeze because I no longer fuss trying to get out my electronics before I get to the front. (For more tips on getting through security take a look at How to ace security like a pro.)

    PFH Top Tip: Wherever you do store your laptop and valuables whilst travelling, I highly recommend keeping them on your person as you fly, and out of sight when you’re sleeping. I have read far too many horror stories of people getting their camera equipment, laptops etc stolen from overhead lockers whilst they’re not paying attention. It’s a lot harder for someone to steal something from your closed bag which is jammed under the seat in front, with your legs on top and preferably with one foot through a strap than it is in an unwatched overhead locker.

    Headphones

    I genuinely don’t know how I travelled without my Bose noise cancelling headphones. I have never been more grateful to a pair of headphones as I am to these babies. I have the Bose QuietComfort 35 (series I) which I don’t believe are available anymore as series II came out with Alexa and Google Assistant built in, plus they now come in rose gold which I am not jealous about at all…

    I love my noise cancelling headphone unconditionally because they are comfortable, they fit way better than any airline’s headphones ever will, they cancel out any loud children (I don’t have them so I can still be annoyed by them), snoring, coughing and that general inflight white noise. Don’t worry you can still hear inflight announcements through them (I don’t know how, magic maybe?) Plus they adapt to the onboard entertainment so you can still watch their films etc.

    I also tuck my EarPods into my Bose case because I like to take these out with me on public transport that isn’t a flight so I can travel more safely with awareness of my surroundings.

    Phone and charger

    The Everywhere Bag has a handy phone pocket on the outside but it is external so I don’t often put it in there. I pretty much use that pocked for tissues. I also have a phone necklace from xouxou that allows me to wear my phone like a crossbody bag which is much safer and efficient for when I’m on the go.

    After my original phone charger cable split, I bought an extra long cord from Amazon and it’s so much better. It means I’m not limited to needing to be right next to a plug/USB port.

    Power bank 

    Originally I used a 3000 mAh power bank from Fresh N’ Rebel but it didn’t hold much power and it would go flat if I didn’t use it within a day or two of charging. About a year ago I upgraded my ancient and broken carry-on suitcase to an Away The Bigger Carry-On mostly because it’s pink but also because it came with a detachable power bank so I can charge a couple of electronics on the go. The AWAY power bank lasts a lot longer, charges much faster and comes with universal adapters to charge it.

    Remember to remove the power bank from the suitcase before sending it through security.

    Universal travel adapter 

    A universal travel adapter is one of the most useful things a traveller can own. Keeping it accessible in your hand luggage means you can charge anything on the go wherever you need to (provided there’s a socket) – you never know when you’re going to get stuck in an airport so at least you can charge your electronics if you do.

    Liquids

    Recently I chose to switch from a plastic liquids bag to a silicone one. I always reused my plastic bag but I don’t like using a plastic one, because it’s not good for the environment.

    If any airports do kick off about it, you can just temporarily use one (and save it) but as long as it’s clear for the most part, it’s fine. In my liquids bag I carry:


    • Toothpaste – I am using up some minis that I have collected over time, then once they are gone I will be switching to toothpaste tablets.


    • Lip balm – to hydrate my lips.


    • Moisturiser – to hydrate my face.


    • Under eye gel – to eradicate dark circles which are inevitable when I travel.


    • Hand sanitiser – to clean my hands before eating, germs thrive on public transport.


    • Deodorant – to keep fresh.


    • Perfume – if I need extra help keeping fresh.


    • Lavender sleepy time gel – it helps soothe me to sleep though it’s also good for stress and headaches.


    • Lavender pillow spray – this also helps soothe me to sleep, I spray it onto my travel pillow. It’s in a smaller travel bottle which I refill from the larger one kept at home.


    • Jet lag essential oil roller – formulated to keep me awake when I’m struggling with jet lag. Though my goal is usually to sleep as long as possible, if for any reason I need to stay awake through jet lag (say, return flight home) this helps.


    For the most part, these items are refillable or recyclable. 

    Remember to keep each liquid under 100ml.

    Cosmetic bag

    I use a cosmetic bag to keep anything little together so I’m not searching for it in the bottom of my bag, plus it’s easy to pull the whole thing out on a plane, train etc. In mine I have:


    • Makeup remover – I used to travel with a mini pack of makeup wipes but they don’t biodegrade, then I tried taking my magic makeup remover cloth but I didn’t like putting it back into my bag wet, so now I use a biodegradable makeup pad from Lush that I can get multiple uses out of. You simply wet it, wipe it over your face and use your fingers to melt off your makeup, then you can rinse it off your face. I cannot bear to wear makeup during long flights, you wouldn’t sleep with your makeup on at home, so why do it on a plane where the recirculated air is more likely to cause breakouts?


    • Toothbrush – like the makeup remover I have opted for a sustainable replacement with my toothbrush. I no longer use plastic toothbrushes as they take 300 years to break down where as bamboo toothbrushes are natural and will biodegrade naturally without releasing any nasty chemicals, I get mine from The Humble Co. I brush my teeth on long flights before sleeping, just as I would at home, because it cares for my teeth and gums, freshens my breath and is part of a good sleep routine.


    • Hair tie – to tie my hair up whilst I wash my face and brush my teeth.


    • Painkillers and cold and flu tablets – you never know.


    • Contraceptive pill – I like to keep these close even if I’m not on an overnight flight. If I know I’m going to be on my period I will also pop my Saalt menstrual cup in too. (Check out Travelling on your period with a Saalt menstrual cup for more info).


    • Chewing gum – another big sustainable swap in my travel bag is from leading brand chewing gum that contains plastic to a natural one that will biodegrade and doesn’t contain anything nasty. The Humble Co. has many flavours if you don’t just want mint. I chew gum when I wake up too late on a flight to brush my teeth before landing.


    • Tissues – For clearing stuffy noses and cleaning up any turbulence related spills.


    • Olbas inhaler – I always get congested on flights due to the quality of air, so towards the end of 2019 I started travelling with my Olbas oil inhaler which I already had from a previous cold, and it works wonders for clearing my nasal passages onboard. Once it has finished I will switch to bringing a small pot of Vicks Vapour Rub to eradicate the plastic from the inhaler.


    • Antibacterial wet wipes – the first thing I do when I sit down on a plane or train is disinfect the tray table, arm rests, screen, controller, seatbelt buckle, any buttons and the window blackout. Basically anywhere that you can’t trust has been cleaned and you will be touching with your fingers throughout the flight. Aeroplanes have such a short turn around that they aren’t always cleaned properly between flights, next time you board a plane, take a look at the floor to see the state it’s in. Nine times out of ten I’ve seen bottles, crumbs, used headphones and food wrappers still on the floor, so I know I can’t trust the cleanliness of the seat I’m about to be stuck in. I also cannot remember the last time I had a clean tray table so I prefer to wipe. One wipe will clean both mine and Michael’s seat areas. Dettol has antibacterial ones.


    • Plasters – both normal and blisters, just in case.


    • Eye mask – To shut out the world when I catch some Z’s.


    • Pen – for making notes and filling out immigration cards onboard to save time in the airport on the other side.


    Flat lay bag

    As I mentioned above, I remove my makeup when flying but depending on where I’m heading on the other side, I may apply some before landing. I keep it basic so I’m not carrying too much so in my mini Flat Lay Co. bag (I’ve listed all the reasons why I love it in my blog post Why the Flat Lay Co.’s makeup bag should be your go-to) I have the following products:


    • Glossier’s Boy Brow – to tame and fill my eyebrows.


    • Concealer – another product to tackle tired eyes.


    • An instant look in a palette by Charlotte Tilbury – this reduces the amount of products I need to travel with because it includes: blusher, highlighter and contour powders plus three eye shadows and a mirror. I have it in Beauty Glow.


    • Mini application brushes – to apply the makeup.


    • A tinted lip balm – to add colour whilst moisturising my lips.


    • Honest mascara – It has a primer and mascara in one product. I’m all for multi-use products.


    Food and Drink

    Snacks

    I’ve never been a fan of aeroplane food so I pack snacks, but for 2020 one of my goals is to decline inflight meals upon booking to prevent plastic waste. I have found that you can store food in a reusable shopping bag and it doesn’t count as extra luggage because you eat the food and the bag folds up. I’ve never had a problem doing this in the last four years that I’ve been doing it on various airlines. Sure, some airports check the food at security but they never have a problem with a “snack bag”. In my snack bag I have:


    • Fruit


    • Sandwiches in a reusable wax-wrap


    • Sugar free sweets


    • Crisps (preferably a healthy brand, but it isn’t always)


    • Chocolate covered rice cakes


    • Cereal/energy bars made from fruit and nuts


    PFH Top Tip: Eat all of your fruit and fresh products before touching down in the country you are travelling to prevent wasting it in the airport at customs.

    Water bottle

    Travelling with a reusable water bottle hasn’t changed but the brand has. I switched from S’well to Dopper after the seal on my second S’well bottle broke which caused the bottle to leak if it wasn’t upright. I couldn’t handle this happening to a third S’well bottle so I decided to switch it up and conveniently received one from Dopper. Like my previous S’well bottles, the Dopper has an insulated version that keeps contents hot for 9 hours and cold for 24.

    What’s also great about Dopper bottles is they’re dishwasher safe and easy to clean by hand (unlike S’well) and they convert into a cup. This is particularly handy during flights because you can decline a single use plastic cup and offer up your Dopper cup instead so you’re not missing out on juice, tea or coffee etc.

    Remember to empty your water bottle before security but once you’re on the other side you can refill it at various stations that have been put up in airports all around the world, and if you can’t find one, just ask a café to fill it with tap water. 

    A really great app for finding refill stations on the go is “Refill” (founded by the author of “How to Save the World for Free” which I mentioned earlier). Via this app you can enter in your location and find your closest spot to refill. It’s a global app, so check it out.

    Travel pillow

    As I’ve mentioned earlier in this post, sleep is the most important thing to me when I’m travelling and the most crucial item that I need to get that, above everything else, is my travel pillow.

    To read about travel pillows and why I use the one I do, check out my blog post Travel pillows – who you should be sleeping with.

    I just use the popper to attach it to the outside of my travel bag, around the handle, but as it’s memory foam, it can also be squashed flat into a carry-on suitcase.

    .

    Aloha, Gabriella

    Pin this post
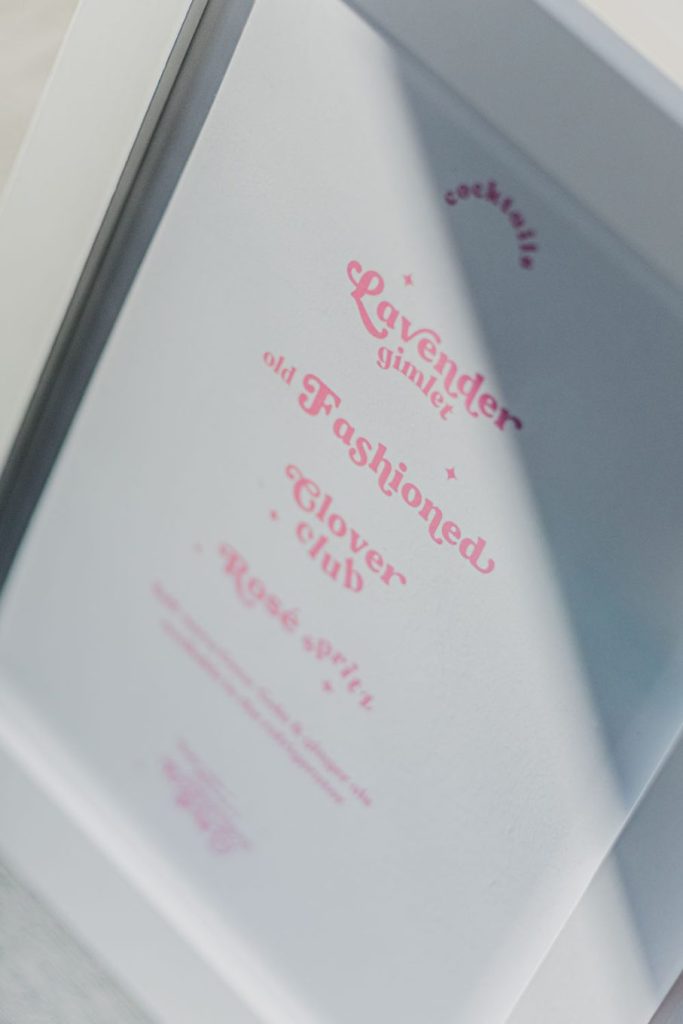

    .

    *True to the date this post was published.

    Items from Dopper, Dune, Anatomicals and The Humble Co. have been gifted. I am not working with Away, I just really like their Everywhere Bag.

  • PFH Rio de Janeiro mix tape playlist

    PFH Rio de Janeiro mix tape playlist

    As you may know by now I always make a playlist for each destination I’m travelling to that includes songs sang about where I’m going. If you haven’t already listened to my previous playlists you can do so at the following links:

    PFH London mix tape playlist

    PFH New York City mix tape playlist

    PFH Hawaiian mix tape playlist

    PFH California road trip mix tape

    This time however it’s Michael, my partner, who has put together one of the very best Rio themed playlists you will ever hear. Michael has been obsessed with Brazil for as long as I’ve known him and has been listening to Brazilian music such as Bossa Nova and MPP (Música Popular Brasileira) for many, many years, so he very kindly curated his massive playlist to create one for you that features 36 of his favourite Brazilian songs that perfectly express that world-famous Carioca spirit which you can listen to on Google Play here and on Spotify here.


    If you don’t have access to either of these I’ve listed them down below:

    Bat Macumba, Os Mutantes

    Juca, Chico Buarque

    Tim Dom Dom, Jorge Ben

    Ferro Na Boneca, Novos Baianos

    Você Não Entende Nada, Gal Costa

    Preta Pretinha, Novos Baianos

    Bicho Do Mato, Jorge Ben

    A Minha Menina, The Bees

    The Answer, Marcos Valle

    Take me to (Aruanda), Astrud Gilberto

    Ela E’ Carioca, Tom Jobin

    The Girl From Ipanema, Frank Sinatra with Antonio Carlos

    Cantiga da Vida (ft. Caterina Valante), Luiz Bonfa

    Brazil (AKA Aquarela do Brasil), Antonio Carlos Jobim

    Baby, Gal Costa

    Whistle Samba, Maria Toledo

    Aquele Abraco, Gilberto Gil

    Que Pena, Gal Costa

    So Nice (Summer Samba), Marcos Valle

    Brasil Pandeiro, Novos Baianos

    Não Identificado, Gal Costa

    Desafinado Joao Gilberto

    Crickets Sing For Anamaria, Marcos Valle

    Berimbau, Astrud Gilberto

    Alegria, Alegria, Caetano Veloso

    Lost In The Paradise, Gal Costa

    Chup, Chup, I Got Away, Marcos Valle

    Fly Me To The Moon, Astrud Gilberto

    Mais Que Nada, Sergio Mendes & Brasil ‘66

    Life on Mars?, Seu Jorge

    Never My Love, Astrud Gilberto

    Agua De Beber , Sergio Mendes & Brasil ‘66

    A Certain Sadness, Astrud Gilberto

    Rainha do Mar, Gilberto Gil

    Cidade Maravilhosa, Joyce Moreno

    Evaporar, Little Joy

    .

    Aloha, Gabriella

    Pin this post
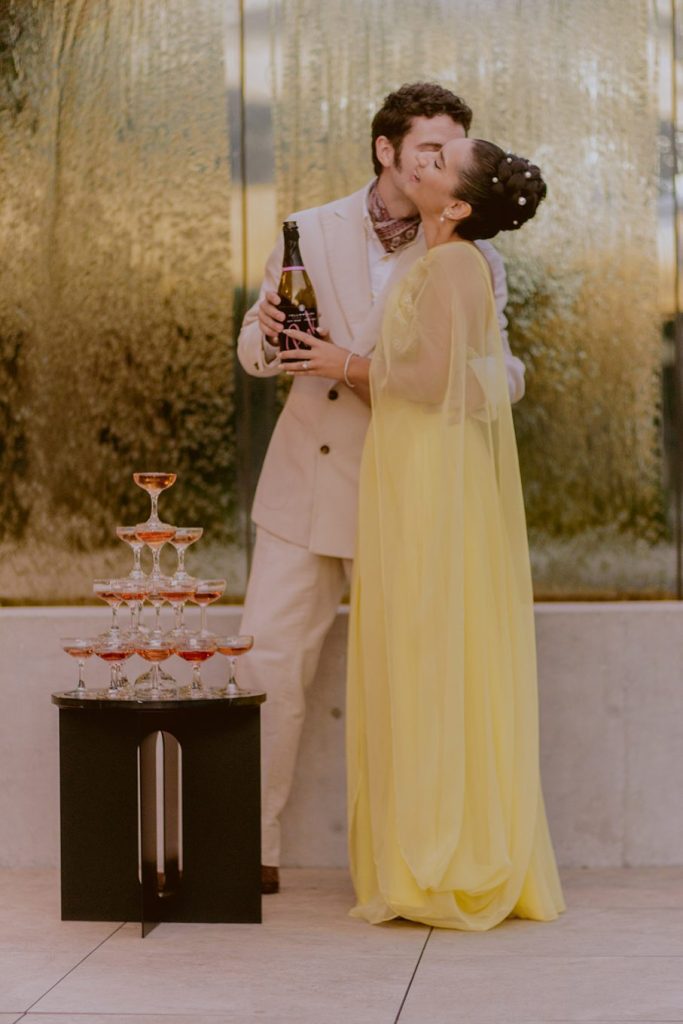


  • PFH’s 10 Best Instagram spots in L.A.

    PFH’s 10 Best Instagram spots in L.A.

    Let me take you on a tour of arguably one of the best places to get a huge variety of Instagram shots, my favourite city: Los Angeles.

    1. Hollywood Sign

    There are three amazing places to get shots with the world famous Hollywood sign:

    Hike to the sign

    For shots with the back of the sign you want to hike up to the top of Mt. Lee. To find out exactly how to get there take a look at my post How to hike to the Hollywood sign.

    View this post on Instagram

    A post shared by Postcards from Hawaii (@gabriellawisdom)

    View this post on Instagram

    A post shared by Postcards from Hawaii (@gabriellawisdom)

    Lake Hollywood Park

    With the sign smiling down on it, this park is the perfect place for a picnic and a cute couple shot whilst you’re at it.

    Street parking is free from 6am-8pm, spaces are usually available on both sides of the road on Canyon Lake Dr.

    Hollywood sign viewpoint

    This is actually right next to Lake Hollywood Park, it’s just a few steps further up the sloped footpath.

    Up here there are plenty of spots to get photos. Everyone queues to stand up on the rocks but really you can stand anywhere to get great photos with the sign in the background. For a slightly quieter spot, walk a little further on to where there’s a couple of trees.

    View this post on Instagram

    A post shared by Postcards from Hawaii (@gabriellawisdom)

    View this post on Instagram

    A post shared by Postcards from Hawaii (@gabriellawisdom)

    2. TCL Chinese Theatre

    “Mary’s got the same size hands as Marilyn Monroe, she put her fingers in the imprints at Mann’s Chinese Theatre Show” – Kelly Rowland.

    Miss Monroe undoubtedly brings in more tourists than any other name scrawled in concrete. The proof is in the prints; the colour of her imprints compared to everyone else’s are much much darker and worn.

    To protect Sid Grauman’s legacy the forecourt is roped off every night and is washed first thing in the morning before it opens at 8.30am.

    PFH Top Tips for getting a photo with your hands in your favourite star’s imprints:

    • Know where you’re going, Marilyn is located near the back on the left hand side. I suggest researching who you want to see and where they are before you go so you can make a beeline for them.
    • Wait out front at 8.30am, they open up from the left so stand there to get in first.
    • Bring a towel or tissues to mop up the water, the sun won’t have dried them off at 8.30am.
    • Bring antibacterial hand gel or wipes because your hands are going to look grim when you’re done.

    View this post on Instagram

    A post shared by Postcards from Hawaii (@gabriellawisdom)

    3. Central Perk

    What? Really? Central Perk, as in the coffee shop from F.R.I.E.N.D.S? Yep, you read it right!

    The Warner Bros Studios Tour features a chance to sit on the famous brown couch whilst pretending to sip out of coffee cups the size of buckets. The full Central Perk set was rebuilt for our enjoyment, and there’s even a functioning café where you can pick up a coffee and pose with the Central Perk window shown so many times throughout the show.

    Of course this isn’t the only piece of T.V. history you can get a snap with. The tour includes Rosewood from Pretty Little Liars, Stars Hollow from Gilmore Girls and the exterior of the Full House house!

    You may even be lucky enough to visit one of their current production’s sets such a Big Bang Theory, Fuller House or Ellen – you won’t be able to take photos in these though, but it’s an amazing opportunity either way!

    Tour tickets start from $55 for children aged 8-12 and $65 for adults. You can purchase them here.

    4. Beverly Hills Hotel

    My favourite photos from my whole three week trip were taken in the driveway to this hotel!

    The Beverly Hills Hotel is part of the Dorchester Collection and oozes Hollywood history and glamour, it’s iconic!

    For the best angle that will allow you to get in the full sign, you’ll want to stand between the first and second lamp posts and keep to the left. SAFETY PRECAUTION: This is the main entrance to the hotel by car so vehicles come through frequently. Keep alert, be patient and you’ll get your shot, but remember no photo is worth getting run over!

    View this post on Instagram

    A post shared by Postcards from Hawaii (@gabriellawisdom)

    View this post on Instagram

    A post shared by Postcards from Hawaii (@gabriellawisdom)

    View this post on Instagram

    A post shared by Postcards from Hawaii (@gabriellawisdom)

    5. Palm tree lined road

    One of the first things that comes to mind when I think of L.A. is cruising towards the Hollywood sign down a long stretch of road lined with skinny palms trees that are reaching up to a bright blue sky, the sun flickering between each tree as you pass.

    For a chance to stand in-between all of this perfection head over to where S Windsor Blvd meets W 5th St, and face North down Windsor Blvd. The sign might not seem close enough for your liking but it’s the best chance you’ve got of framing it between rows of palm trees.

    It’s a pretty quiet residential area but there are still a few cars passing through, the road is also located close to a crossroad so stay alert and make sure it is completely clear before stepping out into the road. I suggest going early in the morning, it will be safer as there are less cars about.

    “June Gloom” was taking over at the time we shot here so not only did we not get that dreamy blue sky but we also didn’t stand a chance of getting the Hollywood sign in the background, but hopefully you’ll have better luck and a clear day.

    There is parking all along these streets but keep in mind where you’re snapping from when you park your car so it’s not in your shot.

    View this post on Instagram

    A post shared by Postcards from Hawaii (@gabriellawisdom)

    View this post on Instagram

    A post shared by Postcards from Hawaii (@gabriellawisdom)

    6. Beverly Gardens Park

    This 1.9 mile park goes from Wilshire and Santa Monica Boulevard to Dohney and Santa Monica Boulevard and features one of the most photographed spots in town! The 40 foot long “Beverly Hills” sign, accompanied by a big water feature, sits between N Beverly Dr and N Canon Dr.

    There is free parking along the back of the park but if those spaces are full the surrounding streets also offer parking. Just make sure you check the time allowance if you’re planning on being in the park longer than just to take photos.

    View this post on Instagram

    A post shared by Postcards from Hawaii (@gabriellawisdom)

    7. Urban Light

    LACMA’s most famous art installation is lit up 24/7 so if you can handle it, arrive as late as you can to get nighttime shots that don’t have people zipping in and out of the background.

    PFH Top Tip: Save money on parking by ditching the pricey LACMA multistories and use the Whole Foods parking lot located on the corner of S Fairfax Ave and W 3rd St. it’s a 15min walk to Urban Light with 1hr 30mins free parking for customers but if you are aiming to shoot late then you shouldn’t have a problem.

    View this post on Instagram

    A post shared by Postcards from Hawaii (@gabriellawisdom)

    8. Colette Miller Wings

    Miller painted a series of wings across the world “to remind humanity that we are the angels of this Earth”. Six years later they’re still crazy popular on the gram.

    As L.A. is where they first made an appearance there are five across the city:

    • Traction and Hewitt in the Arts District.
    • Angel City Brewery.
    • Regent Theater.
    • St. Regis Wine & Liquor.
    • Melrose Avenue.

    View this post on Instagram

    A post shared by Postcards from Hawaii (@gabriellawisdom)

    9. The “Made in L.A.” Wall

    Located on the side of Cisco Home on the corner of Melrose Ave and N Laurel Ave.

    View this post on Instagram

    A post shared by Postcards from Hawaii (@gabriellawisdom)

    10. Paul Smith Pink Wall

    If you want a free fashion show you’ve come to the right place! People really step up their game at the pink wall and bring a multitude of props. In the 10mins I was there I saw flowers being thrown and even a fake picnic being set up!

    Luckily queues go down quickly for this one because the wall is long enough to accommodate at least five people to pose away at one time, with plenty of space in-between so that no one else is in your shot.

    FYI you can’t use any kind of professional camera equipment to take photos with the wall it’s “cell phones only” so make sure to use the best one out of the people travelling with you. Sounds strange I know but there’s actually a man whose sole job is to monitor people at the wall, making sure they only use phones and keep a good distance. I swear the security for this wall is tighter than Beyoncé’s Deréon jeans.

    View this post on Instagram

    A post shared by Postcards from Hawaii (@gabriellawisdom)

    If you make it to the Paul Smith wall there’s an instaworthy coffee shop on the opposite side of the road called Carerra Café. They also have an awesome hand painted mural wall that changes frequently. Unfortunately it was in the middle of being painted with the latest Hollywood mural when we tried to shoot there and couldn’t make it back for when it was finished. The wall isn’t even the best bit though. Here you will find the most snap-worthy coffee in town. Using the Ripple Maker they can print a multitude of images from slogans to Kim KW’s ugly cry onto the foam of your latté or cappuccino! If you’re super prepared you can even download the Ripple app and have any image of your choice printed on your coffee!

    They’re open everyday 8am-6pm.

    .

    For a chance to be featured on my Instastories use #postcardsfromhawaiiblog on your snaps at these locations!

    Aloha, Gabriella

  • 7 tips for buying your best suitcase

    7 tips for buying your best suitcase

    Getting new luggage is like entering a new relationship, you don’t know where it’s going yet but they have to be strong, reliable and attractive but most importantly in it for the long haul. Feel like you need some advice before committing? No problem, have a read through my top seven tips so you can make your choice confidently.

    1. No zips! 

    I am adamantly against zips with any suitcases that are leaving your side (i.e. checked bags). Your padlock stands no chance against a determined thief, and no I’m not talking about code breakers, bolt cutters or even a knife, it is far simpler than that! A ballpoint pen will glide right through the centre of those zip teeth like a figure skater on ice. Worst part? You might not know until it’s too late, just drag that pull tab back over the opening made with the pen and it’s as good as gold… I’m not kidding, on a trip from Mauritius back to NZ between connections, my cousin’s suitcase had been opened despite the closed and undamaged padlock. It’s an awful thing to happen, not to mention zippers can get caught, stuck and break, disaster! Ditch the zip.

    2. Go hard or go home

    Hard beats soft every time. I know most people will argue that soft means you can squeeze in more items and that they’re lighter but soft can rip, is easier to break into, isn’t generally water proof, doesn’t provide much protection for the contents and it isn’t going to hold well under the pressure of other cases which will inevitably be placed on top somewhere along your travels. Yes harder cases are heavier, that’s a given, but realistically you rarely bear the full weight of your case and if you’re worried about losing wiggle room on your weight allowance then you should be going hard to protect your over stuffed case anyway. You’ve been told!

    3. This is wheelie important

    It’s the 4 wheels vs 2 wheels dilemma. I prefer 4 because it can be used both ways. It allows for 360 degree movement and offers a wider range of manoeuverability. It also takes a lot more weight off your body than dragging a 2 wheeler behind you. It can be argued that 4 wheelers are harder to move when you’re walking down a street and they make you wider in crowded areas but the beauty of a 4 wheeler is that you can pull it behind you like a 2 wheeler in those situations. Look for brands that boast testing their wheels over great distance for assured quality.

    4. Take a load off

    Test the case with weighted items to see how well it manoeuvres. When getting fitted for backpacks, most good retailers such as Cotswold Outdoors, will fill it with varying weighted bags to see how it carries on your back because you don’t want to injure yourself with the wrong fit. Well, just because it is a suitcase and not loaded up onto your back, it is still important to be mindful of the strain on your body. Whether it’s 2 wheels or 4 wheels an element of weight will be put on you either through dragging or pushing, so make sure you can comfortably push or pull that weight without hurting you arms or back. 

    5. Get a handle on things

    With regards to weight, you also want to check if the main handle which you will be using to push or pull with is sturdy. You don’t want it to rattle or feel weak under the weight of your case because once that is kaput, you are going to end up damaging your back from carrying the full weight of your suitcase. Not to mention what a general inconvenience it is. Keep in mind you’re not just taking your case through an airport, think about how you lift your case off a cramped underground train, how you lift it up a couple of stairs, how it gets put on luggage racks – you tend to use the top handle, albeit pushed down into the locked position but it is strained in these tiny moment, make sure it can withstand these moments. 

    6. TSA you say?

    The Transportation Security Administration (TSA) of the United States have the right to access passengers’ luggage without them being present, so to prevent damage to locks – which without a TSA lock cannot be claimed – they developed a specific lock which enables them to access your luggage with a master key and then lock it securely and safely afterwards. You can’t add TSA padlocks to suitcases that have combination seals rather than a zip, so make sure the one you are buying has one built in.

    7. Size matters

    Put some real thought and effort into the size, it will be so disappointing if you spend a significant amount of money on a suitcase only for it to be too small or even too big for how much you travel with. Consider what kind of trips you will be taking this case on and what contents it will be filled with. Once you add up your toiletry bags, clothing, accessories and footwear will you be able to fit it all in with souvenir room to spare? Think about how in winter your three jumpers take up half the case alone. Are you like my partner who needs at least three pairs of shoes to cover every occasion, can you get them in without crushing everything else? I always recommend going into a store to look at the sizes and even bringing along some big items you would pack to get an idea of space. If you are looking for hand luggage make sure it fits the cabin size requirement, most good luggage companies will inform you if that case is cabin size but airlines do vary on their allowances. Sky Scanner and Samsonite have made super handy tables but you should always check your airline for their specific allowances.


    So now that you have gone through my tips, I’m going to share with you my most trusted suitcase brands in order of budget, and remember suitcases are investments, you want them to withstand the test of time.


    Samsonite

    My first investment case and arguably my favourite – don’t tell the others – was the Aeris Spinner 4 wheels 75cm in pink. I bought this when I was moving to Paris and I needed a big case that I could move the material contents of my 21 year old life without drama (anyone who knows the story of me nearly missing my Eurostar when I first moved to Paris can have a good laugh at that). This was also my first 4 wheeler and I have never looked back. This size is great for a two week holiday for one person or for a couple to share on a city break if you want to save on the checked bag cost.

    This American company has been making cases for over 100 years and are one of the most well known brands. Their products go through meticulous quality testings which features tumble, handle, drop, wheel, zip and lock tests. You can find their guarantee here. Their hard cases such as S’Cure and Aeris come in a great variety of colours to suit your personality best and they have frequent sales – as I write they are offering 10% off your purchase when you sign up to their emails, plus they have outlet shops around the world for even better discounts. The price range for a medium to large is between £150-£250.

    Lojel

    My partner bought the Octa medium for our round the world trip and it’s now his main case no matter where we go – though on reflection he is a much lighter packer than me and I’m always lumbered with the toiletries. What I love most about this case is it has four locks, two of which are TSA combination locks, it’s the most secure case I’ve ever travelled with. Another fantastic feature is their attention to interior pocketing, particularly on the Octa 2 which is fabulously designed to hold both sides in place when closing and opening the case. Lojel has a great social media presence, they are so engaged with their customers and repost frequently so make sure to give those snaps some extra loving when you add your filter.

    This Japanese luggage company with 25 years of experience is a newbie in comparison to the others in this list. They’re heavily design based with the most enticing colours and look books that make you want every item they sell! Their tests include dropping the products 2500 times and rolling the wheels for 30 miles. You can find more about their 10 year warrantee here. Groove 2, Novigo and Kozmos are amongst their most secure cases, plus the colours and designs are divine, especially the Groove 2 collection, I want all three! The price range for a medium to large is between £150-250.

    Delsey

    I bought my first Delsey for my 2016 RTW trip where I travelled to 23 destinations over four months. I tried a bunch of backpacks but I couldn’t get on with the idea of carrying my life on my back, not to mention the fact that I’m so small I fell over every time they weighted it, so I chose to travel with a suitcase. I bought the Vavin Securite 4 double-wheels 66cm in silver and it was brilliant. That case went on 19 flights in the space of four months, it was constantly bashed, scuffed, dropped and vandalised by my travel sticker collection and it survived it all. I packed clothes which prepared me for a New Zealand Alpine Trek in winter right through to a LA heatwave in the middle of summer, I had six pairs of shoes (because, you know, options), full sized toiletries, souvenirs from everywhere I went (including a chopping board of all things). I even had a TRX in that little case and it took it all! 

    Delsey is an elegant Parisienne brand and have been making stylish cases for over 70 years. They have a five year world wide limited warrantee which you can find here. The Belfort Plus, Bastille Frame and Moncey come in a range of colours and feature great multipurpose interior pockets, plus there is currently a subscription pop up on their website with 10% off your first purchase. The price range for a medium to large is between £150-300.

    .

    Now you know everything important to buy your next suitcase, yay! Let me know how useful you found this and what cases you can’t travel without.

    Aloha, Gabriella

    .

    Full disclosure – the offers mentioned in this post were live at the time of publishing. Also I am not sponsored by these brands and have no paid partnership with them, these are just my own opinions and reviews.